When you purchase a live photo, you come across several features that make it all worth it. One of those features is the live photo feature. It allows you to capture a moving picture. This includes 1.5 audio and video before and after you capture the photo.
However, live photos are not without their issues. To help you along, this article covers the various issues you might have and how to fix live photo issues. It also enables you to understand how to use the live photo feature better. Now that you know what to expect, let's take a look.
Part 1: Abstract of Live Photos
Apple introduced live photos as a new feature in the iPhone 6s. It has become the default camera setting for iPhones since then, and iPhone users enjoy it. iPhone works by capturing a MOV video file when you take a picture. iPhone cameras work by taking pictures once you open the camera app without you tapping the shutter button. This action allows it to capture photos quickly, but iPhone deletes them if the user doesn't need them.
You can call iPhone live photos a stop-motion animation. It is pretty fun and can be helpful in some situations. The live photo feature is a literal definition of capturing moments as they are. It is usually just three seconds, 1.5 seconds before and after the capturing. This technology is an Apple technology and is therefore unique to them. With live photos, you can take a still image and a short video at the same time. It is like a GIF with sounds.
When you capture a live photo, iPhone captures the photo, takes some pictures in the background, and saves them. It then saves the image before and after you snap it and stitch them into a smooth animation. This animation, however, doesn't last more than three seconds. It also saves audio from the seconds captured to provide you with a soundtrack. However, there's a lot more to live photos, and it isn't without its issues. Keep reading to discover how to use iPhone live photos and solutions to major live photo issues.
Part 2: How to Use Live Photo feature on iPhone
Some iPhone users are oblivious to the live photo feature. Chances are, the live photo isn't their default camera, and they've yet to discover it. When you discover it, the next question becomes how to use the live photo feature on iPhone. Using the live photo feature can be very easy. To simplify it further, below are the steps to take live photos on iPhone.
-
Firstly, you have to launch the iPhone camera app.
-
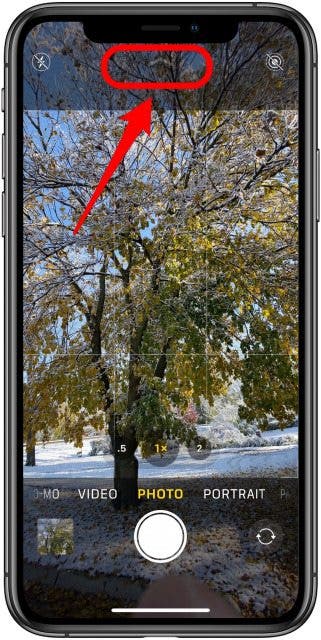
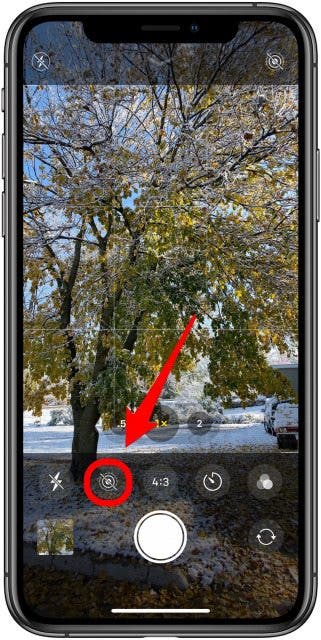
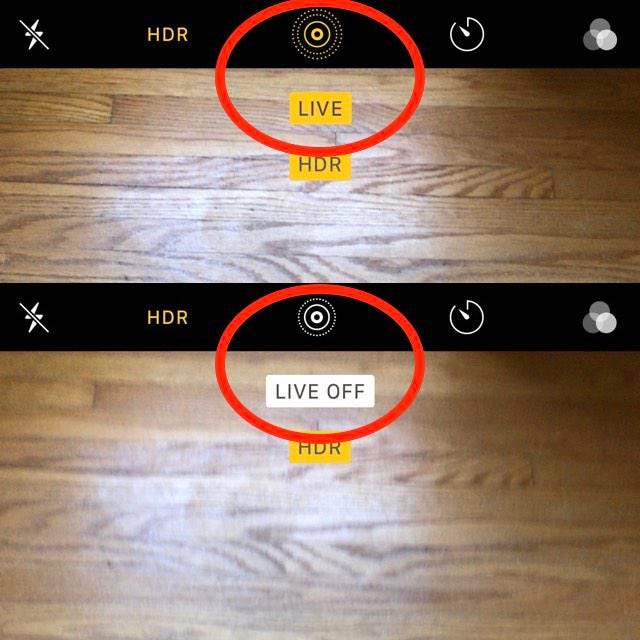
Right at the top of the screen, there's an icon with three concentric circles. Not that the position of the icon varies by the iPhone version. While some iPhone versions have the icon at the center, others have it at the top right. You can also simply swipe down on your camera.
-
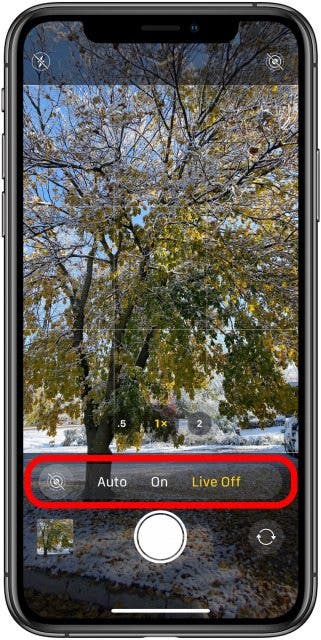
Tap on this icon to enable it. You can tell it is enabled when it lights up, and the line through it disappears.
-
Once it is activated, take your picture like a typical picture capturing moment.
Now that you've taken the picture, viewing it is where the fun begins. You get to see a static photo transform into a combination of movement and sounds. Also, viewing the iPhone live photos is easy with the steps below.
-
You have to launch the photos app. If you just took the picture, the photo icon is at the bottom left corner of the app.
-
However, if not, you can go to the Photos app and tap the live photo you want.
-
Hold the screen till your live photo comes to life. You can view as delete as you want; you're in charge from this moment on.
Part 3: How to Fix Live Photo Issues on iPhone
As fun as a live photo is, it isn't without some issues of its own. However, you're in luck right here. This article explains how to fix live photo issues on iPhone. The steps are detailed to ensure you get them right the first time around; let's take a look.
1. Edit the Live Photo's Length
If you have taken a live photo and find that it is too long, it's easy to fix. Keep reading for the steps to trim out some part of your live photo to make it perfect.
-
Firstly, you have to launch the photos app on your iPhone.
-
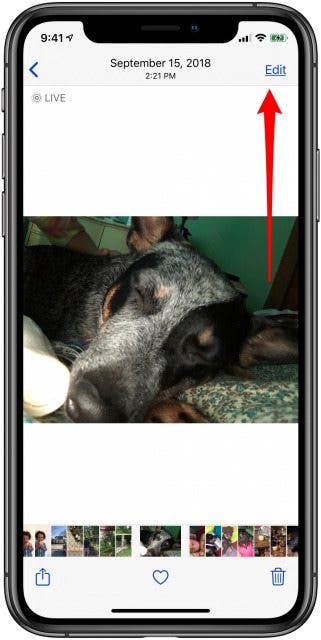
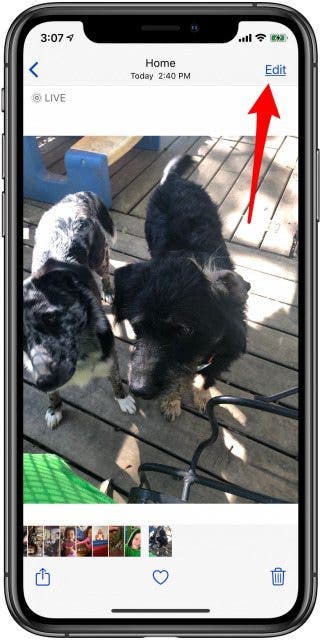
Now, click on the live photo you would like to edit and tap edit on the screen.
-
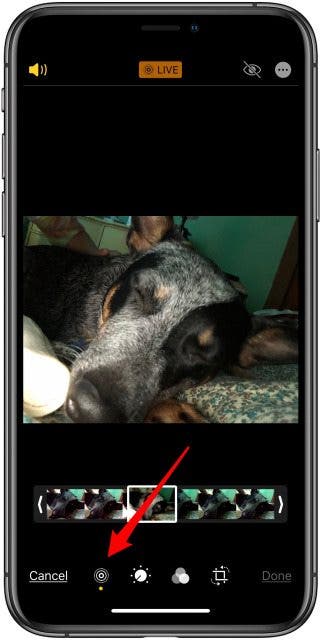
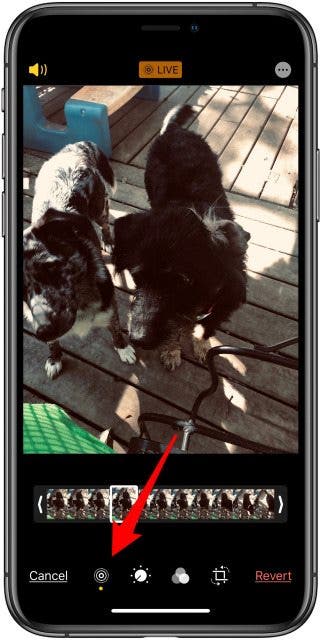
Next, you will find the live photos icon at the bottom of the page; tap on it.
-
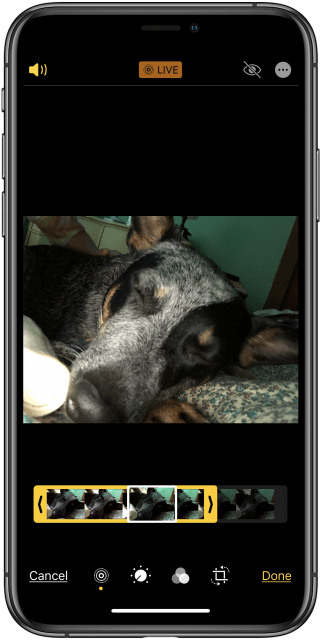
The next step is to hold the left end of the frame bar under the photo. When the bar turns yellow, drag the bar end of the part you want the image to start.
-
You can also repeat the process at the end of the frame bar to edit the end of the live photo.
-
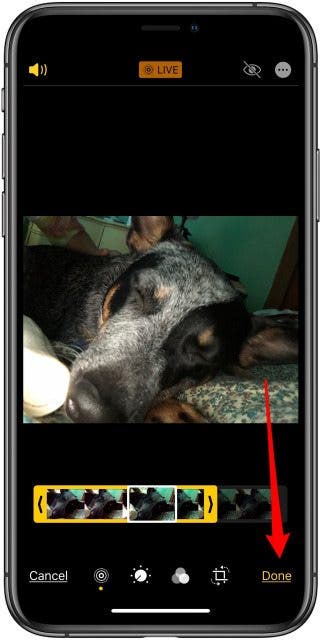
Tweak the live photo as much as you want to. When you finish, tap 'done' to save the newly edited live photo.
Now, you can view your live photo, and you're sure to find it to your satisfaction without the unwanted parts.
2. Change the Live Photo Key Photo
Every live photo has a still frame that represents the live photo in your photos app. If you find that you're not comfortable with the still picture, you can also change it. Keep reading for how to fix live photos on iPhone by changing the key image.
-
It begins with launching your photos app and choosing the live photo you want to change its key image.
-
Tap on this photo once you locate it and tap edit to begin the process.
-
Next, tap on the live photos icon, which you will find at the end of the screen. It will present you with the different frames of your live photo.
-
Now tap on the frame bar below the photo and select a frame. You can choose different frames till you find the key image you prefer.
-
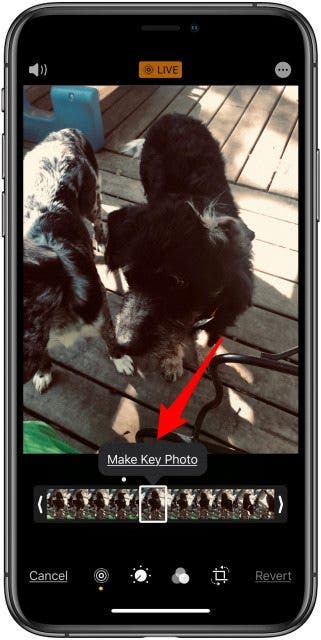
Once you locate this, tap 'make key photo,' and it will effect the settings.
-
Next, tap done, and the iPhone will save the changes.
Note that while you can change the key photo of all live photos, it won't remain a live photo if you have an older iOS. However, if your iPhone has an iOS 10 or more recent, you can edit a live photo, and it will remain one.
3. Convert & Save Stills of a Live Photo on Your iPhone
Sometimes, your iPhone takes some videos on the live photo you would prefer to keep to yourself. There's also a chance you would like to have the still version; we have a solution for you. If you want to learn how to fix live photos by saving stills, follow the steps below.
-
Open the photos app and locate the live photo you would like to save a still for.
-
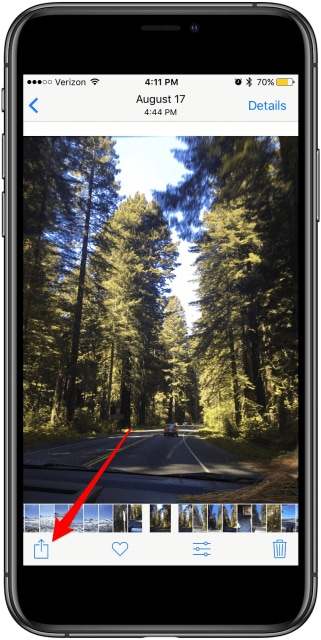
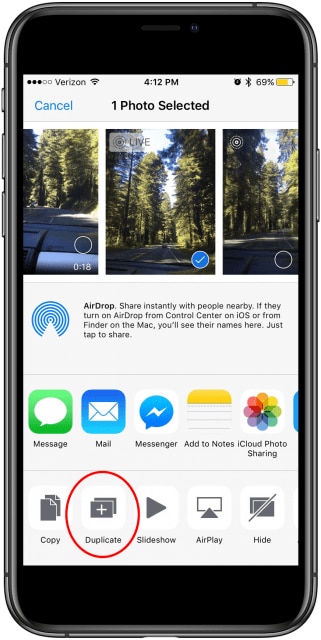
Next, tap on the 'share' icon on the screen.
-
From the list of options displayed, select duplicate.
-
Next, tap 'duplicate as still photo.'
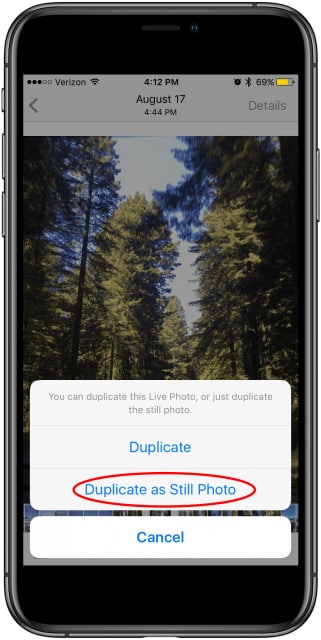
Automatically, the iPhone will create a still of your live photo on your iPhone device. You can share the still whenever you want or even delete the live photo to make space on your iPhone.
4. Convert a Live Photo into a GIF
Another tip on fixing live photos on iPhone is to convert the live photo into a GIF. However, the Photos app recognizes GIFs from iOS 11. From this version, you can see your GIF move and also share live photos as GIFs. This feature is available right on the Photos app, and you have two options; Bounce and Loop. You can also use the long exposure option to add effects on them. Let's explore the steps to convert a live photo into a GIF below.
-
To begin, you have to open the iPhone Photos app.
-
Next, choose the live photo you would like to convert to GIF.
-
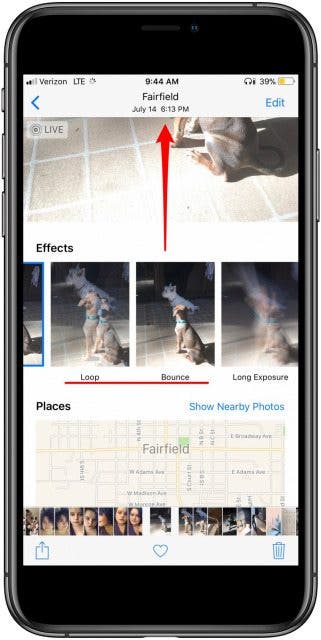
Tap on the live photo and then swipe up on it to reveal the editing option.
-
The Photos app will provide you with four options: bounce, live, long exposure, and loop.
-
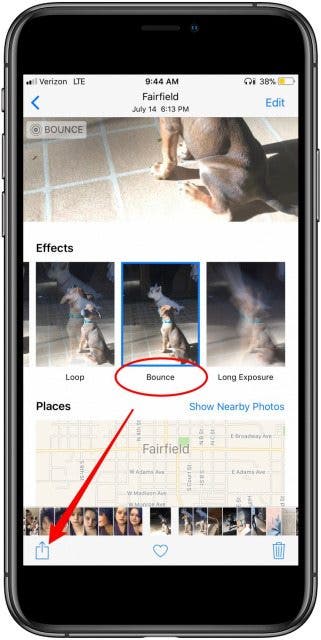
Bounce and loops turn the live photo into a GIF. First, tap on 'bounce' to see how it makes your image look like a GIF. Then, try out 'loop' and compare for which you would prefer.
-
Once you decide on the GIF option you prefer, leave that option selected, and the iPhone automatically converts your live photo into a GIF.
-
You can then share your GIF to different platforms by selecting the share button.
Note that you can only use the GIF for social media platforms and messaging. Once you try to share via email, the iPhone converts the GIF file into a movie file. However, if you use an older iOS, you can always try a third-party app to make your live photo into a GIF.
5. Convert Live Photos into Videos
Another option you have for your live photo is to convert it to a video. You can combine two or more live photos and convert them into a complete video. It's an easy process, and we outlined the steps below.
-
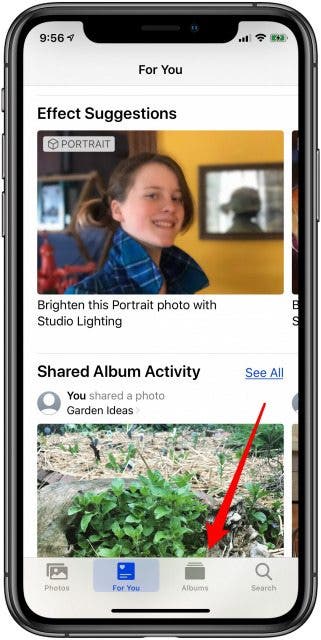
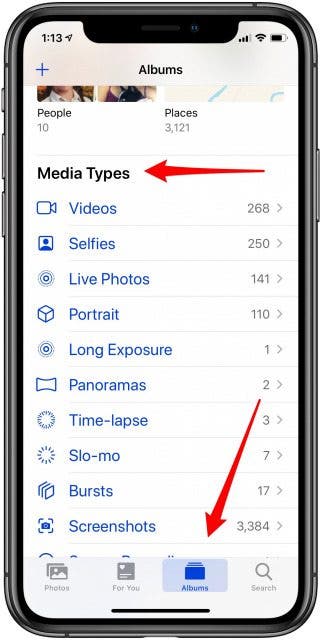
Launch the Photos app and mark the live photos you would like to convert into a video. A quick way to find all your live videos is to select the albums tab, and you'll find your live photos under media type.
-
Select one of the live photos and then click on the share icon.

-
Select the other photos in your live photo series.

-
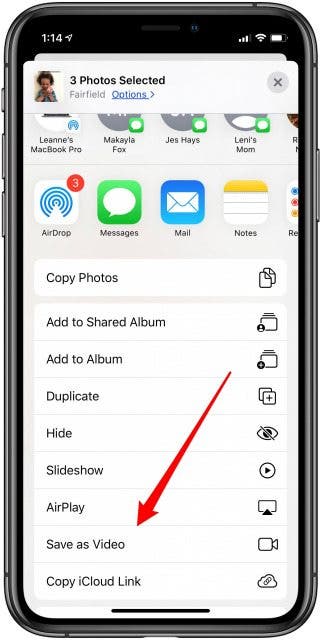
Scroll down and select 'save as video.'
-
This will then convert your live photos into a video. To view your new video, choose the recent tab under album.
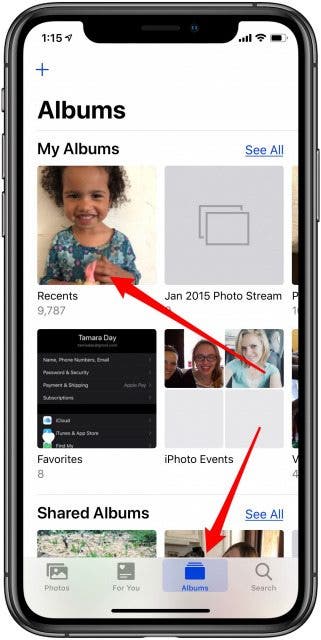
You will find your new video under the recent tab. You can watch, share and edit as you please.
6. Turn Off the Live Photo Feature
If you have decided you don't want live photos anymore, no worries. You can always turn off the feature by following the steps below.
-
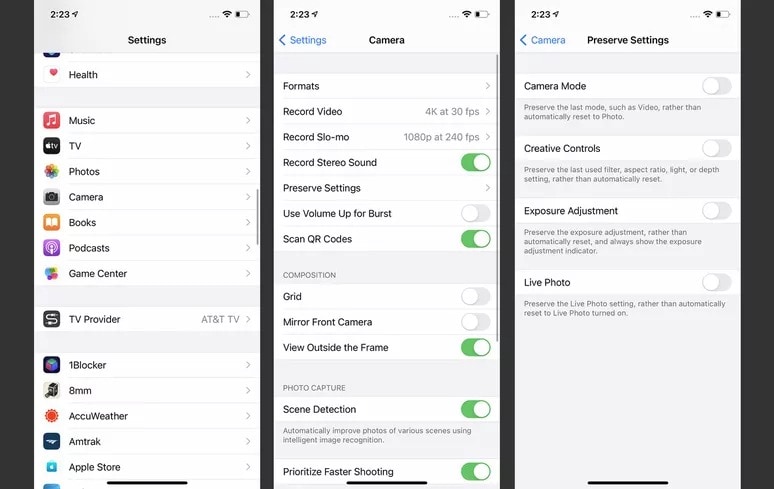
Firstly, visit Settings on your iPhone.
-
Scroll to 'camera' and select it.
-
Tap on preserve settings, and from the options, move the live photo slider to off/white.
-
Now, visit the camera app and tap on the live photo icon to disable it. Once it is off, it won't be lit up again, and there'll be a line through it.
Because you chose to preserve the settings, the live photo feature will stay off.
7. Use Third-Party Repair Software --- Wondershare Repairit
Learning how to fix live photos on iPhone is excellent. However, it doesn't help when your live photos are corrupt. In such a case, you don't have to delete the live images or lose them forever.
You can try repair software like the Wondershare Repairit. This software supports different file types and will have your photos back to their original once again. The process has been simplified for you below and broken into three steps; let's take a look.
Step One: Add the Live Photos

The first step in repairing your photos is to visit the official Wondershare Repairit website. Once you're on the website, click 'add files' and choose the corrupt live images on your device.
Step 2: Repair Live Photos

Once you select the live photo or multiple live photos, click on 'repair file,' which is at the bottom of the screen. Clicking this begins the repair process on your file.
Step 3: Save Repaired Live Photos

After the repair, you can choose to save your files. Once you click save, Wondershare Repairit will let you preview the repaired files, and you can save once the files are satisfactory to you. If not, click on 'advanced repair' to carry out a more complex repair process on your live photo.
This video can help you fix your corrupted live photos with a step-by-step guide.
Further Reading:
Here are the useful articles to help you.
1. Fix Photo Faded.
2. Effective Way to Fix Low-quality Images.
3. Repair JPEG Colour Change Export in Photoshop CC.
Closing Words
Live photos are exciting as they allow you to capture moments with audio. It is like your very own animation created by you. However, live photos are not without some issues for your own. To help you enjoy the live photo feature on iPhone better, this article explains how to fix live photos on iPhone.
We also explain how to use this camera feature to help you along. If your live photos get corrupt or damaged, you can use Wondershare Repairit to fix them and return them to the original. With this software, you never have to lose another picture again to malware attach or other damaging factors.
FAQs
-
How do I fix my live photo not working?
There are many reasons why live photo doesn't work. Maybe, you should check your camera setting to confirm live photo isn't off in preserve settings. -
What do I do if my live photo doesn't load?
You can try turning off the 'optimize storage option.' It could be that your photos are not loading correctly from the cloud. So, turning this off will allow your images to be saved on the mobile phone.