

Has it ever happened that you have taken a nearly perfect shot, but some unwanted object ruined it? Perhaps a stray pedestrian or a photobomber wandered into your beautiful landscape. While Adobe Photoshop is the ultimate tool for fixing these frames, mastering the right techniques is essential for a seamless result.
As highlighted in Reddit design communities, the secret to professional editing lies in choosing between automated AI and manual precision. Before we dive into the step-by-step tutorial on how to remove unwanted objects in Photoshop, here are the essential highlights to guide your workflow:
In this article
Part 1: Overview of Tools and Techniques for Object Removal in Photoshop
Before diving into the step-by-step process of how to remove an unwanted object in Photoshop, let's familiarize ourselves with the primary tools and techniques at our disposal:
- Content-Aware Fill: A powerful feature that intelligently analyzes surrounding pixels to fill in removed areas seamlessly.
- Clone Stamp Tool: This allows you to sample one area of an image and paint it over another area.
- Spot Healing Brush: Automatically samples nearby areas to cover imperfections or small objects.
- Patch Tool: This enables you to select and replace unwanted areas with samples from other parts of the image.
- Healing Brush: Similar to the Clone Stamp but blends the sampled pixels with the surrounding area for a more natural look.
- Lasso Tool: Helps in making precise selections around objects you want to remove.
- Object Selection Tool: Uses AI to detect and select objects in your image automatically.
Part 2: How To Remove Unwanted Objects In Photoshop
Now that we're familiar with the tools, let's walk through a step-by-step process to remove objects from photo in Photoshop using one of the most effective techniques: Content-Aware Fill.
Step 1: Duplicate the Layer
Step 1: Begin by navigating to “File” > “Open” and choose the image you want to work on in Photoshop. To ensure a non-destructive workflow, keep the original image intact.

Step 2: Duplicate the image layer to work on the copy. This way, if any mistakes occur, the original image remains unchanged. With the image open in Photoshop, right-click on the layer in the “Layers” window and select “Duplicate Layer” from the menu.
Step 3: You should now see both the original and the duplicate layers in the “Layers” window.
Step 2: Use the Lasso Tool
So, we have created a duplicate layer in Photoshop. We will now try a more manual approach using the Lasso Tool to remove
Step 1: The next step is to select the objects you want to delete. The selection doesn’t need to be precise. Just ensure it includes the entire object you wish to remove while preserving as much of the unselected background as possible.
Step 2: Use the Lasso tool for a rough selection. You can find it in the toolbar at the bottom left of the screen by clicking on the icon shown below. This tool is handy for making quick and rough selections.

Step 3: With the Lasso tool selected, click and hold the mouse button, then draw a closed loop around the subject to define the selection area.
Step 3: Generate A Fill Based On Surrounding Pixels
For more complex removals, you might need to combine techniques:
Step 1: Once the selection is complete, the solid line will turn into a line of moving points. Navigate to “Edit” > “Content-Aware Fill”. Alternatively, you can press Shift + Backspace (Windows) or Shift + Delete (Mac) to open the Fill dialog. Ensure “Content Aware” is selected in the drop-down menu.

Step 2: The tool will then analyze the surrounding pixels and intelligently fill the selected area. This allows you to easily remove people, text, or any other unwanted objects from your photos.=

By mastering these techniques, you'll be well-equipped to remove unwanted things in Photoshop and enhance your photos significantly.
Part 3: Remove Unwanted Objects From Photos Online: Try Repairit Photo Eraser
While Photoshop is a powerful tool for removing unwanted objects from photos, it may not always be the most convenient or accessible option for everyone. This is where online alternatives like Repairit AI Photo Eraser come into play.
Here's why you might consider using Repairit instead of Photoshop:
- User-Friendly Interface: Repairit offers a more straightforward, intuitive interface compared to Photoshop's complex layout.
- No Installation Required: Being an online tool, you can access Repairit from any device with an internet connection.
- Cost-Effective: Repairit can be more affordable than a Photoshop subscription, especially for occasional users.
- Quick Results: The AI-powered tool can often remove objects faster than manual Photoshop techniques.
- No Learning Curve: Unlike Photoshop, which requires significant time to master, Repairit can be used effectively with minimal training.
To use the online version of Repairit Photo Eraser, follow these steps:
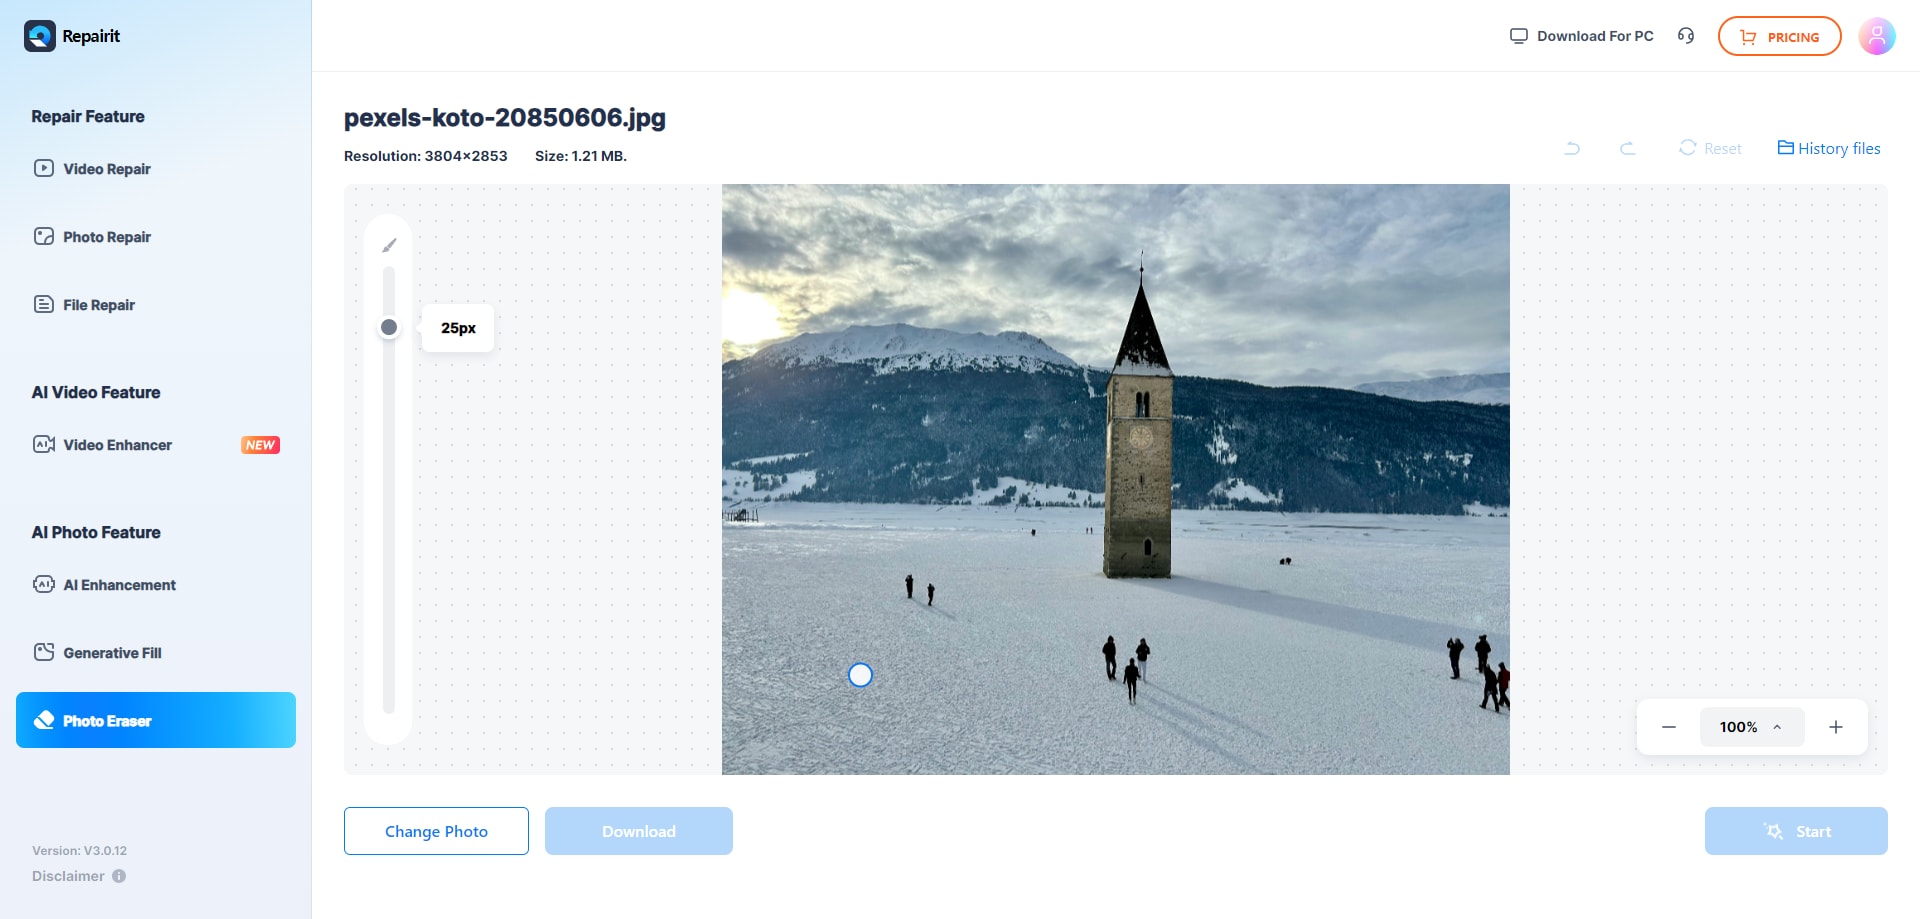
Step 1: Visit the Repairit AI Photo Eraser website. Click on the "Add Photo" button to select the image you want to edit.

Step 2: Once your photo is uploaded, use the brush tool to mark the object you want to remove. Click the "Start" button and wait for the AI to process your image.
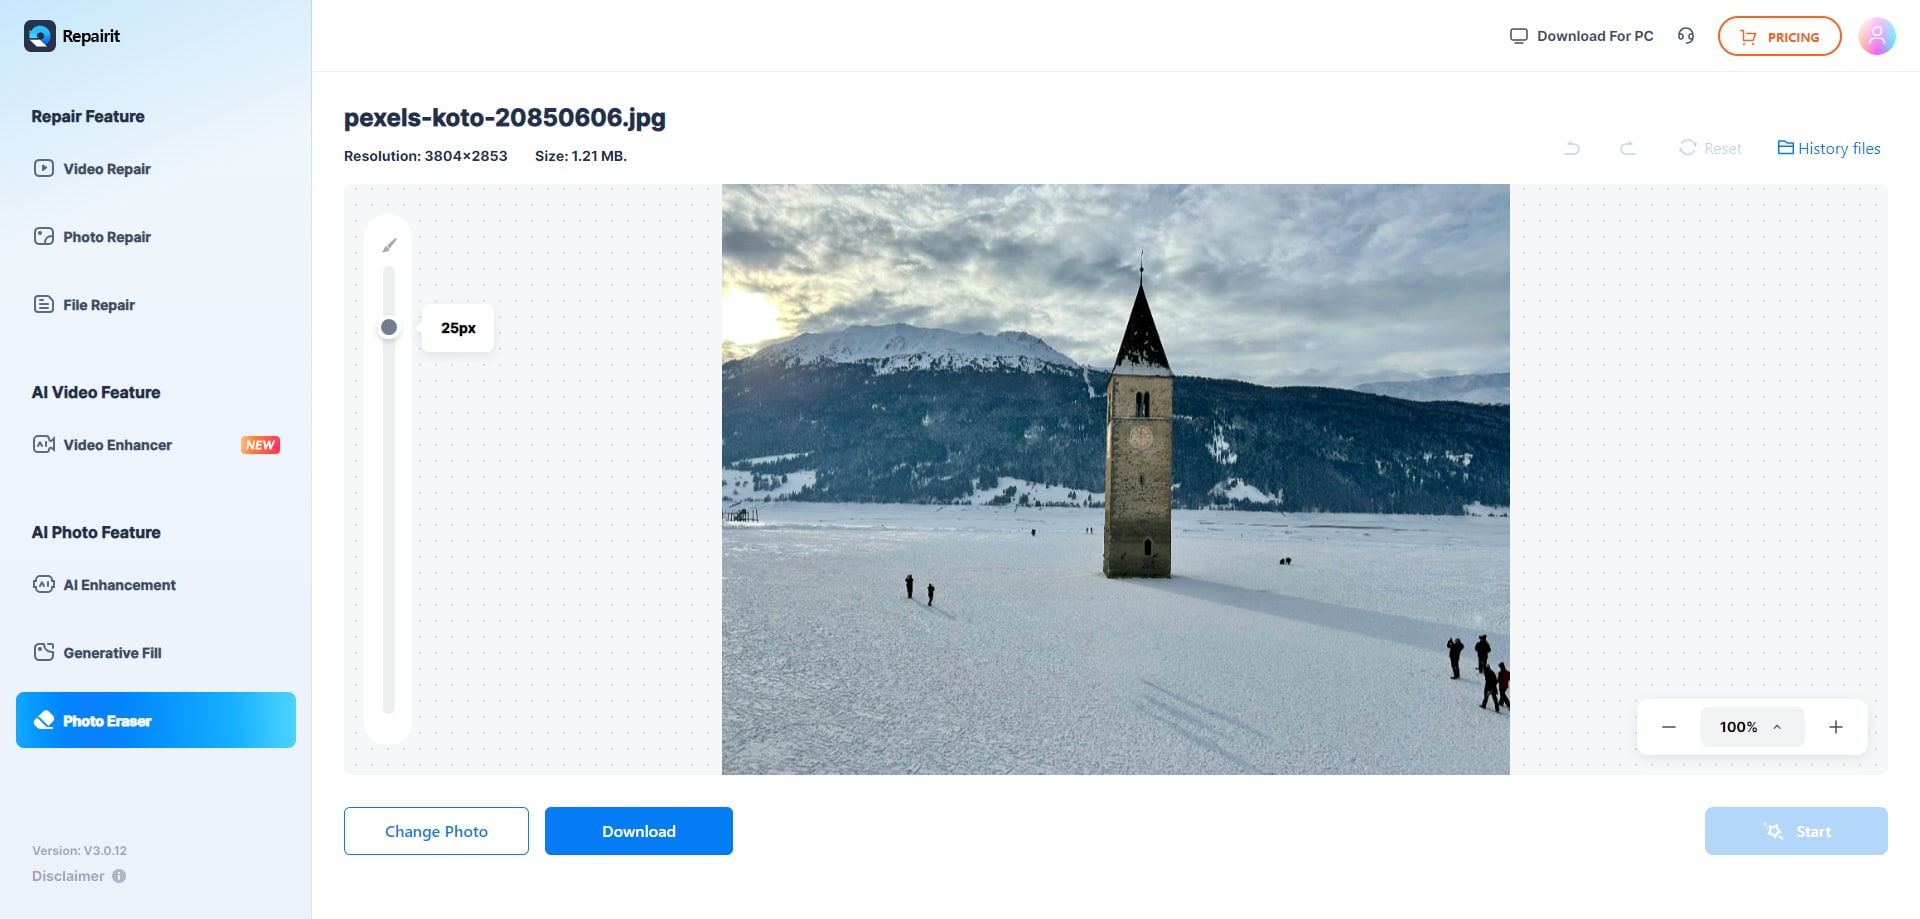
Step 3: If you're satisfied with the result, download your edited photo. If not, you can adjust your selection and try again.
While online tools like Repairit offer convenience and speed, they may not provide the same level of control and precision as Photoshop for complex removals.
However, for quick edits and simple object removals, Repairit Photo Eraser can be an excellent alternative.
Choosing the right method depends on your time and skill level. While Photoshop provides granular control for studio-grade work, modern AI alternatives offer incredible speed for daily edits. Refer to the comparison table below to see how Adobe Photoshop stacks up against Repairit AI Photo Eraser in terms of difficulty, cost, and efficiency:
| Feature | Adobe Photoshop | Repairit AI Photo Eraser |
|---|---|---|
| Difficulty | High (Steep learning curve) | Zero (One-click AI) |
| Process Time | 5-15 Minutes | Seconds |
| Installation | Heavy Software Required | Online / No Install |
| Best For | Professional Studio Work | Social Media & Quick Fixes |
Part 4: Tips To Refine Your Edits For A Natural Look
Regardless of whether you choose to remove objects from photo in Photoshop or use an online tool, achieving a natural look is crucial. Here are some tips to refine your edits:
- Pay attention to lighting and shadows: Ensure that the lighting in your edited area matches the rest of the image. If you've removed an object that was casting a shadow, you may need to recreate that shadow for a realistic effect.
- Maintain consistent texture: When using tools like the Clone Stamp, sample from areas with similar texture to maintain consistency across your image.
- Use multiple layers: Working on separate layers allows you to adjust the opacity of your edits and blend them more naturally with the original image.
- Zoom in and out: Frequently zoom in to work on details, but also zoom out to ensure your edits look natural in the context of the entire image.
- Use the History Brush: This tool allows you to selectively undo parts of your edits, which can be useful for fine-tuning your work.
- Apply noise if necessary: If your edited area looks too smooth compared to the rest of the image, consider adding a bit of noise to match the image's grain.
- Take breaks: Sometimes, looking at an image for too long can skew your perception. Take regular breaks to come back with fresh eyes.
By following these tips, you can ensure that your efforts to remove unwanted things in Photoshop result in natural-looking, professional edits.
Conclusion
Learning how to remove unwanted objects in Photoshop is an invaluable skill for photographers and digital artists alike. With the techniques and tools discussed in this guide, you're now equipped to tackle a wide range of object removal challenges in your images. Remember, practice makes perfect, and each photo presents a unique set of challenges.
FAQ
-
How long does it take to learn how to remove unwanted objects in Photoshop?
The time it takes to master object removal in Photoshop varies depending on your prior experience with the software and your dedication to practice. Basic techniques like using Content-Aware Fill can be learned in a few hours, but becoming proficient in more advanced techniques might take several weeks or months of regular practice. The key is to start with simple removals and gradually tackle more complex projects as your skills improve. -
Can I remove objects from photo in Photoshop without leaving any traces?
In many cases, yes, it's possible to remove objects from photos in Photoshop without leaving visible traces. The success of your edit depends on factors such as the complexity of the background, the size of the object being removed, and your skill level with Photoshop tools. Techniques like Content-Aware Fill, when used correctly, can produce remarkably seamless results. However, for very complex scenes or large objects, achieving a perfectly undetectable removal may require advanced skills and multiple techniques. -
Is it ethical to remove unwanted things in Photoshop for all types of photography?
The ethics of removing objects in Photoshop largely depend on the context and purpose of the photograph. For artistic or commercial photography, object removal is generally accepted and often expected. However, for photojournalism or documentary photography, removing objects can be considered unethical as it alters the reality of the scene. It's important to consider the intended use of the image and any relevant professional or ethical guidelines. When in doubt, it's best to be transparent about any significant edits made to an image.
