How to Use Wondershare Repairit for Email?

Wondershare Repairit for Email is a comprehensive Outlook email repair program. It supports fixing severely damaged PST and OST files on both Windows and Mac systems; restores emails that have been deleted for a long time; scan corrupt emails from any location on your computer; repair batches of damaged emails, etc. To get more valuable functions, let’s explore together!
free download

free download

Launch Wondershare Repairit for Email

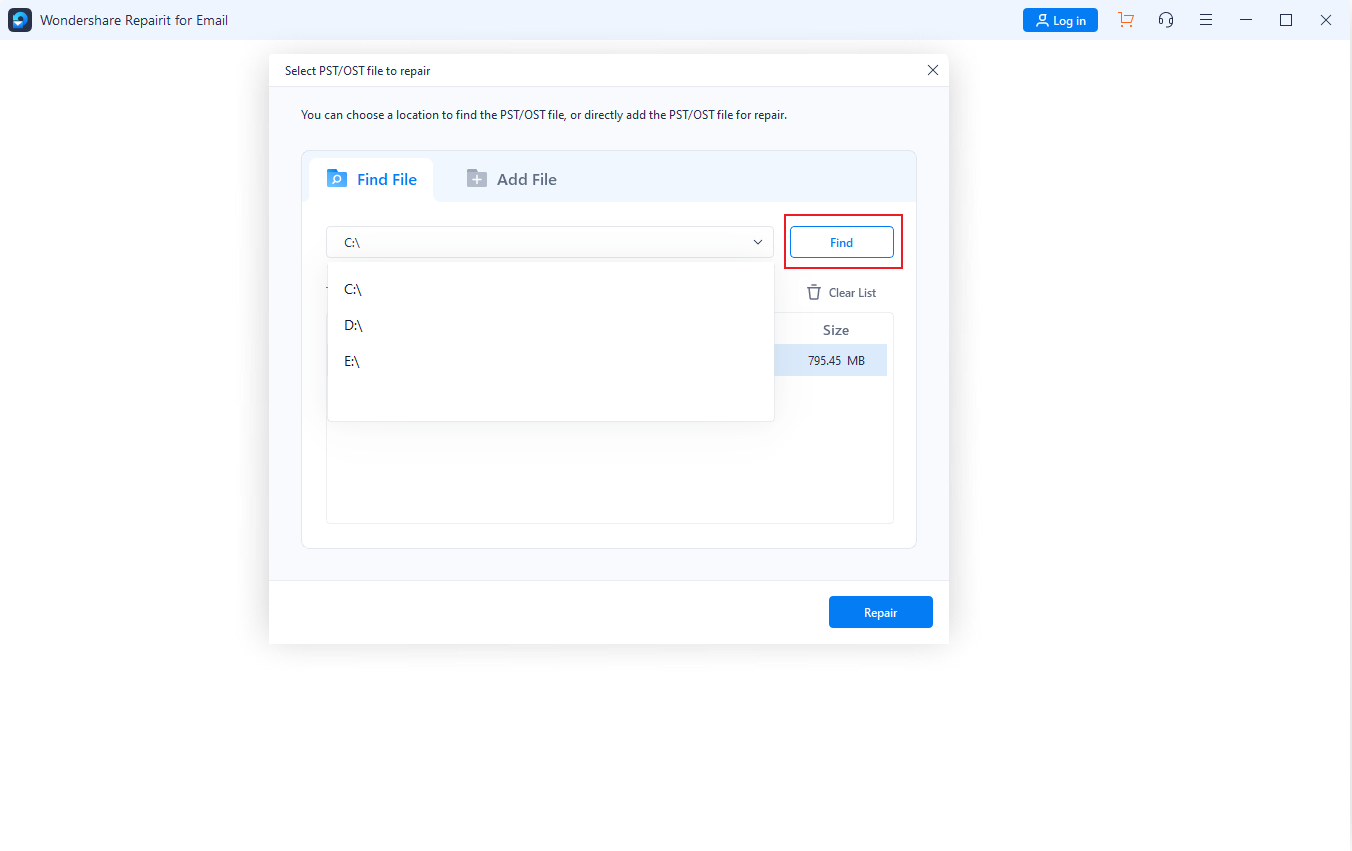
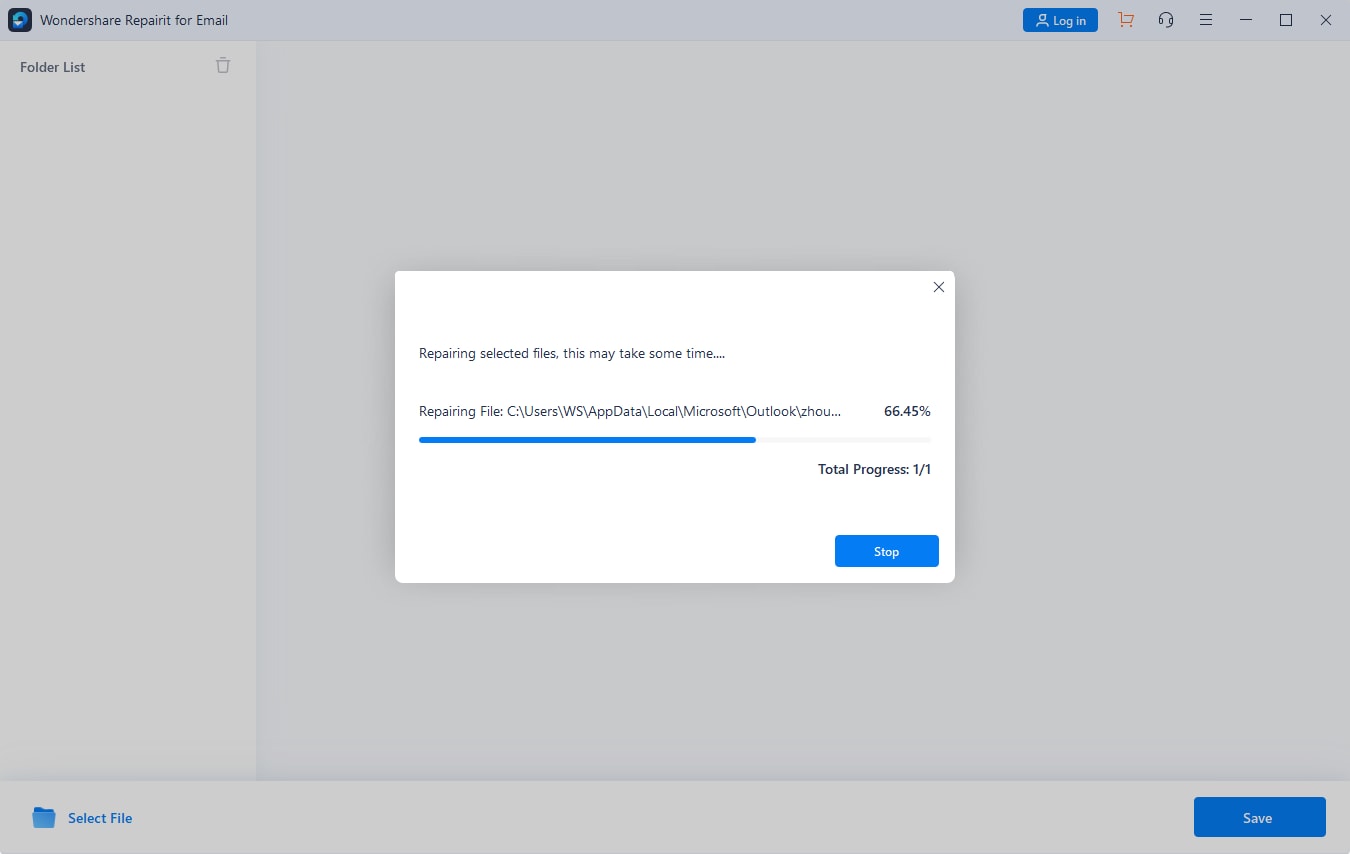
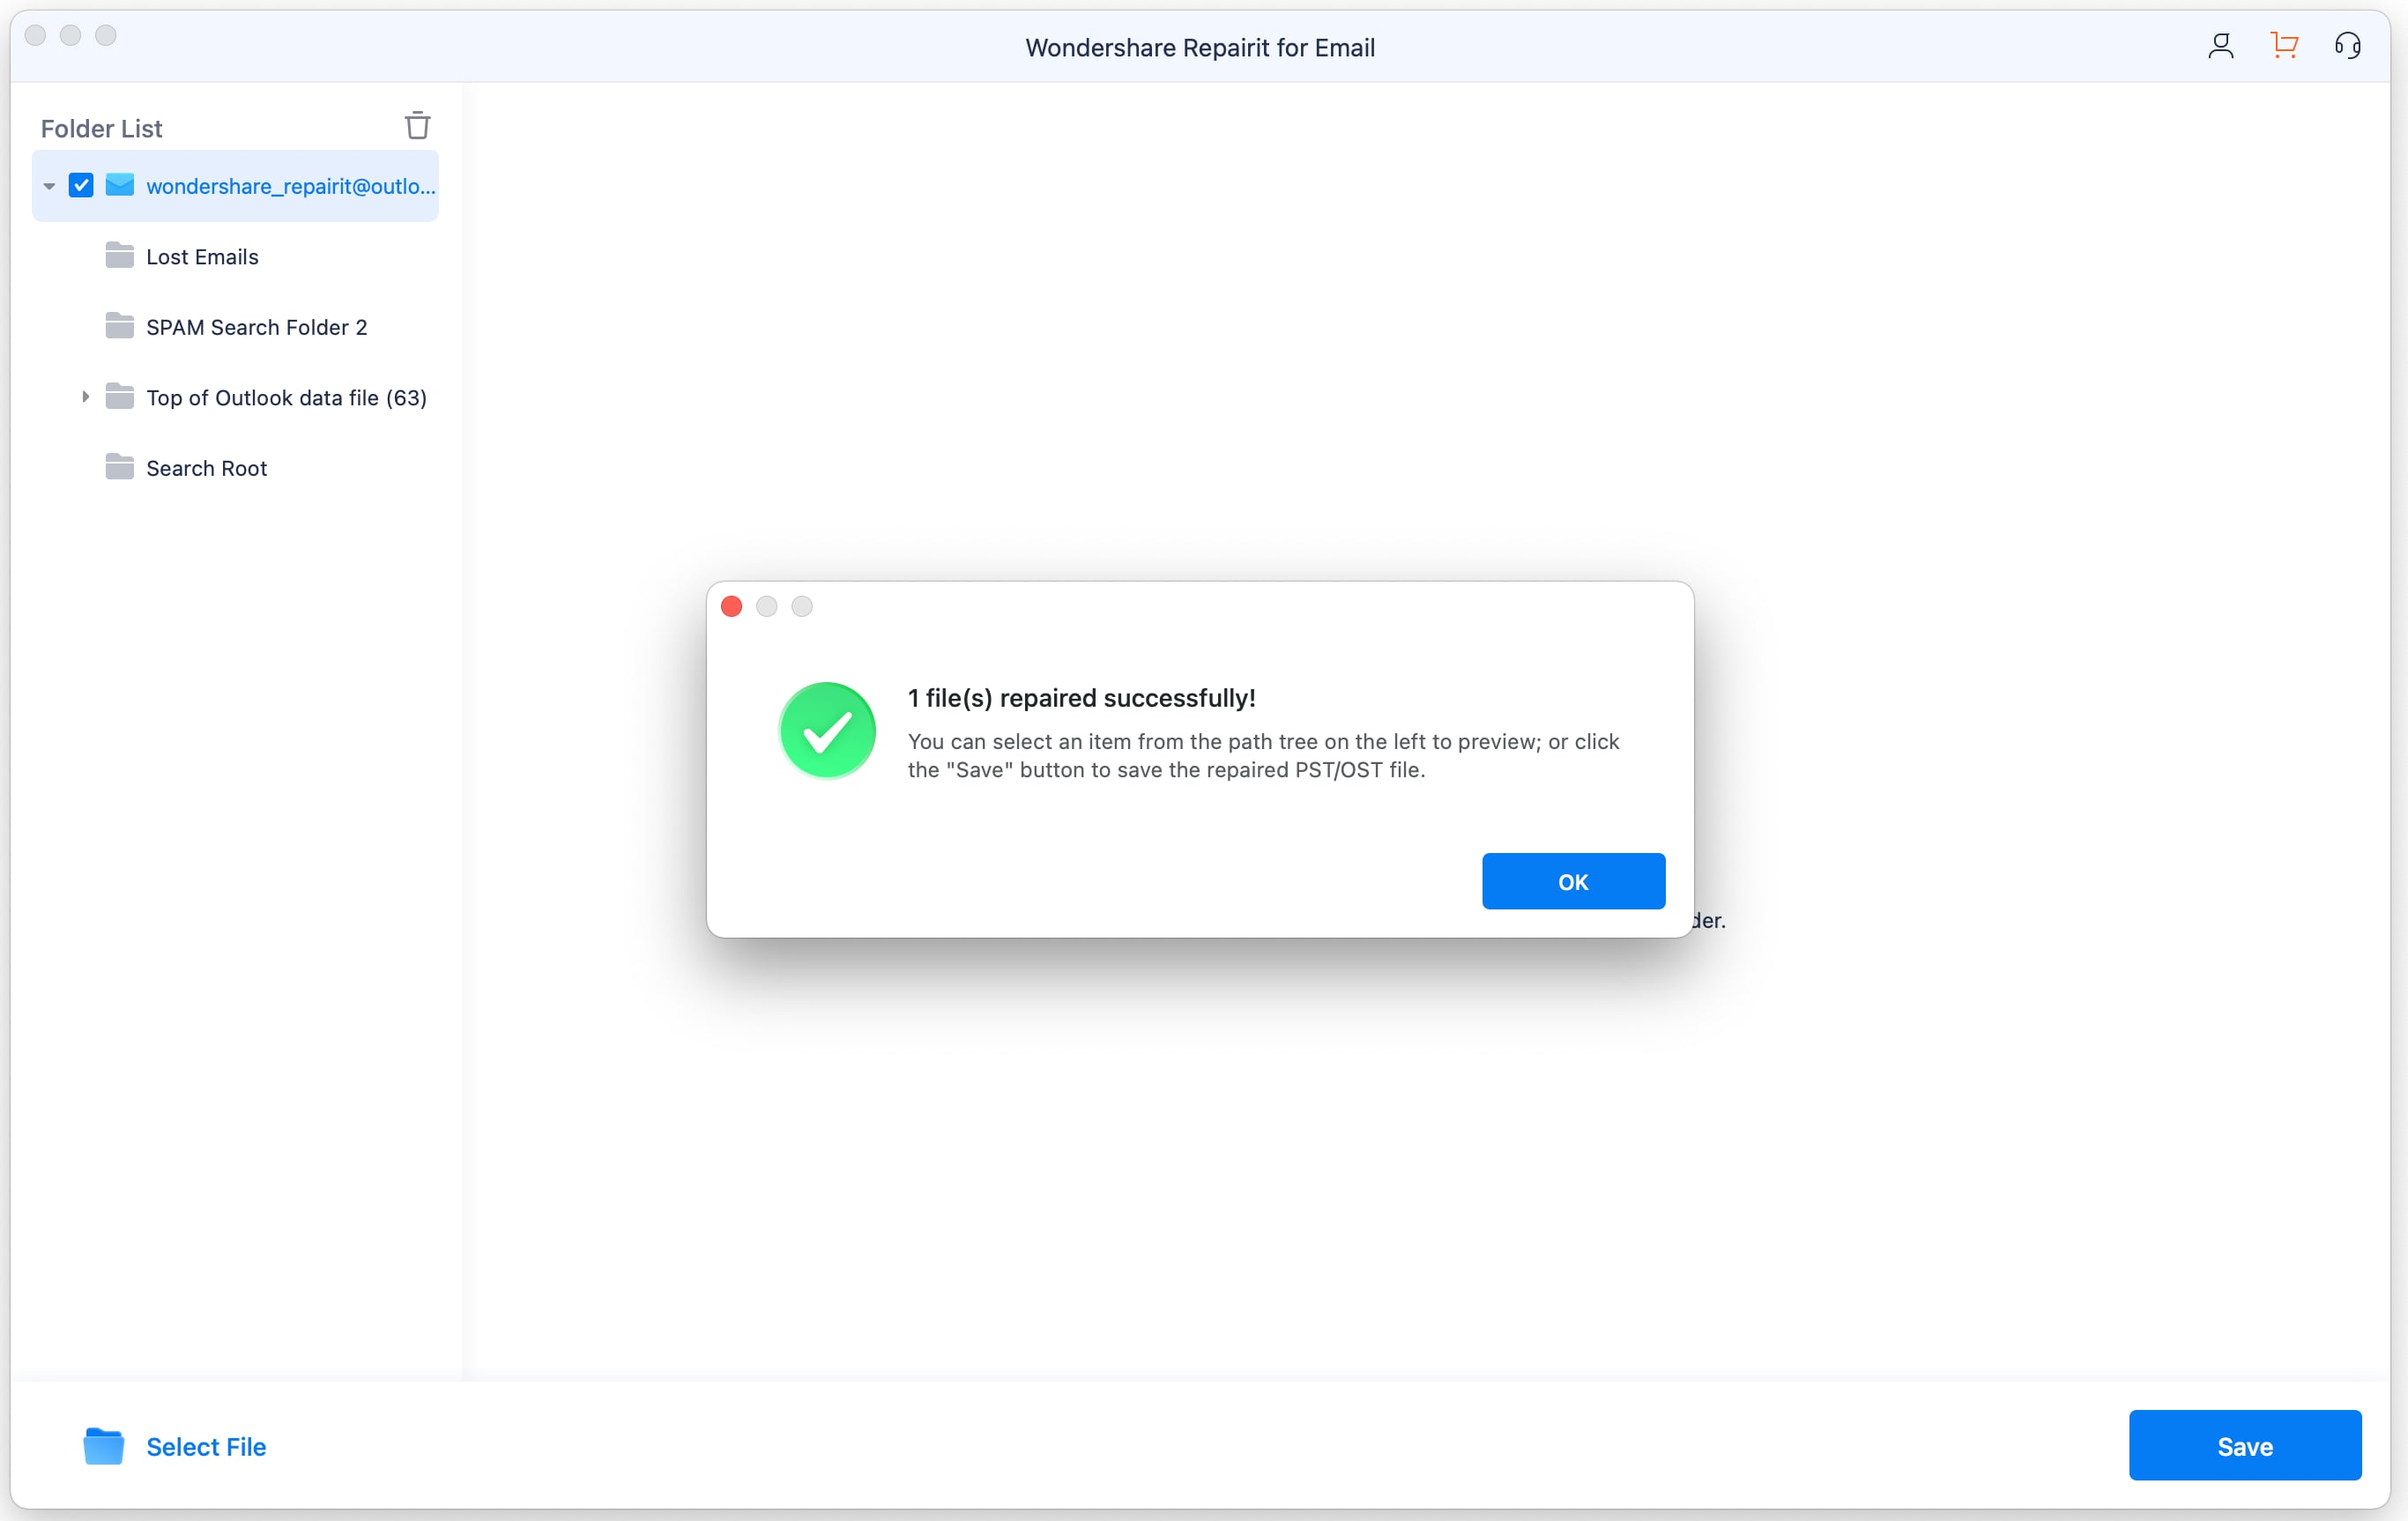
If focusing on the product performance, we could hardly find other email repair products better than Repairit for email. As described above, this program performs excellently in format, system, and scenario support. You can quickly repair PST or OST files from Outlook with Repairit for Email, no matter how severely damaged. So, let’s dive into the easy steps of Repairit for Email.

  • On Windows

There are two ways to launch Repairit for Email:

1. Doubleclick the “Wondershare Repairit for Email” icon if it appears on your Desktop.

2. If the product icon is not on the Desktop, you can input “Wondershare Repairit for Email” in the search box on your Windows computer. And then click the App to launch it.

  • On Mac

To launch Wondershare Repairit on Mac, please follow the simple steps:

1. Double click the “Wondershare Repairit for Email” icon on the Mac Desktop.

2. Not there? Try Finder-Applications-Wondershare Repairit for Email, and double click the software.

2. Repair Emails on Windows

There are three simple steps to repair your emails

  • Upload corrupt emails
  • Start the repairing process
  • Preview and choose a path to save
Step 1

Upload your corrupt emails

After you launch this program, you will see an interface of Repairit for Email, indicating selecting PST or OST emails. Next, click on “Select File” to upload the corrupt emails.

 upload pst or ost files

A window will prompt reminding you to select files from the desired location. You can look through different locations to find the corrupt emails by clicking on “Find”, or click on “Add File” to directly choose the email if you already know its location. You can add a single or batch of emails.

add email from the desired location
Step 2

Repair the uploaded emails

After you add the emails, please click on the blue “Repair” button. Repairit for Email will automatically restore your corrupt emails in seconds.

 start the email repair process
Step 3

Preview and save the fixed emails.

After finishing the repair process, you can find all the repaired emails on the left panel. Double click one email file to preview the content inside, and then choose a path to save it.

preview the repaired emails

3. Repair Emails on Mac

If you are a Mac user, follow these three simple steps to repair your corrupt PST and OST files.

  • Add the PST/OST files
  • Click “Repair” to start the repairing process
  • Preview and save repaired emails on your Mac
Step 1

 Select the repaired emails

After launching this program on Mac, you will see an interface of Repairit for Email Next, click on the “Select File” button to upload the corrupt emails.

add the corrupt pst or ost files

You can select one specific email or multiple corrupt emails simultaneously. Then you need to click on the “Repair” button to start the repairing process.

upload the corrupt pst or ost files

Step 2

 Start repairing damaged emails

When finishing uploading all the desired email files, it’s time to repair all of them by clicking on the “Repair” button. After a few seconds, you will see the emails have been successfully repaired.

emails repaired successfully

Step 3

 Preview and save the repaired emails on your Mac

Once the repairing is done, choose any restored email to preview the content. If you are satisfied with the emails, you can select a location to save them on your Mac.

preview the repaired emails