
Ever take a photo that didn’t match what you saw in real life? Maybe the lighting was too dark or the colors looked dull. Since cameras don’t always capture scenes the way our eyes do, you can fix this later using color grading in Lightroom.
Color in photography shapes the mood of an image, guides the viewer’s attention, and adds meaning. You can control colors during a shoot with lighting or timing, and tools like Adobe Lightroom let you refine and perfect them afterward. This guide will show you how.
Table of Contents
Part 1. What Is Color Grading in Lightroom and Why It Matters
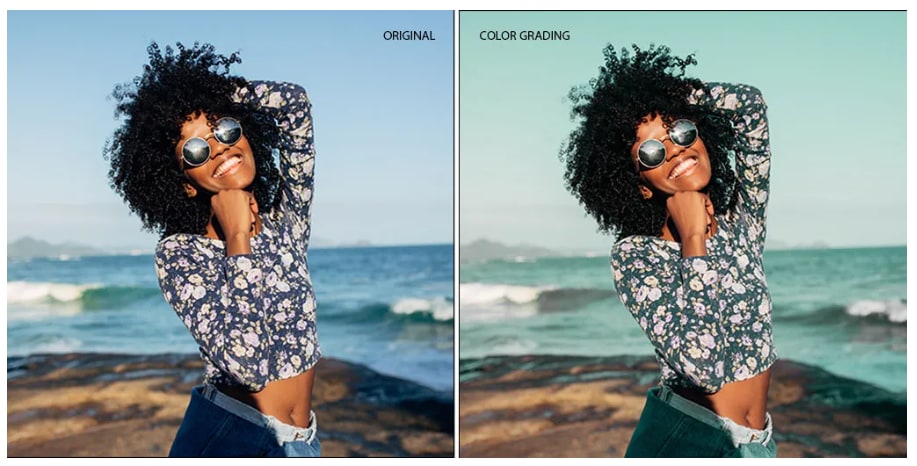
Color grading is a post-production technique that changes image color tones to create a specific mood or style. With editing software, you adjust hue, saturation, and luminance in shadows, highlights, and midtones.
This technique is common in photography and film. For example, Blade Runner uses strong, stylized colors for a cyberpunk feel, while The Twilight Saga uses cool tones for a mysterious atmosphere. Cool tones convey sadness or seriousness; warm tones evoke joy or nostalgia.
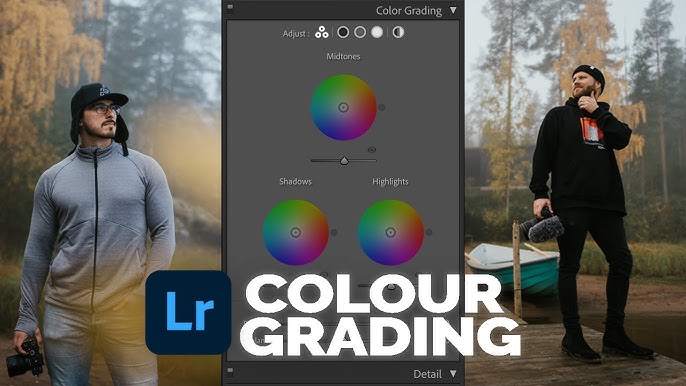
The Lightroom color grading panel is where the magic happens. It lets you adjust colors in different parts of your image:
- Shadows add tones to the darker areas.
- Midtones control the middle range of light and color.
- Highlights adjust the brighter parts of the photo.
- Global change the overall color of the entire image.
Part 2. Step-by-Step: How to Do Color Grading in Lightroom
Color grading in Lightroom has improved tools to adjust colors and tones to make photos look better. It helps add depth, enhances lighting, and works great for any photo style, especially landscapes and portraits. You only need Lightroom and your photos to get started.
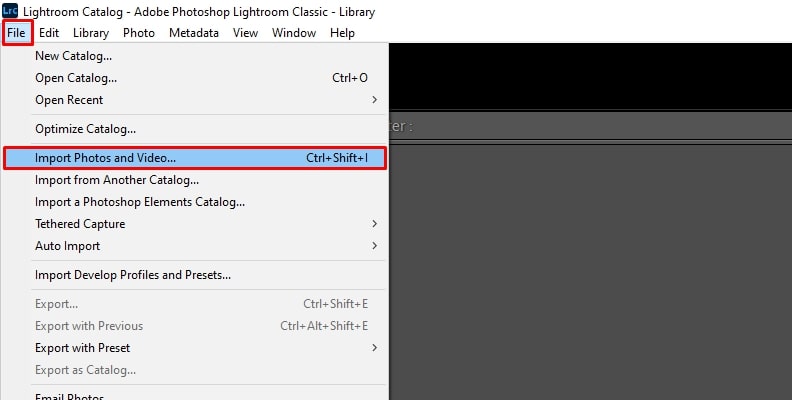
Step 1: Import Photo
Go to File and select Import Photos and Video.
Choose your photo, then import it from the Library panel.
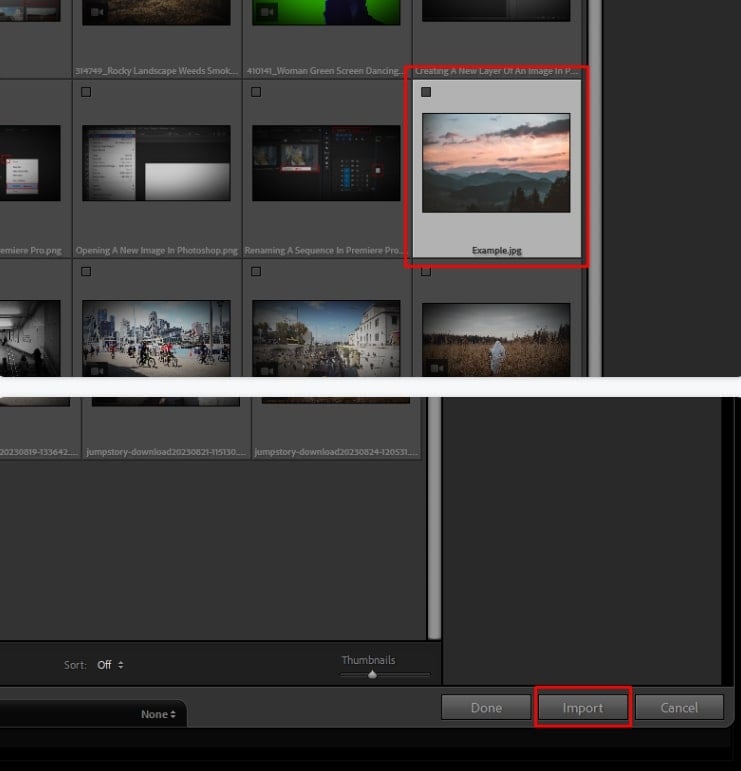
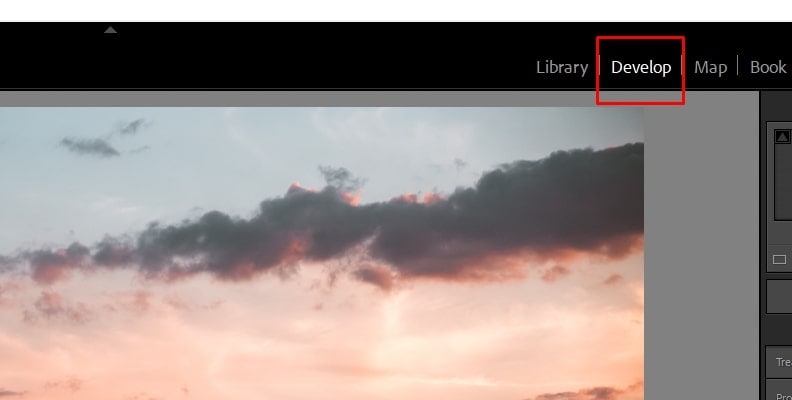
Open the Develop panel. For best results, use RAW files.
Step 2: Prepare Photo
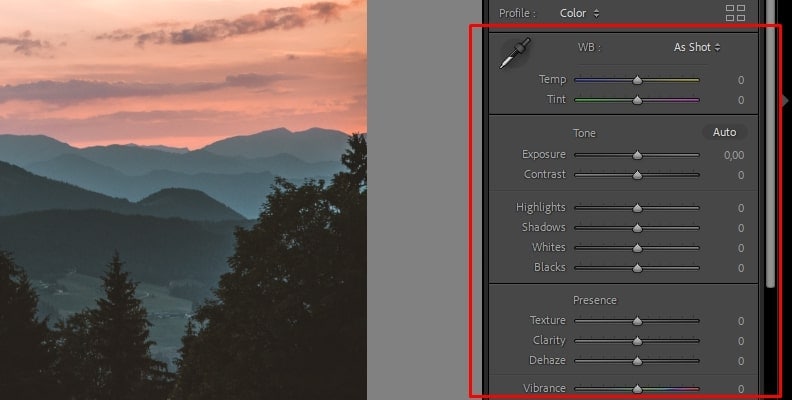
Before color grading, adjust exposure, contrast, white balance, tint, and tone curve. Ensure balanced colors and lighting. If you are already satisfied, you may skip this step.
Step 3: Open the Color Grading Tool
In the Develop panel, access Color Grading. In older Lightroom versions (2020 or earlier), find Split Toning, which offers similar but limited choices.
Use the panel to adjust:
- Midtones
- Shadows
- Highlights
- Global (entire image)
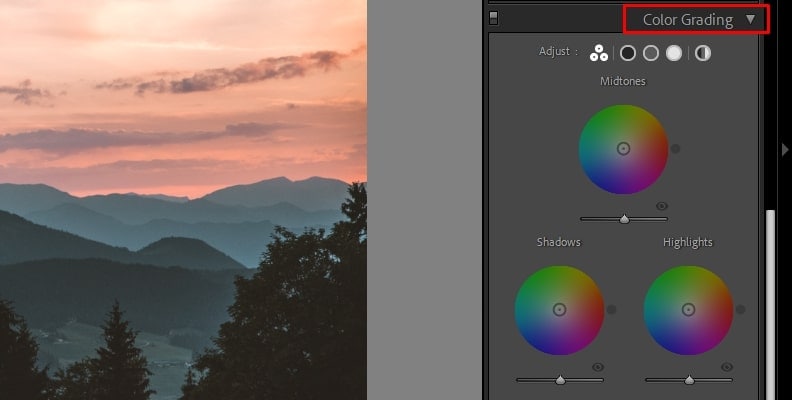
Step 4: Work with Color Wheels
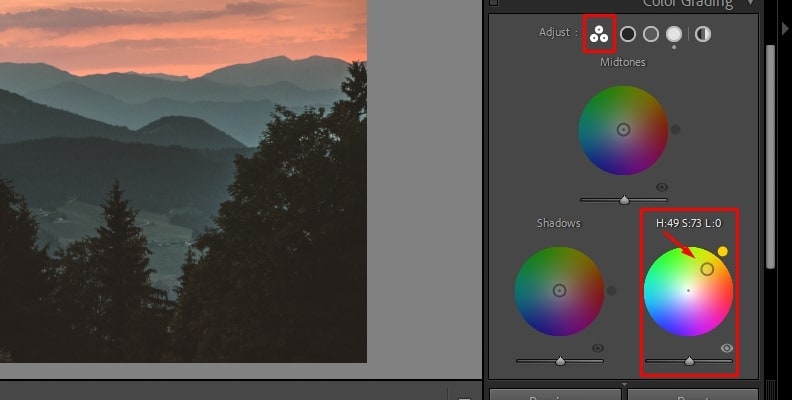
You will see three wheels: midtones (top), shadows (left), highlights (right). Drag the circle to adjust hue. Move outward to raise saturation, use the slider below for luminance. For landscapes, try orange in highlights for warmth and blue in shadows for depth.
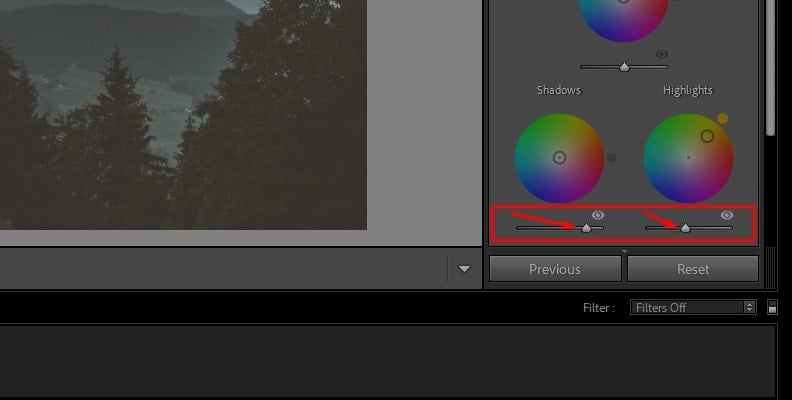
Step 5: Adjust Blending and Balance
Use Blending to mix color ranges smoothly. Move Balance to shift between shadows (left) and highlights (right).
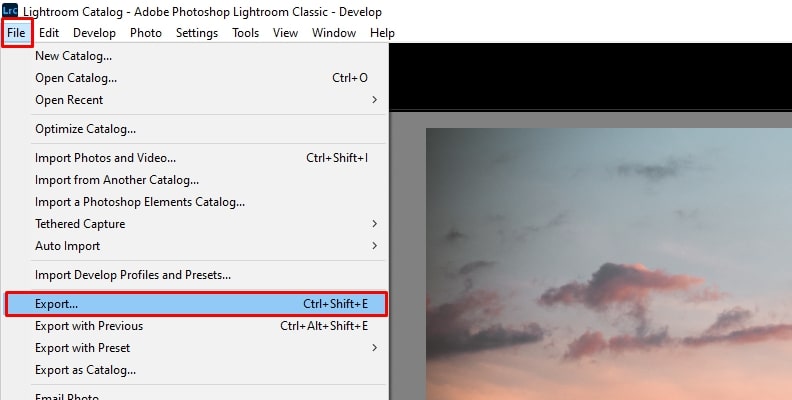
Step 6: Export Photo
When you’re happy with the result, export your color-graded photo in your desired format.
Part 3. Enhance Image Quality Before Color Grading
Color grading works best when you start with polished and high-quality images. If your photo is blurry, noisy, or low in detail, the edits won’t look as sharp or natural. High-quality images give you more room to adjust tones and colors without losing details.
Before grading, consider enhancing your photo to bring out details, improve sharpness, and reduce imperfections. Tools like Repairit Photo Enhancer can help upgrade your image quality, ensuring you get professional-level results when you start adjusting colors.
Key Features:
- Improve image clarity, color balance, and details automatically for better color grading.
- Sharpen low-resolution or blurry images and keep facial features and textures natural.
- Remove digital noise and grain for a cleaner, more polished look.
- Restore lost details in shadows, highlights, and edges to keep image depth.
- Boost vibrancy without causing oversaturation or distorting original tones.
- Enhance quickly and preview changes in real time before saving.
Here’s how to enhance your image quality with Repairit before color grading:
Step 1: Open Repairit. Choose AI Photo Enhancer under More Types Repair.

Click +Add or drag in photos (JPG, JPEG, PNG, BMP, WEBP). Enhance several images at once with batch processing.

Step 2: Choose from three AI models: General Mode, Portrait Enhancer, or Old Photo Restoration. Select your output resolution. Press Start Enhancing.

Step 3: After enhancement, review the results and click Save All to export the improved photos to your device.

Part 4. Pro Tips for Cinematic Lightroom Color Grading
Color grading in Lightroom can seem overwhelming. Beginners often adjust every slider, making photos look unnatural. Instead, make small, subtle changes. Here are some tips to get started:
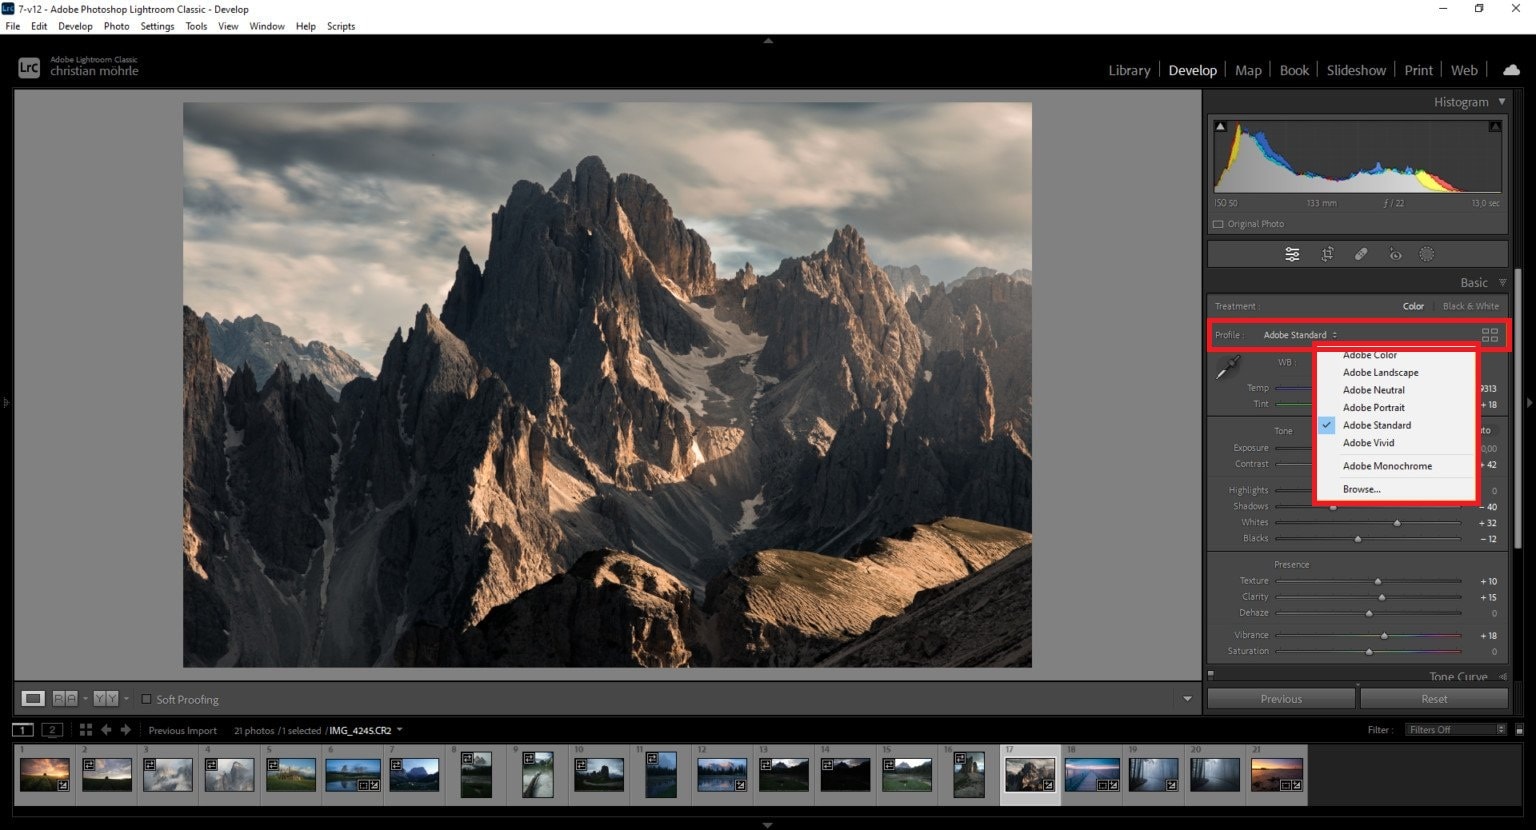
- Choose a photo profile to match your style. Use Adobe Landscape for rich colors or Adobe Standard for a balanced base before grading.
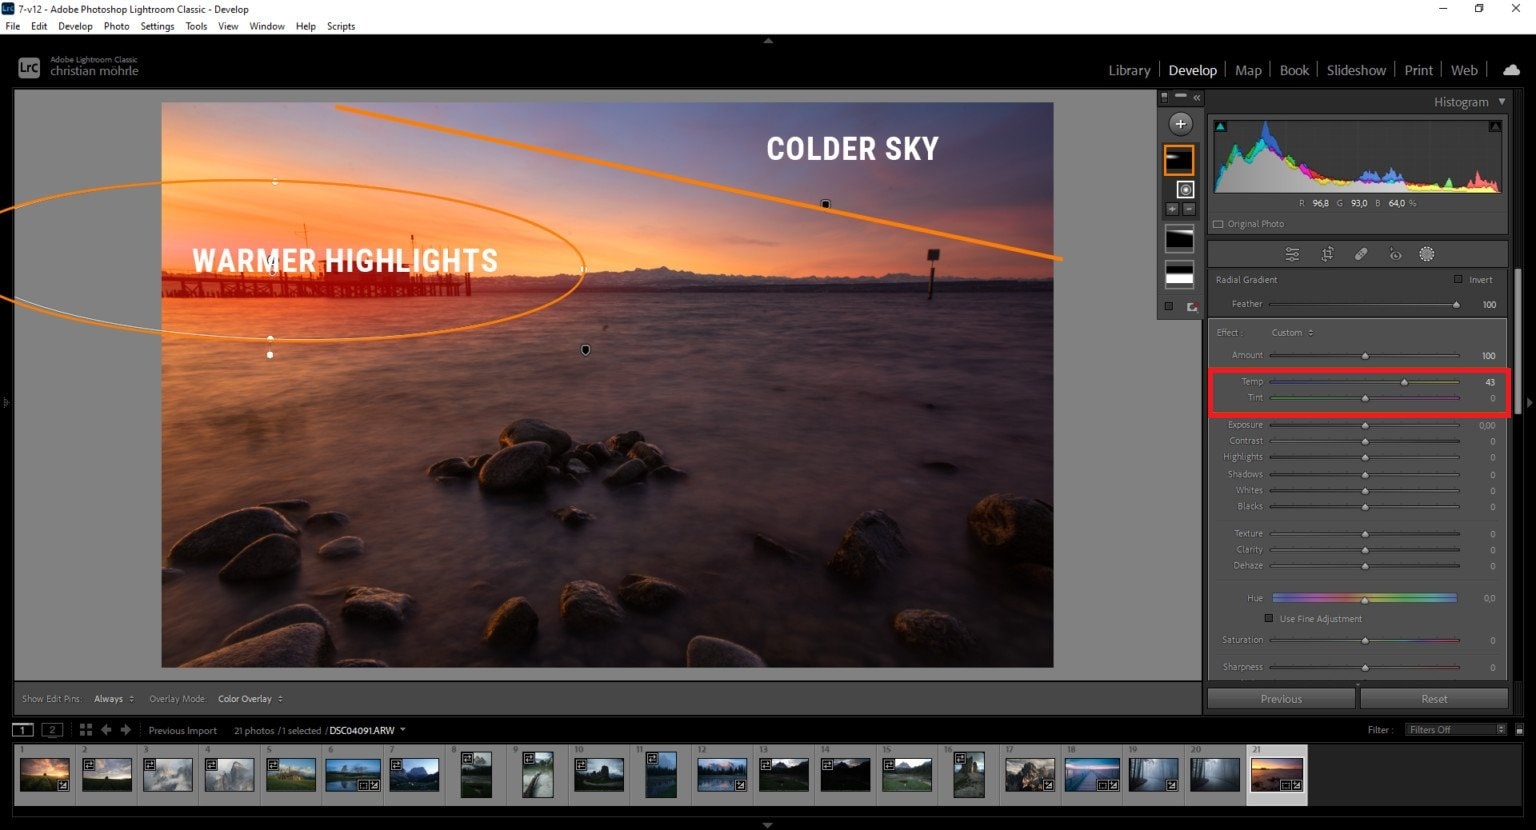
- Set the white balance by adjusting Temperature and Tint to control mood:
- Warm up sunsets by increasing the temperature.
- Cool down foggy or dark scenes by lowering the temperature slider.
- Use the eyedropper tool to neutralize color casts.
- Use complementary colors. Add warm tones like yellow or orange to highlights and cool tones like blue to shadows for balance, or reverse them for a moodier effect. Try linear gradients for skies, radial gradients for sunlight, and masking tools to adjust specific areas without changing the entire image.
- Employ the Tone Curve to adjust contrast and color. Raise the red channel in highlights for warmth or lower the blue channel for yellow tones. Try warmth in highlights and midtones, coolness in shadows. Small changes matter.
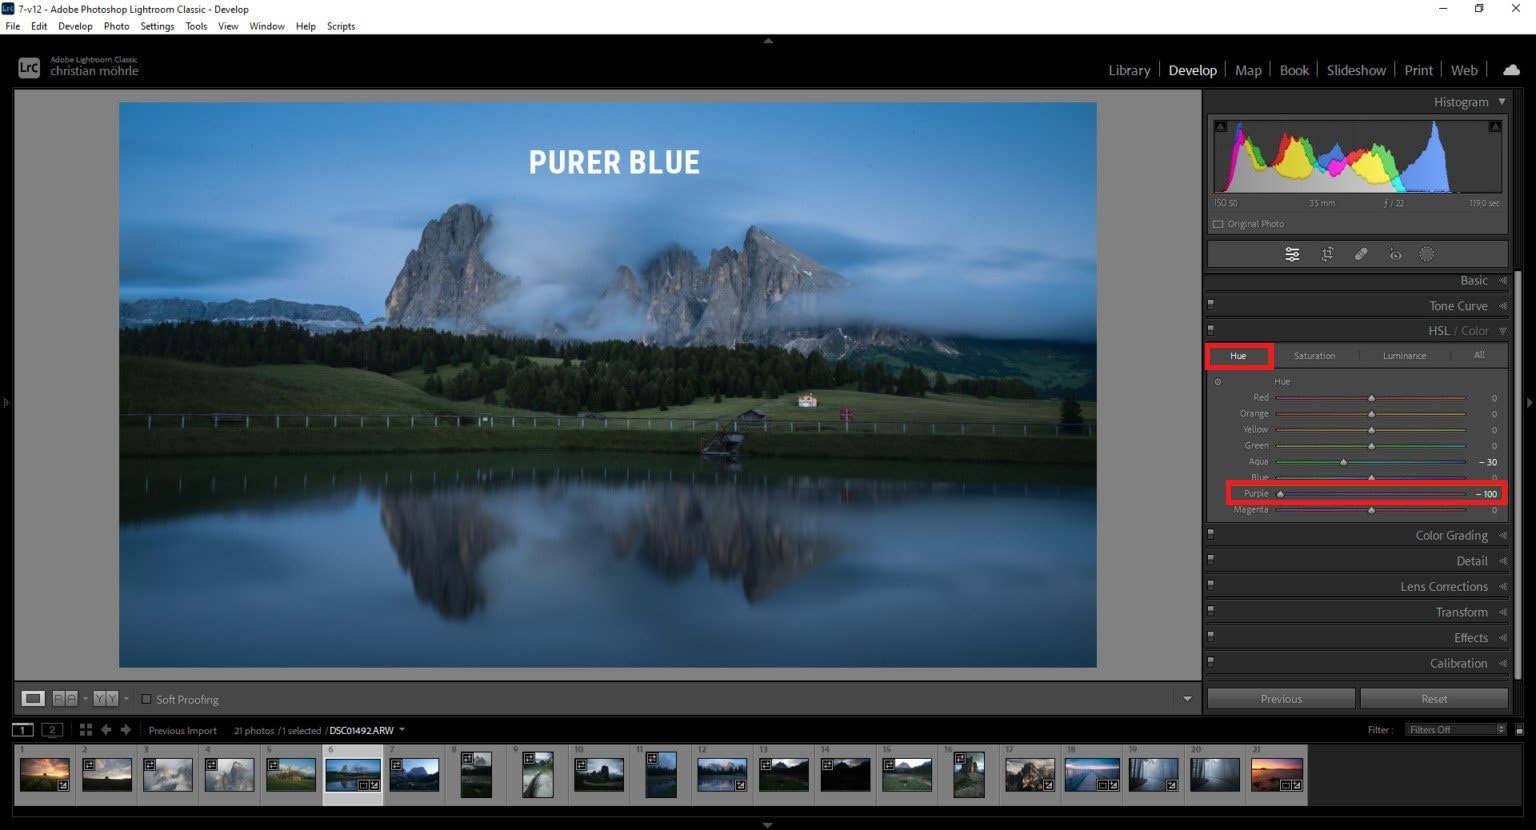
- In the HSL panel, tweak individual colors:
- Change Hue to shift colors.
- Adjust Saturation to make colors pop.
- Modify Luminance to control brightness and depth of colors.
- Hold Shift when adjusting colors to keep the hue steady while changing saturation. This helps fine-tune color intensity.

Part 5. Common Lightroom Color Grading Mistakes (and Fixes)
Even with tools like Lightroom, it’s easy to go overboard with color adjustments. Small mistakes in tone, balance, or saturation can make photos look unnatural. Here are common color grading errors and simple ways to fix them for better results.
| Mistake | Why It’s a Problem | How to Fix It |
| Over-saturation and unrealistic tones | Too much color makes images look fake and harsh. | Use subtle adjustments; keep colors natural by lowering saturation or using the Hue slider for balance. |
| Ignoring skin tones in portraits | Skin can look unnatural if overly tinted by color grading. | Prioritize natural skin tones by adjusting the orange/red hues carefully. |
| Not maintaining consistency across images | A mismatched style makes a photo set look unprofessional. | Apply similar color grading settings or use presets to keep a cohesive look. |
| Crushing shadows or highlights | Losing detail in very dark or bright areas can flatten the image. | Adjust the luminance sliders and use masks to preserve details. |
| Relying only on presets | Presets may not suit every photo, leading to poor results. | Tweak presets to match the specific lighting and mood of your image. |
Conclusion
Color grading in Lightroom helps turn simple photos into cinematic ones. With the right balance of tone, color, and light, you can shape the mood and style of your shots without making them look overedited. Always start with clear, high-quality photos to get the best results. Use subtle adjustments, keep skin tones natural, and match the colors across your photos for a consistent look. The more you practice, the more Lightroom becomes your creative tool for telling stories and bringing emotions to life through color.
FAQs
-
How do color grading and color correction differ in Lightroom?
Color correction fixes issues like white balance, exposure, and contrast to make an image look natural. On the other hand, color grading goes a step further by creatively adjusting colors to set a mood or style. -
How can I achieve a cinematic look with Lightroom color grading?
Start by warming up highlights with orange or yellow tones and cooling down shadows with blues or teals. Then fine-tune saturation and contrast to create depth and drama, similar to what you see in movies. -
Can beginners create professional edits using Lightroom color grading?
Yes. Beginners can achieve pro-level results by learning the basics of the color wheel, practicing with presets, and making subtle adjustments instead of over-editing. Consistency and attention to detail are key.
