“How can I remove the white background from this image completely?”
Many users find it annoying to have a white background on their images. It's a common concern, especially for those looking to create professional-looking graphics or simply isolate a subject from a cluttered background.
Luckily, with the right tools and simple steps, you can easily remove that white background from pictures and achieve a clean, transparent look. This article will explore some of the top 5 tools available to help you. Keep on reading.
In this article
Part 1. Reasons to Remove White Background from Picture
But why do most people need to remove the white background of an image? Here are the top reasons:
- Removing the white background focuses more on the image's subject or main part.
- Pictures with no background are more decent and cleaner. This is very important for businesses and e-commerce websites.
- Removing the background in an image lets you quickly place objects in different backgrounds. This is a common requirement in all design projects or marketing material.
- Multiple image background removal brings consistency. It is effective for branding purposes, also it shall give a professional look.
- Without a background, editing and adjusting images becomes very easy. Adding shadows and other effects like reflection is more convenient.
- Images without backgrounds fit perfectly in most of your designs. They work great on websites, social media, and printed material.
Part 2. 5 Best Tools to Remove White Background from Photo
Removing a white background from a photo can give your image a clean, professional touch. Whether you're working on social media content, marketing materials, or personal photos, having the right tools is key. Here are the 5 best tools to easily remove white backgrounds for professional results.
1. Try Repairit Photo Eraser to Remove White Background of Picture
Repairit Photo Eraser is an AI-based tool that helps you easily remove unwanted objects, blemishes, or white backgrounds from your photos. It uses an advanced system to precisely select and erase elements, leaving your subject intact. With Repairit Photo Eraser, you can quickly delete unwanted white backgrounds in your photos in 3 steps. Moreover, Repairit works on Windows and Mac operating systems.
Key Features:
- Removes white backgrounds, objects, and distractions with a single click.
- Repairit delivers outcomes without compromising quality.
- Works on various image formats like JPG, JPEG, PNG, BMP, and WEBP.
- Supports batch processing to remove backgrounds from multiple photos at once.
Here's how to use Repairit Photo Eraser to remove a white background:
Step 1: Navigate to the Photo Eraser section. Upload your image by clicking Add Photo.

Step 2: Use the brush tool to mark the objects you want to remove. You can freely adjust the brush size and zoom in for precision. Click Start to begin removing the marked objects. The process may take some time.
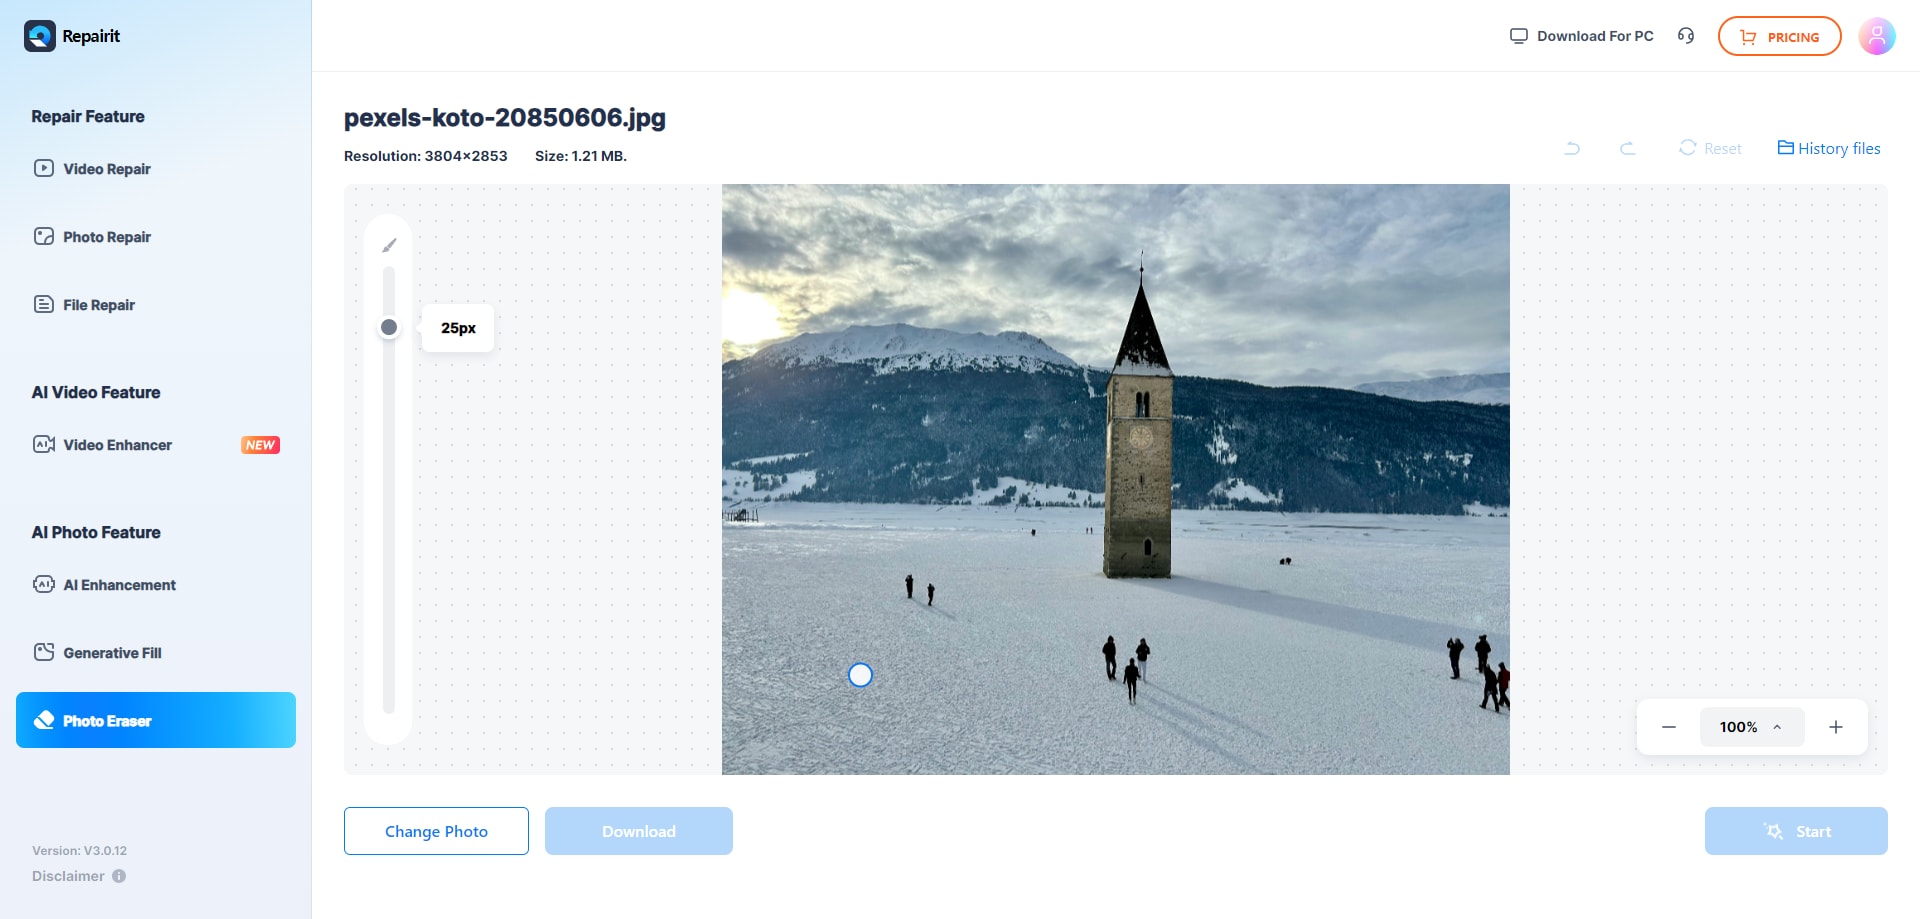
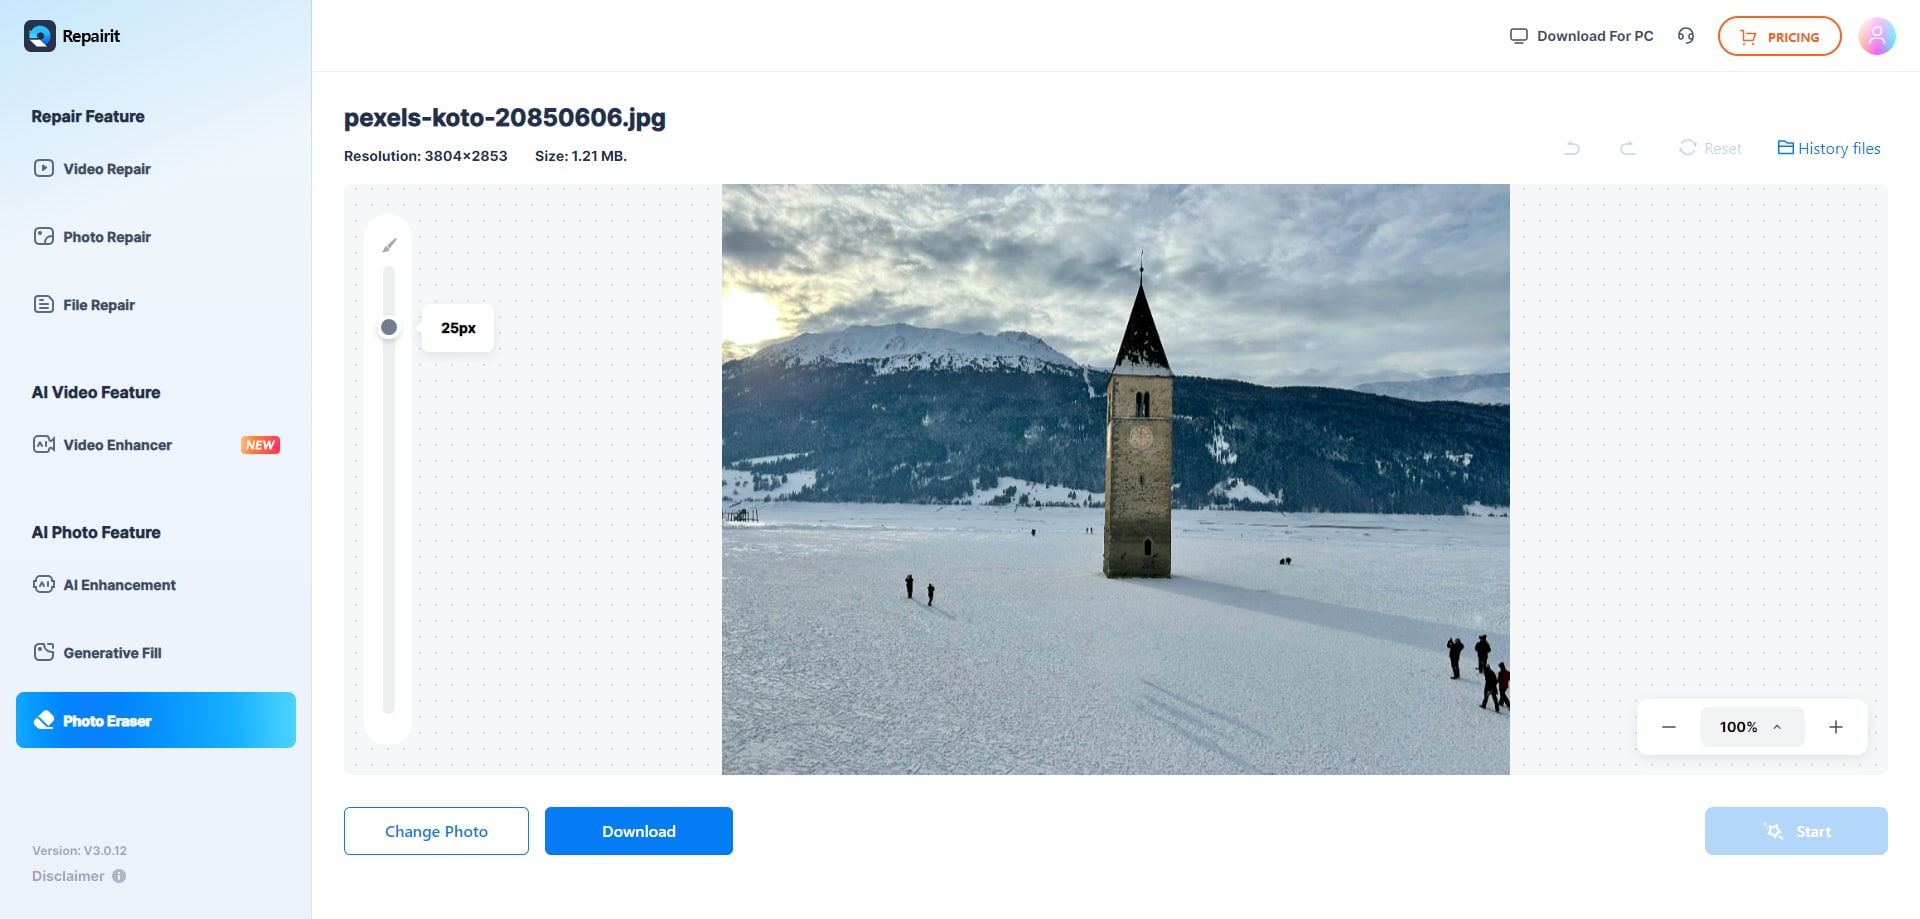
Step 3: Once the erasing is complete, preview the results. If satisfied, download the edited image.
2. Try Remove.bg to Remove White Background from Picture
Remove. bg is a free online tool that can remove white backgrounds from images in a snap. Using this advanced AI-driven tool, you can precisely select and remove the background while preserving your subject. The job is automated and fast, ensuring professional results.
Key Features:
- Remove.bg lets you remove white backgrounds within 5 seconds.
- Perfectly retains the details and image quality of the subject.
- Allows editing the white background selection if needed.
- Supports diverse image file formats, including PNG, JPEG, WEBP and HEIC.
Here's how to use Remove.bg:
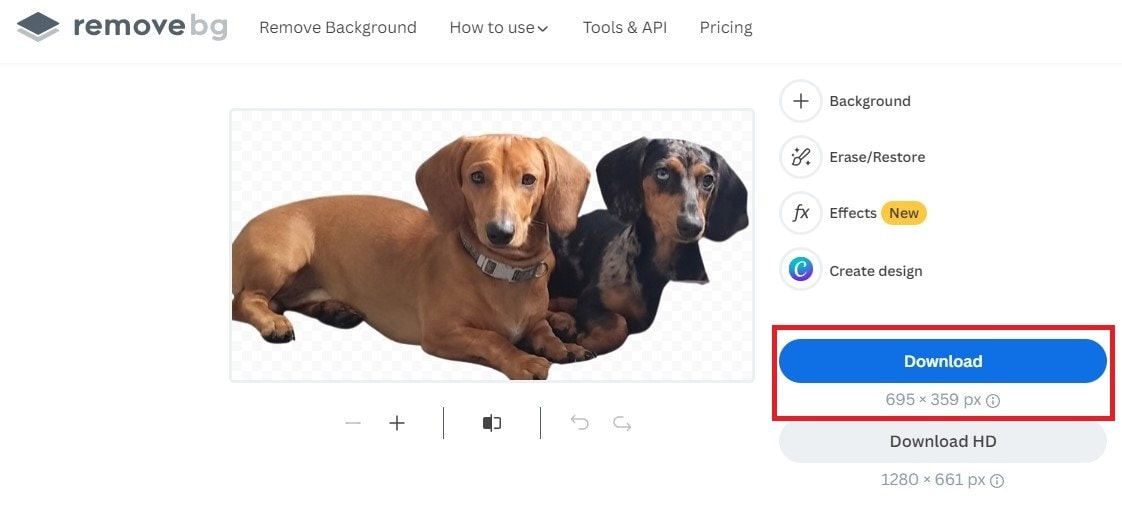
Step 1. Open the Remove.bg website and click "Upload Image." You will be asked to select the image file with the white background you wish to remove.

Step 2. Remove.bg will automatically detect and remove the background.
Step 3. Once done, check on your edited picture, then edit any modifications using the Editing tools. Click Download to save the image with a transparent background.
3. Try Photoroom to Remove White Background of Image Online
Photoroom is another AI-driven online tool that supports the auto removal of image backgrounds. This advanced algorithm selects elements with utmost accuracy and erases them to leave your subject intact with a few clicks. The tool’s automated features are designed with online access and will save much time and effort.
Key Features:
- Doesn't affect the quality and details of your main subject even if the white background is removed.
- Supports JPG, PNG, and WEBP image formats.
- Enable editing of the white background selection, if needed.
- Provides instant background replacement options.
Here's how to use Photoroom online:
Step 1. Go to the Photoroom website. Click Start from Photo on its site to upload your image. Photoroom automatically detects the background and removes it.

Step 2. Check the edited image and make any edits that would be necessary using editing tools.
Step 3: Click Instant Backgrounds to change to the image's different background. Once satisfied with the result, click Download to save the image.

4. Try Image Online.co to Remove White Background from Photo
Image Online.co does have a basic but powerful way for users to remove the background of an image. This tool has user-friendly options, and no technical skills are required. With its easy-to-use interface, you can edit your photos quickly, making them look clean and professional.
Key Features:
- One-click auto-remove background.
- It supports JPG and PNG image formats.
- It previews the edited image.
- It allows to refine the selection in case of a need.
Here’s how to use Image Online:
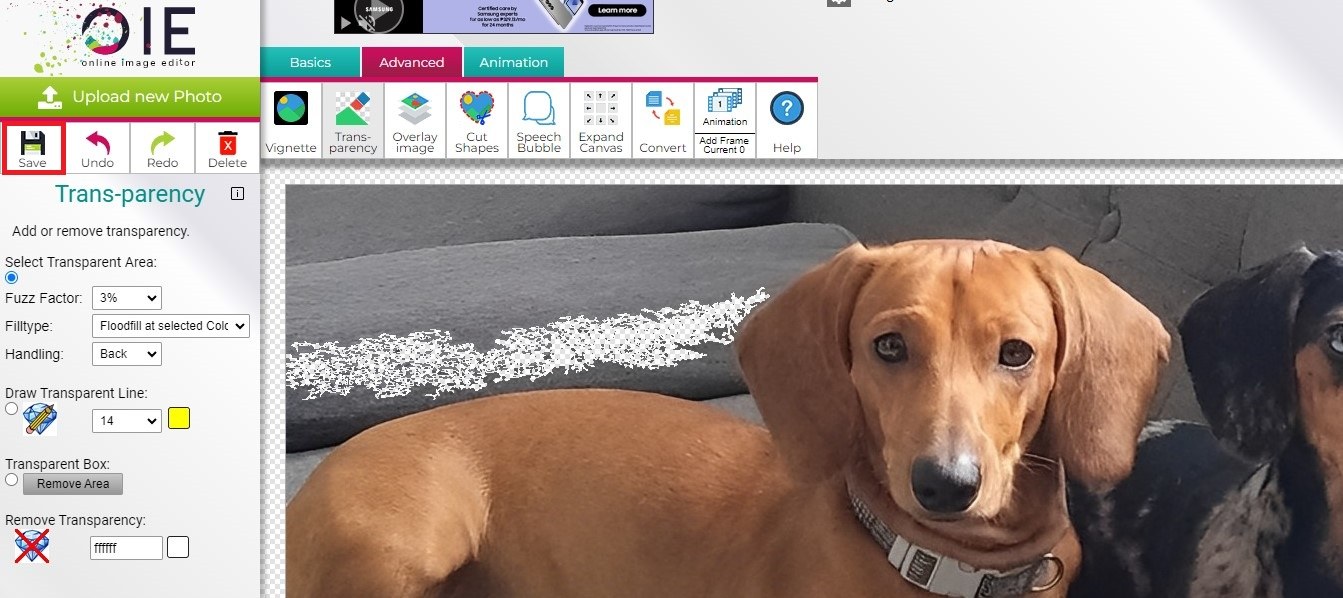
Step 1. Open your browser and proceed to Image Online's website.

Step 2. Click the Upload button. Choose the photo from which you want to remove the white background.
Step 3. Hit Remove Background. The above tool will find and delete the white background on its own.
Step 4: You can edit edges or adjust any needed with the editing tools given. Click the Save button to keep the edited photo to your device.
5. Try Fotor to Remove the White Background of Picture
Fotor is a free online tool that can help remove backgrounds from your images in just a few clicks. It utilizes sophisticated AI technology in precisely selecting and erasing the background to leave your subject intact. Fotor automates white background removal while ensuring quality with minimum effort. Its user-friendly interface and faster speed make it one of the great tools for all your photo editing needs.
Key Features:
- Removes backgrounds with a single click.
- The image quality and details of the subject are retained.
- Supports PNG, JPG, JPEG and SVG image formats.
- Allows editing the selection if needed.
- Instant background replacement options.
Here's how to use Fotor:
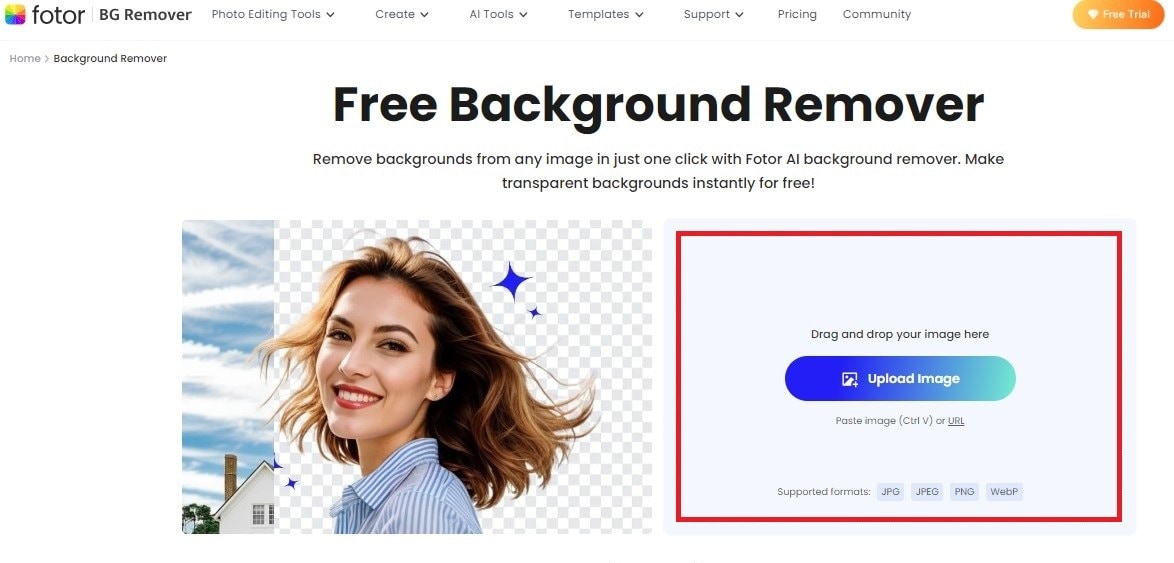
Step 1. Go to the Fotor website and click Remove Background to upload your image. Fotor will detect the background itself and automatically remove it. Click Upload Image to add your images.
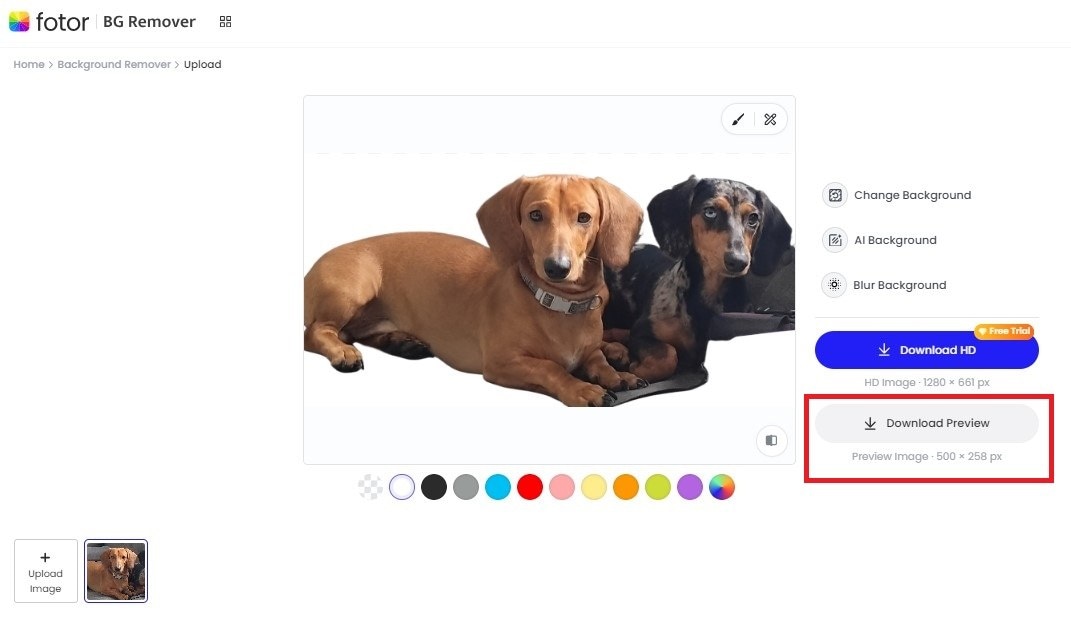
Step 2. Click Replace Background to select a new background for your image. Once satisfied with the result, click Download Preview to save the image.
Part 3. How to Remove the Background of an Image Office?
Removing the background image in Microsoft Office is quite easy and very fast. You can use this in any application, such as Word, PowerPoint, or Excel. This intrinsic functionality of Office gives the power to the user to produce clean documents and professional presentations with much ease.
Follow the steps below to remove the image background in the MS office.
Step 1. Open the application Office and insert your picture by clicking Insert in the top menu. Choose Pictures and select the image from your device.

Step 2. Click on the image to select it. Then, a new tab appears in the top menu: Picture Format. Select it.
Step 3. Select Remove Background. The program will automatically detect a highlight of the background.

Step 4. If needed, shape the selection by handles. You can mark areas to keep/remove through Mark Areas to Keep and Mark Areas to Remove.
Step 5. Once you have your desired selection, simply click Keep Changes. You will then have only your main subject in your image; it removes the background. Save your document or export an edited image if you need to.

Conclusion
Removing white backgrounds from images is now easier than ever with these top tools. From beginners to pros, these tools will save you time and give your photos a better touch. Try them out, and you will be amazed at the change. Create cleaner, more professional images today!
FAQ
How can I ensure a clean removal of the white background?
1. Use high-quality images with a clear distinction between the subject and background.2. Zoom in and manually refine edges if necessary.
3. Use feathering or smoothing tools to soften edges and reduce jagged lines.
What is the difference between a transparent background and a removed background?
A transparent background means that the area previously occupied by the background becomes see-through, allowing any background behind the image to show through. Removing a background usually means making it transparent, but it can also mean replacing it with another color or image.How do I easily download a photo with a transparent background?
After removing the background, save the image in a format that supports transparency, like PNG. Ensure that the transparency option is selected when saving the file.


 ChatGPT
 Perplexity
 Google AI Mode
 Grok
Grok

