

 TL;DR:
Pictures failing to save in your phone's gallery typically result from depleted device storage, restricted app permissions, or a physical write-protection lock on the SD card.
● Clear the Camera app cache via your device settings, grant explicit storage access to third-party apps, and disable real-time scanning in any active antivirus software that might block file creation.
● For SD card storage, verify that the physical switch on the side of the card is pushed upward away from the locked position before unmounting and remounting the card.
● Restore images corrupted by these saving errors using the Wondershare Repairit - Photo Repair desktop application for Windows and macOS, or utilize the online version if your damaged files are 3GB or smaller.
Ask AI for a summary
 ChatGPT
 Perplexity
 Gemini
 Claude
 Grok
Grok
I’m facing an issue with my Samsung phone as the pictures taken with the camera don’t save in Gallery. Can’t open picture when it's taken from Android camera or gallery pictures not showing can be a common issue. Why is my phone not taking pictures? Can someone tell me how to fix it?
As I stumbled upon this query, I recalled that even I encountered a similar situation with my phone. Well, chances are that the camera app on your device might not be working or there could be any other firmware-related issue.
Therefore, even after taking photos on your camera, the images are not saved, so you need to troubleshoot the problem. Here, gallery not showing pictures can be resolved with a few simple steps, and I will guide you on how to do it.

Part 1: Why Are Pictures Taken from Camera Not Getting Saved?
While this issue can take place on any smartphone, it is more common in Android than iOS devices. Gallery pictures not showing is a common symptom of this problem. Ideally, if even after taking a picture, it isn’t getting saved on your device, then it can happen due to the following reasons:
-
App-related Issues: In most cases, this problem takes place when there is something wrong with the inbuilt camera or any other third-party camera app that you are using (like Snapchat or Instagram).Sometimes, CapCut unable to process image is another sign that the camera app isn’t working properly.
-
Firmware Problem: Chances are that your device might be running on an old or outdated firmware version, causing issues with its camera app.If you’ve noticed your camera malfunctioning, or if why is my phone not taking pictures, it could be related to the outdated software version on your phone.
-
Security Reasons: At times, even a third-party anti-malware tool or the built-in settings on the device can stop the camera app from saving photos on it. This may also explain why isn't your phone taking pictures when you try to capture something.
-
Corrupt Device: If your phone has been corrupted by any virus or malware, then it can cause the malfunctioning of its camera app. This could result in gallery not showing pictures after taking a shot or photos failing to save properly.
-
Storage Issues: Besides that, if there is not enough free space on your device or the connected SD card, then your photos won’t be saved as well.
Part 2: Pictures Taken with Camera Doesn’t Save in Gallery: 8 Feasible Solutions
If your pictures taken with the camera doesn’t save in the Gallery of your device, then I would recommend following these quick solutions:
Fix 1: Restart your Device
Since this is not a major issue, chances are that a simple restarting of your device would be able to fix it. Ideally, when you restart your device, it also resets the present power cycle which can troubleshoot minor issues with it.
To restart your phone, you can just long-press the Power key on the side. As the power options appear, you can choose to restart your phone and wait for the process to be completed.
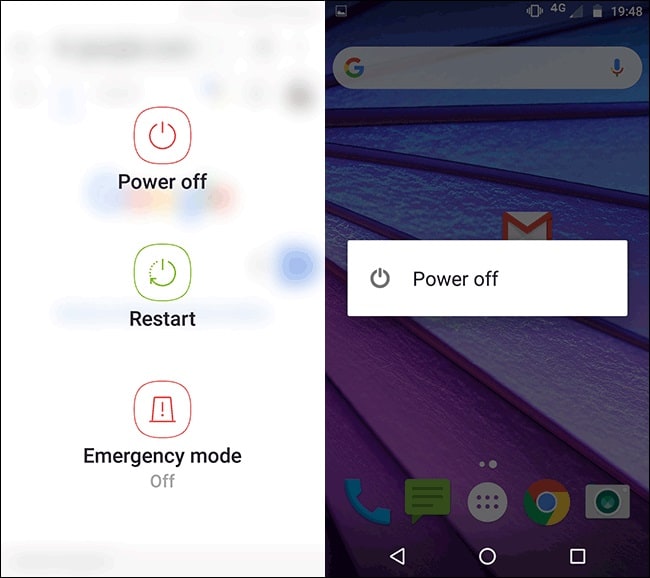
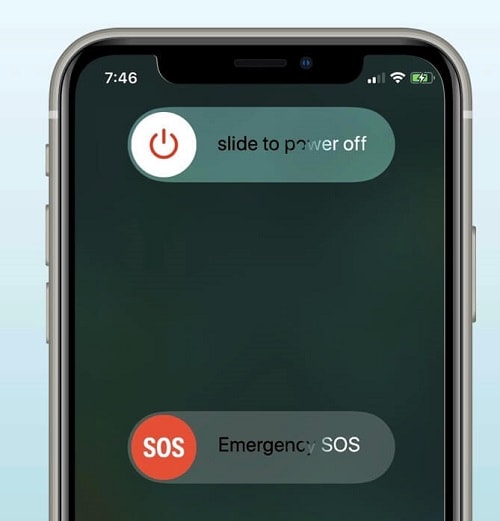
Alternatively, if you are using an iOS device, then you can just swipe the power slider to turn off your device. Afterward, you can wait for around 5 seconds, and turn on your iPhone to restart it.
Fix 2: Make Sure there is Enough Available Space
As I have listed above, if there is not enough space on your phone, then its photos won’t be saved on the device storage. Therefore, if the pictures taken with the camera don’t save in Gallery, then you can go to the storage settings of your device.
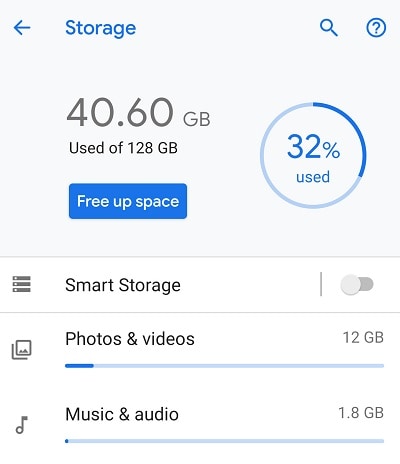
From here, you need to ensure that your device has enough available space. Besides that, you can also get rid of unwanted things (like documents, photos, or apps) from your phone to make more space. Similarly, you can also check the available space in the SD card (if it’s the default storage for your phone’s camera).
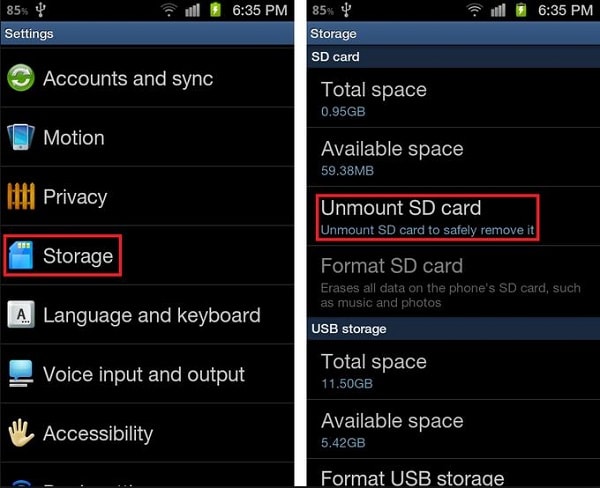
Fix 3: Unmount your SD Card and Mount it Again
It has been observed that a lot of people encounter issues like the pictures taken with the camera doesn’t save in Gallery while using an SD card. The simplest way to fix this is by unmounting your SD card and mounting it back again.
You can do this by visiting your Android phone’s Settings > Storage > SD Card and tapping on the “Unmount” option. Afterward, you can just remove the SD card from your device and restart it.
Once your device is restarted, you can connect your SD card to its relevant slot and go to its settings to mount it again.
Fix 4: Check if the SD Card is Write-protected
A lot of SD cards come with an inbuilt write-protection switch that is mostly located at the side. If you have locked the SD card, then it will enable its read-only mode (which means you can only read its content but can’t write anything on it).
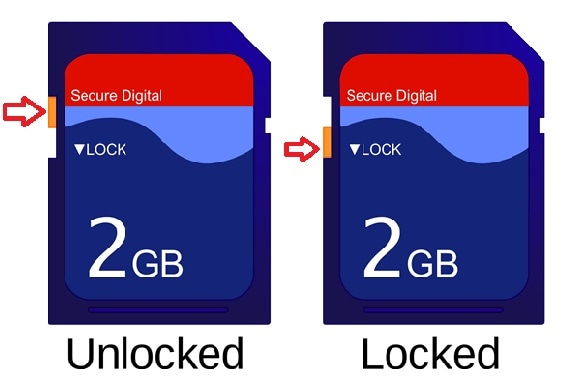
You can just check the write-protection switch on your SD card and make sure it is away from the “lock” button (in the upward direction). If not, then you can first disable its write-protection switch and connect it to your device again.
Fix 5: Update the Firmware on your Device
When my pictures taken with the camera doesn’t save in Gallery, I discovered that the issue was related to an outdated firmware version. That is, if you are running an old, corrupt, or outdated iOS/Android version of your phone, then you should update it to the latest stable release.
If you own an Android device, then you can just go to its Settings > General > About Phone or Settings > System > System Update to upgrade its firmware.
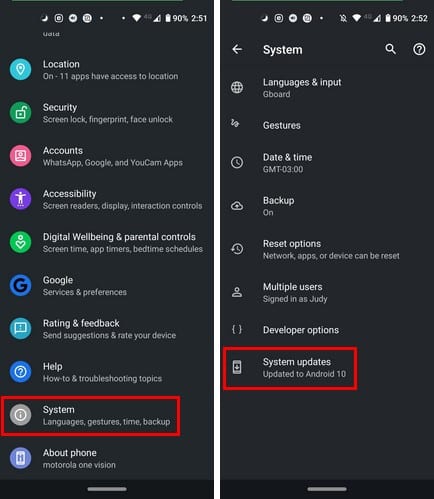
Besides that, iOS users can do the same by visiting Settings > General > Software Update.
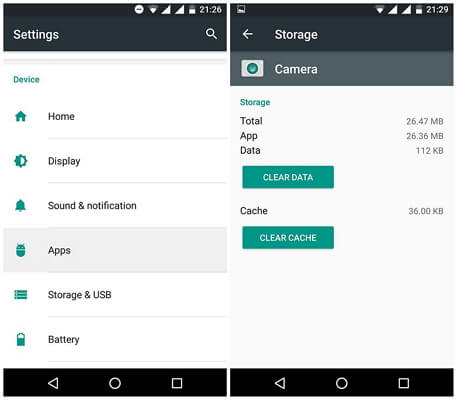
Fix 6: Clear the Accumulated Cache of the Camera App
If you have been using the Camera app for a while now, then it could have accumulated a lot of cache content. This can cause issues like the pictures taken with the camera don’t save in Gallery.
Though, you can easily fix this by visiting your Android phone’s Settings > Apps > Camera and tapping on the “Storage” or “Manage Storage” option. From here, you can just tap on the “Clear Cache” button to get rid of its cache content.
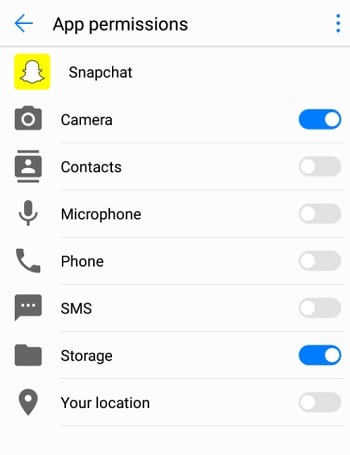
Fix 7: Check Relevant Permissions for the Camera App
In case you are using any third-party camera app (like Snapchat or Instagram), then you should check the permissions given to it. For instance, if the app has not been given access to your phone’s storage, then it can’t save the photos that are clicked by you.
To fix this issue, you can just go to your phone’s Settings > Apps > App Permissions and select the relevant app (like Snapchat). Now, from the list of the permissions given to the app, make sure its camera and storage features are enabled.
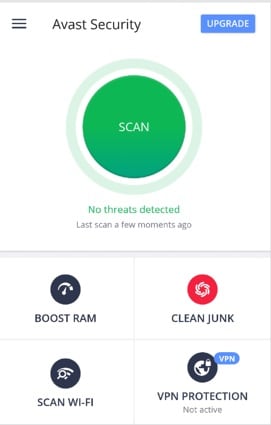
Fix 8: Turn off Third-party Antivirus Apps
Lastly, if the pictures taken with camera don’t save in Gallery, then you should disable any anti-virus application on your phone. Surprisingly, some anti-malware tools can block the vital actions needed by the camera app to save the clicked photos on the device storage.
All you need to do is launch the anti-virus app that is installed on your phone, go to its settings, and disable its real-time scanning operations. Afterward, you can launch the Camera app again, and check if it fixes the issue or not.
That’s it! By following these smart solutions, you can easily make sure that your photos would be saved by the camera app on your phone’s gallery.
Part 3: What If My Photos Get Corrupted? How to Fix Them?
As you can see, it is quite easy to resolve an issue like pictures taken with camera doesn’t save in Gallery. Though, at times, your photos can get corrupted while troubleshooting this issue. In this case, you can consider the following suggestions to restore your corrupted pictures:
Tip 1: Use a Professional Photo Repair Software
The best way to repair your corrupted photo is by using a professional tool like Wondershare Repairit - Photo Repair. The desktop application runs smoothly on leading Windows and macOS versions with a user-friendly interface.

Wondershare Repairit - Photo Repair
 Security Verified. Over 7,302,189 people have downloaded it.
-
Repair damaged photos with all levels of corruption, such as grainy photos, dark photos, pixelated photos, faded photos, etc.
-
Repair images of diverse formats, such as JPG, JPEG, PNG, CR3, CR2, NEF, NRW, etc.
-
Repair critically damaged or corrupted photos available on SD cards, phones, cameras, USB flash drives, and more.
-
Repairit has a quick and advanced repairing mode. You can use either depending on the level of corruption the photos has undergone.
-
The "AI Image Upscaler" feature can enlarge the repaired photos to 2X, 4X, and 8X.
-
Intelligently restore old/scatched photo and colorize black and white photos with various AI effects.
-
No limit to the number and size of the repairable photos compared with the online version of Repairit.
-
Support Windows 11/10/8/7/Vista, Windows Server 2003/2008/2012/2016/2019/2022, and macOS 10.12~macOS 14.
Attention:
Wondershare Repairit is a desktop software, so you repair the photo files on your Windows PC or MacBook. If you just want to repair photos on your phone and the damaged photos is no more than 3GB, please try the online version of Wondershare Repairit - Online Video Repair. Repairit Online supports repairing your corrupted photos freely within seconds and also provides a nice photos repair experience for you.
Tip 2: Scan Your SD Card Frequently
A lot of times, users get their SD cards infected while transferring their photos to their system. To avoid that, make sure that you scan the SD card whenever you connect it to your computer. You can just right-click the SD card’s icon and choose to scan it with Windows Defender or any other installed anti-malware tool.
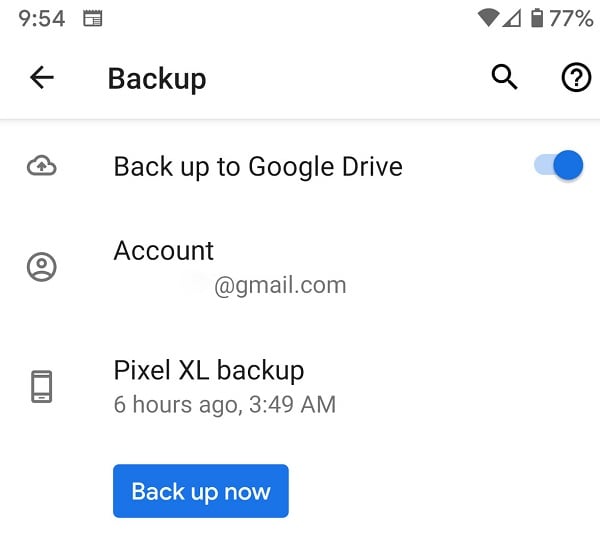
Tip 3: Maintain a Backup of your Photos
If you don’t want to lose your important photos due to unwanted data corruption, then always maintain a second copy. One of the easiest ways to do that is by syncing your photos with your iCloud or Google account. Besides that, you can also take the assistance of various mobile apps, cloud-based platforms, or desktop tools to back up your photos.
Further Reading:
Here are the useful articles to help you.
1. Repair RAF Files of Fuji Camera.
2. The Most Common Digital Camera Errors.
Time to Conclude
By following this guide, you can easily troubleshoot the issue with your phone’s camera or its storage issue. Ideally, if your pictures taken with camera doesn’t save in Gallery, then you can check its cache, storage, or app-related settings.If you are facing issues like why won't my phone take pictures, these steps should help you get to the root cause.
Besides that, you can also check its SD card and follow the above-listed solutions to fix it. Also, if while fixing the issue, your photos have been corrupted or damaged, then you can simply use a professional tool like Wondershare Repairit to fix them.
FAQs
-
Why are my photos not getting saved in the Gallery app?
If your photos are not getting saved in the Gallery, then there could be an issue with the app or its granted permissions. Your device could be running on outdated firmware, or it might not have enough free storage. -
Why is my phone not saving pictures on its SD card?
The default location for saving your photos could be your device’s internal storage and not the connected SD card. Besides that, your SD card could be write-protected, might be corrupted by malware, or not have enough available space. -
What to do if my saved photos go missing?
If your saved photos have been deleted or are lost, then you can use a reliable data recovery tool like Wondershare Recoverit. It is one of the most effective photo recovery applications that can extract lost pictures in numerous scenarios.