MXF files are a common format in video production. They can hold video, multiple audio channels, and accurate timecode in one file. But one of the swirling struggles of many users is the importing process of an MXF file into Premiere Pro. This can be quite annoying, especially when you just want to get started editing, and the audio or video refuses to cooperate.
Luckily, there’s a simple fix. The issue usually comes down to how the files are organized. In this guide, we’ll detail the steps on how to open MXF files in Premiere Pro the right way.
In this article
Part 1. What is an MXF file?
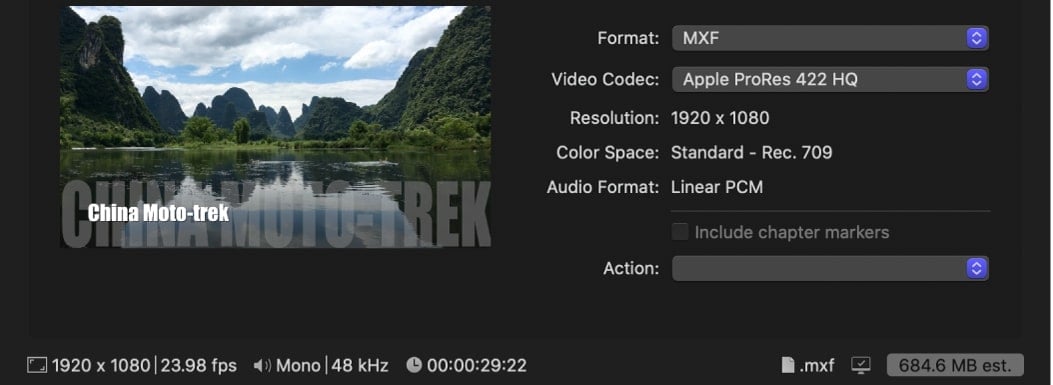
MXF (Media eXchange Format) is a container format widely used in professional video production for recording, editing, and delivering content. It holds video, audio, and metadata all in one file.
MXF files are used in the OP1a format for broadcast delivery, digital cinema, and archiving. These can even support Growing Files, meaning the file can be read while it's still being recorded, making it useful for live events.
- Professional cameras supported: Sony, Canon, and Panasonic
- Platforms supported: Adobe Premiere Pro, Final Cut Pro, Avid Media Composer, and DaVinci Resolve
- Media formats supported: H.264, ProRes, and RAW video
Premiere Pro fully supports MXF files for import, editing, and export. This format combines video, audio, timecode, and metadata in one file, which Premiere can handle easily. It supports MXF formats from popular cameras like Sony XDCAM, Panasonic P2, and Canon XF. Moreover, Premier Pro works on both compressed and uncompressed codecs, including H.264 and ProRes.
Part 2. How to Open Premiere Pro MXF Files?
Importing, editing, and exporting MXF files in Premiere Pro is easy:
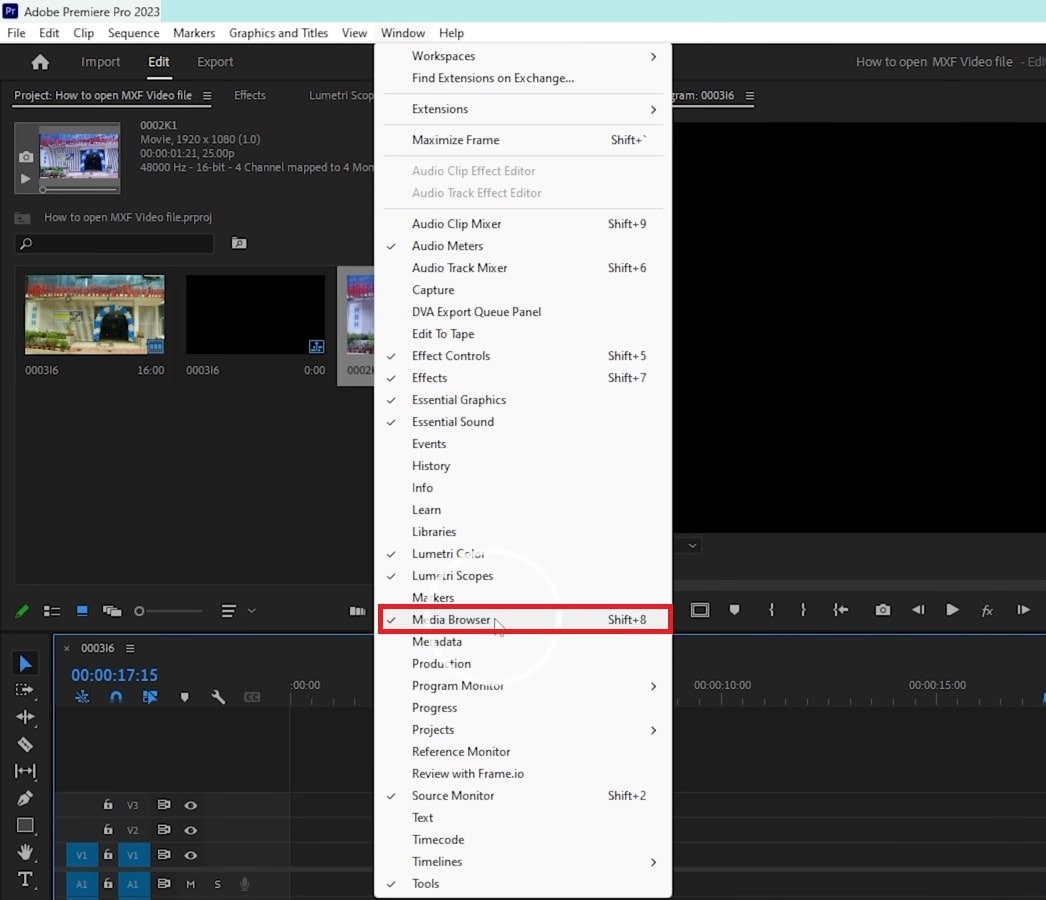
Step 1: Drag and drop MXF files into the Media Browser. Alternatively, you can go to File and select Import to add them to your project.
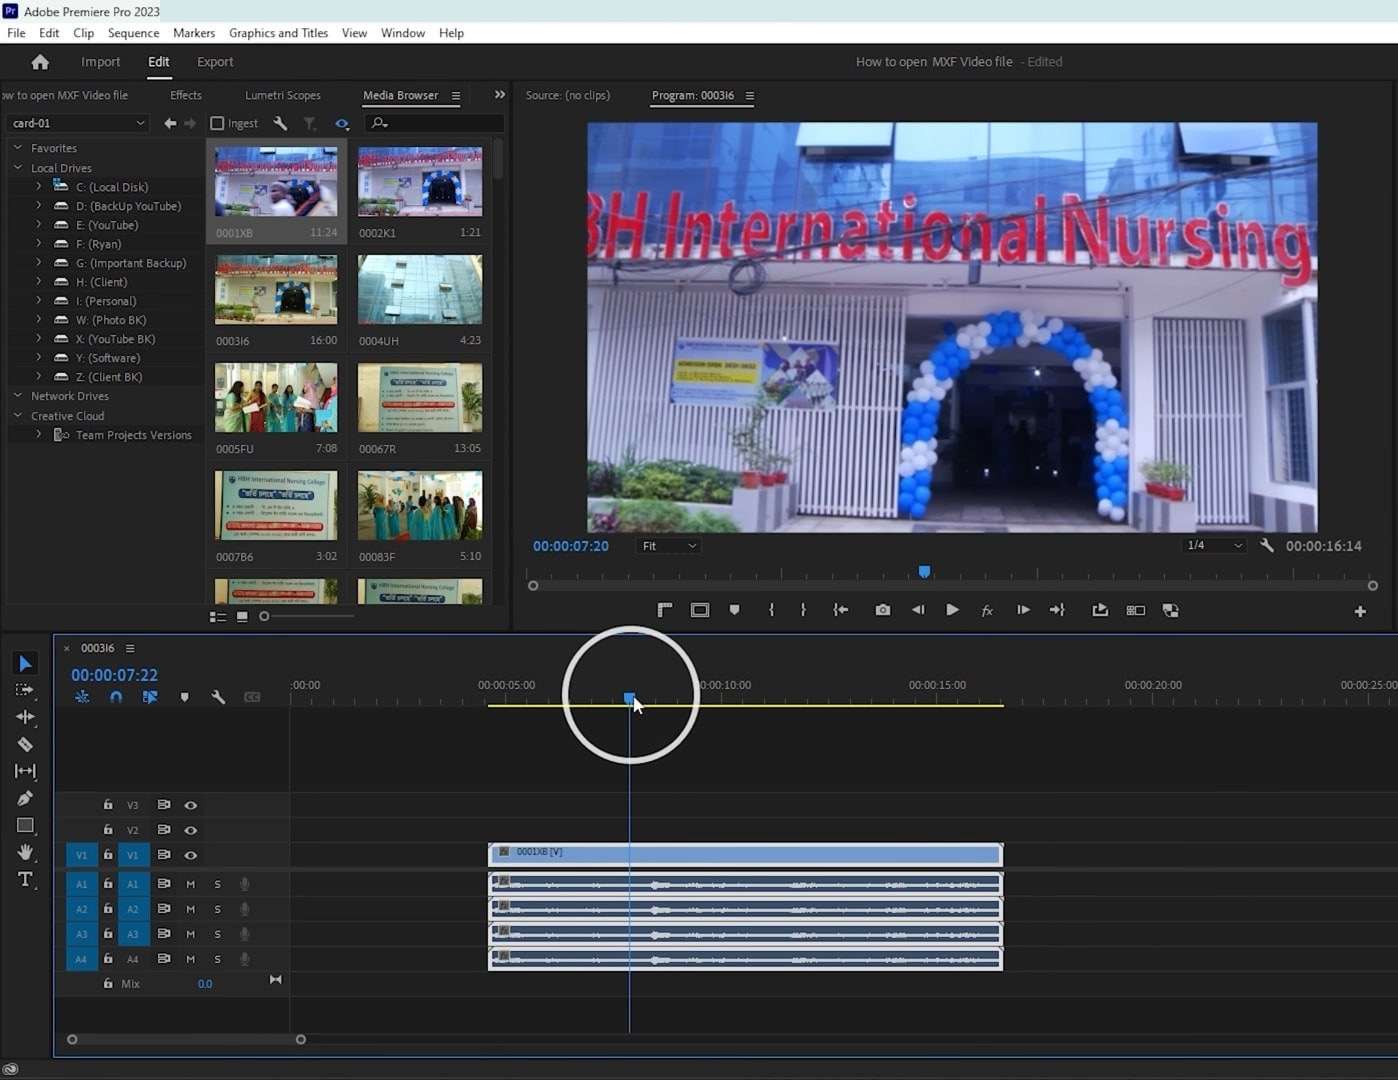
Step 2: Once imported, you can edit MXF files on the timeline like any other. Trim, cut, rearrange clips, add transitions and effects, and adjust audio levels.
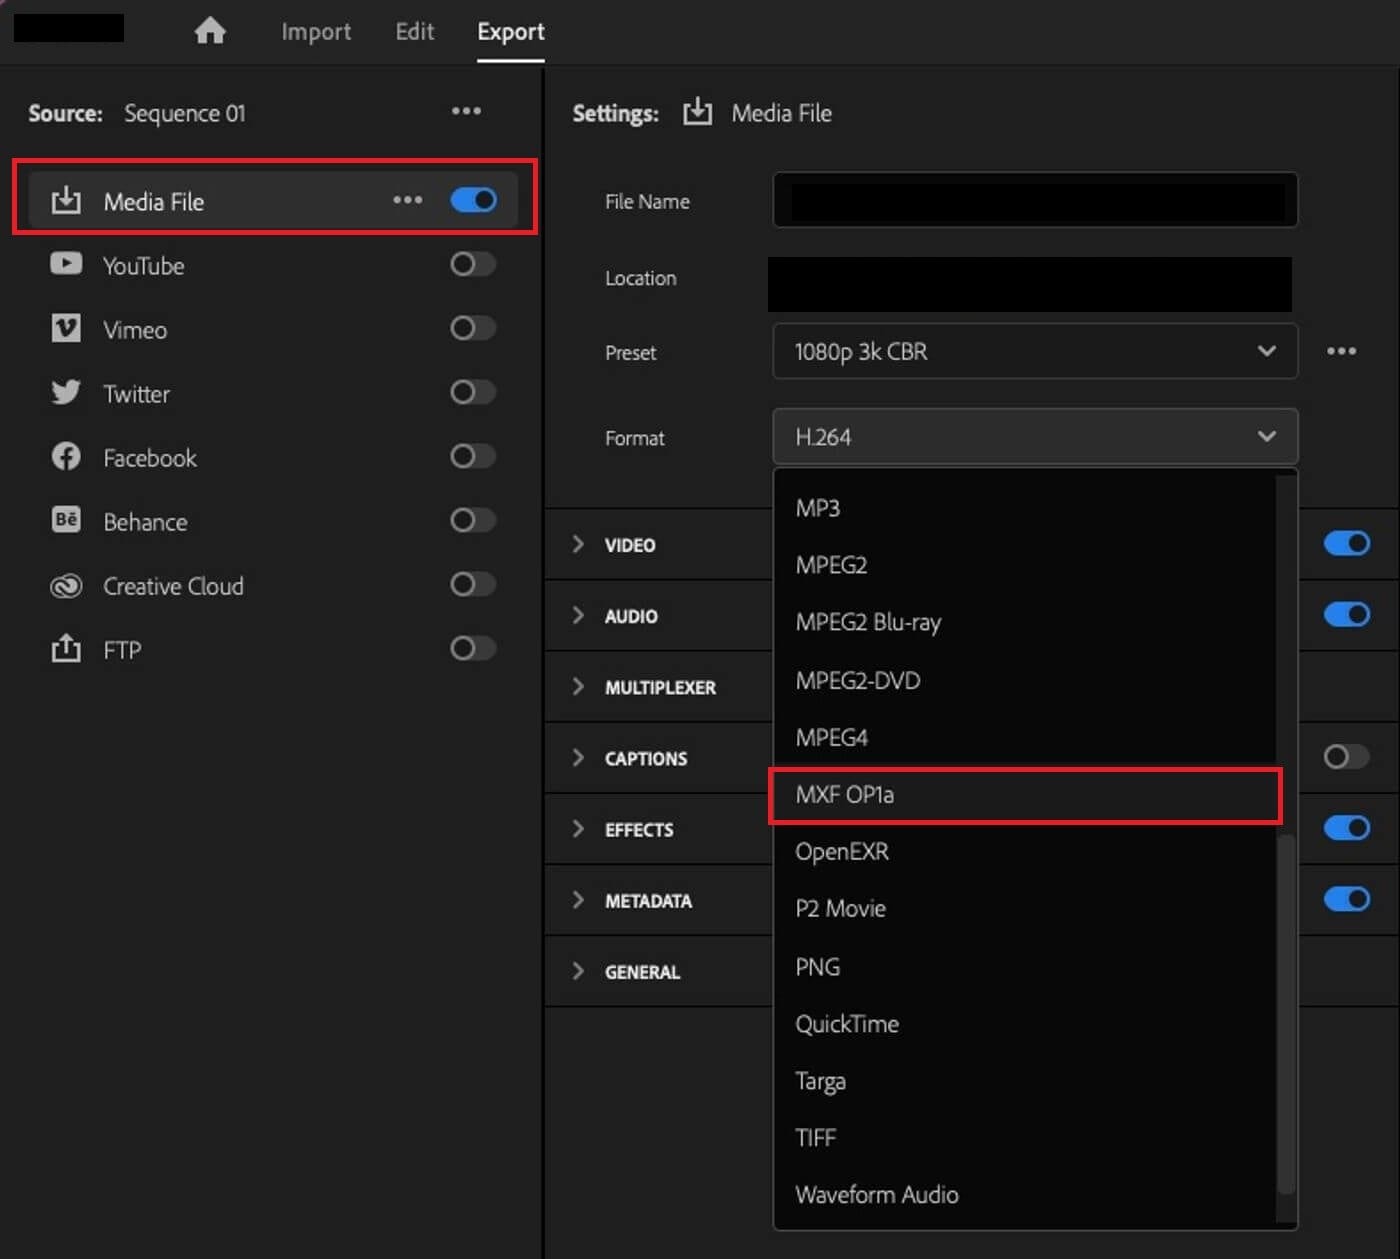
Step 3: To export, go to Media File and select Export. Click Media, and choose MXF OP1a. Adjust settings like codec, resolution, and bitrate as needed.
Part 3: MXF File Issues in the Latest Premiere Pro
Despite Premiere Pro's strong support for MXF, you may encounter occasional issues, particularly with the latest versions. Here are some of the most common MXF file issues in the latest release of Premiere Pro:
- Playback Lag: MXF files may play back slowly or lag, especially with larger or high-resolution files.
- Import Errors: Some users experience issues importing MXF files, with the software sometimes failing to recognize the format.
- Audio Sync Problems: Audio tracks within MXF files can occasionally go out of sync with the video after import.
- Export Failures: Users report that certain MXF files can cause export crashes or error messages during rendering.
Part 4. How to Repair Corrupted MXF Files?
MXF file corruption can occur due to issues like incomplete transfers, unsupported codecs, or software glitches. If you experience problems importing MXF files into Premiere Pro, try these basic fixes:
- Ensure that Premiere Pro supports the MXF file's codec. If not, you may need to convert it to a compatible format.
- Make sure you have the latest version of Premiere Pro, as updates often fix compatibility problems.
- Use file integrity checkers or try importing the file into other software to confirm the MXF file isn’t damaged.
If these steps don’t solve the issue, consider using a dedicated repair tool like Repairit Video Repair. This third-party tool is highly effective for fixing corrupted MXF files. This intuitive software efficiently handles many video issues for you to fix them with no hassle. With its intelligent repair capabilities, Repairit fixes severely damaged MXF files in just three simple steps.
Key Features:
- Restores videos from 20 formats, including MXF, MOV, MP4, M2TS, MKV, and more.
- Allows concurrent repairs of multiple MXF videos.
- Review repaired MXF videos before saving them to ensure quality.
- Maintains original quality while repairing high-definition and 4K/8K MXF videos.
- Outperforms competitors with superior repair technology and results.
To repair MXF videos on your computer, follow these three simple steps:
Step 1: Open Repairit MXF Video Repair. Click Add to import the corrupted videos.

Step 2: After adding the MXF videos, you'll see their details like Image name, size, and resolution. Click Repair to start fixing.

If the MXF video is severely corrupted, select Advanced Repair. Add a sample video that matches the corrupted file's format and device. Click Repair to start this process. Wait for it to finish, and a new window will confirm completion.

Step 3: Click Preview to check the repaired MXF video. If you're satisfied, click Save to choose a new location for the files. Avoid saving them in the same location where the original files were lost.
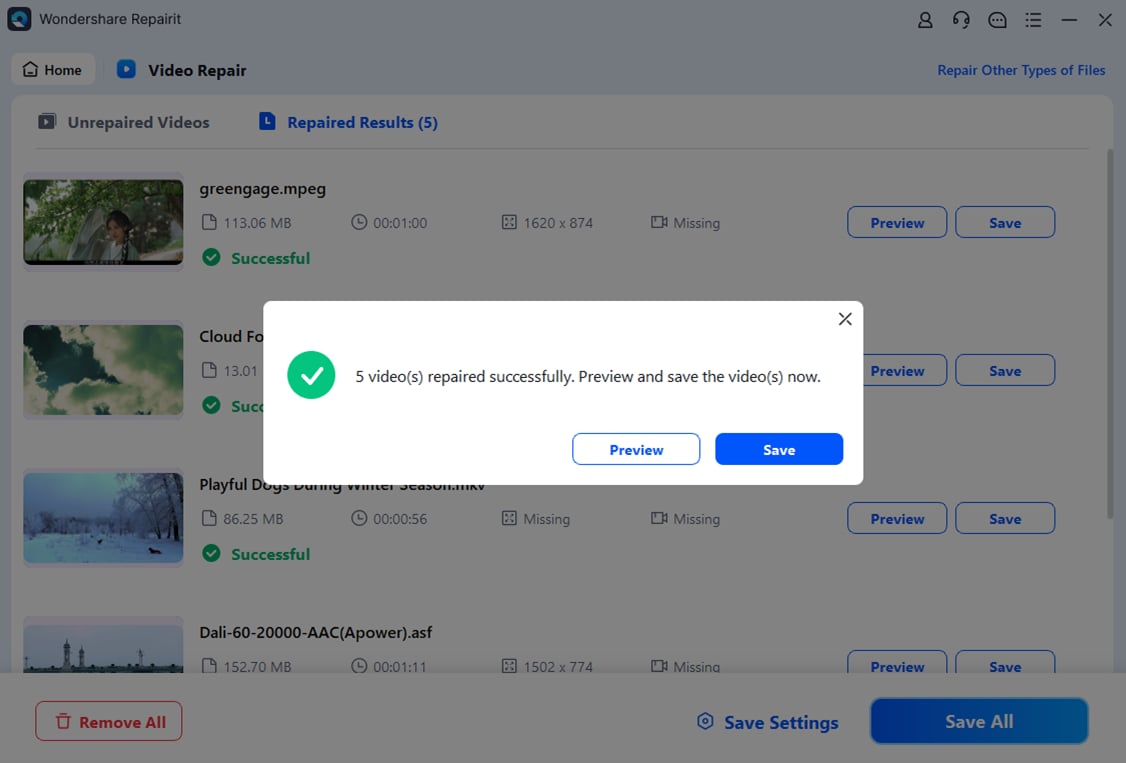
Repair Corrupted MXF Files

Part 5. Optimize MXF Workflow in Premiere Pro
To ensure smooth playback and editing of MXF files in Premiere Pro, consider the following tips:
- Reduce system load: Create lower-resolution proxy files to improve playback.
- Clean cache: Regularly clear your media cache (set it to a dedicated drive if possible).
- Organize files: Use bins to keep MXF files organized for easy access.
- Check system specs: Make sure your device meets Premiere Pro’s recommended specs.
- Lower playback quality: Set playback to a lower resolution in the Program Monitor.
- Match settings: Align sequence settings with your MXF file specs (resolution, frame rate).
- Stay updated: Keep Premiere Pro updated for performance boosts and bug fixes.
- Limit effects: Apply fewer effects during editing; add them after finalizing.
- Use an SSD: Store files on an SSD for faster loading.
- Render complex clips: Render and replace heavy clips to improve playback.
Conclusion
That’s it. You can now easily import your MXF files to your Premier Pro. If ever you encounter corrupted MXF files, fix them with Repairit Video Repair. For more workflow improvement, follow the listed tips mentioned above. By following these tips, you can have a better experience with MXF files and make your video production process more efficient.
FAQ
-
What should I do if Premiere Pro doesn’t recognize my MXF file?
If Premiere Pro doesn’t recognize your MXF file, transcode it into a different format. You can convert it to MP4 or MOV using software like Adobe Media Encoder, HandBrake, or FFmpeg. -
What if my MXF file has audio issues in Premiere Pro?
If you experience audio issues with your MXF file, check the audio tracks. Ensure they are not muted in the timeline. Verify that the correct audio output settings are configured in Premiere Pro. If the issue persists, convert the file to a different format. -
Are there specific hardware requirements for editing MXF files in Premiere Pro?
While editing MXF files, you must have a device with a multi-core processor, a dedicated GPU, and sufficient RAM (16 GB or more). This can enhance performance, especially with high-resolution MXF videos.


 ChatGPT
 Perplexity
 Google AI Mode
 Grok
Grok

