
If you’ve ever filmed with a handheld camera, you know how hard it is to fix shaky video in editing. Luckily, Adobe Premiere Pro Warp Stabilizer makes it easy for you to stabilize those jittery clips.
Before, you utilize After Effects to set shaky video clips. Now, Adobe Premiere Pro Warp Stabilizer allows you to do it right in the app’s timeline. It’s quick and easy to use. This post will guide you to the right steps on how to use the best warp stabilizer settings for smooth results.
In this article
Part 1. What Is Adobe Premiere Pro Warp Stabilizer?
Warp Stabilizer in Premiere Pro helps remove unwanted camera shake from your video, making your clips look smoother and more stable. It analyzes the movement in your footage and automatically adjusts it. Perfect for handheld shots or videos without a tripod.
Key Features:
- This feature automatically scans your clip and figures out how to stabilize it.
- It has adjustable settings which you can change things like smoothness, method, and borders to get the look you want.
- You can see the results right away as you edit.
You may also interest: How to Stabilize GoPro Footage Like A Pro?
How to Stabilize Videos in Adobe Premiere Pro
How to Stabilize Video in After Effects?
Part 2. How To Stabilize Footage With Best Warp Stabilizer Settings?
Adobe Premiere Warp Stabilizer is an advanced tool for fixing jittery video. It checks your clip and smooths out the camera movement, giving you a more polished result. Here’s how to use it:
Step 1: Import and Select Your Footage
Bring your shaky video into Premiere Pro and drag it onto the timeline.
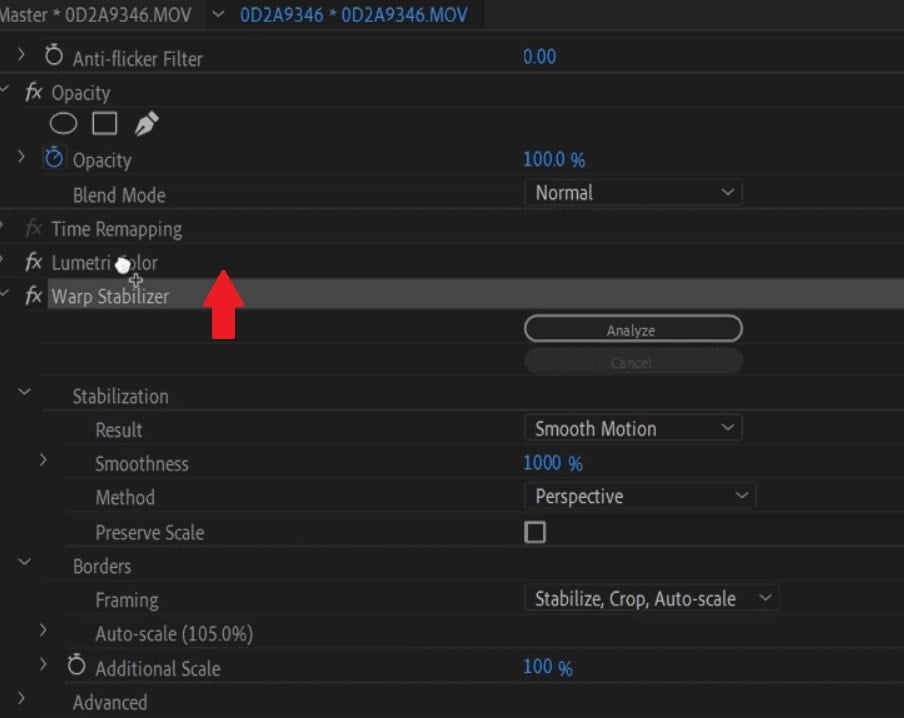
Step 2: Apply the Warp Stabilizer Effect
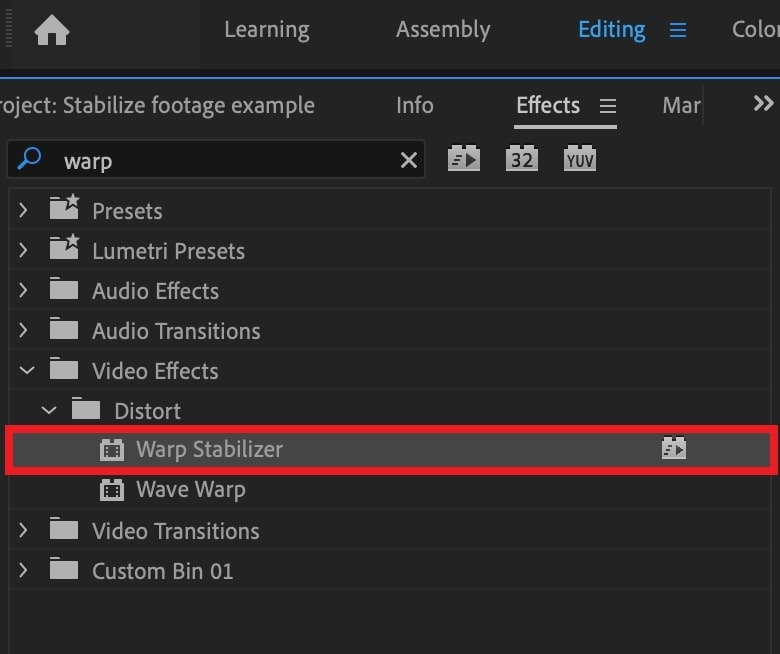
In the Effects panel, go to Video Effects and select Distort, then drag Warp Stabilizer onto your clip.
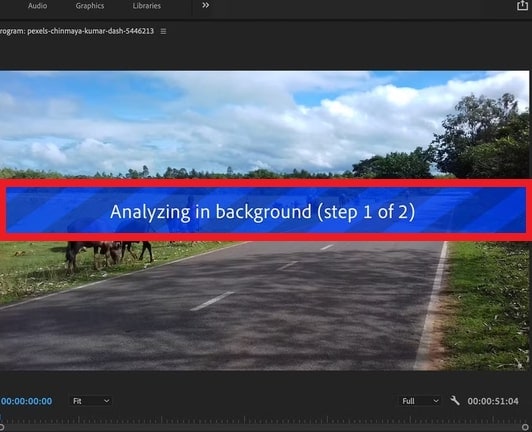
Step 3: Let It Analyze
Once applied, Premiere Pro will automatically start analyzing the clip. You’ll notice an “Analyzing” prompt while it is quickly processed.
Step 4: Adjust the Settings
You'll then find Warp Stabilizer settings. Choose the right option for your footage:
- No Motion: Use this if your shot is from a fixed position with no movement.
- Smooth Motion: Great for footage with pans, zooms, or other movement.
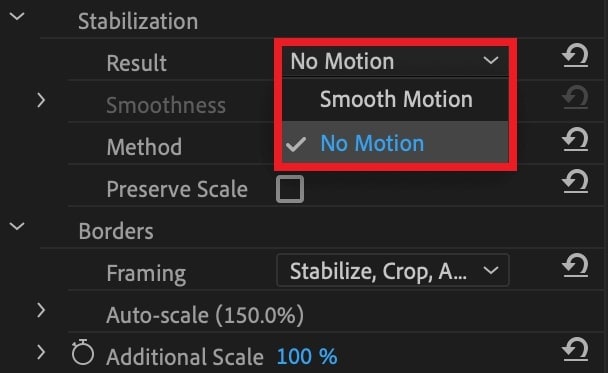
You can also adjust the Smoothness slider. A higher value gives smoother results but may crop more of the frame.
Step 5: Fine-Tune and Review
Watch your clip. If it looks too stiff or unnatural, tweak the settings. You can also adjust the Method and Framing options for better control.
Warp Stabilizer in Adobe Premiere Pro is great, but it’s not perfect. Sometimes, it can cause weird warping in your footage, especially in the background. If that happens, try lowering the Smoothness setting or changing the Method (like Position, Scale, or Subspace Warp). For tough clips, you can also try turning on Detailed Analysis in the Advanced settings.
Here are 6 tips in assisting you to get better results:
- Adjust Cropping Carefully
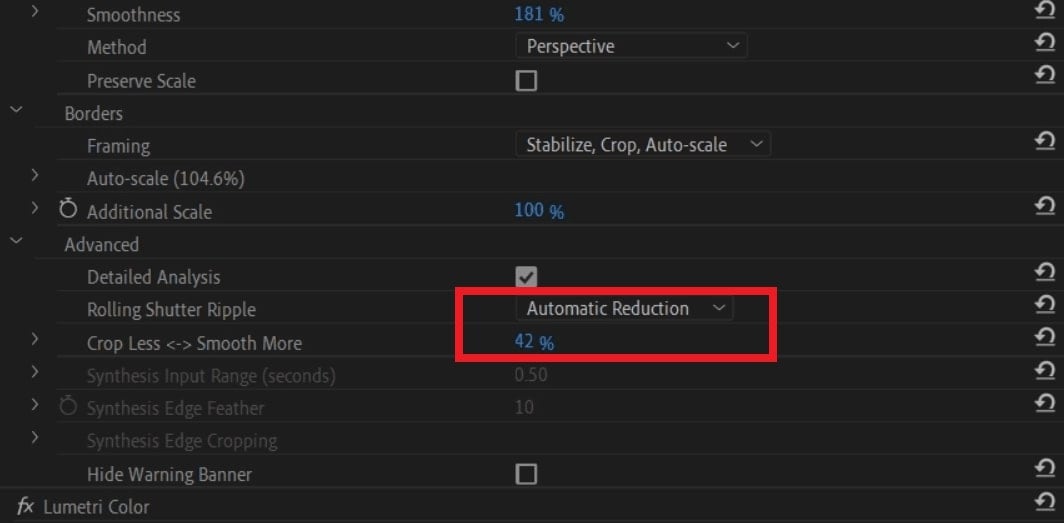
Warp Stabilizer might crop your footage more than you’d like to make it smooth. If that’s a problem, use the Crop Less <-> Smooth More slider under Advanced to keep more of your frame while still stabilizing.
- Shoot With Stabilization in Mind
Don’t just rely on the Warp Stabilizer feature to set blurry and worse footage. If you don’t have a gimbal, try shooting with a wider frame or faster shutter speed. This gives the stabilizer more to work with later.
- Keep Warp Stabilizer at the Top
Effects are applied in the order they appear in the Effect Controls panel. Make sure the Warp Stabilizer is at the top. If you move things around, like adding a mirror effect, you’ll need to re-analyze the clip.
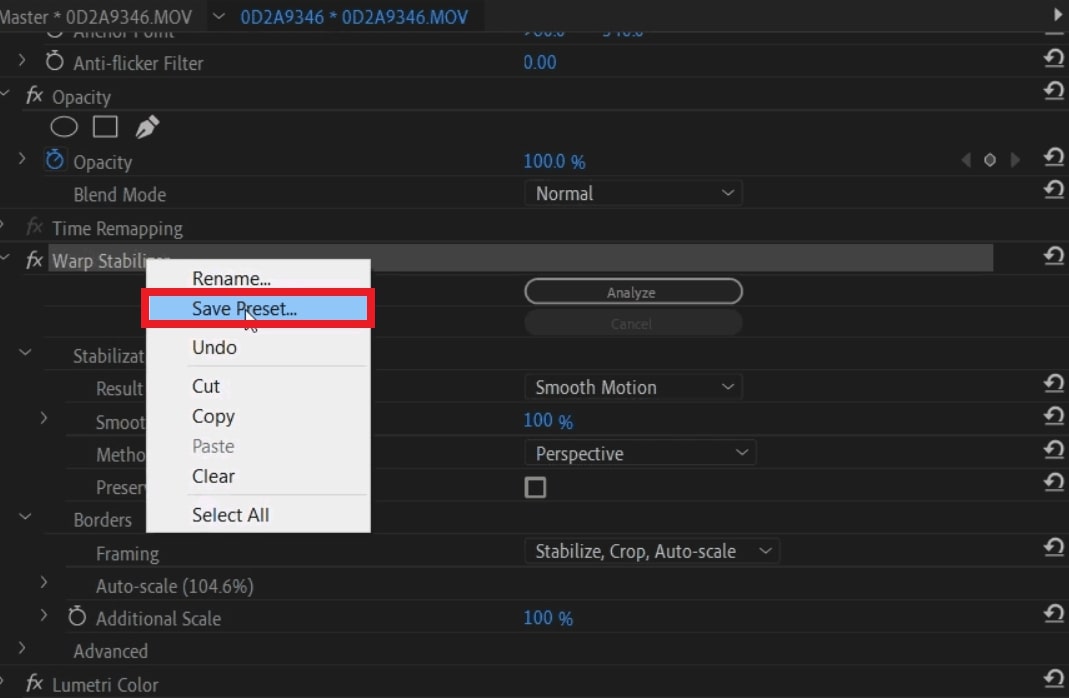
- Save Your Settings as a Preset
If you find settings that work well, save them as a preset. This saves time when working with multiple shaky clips. Just remember that Warp Stabilizer still needs to analyze each new clip individually.
- Use Nesting for Speed Changes
If you notice a red banner when stabilizing a video clip with speed changes, nest it. This lets you stabilize and adjust speed without errors.
- Use Advanced Settings Wisely
Once you’re comfortable, try the Advanced options:
- Detailed Analysis: Gives smoother results but slows down the project.
- Rolling Shutter Ripple: Use Enhanced Reduction if your footage looks wobbly.
You can also turn off the warning banner that appears when stabilization needs re-analyzing.
Part 3. Common Warp Stabilizer Premiere Pro Issues and Fixes
Using Warp Stabilizer in Premiere Pro is usually easy, but sometimes you’ll run into errors. One common one is this: Error: “Warp Stabilizer requires clip dimensions to match sequence.” This message pops up when the size of your video clip doesn’t match the size of your sequence. For example, if your video is 4K but your sequence is 1080p, Warp Stabilizer won’t work until both match.
For quick fixes, you can do the following:
- Nest the Clip: Right-click your video clip and tick Nest. This wraps the clip in a new sequence that matches its original settings—Warp Stabilizer will now work properly.
- Match Sequence Settings: Make sure the clip and the sequence have the same resolution. You can do this by creating a new sequence from the clip (just right-click it in the project panel and pick New Sequence from Clip).
But if your video is glitchy, broken, or won’t stabilize at all, it can be categorized as corrupted. In this worst situation, you can use the best video repair program: Repairit Video Repair. It’s easy to use and can fix damaged videos so you can stabilize them smoothly in Premiere Pro. This fixes these warp stabilizer issues: jerky or flickering, unplayable videos and audio that’s out of sync with the video.
You can’t miss: How to Stabilize DaVinci Resolve Video: A Complete Guide
Key Features:
- Repairit fixes any damaged videos from your phone, GoPro, drone, or DSLR.
- Blurry clips? Black screens? No audio? Repairit uses AI to find and fix common video problems that mess with stabilization.
- You don’t need to worry about file types or codecs. Repairit works with all formats (MP4, MOV, MXF, BRAW, R3D).
- Did you get a whole batch of broken videos? Repair them all in one go.
- Repairit maximizes your video quality (HD, 4K, and 8K) even after jitters.
- Repairs gyroscope data so you can stabilize action shots with tools like Warp Stabilizer and GyroFlow.
Get your clips fixed and stable, fast. Try Repairit with just 3 simple steps.
Step 1: Access Repairit and tick the Add option to add the broken video clips because of the Warp Stabilizer Premiere Pro Issues.

Step 2: Once damaged videos are added, you’ll see their details: Image name, path, size, duration, resolution, and device info. Click Repair to initiate the fixing process.

If the video is severely damaged due to Warp Stabilizer Premiere Pro Issues, you can opt to try the Advanced Repair feature. Upload a sample video from the same device and be the same format.
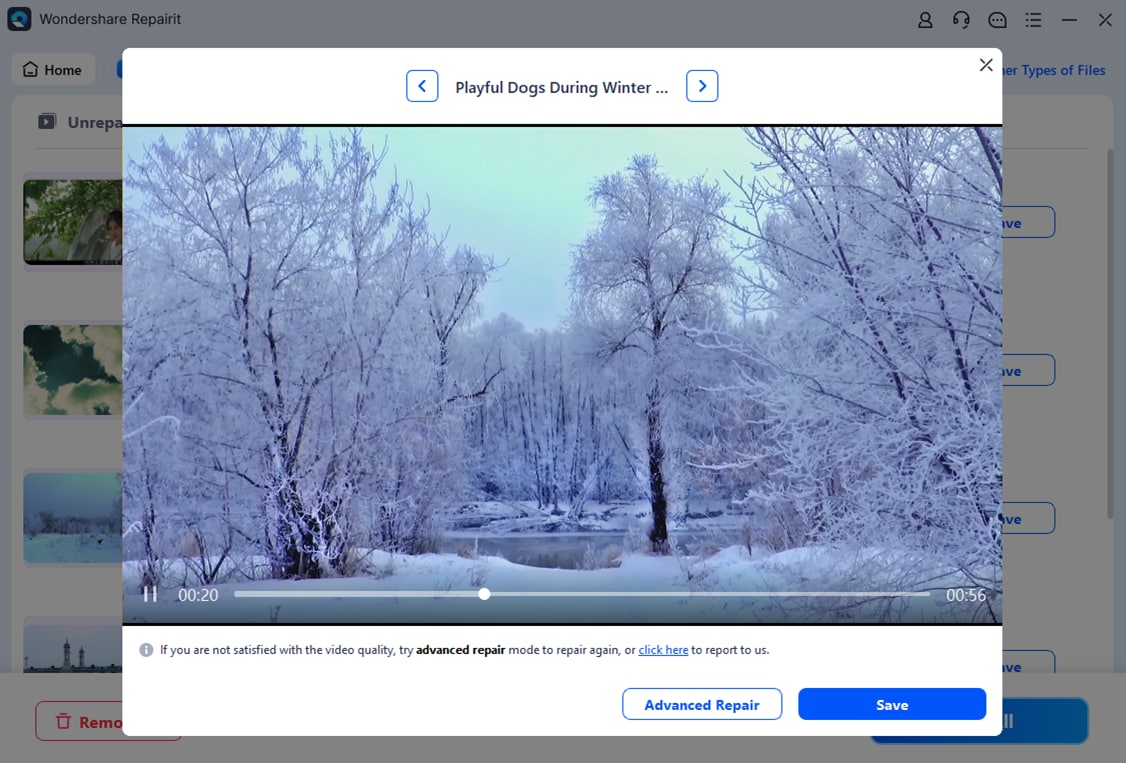
Step 3: Click Preview to check if the repaired video looks good. If you're happy with it, click Save and choose a different folder (not the original one). Your fixed video is now ready to use.

Fix Common Warp Stabilizer Premiere Pro Issues
 Security Verified. Over 7,302,189 people have downloaded it.
Conclusion
Warp Stabilizer in Premiere Pro helps you turn shaky clips into smooth, professional-looking videos. Just apply the effect and modify settings like Smoothness, Method, and Framing to equalize your shot. If the stabilizer isn’t working because the file is damaged, you can use a tool like Repairit Video Repair to fix it first. Even if you're shooting with a GoPro, DSLR, or drone, good filming habits and the right editing tools will give you the best results.
FAQ
-
How long does Warp Stabilizer take to analyze?
It depends on the clip’s length, resolution, and system performance. Short HD clips generally consume a few seconds. The longer or 4K video clips may take a few to several minutes. -
Can I stabilize only part of a clip?
Yes. Apply the Razor Tool to cut the beginning and end part you wish to stabilize. Apply Warp Stabilizer only to that cut segment. -
Is it better to stabilize before or after color correction and editing?
Stabilize before applying heavy color correction or effects for faster analysis. However, always finalize stabilization before exporting.
