

Nowadays, creators look for files that are small, offer sharp details, and have smooth playback. In this case, Premiere Pro does not natively decode AV1, and this can lead to playback lag or stutter during editing. Therefore, use a plugin or convert the AV1 to H.264/ProRes to ensure smooth playback and reliable timeline performance.
However, many users face questions as they move from old codecs to this new standard, and Premiere Pro AV1 import and export is among them. Thus, this guide opens the door with easy steps and gives clear directions so every editor can move forward.
Table of Contents
Part 1. What Is an AV1 File & Does Premiere Pro Support AV1 in 2025?
An AV1 file is a video file format using the AV1 codec, and it gives high-quality video with a smaller file size for streaming and storage. Before you look for solutions to import and export AV1 Premiere Pro, know that Premiere Pro does not natively support the AV1 codec. Hence, users who need AV1 support must use third-party plugins or convert AV1 files to a supported format, such as H.264 or ProRes.

Premiere Pro AV1 Support Explained (Windows vs macOS, GPUs, Codecs)
Having this limitation, users seek an alternative solution to import and export this format. Thus, the given table further sheds light on key differences, limits, and workflow tips across OS, GPU, and codec options. With this, you will get a clear view of Premiere Pro AV1 support and which setup offers the smoothest path for AV1 tasks.
| Feature or Aspect | Premiere Pro AV1 on Windows | Premiere Pro AV1 on macOS |
| Native AV1 Import | Not supported | Not supported |
| Third-Party Plugins | Required, such as Voukoder or Influx | Required, such as Voukoder or Influx |
| GPU Hardware Acceleration | Supported through Voukoder using Intel Arc, some NVIDIA RTX, and AMD GPUs, depending on the plugin | Not supported; macOS AV1 plugin workflows are CPU-only |
| Codec Packs or Extensions | AV1 Video Extension from the Microsoft Store may improve decoding | Not applicable; plugins handle AV1 |
| Recommended Workflow | Convert AV1 to H.264 or ProRes, or use AV1 plugins | Transcode AV1 to H.264/ProRes or use AV1 plugins |
| Optimal Hardware for AV1 | Intel Arc hardware AV1; NVIDIA RTX 4000 or 5000 series | Apple Silicon works only through CPU-based AV1 plugins |
| Performance and Stability | Depends on plugin maturity and GPU capability | Relies on plugin maturity and chip support |
Premiere Pro AV1 vs H.264 vs HEVC — Which Is Best in 2025?
Now that you know the AV1 limits and possibilities of Premiere Pro, it is time to get a look at how AV1 is compared to H.264 and HEVC. With the listed table, you will get to know how each codec stands out in quality and performance.
| Feature or Aspect | AV1 | H.264 | HEVC (H.265) |
| Compression Efficiency | 40–50 percent better than H.264; around 20–30 percent better than HEVC | Least efficient, highest bandwidth needed | 25–50 percent better than H.264 |
| Encoding Speed | Slow, high computational demand | Fast, low resource requirements | Slower than H.264 but faster than AV1 |
| Decode or Playback Speed | Hardware support is increasing, but slower on older/legacy hardware | Fast, wide hardware support | Good hardware support; older devices may struggle |
| Premiere Pro Support | Limited (plugin-based, no native support) | Full native support | Full native support with hardware acceleration |
| Hardware Acceleration | Intel Arc, NVIDIA RTX 40/50, AMD RDNA3. Apple Silicon has limited AV1 hardware decode, no encode support | All major GPUs (NVIDIA, AMD, Intel, Apple) | All major GPUs (NVIDIA, AMD, Intel, Apple) |
| Compatibility | Emerging, not fully adopted in all workflows | Universal, best for legacy and real-time | Growing, supported widely on new devices |
Part 2. How to Import AV1 Files into Premiere Pro Without Errors
To know how you can make AV1 Premiere Pro import successful with alternate solutions, follow the 2 listed options:
Way 1: Convert AV1 to a Premiere Pro–Friendly Codec (ProRes, DNxHR, H.265)
First, convert the AV1 files to Premier Pro-compatible codecs like H.264, ProRes, or HEVC. These formats work smoothly because Adobe has already built Premiere Pro to handle them at full speed and with full stability. Thus, users can rely on UniConverter’s Converter, which also offers batch processing. Users can choose from various formats and adjust parameters to get tailored results via the listed guide:
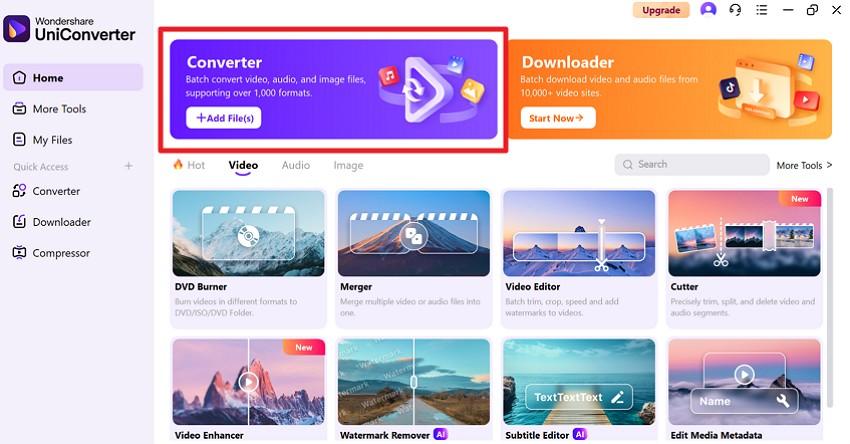
Step 1. Access the “Converter” on the tool and press the “+Add Files(s)” button to import the AV1 file.
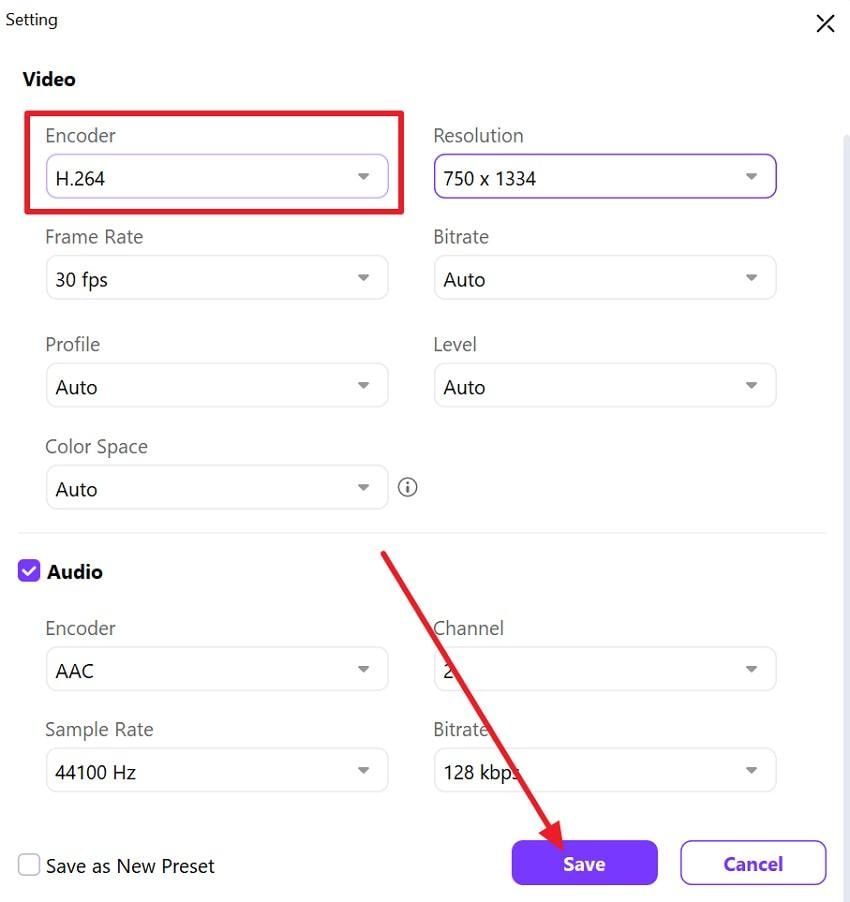
Step 2. After that, choose the “Settings” icon beside the “Concert To” menu and head to the “Encoder” tab. There, choose H.264, HEVC, or ProRes based on your preferences, then press the “Save” button.
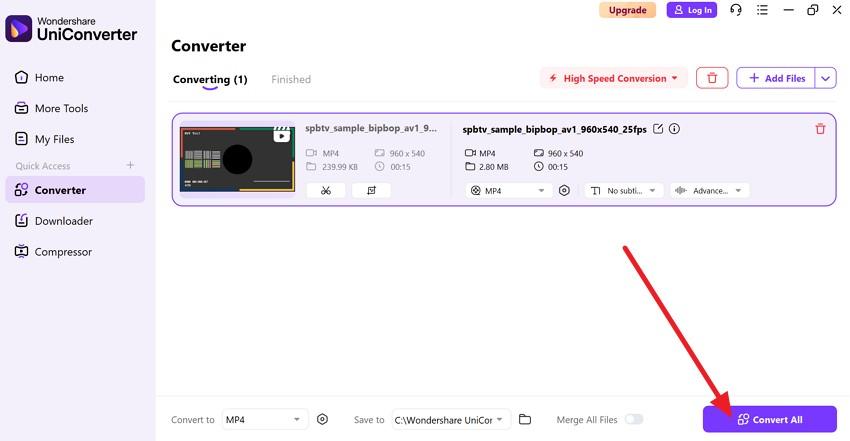
Step 3. Once you have selected the desired codec, click the “Convert All” button and wait for the process to complete. After conversion, import the result into Premiere Pro for smooth, error-free editing.
Way 2: Use a Premiere Pro AV1 Plugin or Updated Codec Pack
To resolve the Premiere Pro AV1 support issue, users can also use a plugin or an updated codec pack. AV1 plugins or codec packs let Premiere Pro open and play AV1 files without errors. This enables editors to import AV1 videos directly instead of converting them first. Besides, they help you drag AV1 files straight into the timeline and keep your setup ready for new video formats, as shown below:
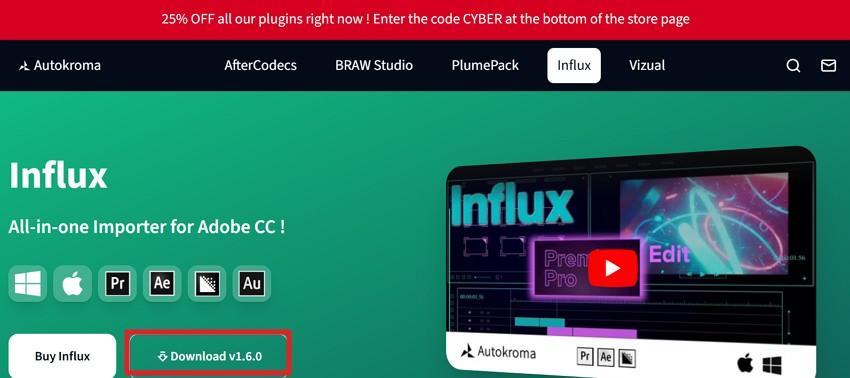
Step 1. Visit the Autokroma Influx official site, download the installer, and launch it by following the prompts. Once done, manually edit the Config.toml file that you can locate from C:\Users\[ Username]\AppData\Roaming\Autokroma\Influx\. There, you can edit settings like “disable=false (active) and overrideAdobe=true (force plugin usage)[][].”
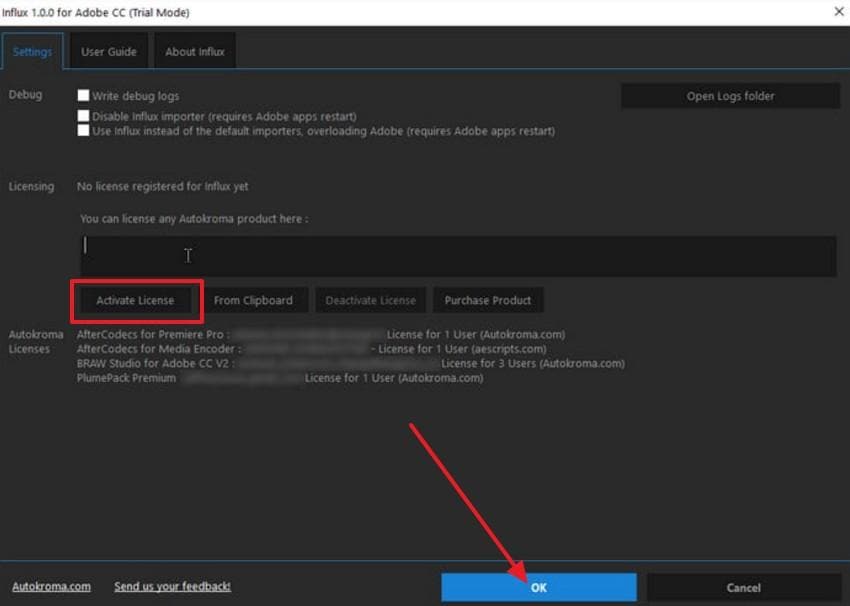
Step 2. Now, open Premiere Pro, right-click a project item, and select “Source Settings.” In the Settings tab, paste your license, click “Activate License,” then click the “OK” button. Restart Premiere Pro to exit Trial mode and clear the Media Cache. At this point, open Premiere Pro without a project, go to Preferences > Media Cache, click “Delete,” and select “Delete All Media Cache Files from the System.”
Part 3. How to Export AV1 in Premiere Pro (2025 Updated Guide)
After having the idea to import AV1 into Premiere Pro, use third-party plugins like Voukoder to export the AV1 encoded video. This solution offers more codec options and gives flexibility for different platforms and formats. Additionally, Voukoder uses your GPU to speed up exports and reduce strain on your computer. So, to know how you can use it and get control over quality, bitrate, and resolution, here is a simple guide:
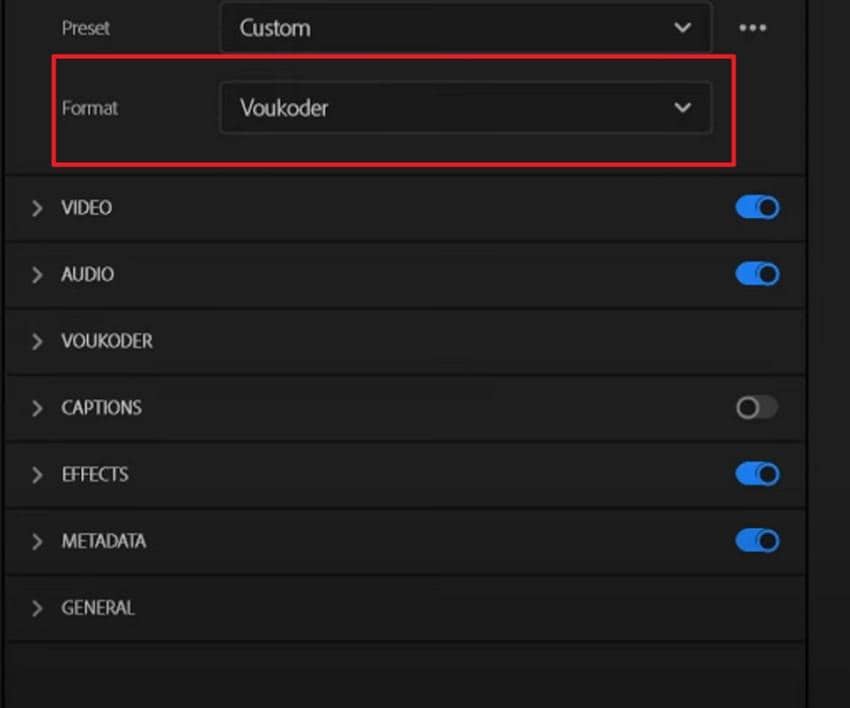
Step 1. Download and install the latest version of the Voukoder plugin and Connector for Premiere Pro from the official Voukoder site. After that, start editing the video in Premiere Pro and, in the export settings window, under the “Format” drop-down, choose “Voukoder.” This integrates the plugin’s encoding options into the export panel.
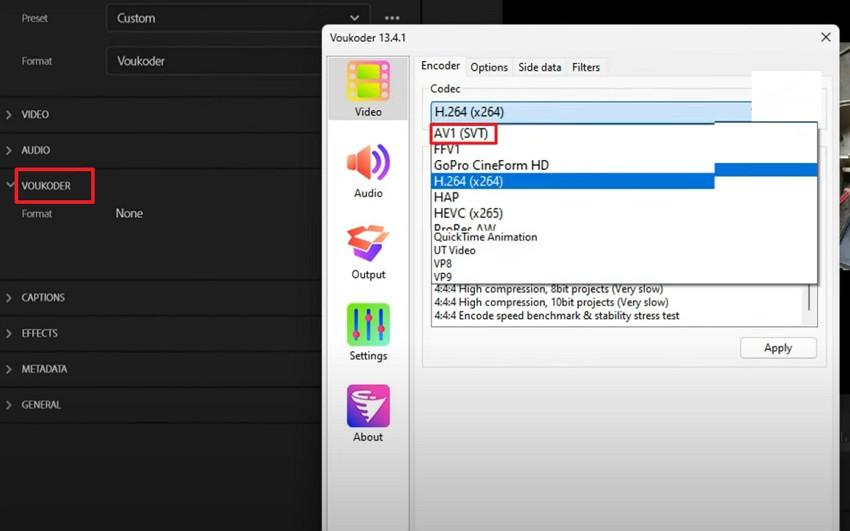
Step 2. Now, expand the “Voukoder” menu, select the “Configure” option, and change the video codec to AV1. Besides, in the “Option” menu, adjust bitrate, resolution, and other export settings to balance quality and file size as needed, and press “OK” and “Export.”
Note: Here are the top Premiere Pro AV1 export settings for YouTube, web streaming, and mobile when using a plugin like Voukoder:
| Setting | Recommended Value for YouTube/Web | Recommended Value for Mobile |
| Codec | AV1 (via Voukoder or plugin) | AV1 (lower bitrate profiles) |
| Container | MP4 | MP4 |
| Resolution | 4K: 3840x2160 or 1080p: 1920x1080 | 1080p: 1920x1080 or 720p: 1280x720 |
| Frame Rate | Match source: 24, 25, 30, or 60fps | 30fps or match source |
| Bitrate | 12–20 Mbps (4K AV1), 6–10 Mbps (1080p AV1) | 3–5 Mbps (1080p), 1.5–3 Mbps (720p) |
| Encoding Mode | Constant Quality (CRF 18–22) or CBR | CRF 20–24 or VBR/CBR |
| Audio Codec | AAC, 320 kbps, 48kHz | AAC, 128–256 kbps, 48kHz |
| Color Space | Rec. 709, 8-bit or 10-bit (HDR only if needed) | Rec. 709, 8-bit |
| Keyframe/GOP | GOP = 1× frame rate (e.g., 30 = 30) or Auto | GOP = 1× frame rate (30) |
Pro Tip: Premiere Pro AV1 Repair — Fix Corrupted AV1 Files with Repairit
Since Premiere Pro lacks native AV1 codec support for decoding video streams, users may see errors such as “Unsupported format” or fail to import the file. Thus, when one tries to import an unsupported format, they may encounter issues such as incomplete media. So, when you try alternate solutions for AV1 import/export, pre-existing corruption in your source video can prevent a successful conversion or import, regardless of codec support.
Tools like Repairit Video Repair can help in this situation, as it handles various corruption scenarios from numerous devices. The software is intuitive and offers a one-click solution with its support for all Codecs and workflows. In addition, it's an AI-powered and effective solution for Full HD, 4K, and even 8K AV1 video files. It also offers the facility to preview the fixed AV1 files before you decide to save them.
Benefits of Repairit to Fix AV1 Codec Video
- Native AV1 Support: Repairit can handle AV1 video files directly, which is important because AV1 is a newer codec and many tools don’t yet fully support it.
- Fixes Many Corruption Problems: The tool can repair AV1 videos with black screens, no audio, missing frames, out-of-sync sound, or playback errors. This is useful for large or high-resolution AV1 files used in streaming or archiving.
- Advanced Repair Mode: It also includes Advanced Repair mode for severely damaged files, which reconstructs videos using a sample file from the same device.
- Batch Processing & Large Files: Users get the option to repair multiple AV1 files at once with no limit on the number or size.
- Maintains Original Quality & Wide Format Support: The tool ensures not to lower the resolution or compress the AV1 video and works with other formats as well, like MP4, MOV, MKV, etc.
Detailed Guide to Fix the Corrupted AV1 Codec Videos [Ultimate Solution]
While learning about the Premiere Pro AV1 support with substitutes, ensure your file is not corrupted and learn how to fix it with Repairit:
Step 1. Within the “Video Repair” toolkit, pick the “Start” button and add the corrupted AV1 files.

Step 2. To fix more than one AV1 video, press the “+Add Files(s)” button on the new interface and hit the “Repair” button.

Step 3. When the process ends, choose the “Save” button or opt for the “Preview” option on the pop-up menu to determine the accuracy. After that, add the AV1 files to converters or use plugins to import into Premiere Pro.

Conclusion
To wrap up, the urge to have small and manageable files raises the query of Premiere Pro AV1 support among creators. Therefore, this guide has answered whether Premier Pro offers support and how one can import and export this format. Be cautious and ensure that your AV1 file is free from any corruption. If you detect issues, Repairit offers an ideal solution for smooth repair and reliable import without interruptions.
Frequently Asked Questions
-
How do I enable AV1 export in Premiere Pro?
Use a third-party plugin, such as Voukoder, to add AV1 export support in Premiere Pro. Once you are done with installation, choose the AV1 codec during export, and adjust settings for the best quality output. -
Why is AV1 lagging or stuttering in Premiere Pro?
Premiere Pro does not natively decode AV1, and this can lead to playback lag or stutter during editing. Therefore, use a plugin or convert the AV1 to H.264/ProRes to ensure smooth playback and reliable timeline performance. -
How can I repair corrupted AV1 footage for Premiere Pro?
You can use a video repair tool like Repairit to fix the corrupted or damaged AV1 video. The tool leverages AI and scans and restores the broken video streams to allow Premiere Pro to import this format correctly, as one tries alternate methods.
