
Video editing has gained more relevance with the use of quality cameras and phones by people. Many of these devices also capture videos in HEVC or H.265 format, which greatly reduces file sizes yet still produces quality images. However, when editors try to import these videos into Premiere Pro, they sometimes face errors or see messages that the codec is missing.
This is where the HEVC codec for Premiere Pro stands out, as the software can read and process such files without hassle. This issue may seem puzzling to many new editors since the video appears good on the device, yet it fails to open in the editing tool. Thus, this article will describe the reasons why this error may occur and will lead you through its simplified ways.
Table of Contents
Part 1. What is H.265/HEVC Codex for Premiere Pro? Why do we Need It?
H.265, also known as HEVC, is a video format that keeps files smaller without compromising quality. It is a more recent and efficient one than the older H.264, which is why many cameras and phones employ it today. In Adobe Premiere Pro, this format is supported for editing and export, but it can still cause problems.
That is why the HEVC codec Premiere Pro is needed to make sure videos open and play smoothly. Moreover, this decoder is used in 4K and 8K recordings because it saves storage without losing clarity. Below, we will discover a few key reasons why you need this specific decoder while using this editing software:
- Smaller Sizes: HEVC compresses videos into smaller file sizes, which saves storage space without reducing the visual quality.
- Quality Playback: It maintains crisp and clear picture quality even after compression to ensure videos look sharp during editing.
- Smooth Editing: The decoder enables Premiere Pro to access HEVC files directly, which minimizes errors and failures to import files.
- Resolution Support: With HEVC, users can edit ultra HD videos like 4K and 8K smoothly inside Premiere Pro.
- Export Options: HEVC makes it possible to export projects into smaller yet HD videos that are easier to share.
Part 2. [Solved] Why Premiere Pro Cannot Import HEVC/H.265 Videos?
A lot of users experience issues with importing H.265 or HEVC video into the editing software. Outdated software versions, unsupported file formats, or low computer performance are the main causes. Sometimes, trial versions of the program do not support this format, which adds more issues. Thus, the following section provides you with 3 quick solutions when the HEVC codec for Premiere can’t import videos:
Solution 1. Install HEVC Codec for Adobe Premiere Pro
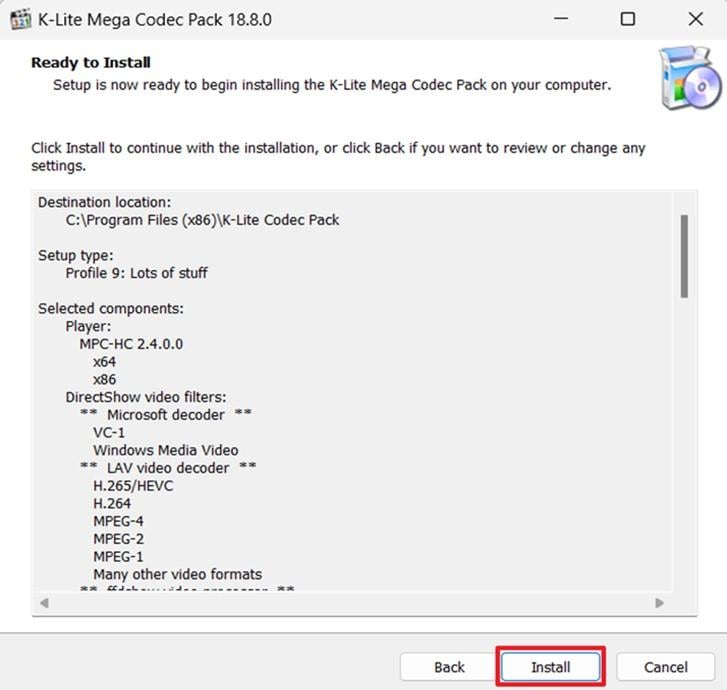
The easiest way to solve import issues is by installing the required HEVC codec. As we explored, the Premiere HEVC codec makes the program capable of reading, importing, and exporting HEVC or H.265 videos. It unlocks full compatibility with modern cameras and smartphones that record in this format. So, follow the steps below to find out how you can install an external decoder when you can’t import such videos:
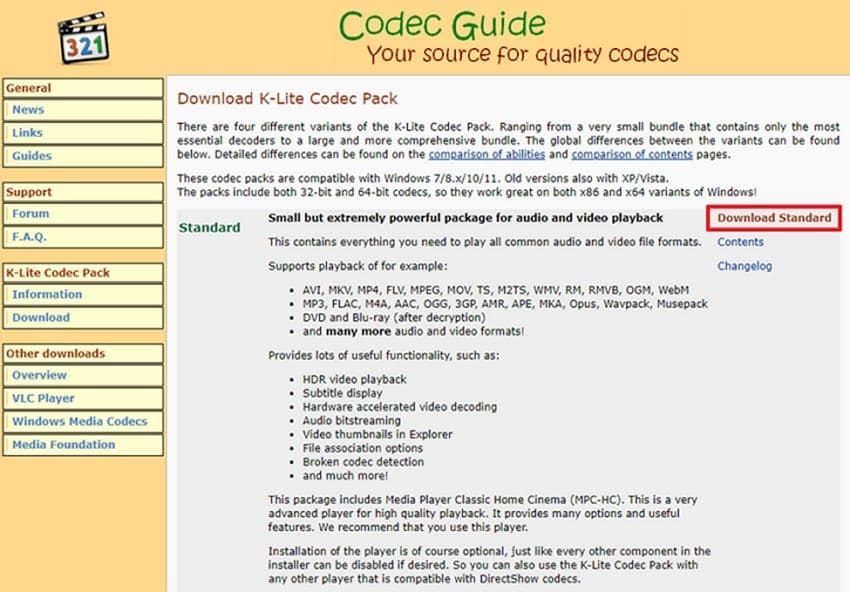
Step 1. To initiate, navigate to the “K-Lite Codec Pack” site and click the “Download Standard” option.
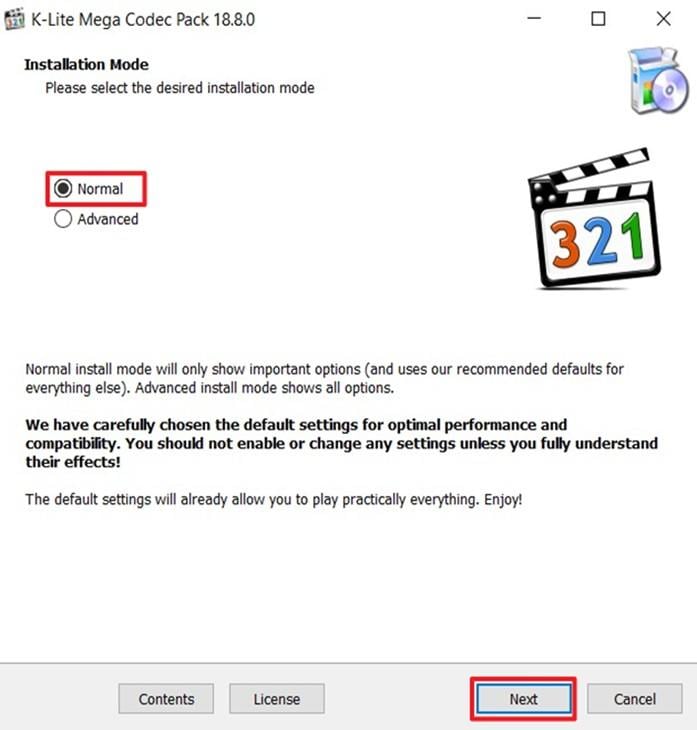
Step 2. After downloading, run the installed file and choose “Normal,” then hit the “Next” button.
Step 3. When you access the “Ready to Install” display, press the “Install” button.
Solution 2. Adjust Settings of Adobe Premiere Pro
Another helpful method to fix errors is by changing the settings inside Adobe Premiere Pro. Sometimes, hardware acceleration causes conflicts when importing HEVC videos, leading to playback or missing codec issues. By unchecking this option, you allow smoother decoding and reduce glitches during editing. This adjustment is simple yet effective for solving compatibility problems with H. 265 Premiere Pro projects that we perform below:
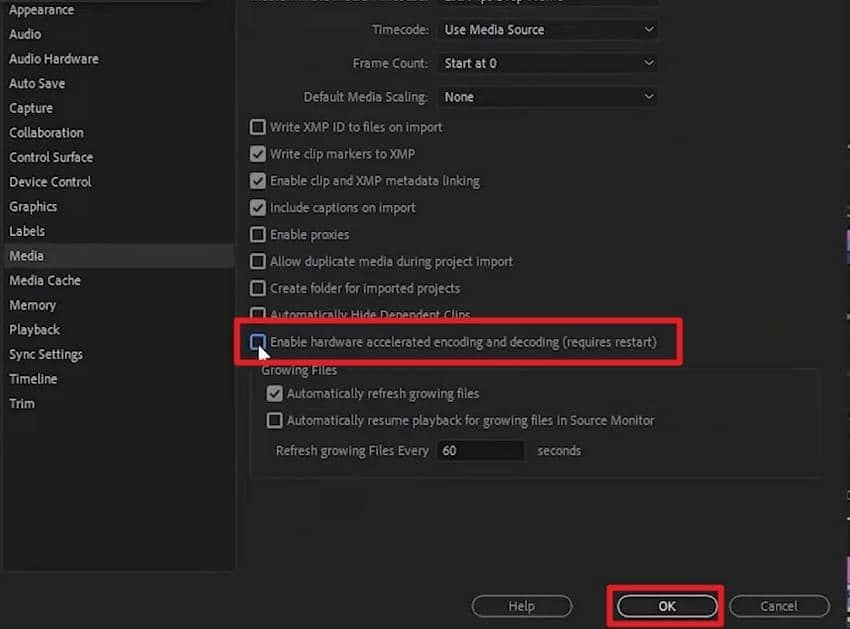
Step 1. Upon running the tool, click the “Edit” menu to go to the “Preference” section and choose the “Media” option.
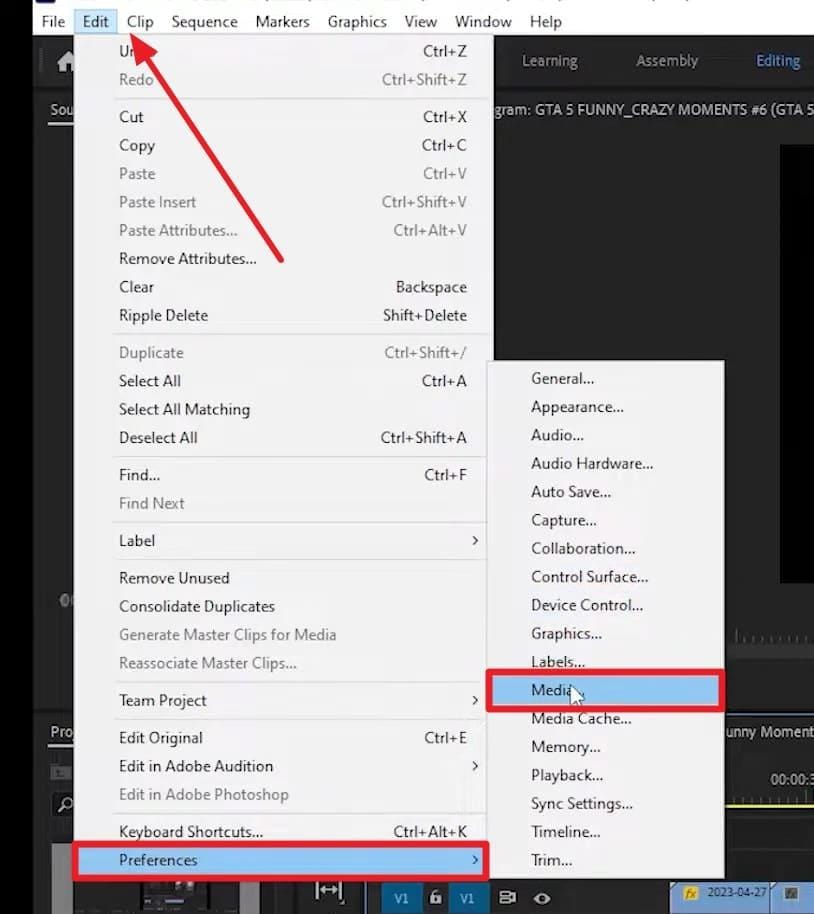
Step 2. Subsequently, uncheck the “Enable Hardware Acceleration Decoding (Requires Restart)” option and restart the software.
Solution 3. Update OS/Drivers
Besides, keeping your computer updated is another effective way to avoid errors when importing HEVC videos. Outdated operating systems or display drivers can also cause compatibility issues, resulting in missing codec messages.
For stable editing of HEVC Premiere Pro projects, always check for the latest driver and system updates before starting your work. Anyway, go through the guidelines to understand how you can update your system’s graphics drivers:
Step 1. Start by navigating to the “Device Manager” and expanding the “Display Adaptors” section. Here, right-click your GPU driver and select the “Update Driver” option.
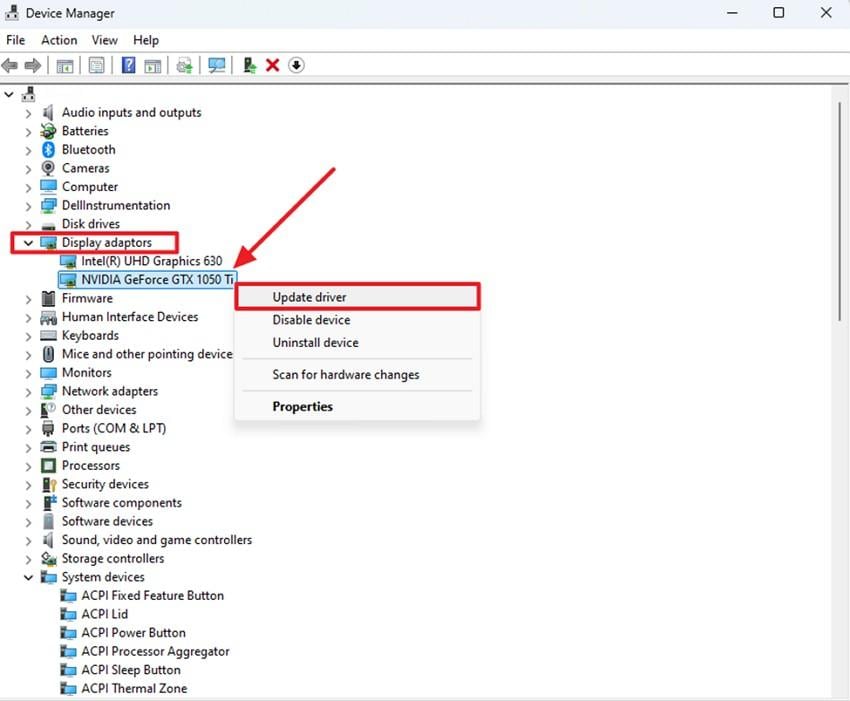
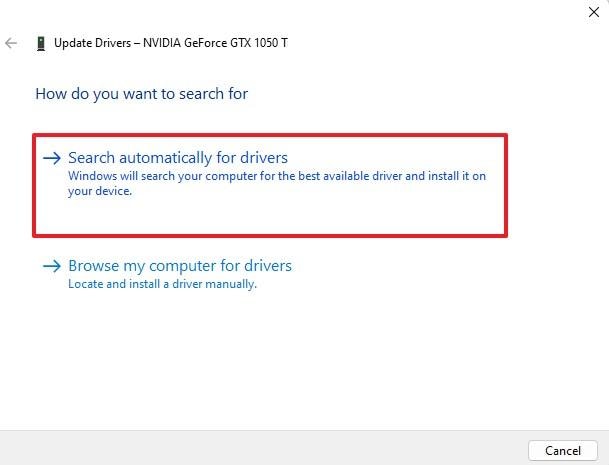
Step 2. As you see a further display, click “Search Automatically for Drivers” and restart your PC upon completing the task.
Part 3. How to Fix HEVC Codec Missing in Premiere Pro [Quick Guides]
Apart from the above solutions, many users still face problems with HEVC videos inside Premiere Pro. Thus, this section covers 3 effortless fixes to help your Premiere Pro HEVC projects run more reliably:
Solution 1. Upgrade Your Adobe Premiere Pro
Missing codec errors are also easily resolved by upgrading to the latest version of Adobe Premiere Pro. As we all know, new updates bring better support, improved stability, and smoother editing for modern formats. This makes Adobe Premiere H.265 projects easier to import, edit, and export successfully. Thus, take guidance from the instructions below to know how to update your editing tool to overcome this problem:
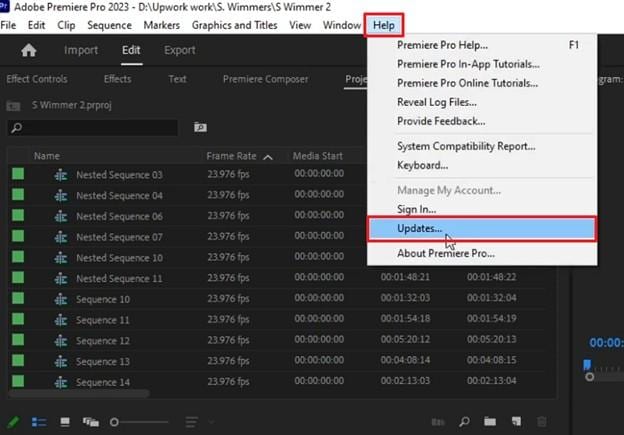
Instruction. Initially, click the “Help” menu to choose the “Updates…” option from the drop-down. Thus, you need to adhere to the given prompt to update your Premiere Pro.
Solution 2. Convert HEVC to an Adobe-Compatible format
Another easy fix is converting HEVC videos into formats that work smoothly with Adobe Premiere Pro. Many times, changing the format removes import errors and makes editing faster, especially on old or slow computers. Online tools like Restream or Convertio can quickly change HEVC into MP4 or MOV without losing quality.
Hence, review the following steps to convert HEVC files when Adobe Premiere HEVC projects face compatibility issues:
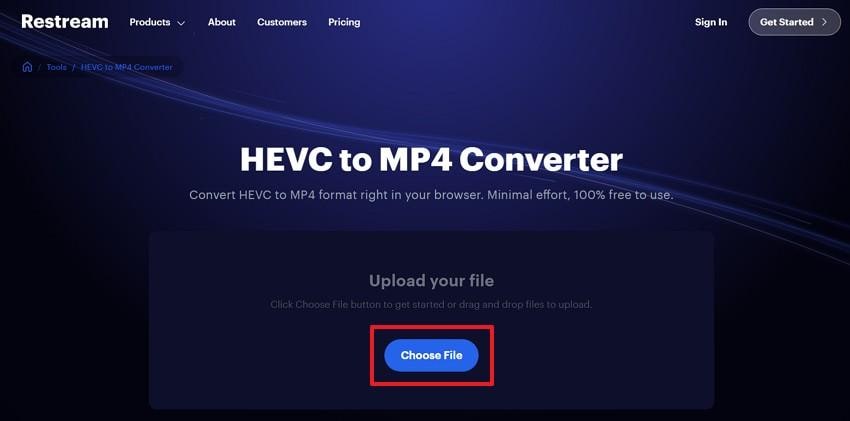
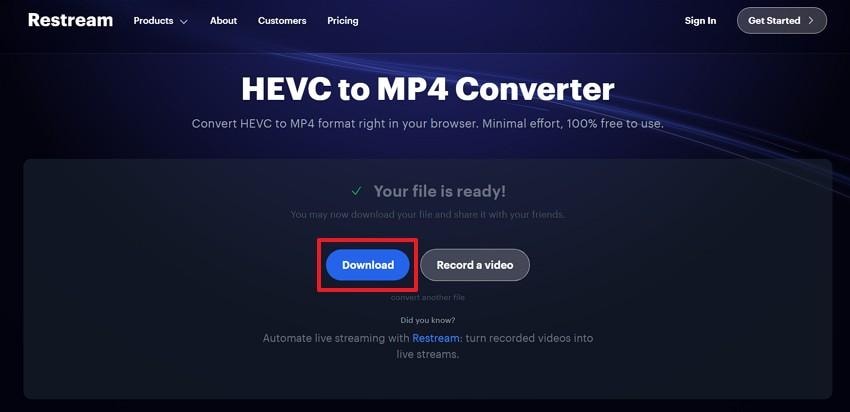
Step 1. Access the “HEVC to MP4 Converter” tool page of Restream and press the “Choose File” button to upload a file.
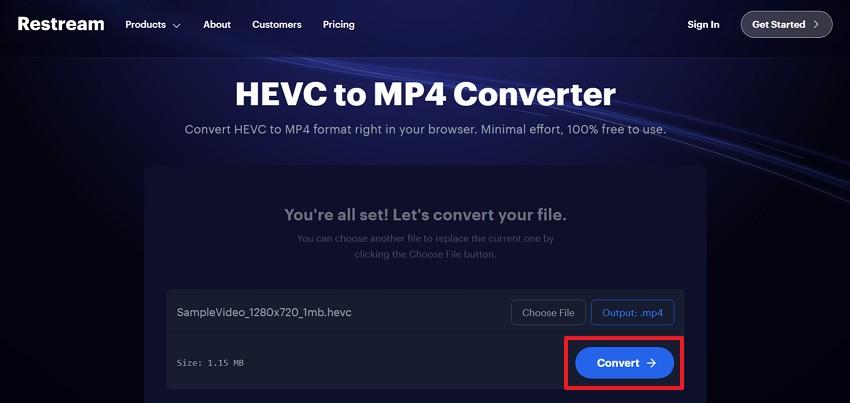
Step 2. Moving ahead, press the “Convert” button and allow the tool to convert your HEVC file.
Step 3. After a few moments, when your file is converted into MP4 format, click the "Download" button to save it.
Solution 3. Clear Cache & Reimport
Sometimes, Premiere Pro shows errors because of corrupted cache files stored in the system. Clearing the media cache removes these conflicts and gives the program a fresh start for smoother editing. After cleaning, you can import HEVC videos again effortlessly without issues. Anyway, adhere to the given steps to clear the media cache to make your Adobe Premiere Pro HEVC projects more stable:
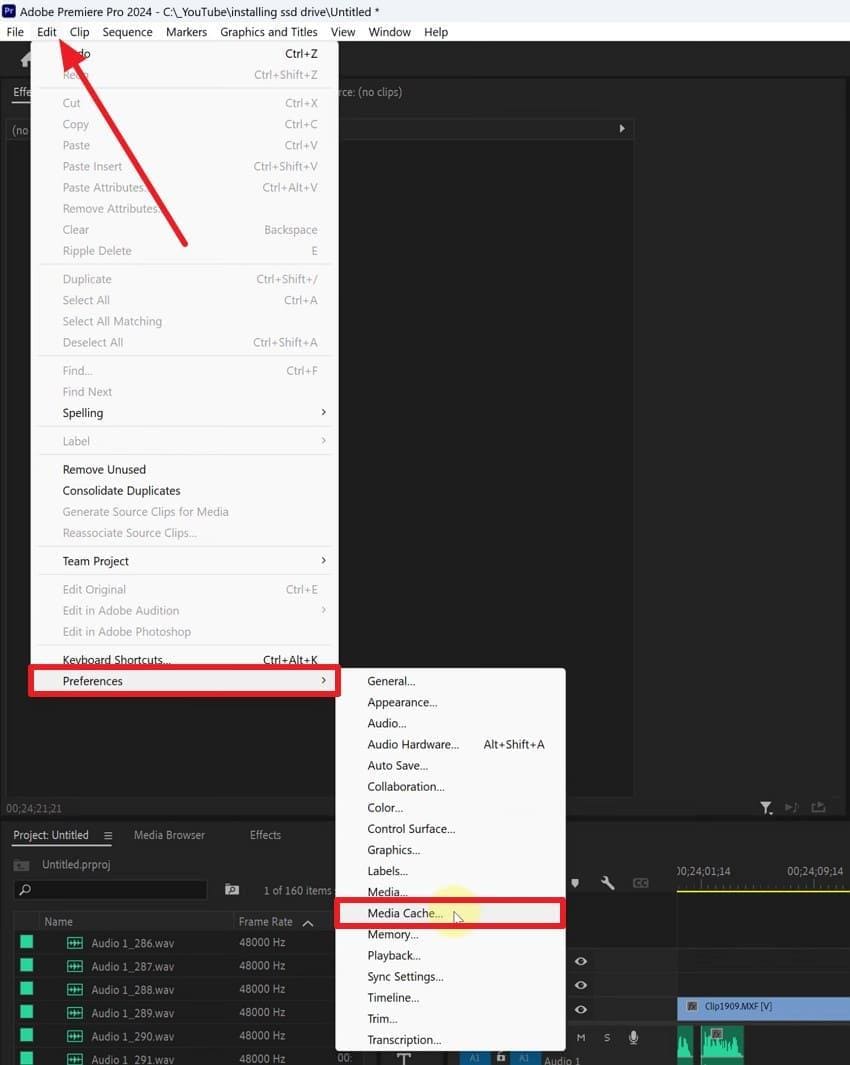
Step 1. To initiate, head to the “Edit” menu to expand the “Preference” section and click the “Media Cache…” option.
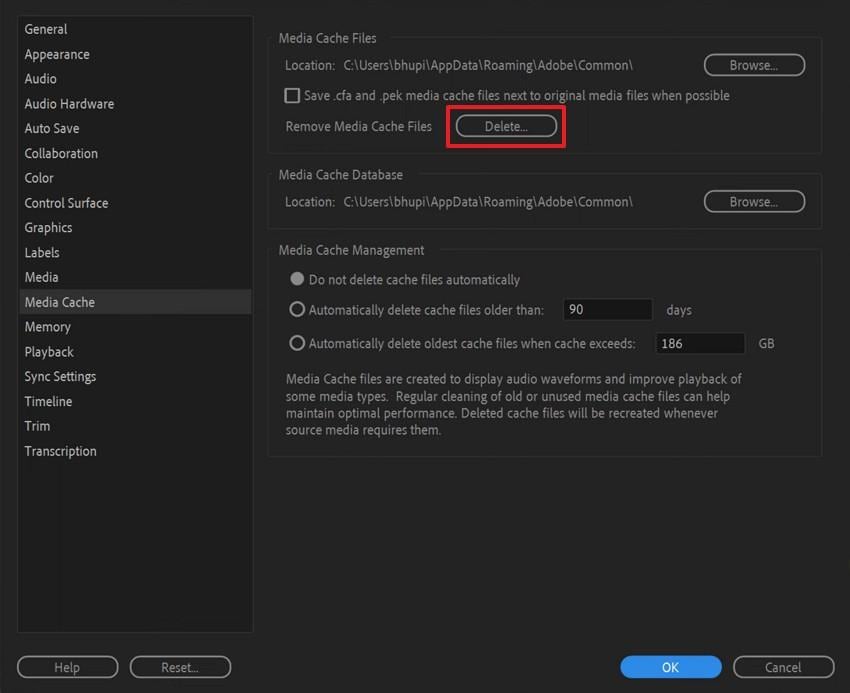
Step 2. Afterward, press the “Delete" button that appears next to the "Remove Media Cache Files” option.
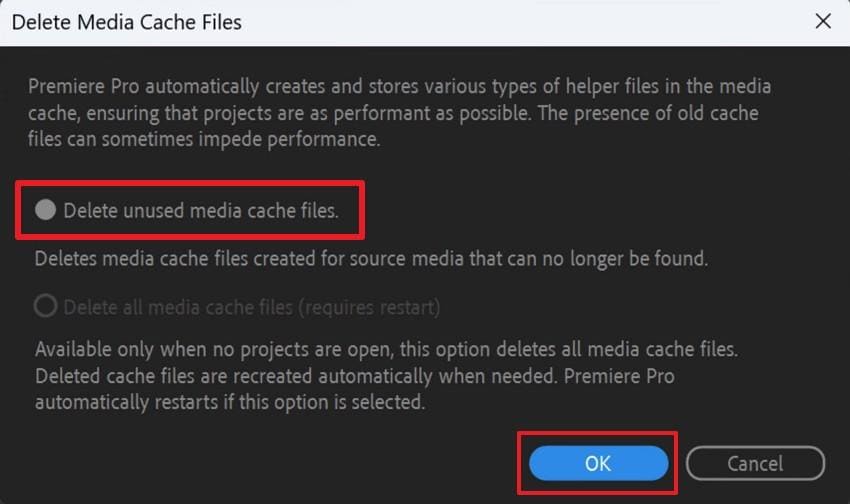
Step 3. As you see a dialogue box, ensure to check the “Delete Unused Media Cache Files” option and hit the “OK” button.
Part 4. Fix Corrupt or Damaged HEVC Videos Before Importing in Premiere Pro
When working with H.265 Adobe Premiere projects, the issue often isn’t just codec compatibility—it’s that the video file itself may be corrupted or improperly converted. A damaged H.265/HEVC file can lead to import errors, audio-video sync problems, black screens, or stuttering playback inside Premiere Pro. Before importing H.265 footage into your editing timeline, repairing the file ensures smooth playback and uninterrupted editing.
This is where Repairit Video Repair proves invaluable. It is specifically designed to restore corrupted or damaged videos, including HEVC/H.265 footage from DSLRs, action cameras, drones, or professional cinema equipment. Supporting 25+ video formats such as MP4, MOV, and MKV, Repairit uses advanced AI-driven repair technology to fix structural errors, broken frames, and missing audio tracks. You can also repair multiple H.265 videos simultaneously and preview the restored clips before saving them, ensuring they import seamlessly into Adobe Premiere.
Key Features
- Quick Repair: Fix common H.265 video issues like import errors, black screen playback, and audio mismatches in Adobe Premiere.
- Advanced Repair Mode: Uses sample files from the same device to repair severely corrupted H.265/HEVC footage with higher accuracy.
- High-Resolution Support: Repairit restores videos in HD, 4K, and even 8K H.265 formats, while maintaining their original quality and visual details.
After exploring its features, many users still confuse the right way to use Repairit to repair their videos. So, the following comprehensive steps will guide you on how you can use it to overcome this challenge:
Step 1. Once you run the tool, go to the “Video Repair” tab and hit the “Start” button. Here, press the “+Add” button to import the corrupted HEVC videos to repair them.

Step 2. Afterward, press the “Repair” button when your imported HEVC videos appear in the “Unrepaired Videos” section.

Step 3. Once they appear in the “Repaired Result” tab, press “Save All” and then the “Save” button to export the HEVC files.

Part 5. Best Practices to Avoid HEVC Codec Issues in Premiere Pro
Other than the above, one should also observe best practices when dealing with HEVC videos. Below, we will explore some key points to help your HEVC Adobe Premiere projects run without interruptions or problems:
- Stay Updated: Always keep Premiere Pro updated to the latest version for improved HEVC compatibility and stronger software stability. Thus, it includes new codecs and bug fixes that reduce crashes and help avoid missing codec errors.
- Standardize Formats: In case HEVC videos still do not work, converting them to other famous formats like MP4 or MOV is the best decision. This helps reduce errors and ensures files run smoothly on both new and older computers.
- Empty Cache: Clearing the media cache in Premiere Pro ensures corrupted files don’t interfere with your HEVC video imports. It refreshes the program, prevents lag, and helps avoid random crashes when handling large or complex files.
- Use Powerful PCs: The HEVC videos are demanding in terms of the processor and sufficient memory to play and edit them within the tool. If your computer is weak, videos may lag or crash during editing, slowing down the entire process.
- Back Up Videos: Before you edit your HEVC files using this editing software, make sure you keep original copies. In case the conversion or editing process goes wrong, you can get back the original file without losing content.
Conclusion
In conclusion, handling the HEVC codec for Premiere Pro feels tricky when codecs or settings create playback problems. This article has explored several solutions to help you, whether you can’t import H.265 Videos or have found missing decoders. One solution to overcome this issue is to convert your HEVC file to other known formats like MP4. However, if your video gets corrupted after conversion, use Repairit to fix it effortlessly.
Frequently Asked Questions
-
Q1. Can proxies improve HEVC editing, and how should I configure them?
Yes, proxies replace heavy originals with lighter versions, allowing smooth playback while keeping quality files linked. Enable the proxy toggle to switch views, editing quickly without stressing your CPU or graphics hardware. When finished, export with proxies disabled, so Premiere Pro automatically uses original HD files for rendering output. -
Q2. How do I fix variable framerate sync issues in HEVC recordings?
Phones usually change frame rate automatically to save battery and storage, creating variable frame rate recordings. Variable timing can confuse editors, causing audio drift or jitter during long interviews or event shoots. Convert the clip to a constant frame rate using a converter, then reimport and test for stability. -
Q3. How do I fix no sound or unsupported audio in videos?
Check audio settings inside Premiere, confirming correct tracks are enabled and routed to your active speakers. When silence continues, the file may be corrupted, requiring targeted repairs before further editing can continue. At this point, use Repairit to restore damaged audio streams within supported formats, then import repaired versions into Premiere.
