
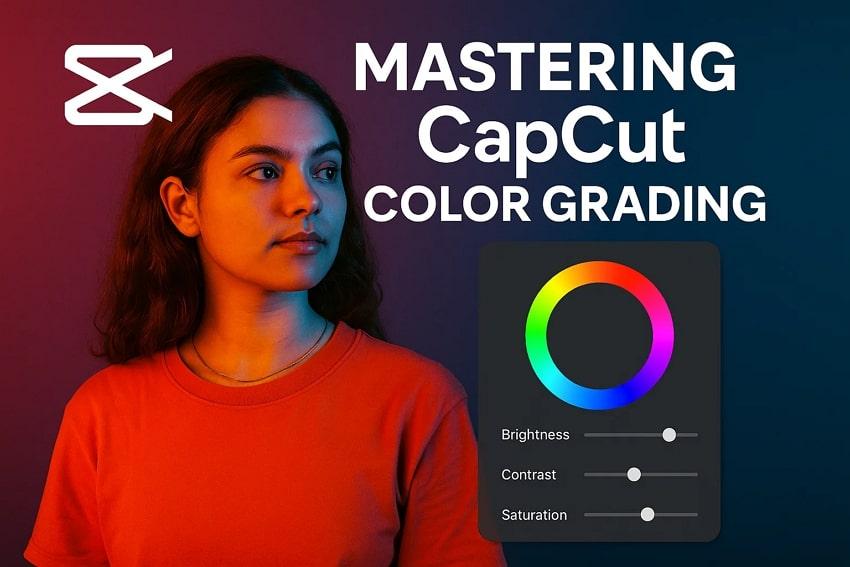
Colors do possess the power to stir emotions and completely transform the way a video is displayed. Even the most beautifully shot footage can fall short without the right tones and contrast. Here, CapCut color grading serves as your ultimate support to unlock cinematic brilliance with professional-grade features.
It alone provides endless possibilities to give your content that big-screen feel with just a few adjustments. To know everything from benefits to stepwise guidelines, the article below will help you master every move in CapCut. Even if you think something goes off, a professional repair program is revealed in the end.
Table of Contents
Part 1. Everything You Need to Know About Color Grading in CapCut
To process color grading in CapCut, first look closer into the 3 stages that make your editing workflow smoother and more impactful:
A. Basic Adjustments
- Brightness: Adjust the overall lightness or darkness of your video for consistency and clarity.
- Exposure: Controls the amount of light in your footage; crucial for correcting underexposed or overexposed shots.
- Contrast: Enhances separation between light and dark areas, adding more depth and drama in your videos.
- Temperature: Makes footage warmer (orange/yellow) or cooler (blue), helping match the visual mood.
B. Effects Adjustments
- Filters: Instantly apply ready-made color schemes for moods such as vintage, cinematic, or dramatic.
- Presets & LUTs (Look-Up Tables): Import or use preset color grades for rapid cinematic looks and a consistent visual appearance.
- Sharpening Tools: They enhance the clarity of your video by accentuating fine details, contributing to a high-quality finish.
- Vibrance: It improves the intensity in the muted colors without over-saturating the already vibrant tones.
C. Advanced Adjustments
- HSL Panel (Hue, Saturation, Lightness): Adjust specific color ranges; you can desaturate only greens or shift sky colors with the blue slider.
- RGB/Luma Curves: Manipulate the tonal curve of shadows, midtones, and highlights for contrast and color in videos.
- Masking/Selective Adjustments: Use masks to apply grading only to specific regions, like the face, for localized enhancements.
- AI Color Correction: Leverage AI-powered auto-corrections for rapid, smart fixes, with manual adjustment for creative control.
Part 2. Benefits of Color Grading in CapCut
With CapCut cinematic color grading, here’s how you can unlock the actual potential and shape real emotions in your videos:
- Cinematic Transformation: Even raw footage can look extraordinary with CapCut grading, as you can add depth and balance highlights to achieve a visual feel. This transformation not only improves quality but also makes your content immersive, as it’s designed for a big screen.
- Consistent Aesthetic: With uniform grading styles across your projects, you create a recognizable aesthetic that ties all your content together. Viewers begin to associate your unique style with your brand, making your profile noticeable among countless competitors.
- For Stronger Branding: Colors are a silent language of branding because they craft a signature look using specific tones and palettes. This consistency created through CapCut helps audiences recognize your content before your brand name is even mentioned.
- Higher Viewer Engagement: Professional-looking videos naturally attract attention because color grading improves their visual appeal, helping to hold viewers' attention. On social media platforms, this edge can make the difference between being overlooked and going viral.
- Adds Emotional Impact: CapCut’s grading tools enable you to set the mood and create a lasting impression overall. When color tones are carefully set, they can guide the viewer’s emotions and make your storyline more impactful.
Part 3. Step-by-Step Guide to Color Grading in CapCut
For cinematic color grading in CapCut, all it takes is following the guided tutorial to achieve a masterpiece straight out of a movie:
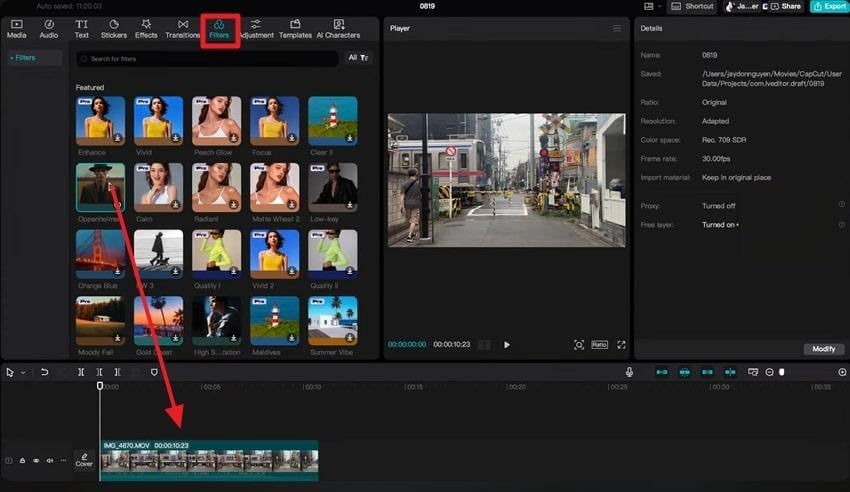
Step 1. First, select the “New Project" option to enter the editing interface for CapCut, then click the "Import” option to add a video. After this, access the “Filters” tab and choose a filter to drop into the timeline.
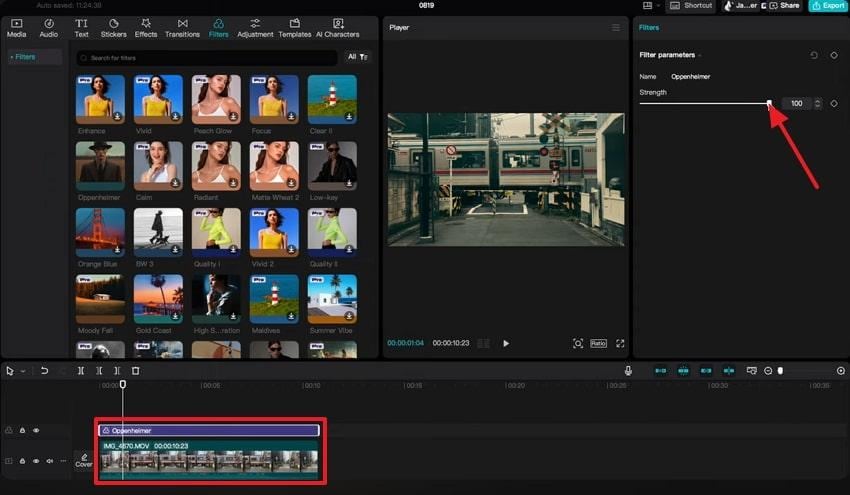
Step 2. Later, extend the length of the filter according to the video and adjust the slider for “Strength” as needed.
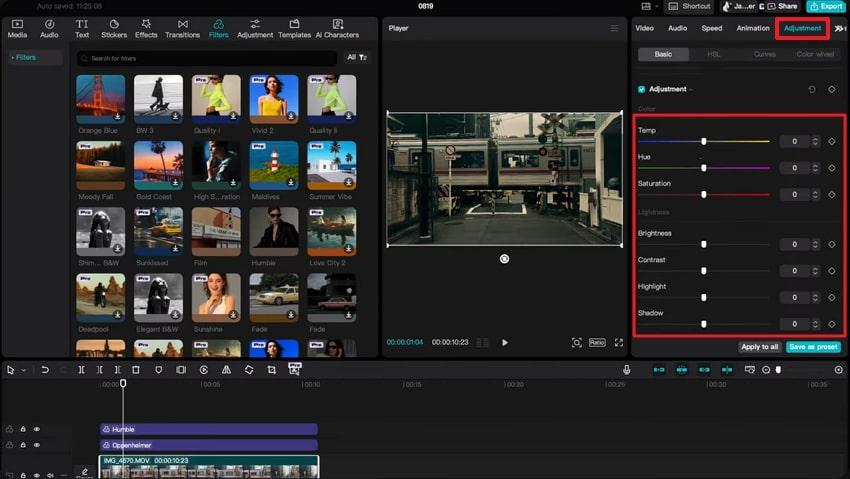
Step 3. Once done, navigate to the “Adjustment” section and make modifications to Temp, Saturation, or Brightness as per requirement. After getting satisfied, press the “Export” button to reveal export settings and save the video.
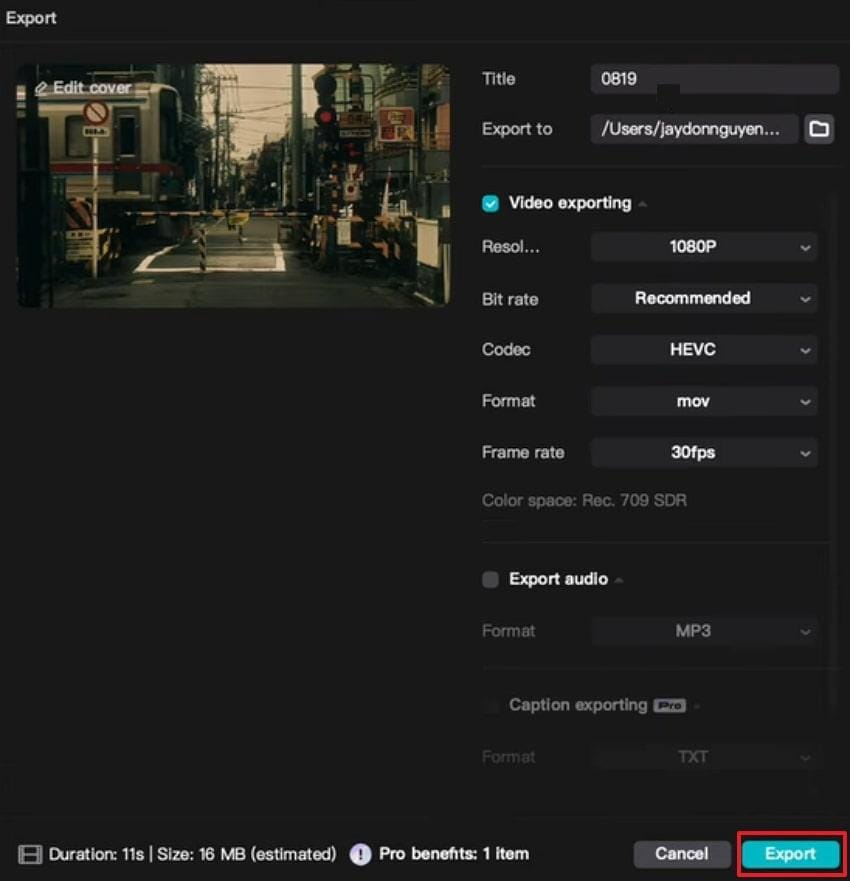
Step 4. In the Export window, specify the export location and set the video exporting resolution to enable the “Export” button.
Part 4. Common Mistakes to Avoid in CapCut Color Grading
To get the best results with CapCut color grading, you should know what to avoid; here are some common mistakes to watch out for:
- Over-Saturating Colors: Excessive saturation can make your videos appear overly bright and even uncomfortable to watch. Remember, the key is to enhance colors subtly so they feel natural with no overbearing effect.
- Ignoring Skin Tones: Skin tones are one of the important elements; if they look too orange, it might lower the video quality. Always balance skin shades carefully, even with a strong cinematic look, to help people relate to the characters.
- Using One-Click Filters Without Adjustments: CapCut’s filters and LUTs can significantly alter a video’s look, but applying them without adjustments can result in a generic appearance. Each video has its own mood, so filters should always be adjusted with tone corrections for a personalized touch.
- Inconsistent Grading Across Clips: When different clips in the same project have mismatched tones, the video feels choppy and unprofessional. To maintain consistency, apply similar grading across all footage or copy adjustments, keeping your project looking cohesive.
- Overlooking Highlights and Shadows: A Flat, washed-out, or overly dark footage often comes from ignoring highlights and shadows. Thus, paying attention to minor details here can add more depth and realism to your video overall.
Part 5. Boost Video Quality Before CapCut Color Grading
Before diving into color grading in CapCut, it’s essential to make sure your footage is high-quality. Even the most advanced color correction techniques in CapCut won’t achieve a cinematic or professional look if your video is low-resolution, blurry, or noisy.
That’s where Repairit Video Enhancer comes in. Powered by AI, it helps you improve video resolution, sharpness, and clarity before color grading. By upscaling your clips up to 4K quality, Repairit ensures every detail and tone adjustment you apply in CapCut truly stands out.
Key Features
- AI-Powered Video Upscaling: Enhance and upscale videos by up to 4×, turning low-resolution footage into crisp 4K visuals.
- Sharpen Blurry or Soft Footage: Bring back detail and texture for a cleaner, more cinematic grade.
- Denoise Videos Automatically: Eliminate unwanted visual grain or compression artifacts for a polished finish.
By preparing your footage with Repairit Video Enhancer, you’ll get smoother highlights, richer colors, and deeper contrast when applying CapCut color grading. It’s the perfect pre-production step for achieving that cinematic finish every creator aims for.
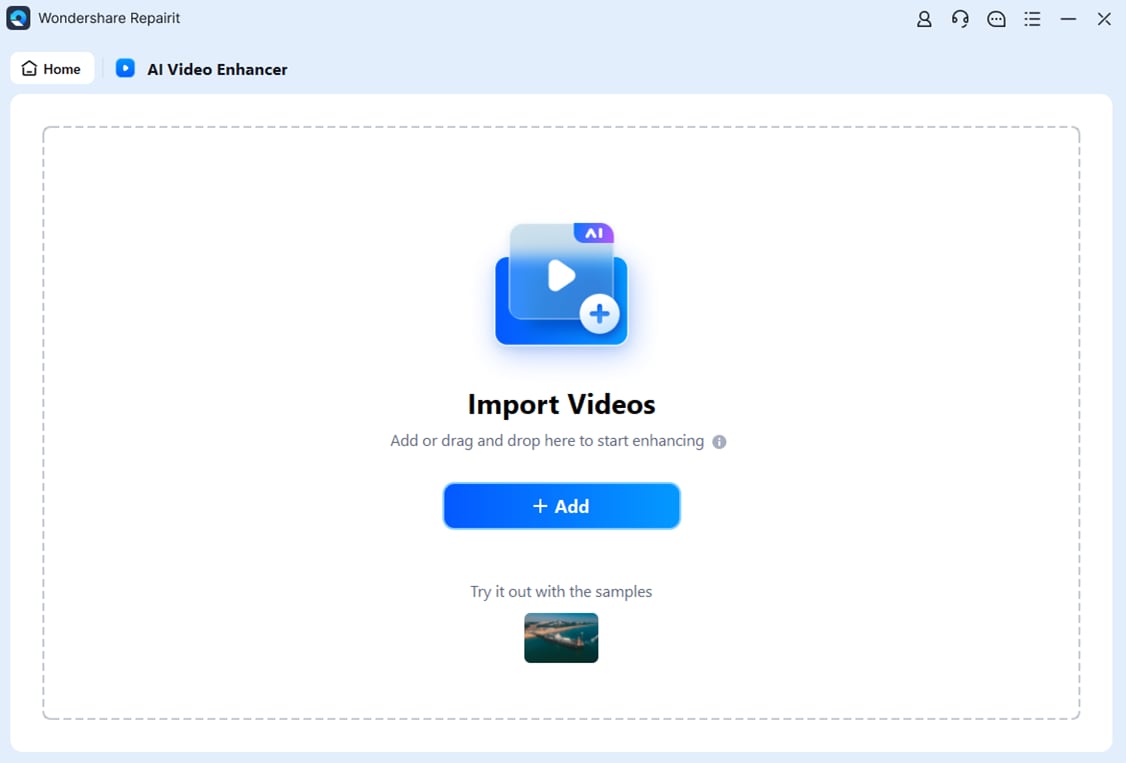
Step 1. To do so, select the “AI Media Enhancer” tab from the More Types Repair interface and press the “Add” to incorporate videos.
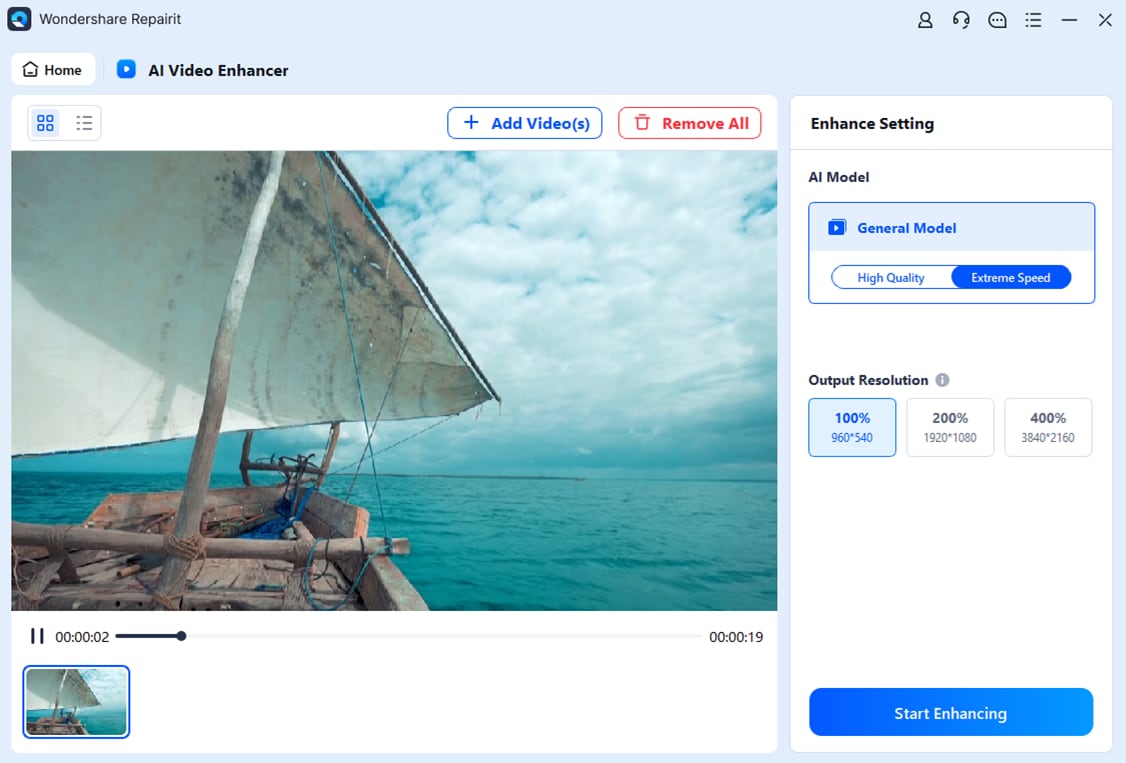
Step 2. Once videos are added, choose the “Output Resolution” accordingly and press the “Start Enhancing” button to begin the process.
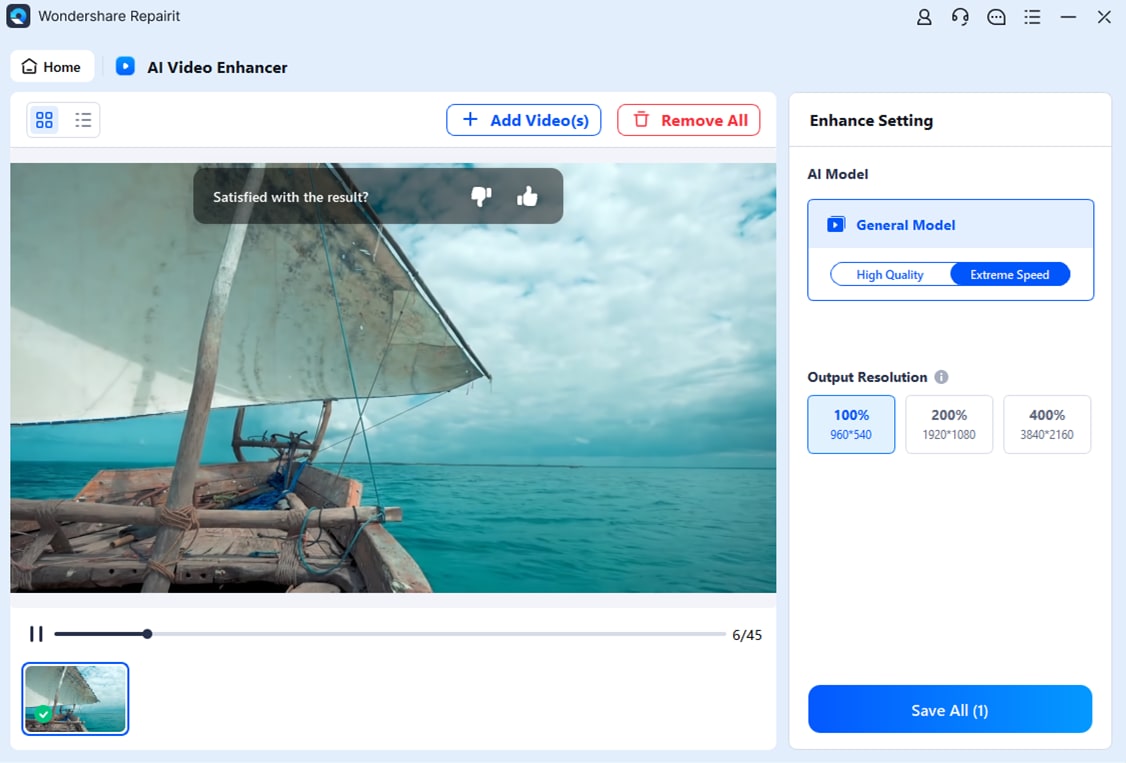
Step 3. Soon, when the process completes, preview the CapCut videos' quality and click the “Save All” button to get them saved on your device.
Conclusion
In conclusion, CapCut color grading empowers you to shape emotions and lend your videos the cinematic style they deserve. Every tone, highlight, and contrast adjustment you make has the potential to turn simple footage into a masterpiece that feels alive. In reality, even the professional color grading program can’t enhance your low-resolution videos, and that's where Repairit becomes your ultimate solution.
Frequently Asked Questions
-
Q1. Is CapCut good for color grading compared to professional tools?
Yes, CapCut is surprisingly powerful for color grading, especially considering it’s a free and convenient tool for beginner editors. While professional software like DaVinci Resolve or Adobe Premiere Pro offers advanced color management, CapCut provides an accessible platform that delivers impressive results overall. -
Q2. Can I do cinematic color grading in the CapCut free version?
Absolutely, the free version of CapCut includes a wide range of features that make cinematic color grading achievable. You can manually adjust brightness, shadows, and saturation to craft a dramatic or film-like aesthetic video. To perform cinematic color grading in CapCut, the platform offers LUTs and cinematic filters that can be customized to suit your preferences. -
Q3. What’s the difference between filters and manual grading?
Filters are pre-designed color presets that instantly change the overall tone of your video with one click. Manual grading, on the other hand, provides complete creative control, including elements such as exposure, hue, and color curves, to achieve a customized result.
