The need for freeze frame in Final Cut Pro becomes clear the moment you want to highlight a decisive moment in your footage. It's perfect for holding emotions, emphasizing key details, and giving your sequence a professional pause that grabs attention. Beyond simple stops, you can create smooth narrative transitions, tutorial callouts, and comedic timing beats this way.
In fact, it's a small effect that delivers massive impact, making your edits feel sharper and far more impressive. For timed pauses, read the entire article and discover the top 5 ways to use freeze frame in Final Cut Pro.
Table of Contents
Part 1. Freeze Frame Final Cut Pro Explained: Why FCP Freeze Frames Are Essential for Storytelling
When you add an FCP freeze frame, you park the playhead on a specific frame to create a still clip. The program either creates a new freeze clip in the timeline or holds a segment. Later, the system displays that single frame for a chosen duration, while the remaining media remains unchanged. Just because the freeze uses your source resolution and color data, you can add zooms or grading on the hold frame.
This non-linear, non-destructive approach enables editors to experiment with where to pause, how long to hold, and which visual treatments to apply. After all, your timeline remains flexible for later changes without introducing additional compression on the frame.
Differences Among Freeze Frame/Hold Frame/Frame Blending/Still Image
Each method creates a paused visual, but the tabular comparison clarifies how they behave differently in Final Cut Pro:
| Method/Feature | How it Works | Typical Use | Key Advantage |
| Freeze Frame | Creates a new still clip from the selected frame. | Character intros, reactions, comedic pauses, and emphasis moments. | Quick and clean freeze that can be trimmed or moved freely. |
| Hold Frame / Hold Segment | Uses Retime to extend a single source frame without generating new media. | Integrates naturally inside speed ramps or slowed sequences. | Non-destructive and stays linked to the original clip and grading. |
| Frame Blending (Retime option) | Blends surrounding frames during speed changes rather than freezing a single one. | Smooth slow motion and speed transition work. | Reduces jitter and motion stutter in moderate slow-mo edits. |
| Still Image Insert | Exports a frame as PNG/JPEG and re-imports it as a photo asset. | Thumbnails, graphics work, and reuse across multiple projects. | Complete control to stylize or treat the frame independently. |
Why FCP Freeze Frame Remains Superior for Clean, Non-Destructive Editing
With the basics out of the way, explore why Final Cut freeze frame shines as the real winner in terms of clarity:
- The tool operates in a non-linear, non-destructive manner, without concern about overwriting or permanent alteration.
- Hold segments are part of FCP’s retiming system, which blends freezes without creating separate renders.
- These timeline operations allow users to adjust duration, move the hold, or change the source frame.
- Since freeze frames reference the original footage resolution and codec, they preserve detail and color.
- Editors can create pauses with timeline commands rather than scattering exported stills throughout your project.
Part 2. 5 Smart Ways to Create a Freeze Frame in Final Cut Pro (FCP Freeze Frame Methods)
To create impressive visual pauses, you’ll first need to understand the different ways you can apply a Final Cut Pro X freeze frame. All the methods discussed in this section offer unique benefits, along with diverse flexibility for your project needs:
1. Basic Method: How to Add a Freeze Frame in Final Cut Pro from the Timeline
It's a basic method that turns a selected timeline frame into a standalone still, giving a sharp pause exactly where needed. The approach is valuable for editors who want a quick solution that highlights an essential moment without interrupting the workflow. Follow the guidelines and learn how to add a freeze frame in Final Cut Pro:
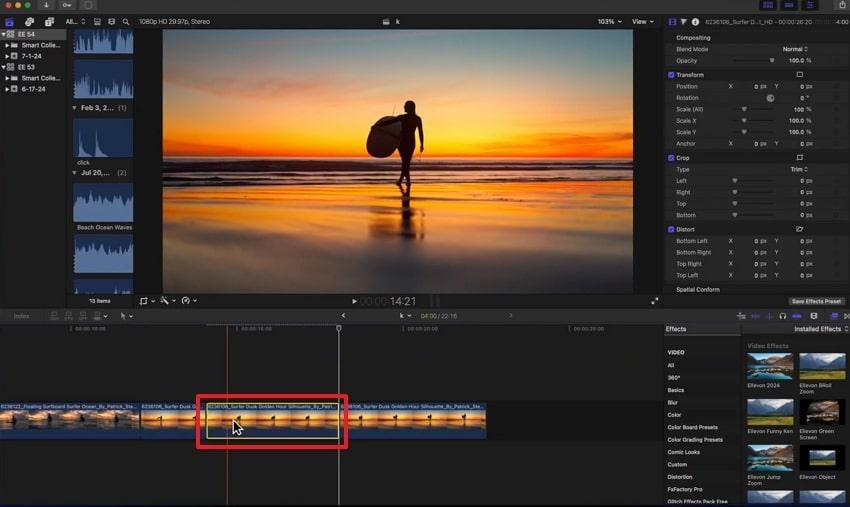
Step 1. First, put your clip on the timeline, play to the exact frame you want to freeze, then pause the playhead with Spacebar. Make sure the clip is selected, then navigate to the “Edit” option and select “Add Freeze Frame.” Here, FCP creates a new freeze-frame clip (4-second frame by default) at the playhead position.

Step 2. Finally, drag the ends of the frozen clip to make it shorter or longer, and edit as required.
2. Create a Freeze Frame from the Browser
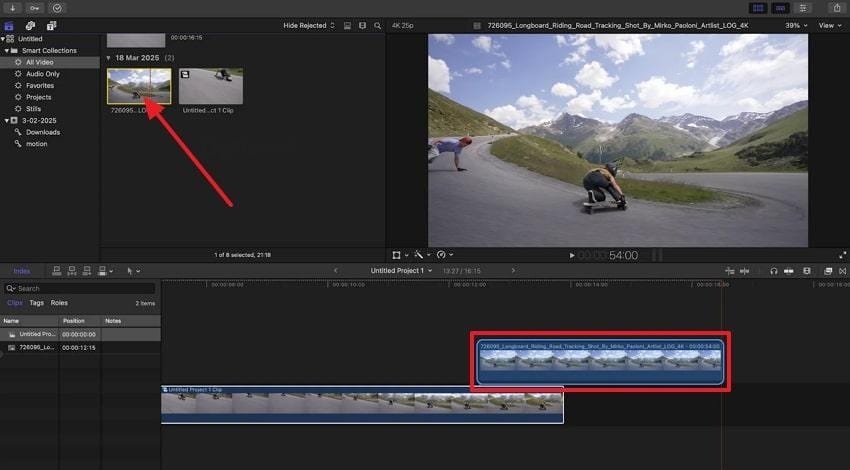
A freeze frame in Final Cut Pro from the browser allows you to set a specific moment before the clip enters your timeline. It's useful in structured projects where organization and clarity matter, helping users build more intentional edits from the beginning. Read the instructions and proceed to generate a freeze frame from the browser:
Instructions: While playing the clip in the browser, locate your perfect frame and press “Option + F” to freeze it. Doing so, FCP will attach your freeze frame as a connected clip, hovering above your primary storyline.
3. Using “Hold Frame” as an Alternative to Final Cut Pro X Freeze Frame
The Hold Frame technique in Final Cut Pro stops the clip at a chosen moment without generating a separate still image. It maintains the timeline continuity, allowing you to pause action, keeping the transition and clips connections intact. Adhere to the guidelines and use a hold frame to freeze the clip in Final Cut Pro:
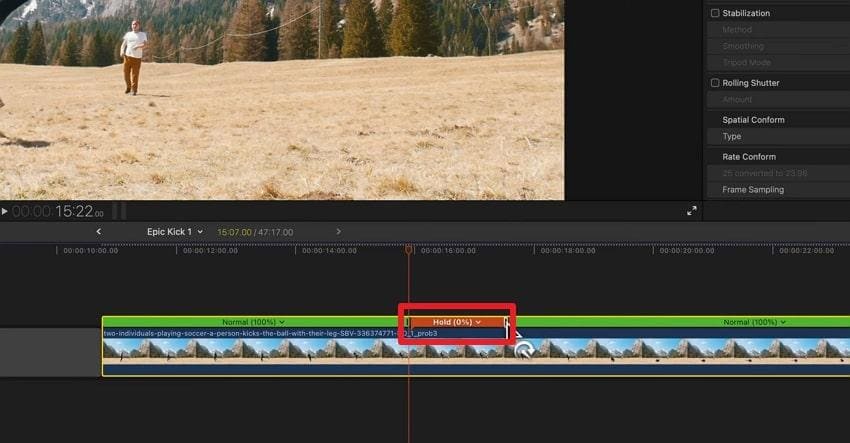
Step 1. In the timeline, find the spot you want to hold and navigate to the “Retime” icon under the viewer. Next, choose the “Hold” option from the menu or use the shortcut “Shift + H” to create a hold segment.
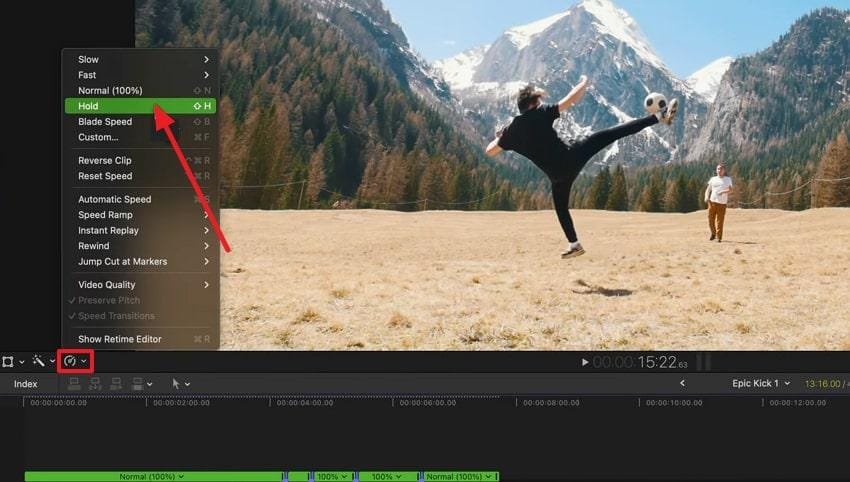
Step 2. Now, drag the retime handle at the end of the created hold segment to make the hold longer or shorter.
4. Export a Still Image and Re-Import
For the highest level of flexibility, export your still frame, and it becomes an independent asset that can be further customized. The FCP freeze frame now behaves like any imported media, allowing you to integrate it into title sequences and build custom transitions. Explore the manual and gain more clarity on how to export a still image:
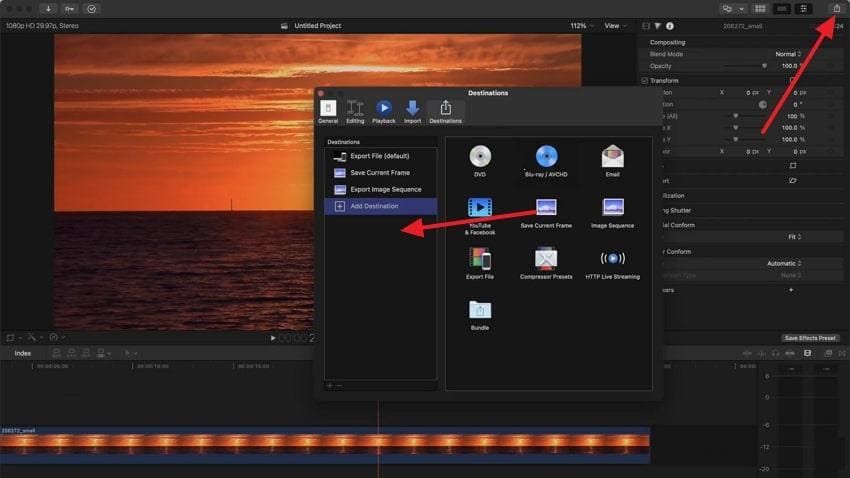
Step 1. On your FCP timeline, find the spot you want to freeze and press the “Export” icon at top right. Next, choose the “Add Destination” option and drop the “Save Current Frame” option in the Add Destination section.
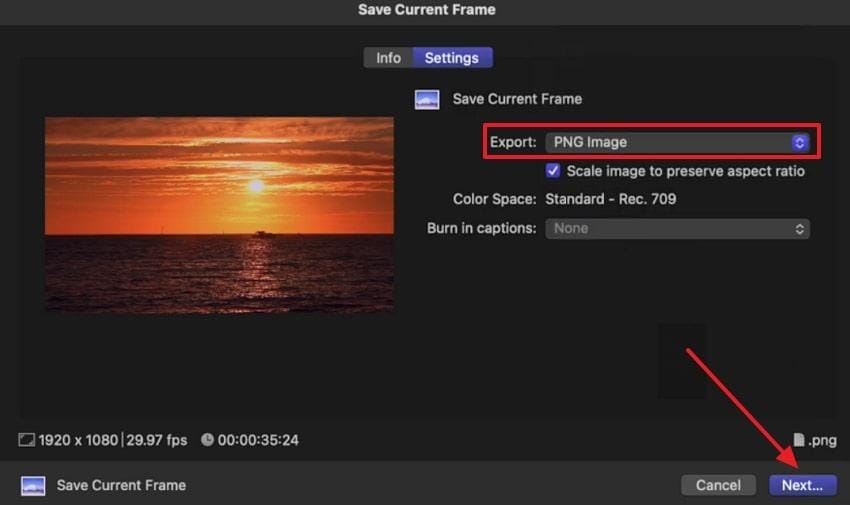
Step 2. From the Save Current Frame export settings, specify the Export format and click the “Next” button. Doing so, you’ll be able to export your frozen frame to a particular destination that can be re-imported from the Finder.
5. Use Time Remapping for Slow-Motion-to-Freeze Transitions in Final Cut Pro X
Another approach is time remapping, which enables editors to blend slow motion with a freeze frame to create cinematic transitions. This method adds emotional impact and visual depth, especially effective in action scenes or narrative reveals. Explore this stepwise tutorial and make use of time remapping for slow-motion freeze frames:
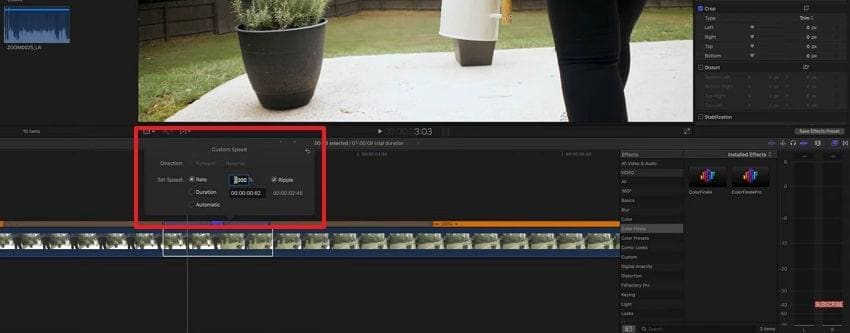
Step 1. At first, add your clip to the timeline and select a particular frame to freeze. Here, press “Command + R” to access the Retime menu and choose the “Custom” option.
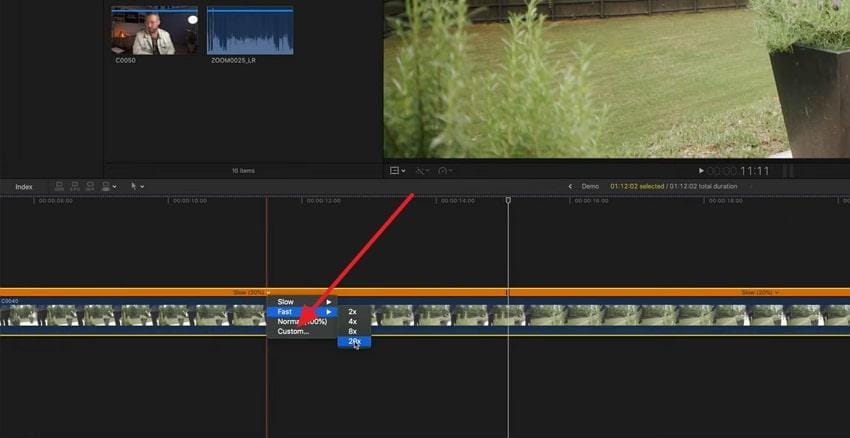
Step 2. In the Custom Speed window, set Speed with respect to percentage for your slow-motion freeze-frame transition.
Part 3. Creative Ways to Customize Freeze Frame Final Cut Pro Effects
To elevate visuals beyond a simple pause, consider the provided freeze frame Final Cut Pro creative techniques:
1. Add Cinematic Zooms and Pans: You can slowly zoom in, zoom out, or slide across the frozen picture by keyframing Scale and Position. This makes the freeze look like a movie shot instead of a flat screenshot.
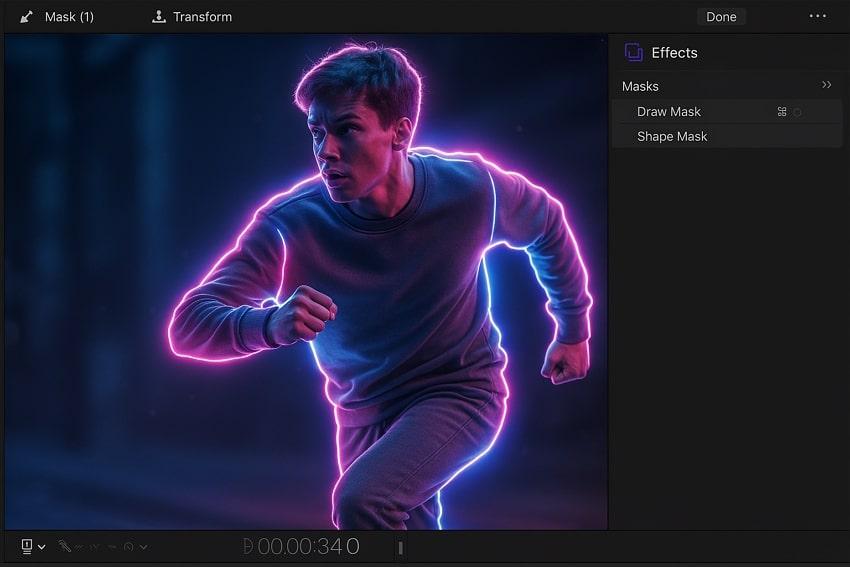
2. Make a Cutout or Outline Around the Person: Copy the freeze frame to a layer above, cut around the person with a mask, and add an outline. Following this, slightly blur or darken the background layer to make the person pop from the screen.
3. Change Colors and Lighting to Set the Mood: Incorporate stronger color and light changes only on the freeze frame; more contrasts or warmer. This explains the viewer, “this moment is special,” and makes the overall pause moment emerge.
4. Mix Freeze Frames with Slow Motion and Speed Ramps: You can slow the clip down, pause on a freeze frame for a second, then speed it back up. If you prefer matching it to a beat, it feels smoother and is great for sports or travel edits.
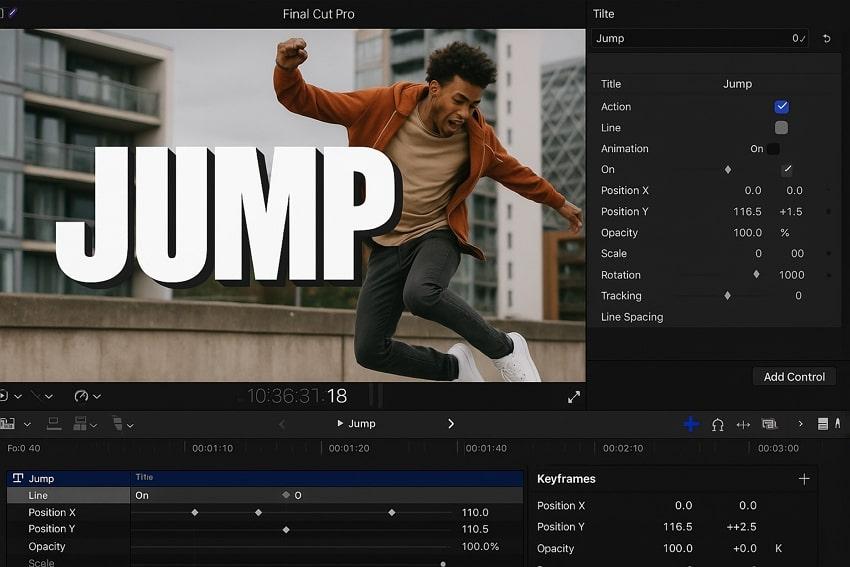
5. Add Fun Text Animations on the Freeze: Put bold or outlined text on the frozen frame and make it slide or bounce in using simple text animations. You can make the camera appear to fly through the text into the next clip, using the freeze as a steady base.
Part 4. Fix Damaged Footage Before Using Freeze Frame in Final Cut Pro
Creating a freeze frame Final Cut Pro effect can be a powerful way to highlight a key moment—but the result depends heavily on the quality of your original footage. If the source clip contains hidden glitches, dropped frames, or audio-video sync issues, those flaws often become more noticeable once the frame is frozen.
Before applying a freeze frame final cut pro effect, it’s a smart move to make sure your footage is clean and structurally sound.
Why Footage Issues Affect Freeze Frame Final Cut Pro Results
When working with freeze frames in Final Cut Pro, even small file problems can affect visual clarity:
- Minor visual glitches or corrupted frames are permanently locked into the frozen image.
- Audio-video desynchronization may signal deeper file structure issues.
- Incomplete or damaged data can lead to flickering, uneven brightness, or banding in freeze frames.
- Heavily compressed or partially corrupted clips may not blend smoothly with surrounding frames on the timeline.
How Repairit Video Repair Helps Before Applying a Freeze Frame Final Cut Pro Effect
A freeze frame final cut pro effect works best when the footage itself plays smoothly. Repairit Video Repair can be used as a preparation step to repair damaged or unstable video files before importing them into Final Cut Pro.
Repairit Video Repair is designed to handle a wide range of video corruption scenarios, including recording interruptions, storage errors, and file transfer issues. By repairing damaged segments where possible, it helps ensure more stable playback and cleaner freeze-frame results during editing.
Key Features of Repairit Video Repair
- Advanced Video Repair Mode: Uses a reference (sample) file to help rebuild severely damaged videos while maintaining original structure when supported.
- Broad Format Compatibility: Supports many commonly used and professional video formats suitable for Final Cut Pro workflows.
- Batch Repair Support: Allows multiple damaged clips to be repaired in one session, improving efficiency for editors.
- High-Resolution Video Support: Capable of working with HD, 4K, and higher-resolution footage depending on file condition.
- Preview Before Saving: Lets you review repaired clips to confirm playback stability before final export.
For flawless footage before the FCP freeze frame, you’ll need to go through the provided guidelines for Repairit:
Step 1. At first, access the “Video Repair” toolkit and press the “Start” button to insert the corrupted footage you have.

Step 2. Move forward and navigate to the “Repair” button to get all the broken Final Cut Pro footage fixed instantly.

Step 3. Once the process finishes, preview your repaired versions, then press the “Save All” button to save them.

Conclusion
In summary, freeze frame in Final Cut Pro is used massively by editors to refine pacing and add creative flair to their edits. Each method outlined in the article, whether a direct timeline freeze or a browser-generated still, shapes the visual appearance of your project. If you ever find yourself dealing with a glitchy frame, it is suggested to get it fixed through Repairit first.
Frequently Asked Questions
-
Q1. Why doesn’t my Final Cut Pro X freeze frame export correctly?
A freeze frame may be exported incorrectly if the source clip is corrupted or the render files are outdated. To have a successful export, consider switching to optimized/original media or repairing clips with a program like Repairit beforehand. -
Q2. How do I add text or titles to a Final Cut freeze frame?
You can add text by placing a Title from the Titles Browser directly above the freeze frame on the timeline. Once added, you can further customize the font, color, and text positioning as you like. -
Q3. Can I create a freeze frame from a compound clip or multicam clip?
Indeed, you can apply the FCP freeze frame inside a compound or multicam clip by selecting the exact spot in the timeline. This ensures the freeze is created from the original camera angle or from nested footage. When you freeze outside the compound/multicam, it may not deliver accurate results because FCP treats the clip as a single unit.