

When you work with videos in Final Cut Pro, you will likely come across H.265, also called HEVC. Many modern cameras, drones, and even smartphones record in H.265. This is because it gives you high-quality video in smaller file sizes. But working with H.265 in Final Cut Pro is not always smooth. In this guide, you will learn everything you need to know about Final Cut Pro H.265 workflow.
Fix H.265 Files for Final Cut Pro
 Security Verified. Over 7,302,189 people have downloaded it.
In this article
Part 1: Understanding Final Cut Pro and H.265 (HEVC)
Final Cut Pro supports H.265/HEVC files, but not every file works perfectly. H.265 stands for High Efficiency Video Coding. It can store very detailed videos, like 4K or even 8K, in much smaller file sizes than older formats like H.264. This is why it’s so popular for action cameras, drones, iPhones, and mirrorless cameras.
Benefits of H.265 in Final Cut Pro
When working in Final Cut Pro, H.265 format provides several advantages that improve both storage efficiency and editing performance. Here’s why H.265 is beneficial in Final Cut Pro:
- Smaller File Sizes. H.265 compresses videos more efficiently than H.264, allowing you to store high-quality footage without using too much space.
- Supports 4K and 8K Editing. You can work with ultra-high-definition videos while keeping file sizes manageable.
- Better Color and Dynamic Range. H.265 supports HDR and higher bit depth, which helps maintain richer colors and smoother gradients.
- Efficient for Modern Macs. Macs with M1, M2, or later chips handle H.265 smoothly, reducing lag during playback and editing.
- Ideal for Mobile and Drone Footage. Many iPhones, drones, and action cameras record in H.265, making it easier to edit footage without converting formats.
However, H.265 files are more compressed and complex. That makes them harder for Final Cut Pro to process, especially if the file is large or recorded with variable frame rates. If something goes wrong during recording or transfer, your H.265 file can also get corrupted.
Common H.265 Issues in Final Cut Pro
When you work with H.265 files in Final Cut Pro, you might face problems like:
- Final Cut Pro can’t recognize the file.
- The file imports, but playback is choppy or freezes.
- Audio is missing, out of sync, or distorted.
- The video plays as a black screen, but the audio works.
- Export errors when you try to save the final video in H.265 format.
These issues usually come from file corruption, incompatible codecs, or hardware not keeping up with the compressed video format.
Part 2: Steps to Set Up Final Cut Pro for H.265 Files
If you want Final Cut Pro to handle H.265 files smoothly, you need to set up your project and settings correctly. This makes importing, editing, and exporting easier, even with large files like 4K HEVC. Below are the steps you should follow.
A. Importing H.265 Files into Final Cut Pro
Before importing, it’s best to update Final Cut Pro to the latest version. Apple regularly improves H.265 compatibility, so having the latest update helps avoid errors or playback issues.
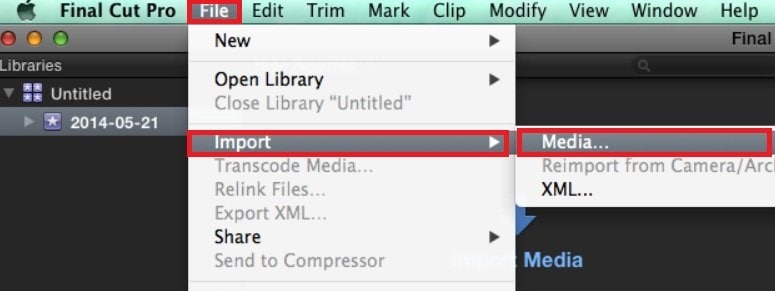
Step 1. Launch Final Cut Pro and navigate to File. Select Import, and click Media.
Step 2. Locate your H.265 files, select them, and click Import Selected.
Wait for Final Cut Pro to process the files. It may take longer for large H.265 videos.
B. Optimizing Playback Performance
Step 1. Create proxy media.
If your files are large or your Mac is struggling to play them back smoothly, create proxy files.
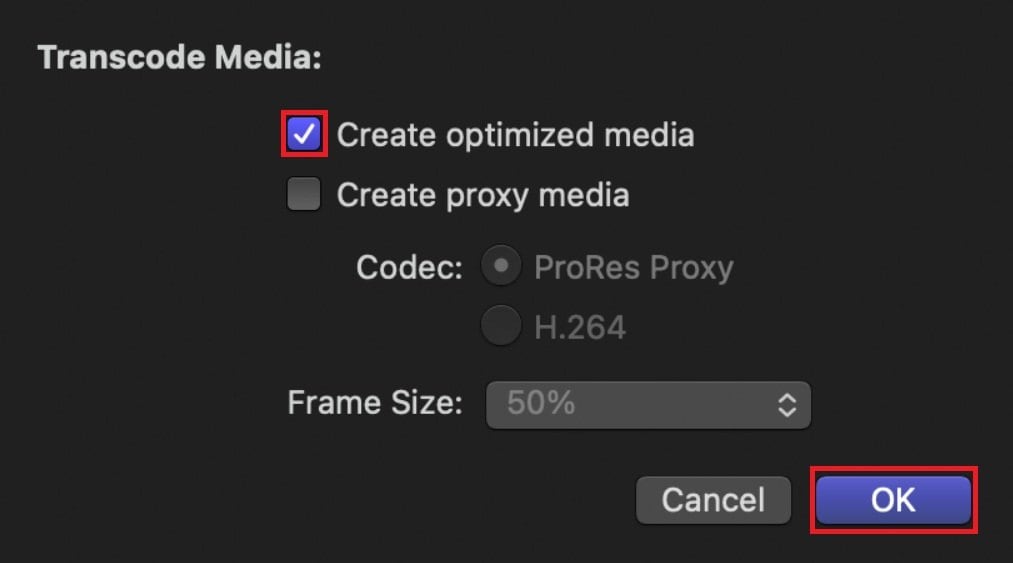
- Go to File. Select Transcode Media.

- Click the Create Proxy Media check box and hit OK.
Final Cut Pro will make smaller, lower-quality versions that are easier to work with during editing.
Step 2. Change playback settings.
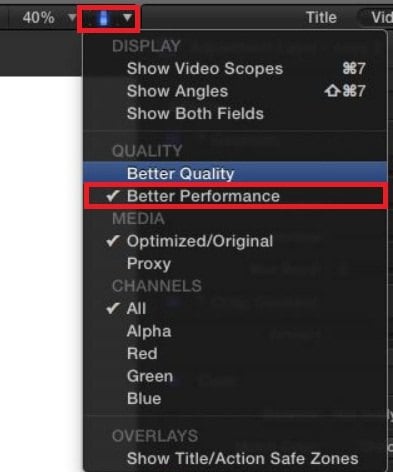
- In the viewer, click the Playback Quality menu (a small icon in the upper right corner of the viewer).
- Set it to Better Performance instead of Better Quality. This lowers preview resolution to keep editing fast.
Step 3. Use fast storage drives.
- Store your H.265 files on an SSD or a fast external drive (like a Thunderbolt drive). Editing directly from slow external hard drives can cause playback to stutter.
Part 3: How to Fix H.265 Files for Final Cut Pro?
Sometimes, even after setting up Final Cut Pro correctly, your H.265 file might still not work. The file could refuse to open, or it might play with glitches, black screens, or missing audio. These problems often happen when the video file gets corrupted.
Corruption can occur if something goes wrong during recording. For instance is the camera losing power, or if the file transfer is interrupted. Storage issues, like using a damaged SD card, can also harm your video files.
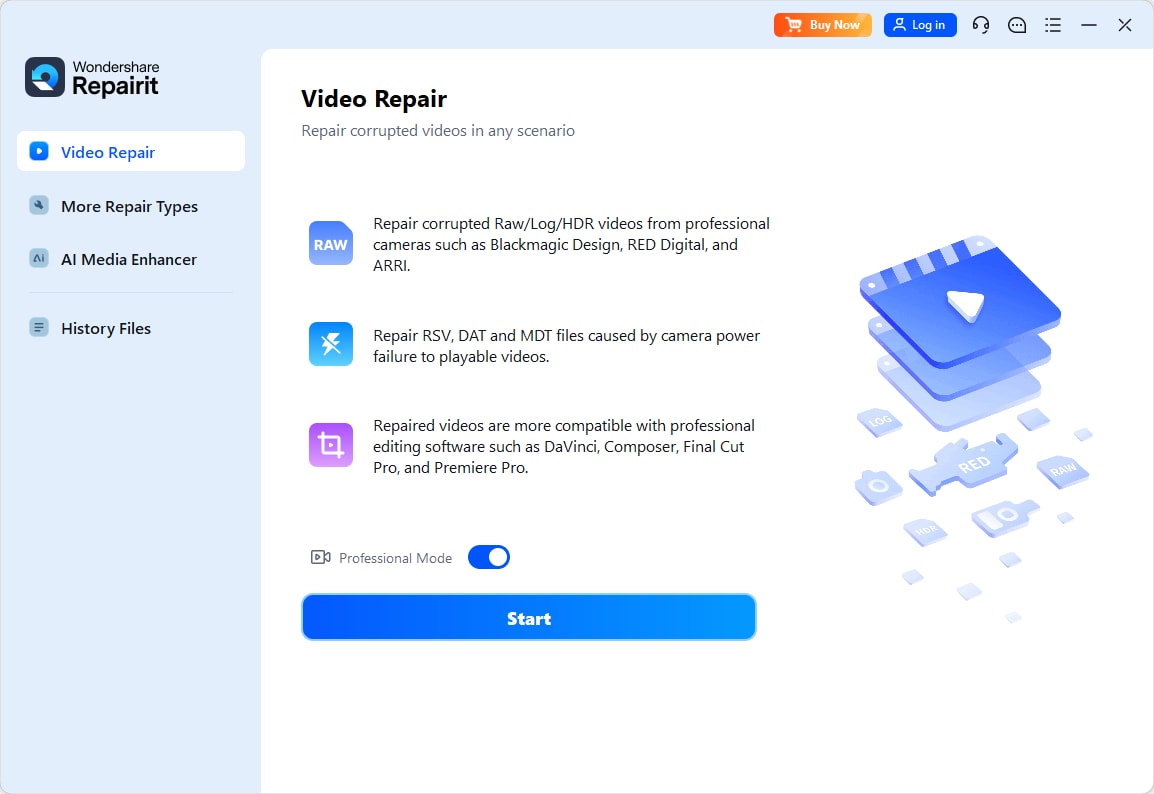
To fix these corrupted files, Repairit Video Repair is a reliable solution. Its Professional Mode Repair works especially well for complex files like H.265/HEVC. This mode can repair files that won’t open in Final Cut Pro, QuickTime, or any media player.
Here’s how you can use it:
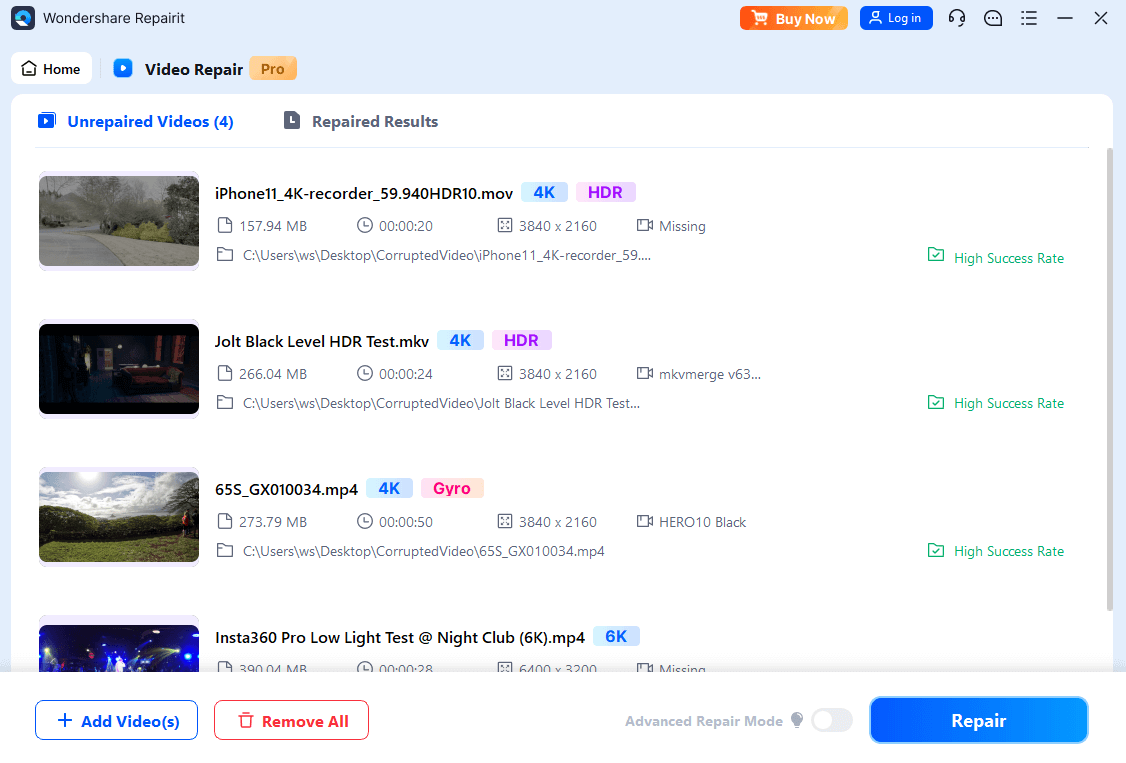
Step 1. Download and install Repairit. Open it and use Professional Mode, then click Start.
Step 2. Click +Add the corrupted H.265 file into the software. Start the process. Just click Repair.
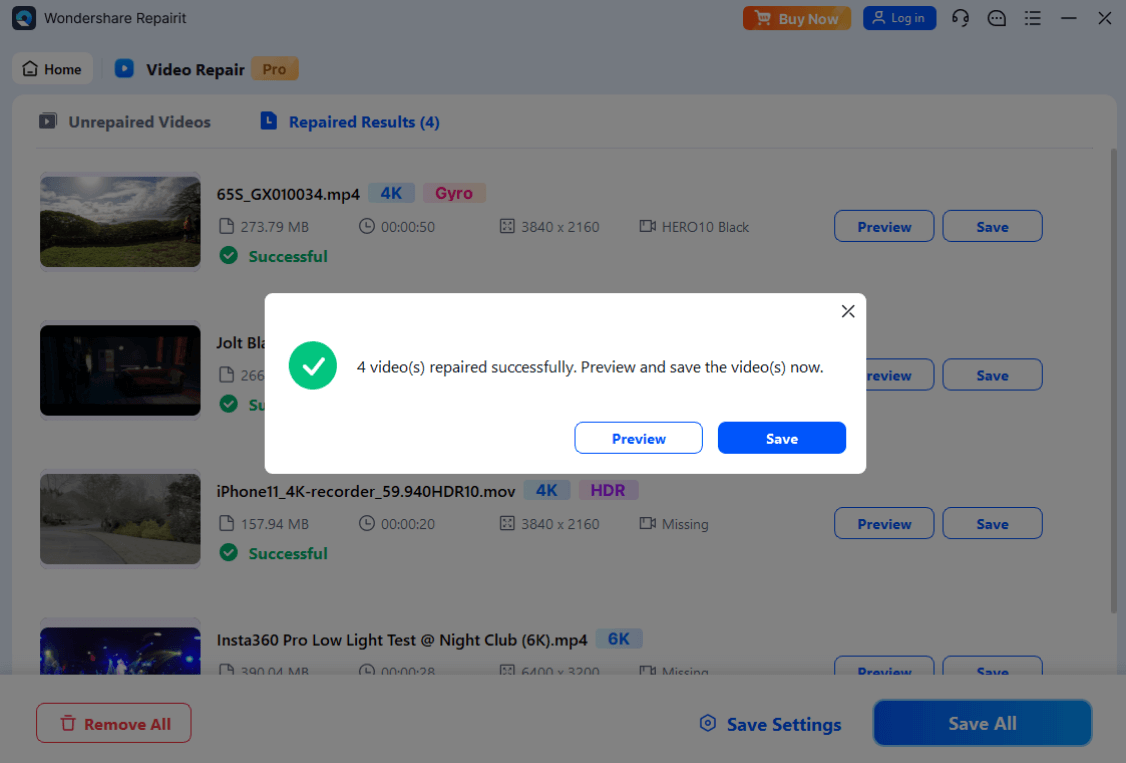
Step 3. Preview the result and Save the repaired file and import it into Final Cut Pro again.
Fix H.265 Files for Final Cut Pro
Security Verified. Over 7,302,189 people have downloaded it.
Part 4: Tips to Avoid H.265 Issues in Final Cut Pro
If you want to avoid problems with H.265 files in Final Cut Pro, it’s important to plan ahead. These files are small and efficient, but they are also more fragile than older formats like H.264. By following these tips, you can reduce the chance of file corruption, playback errors, and editing slowdowns.
Tip 1. Use High-Quality SD Cards
The card you use to record your videos matters more than you might think. Low-quality or fake SD cards can struggle to save H.265 video properly, especially when recording in 4K or at high frame rates. This can lead to files with missing data, frame drops, or damaged headers. To avoid this, always use trusted brands and check that the card’s speed class matches your camera’s recording needs.
Tip 2. Don’t Remove the Card Too Soon
It might feel quick and harmless to pull out the SD card right after recording, but this can actually corrupt your video files. Many cameras take a few extra seconds to fully save your footage, even after you stop recording. Always wait until the camera says it’s safe to remove the card. If possible, turn off the camera before removing the card to keep files safe.
Tip 3. Back Up Immediately
The longer your video files sit on a memory card, the higher the risk of problems. SD cards can fail without warning, especially if you reuse them often. To protect your work, always copy the files to your computer and a backup drive as soon as you can. This way, even if something happens to the card, you still have your original footage saved in two places.
Tip 4. Check Your Camera Settings
Different cameras record H.265 files in different ways. Some offer higher bit depths, larger color spaces, or advanced profiles like HDR. While these options improve quality, they also make the files more demanding for Final Cut Pro. Before filming, check if Final Cut Pro fully supports your camera’s recording format. If you’re not sure, test a short clip first and see if it imports and plays correctly.
Tip 5. Avoid Variable Frame Rates if Possible
Variable frame rate (VFR) means the camera automatically changes the frame rate based on the scene. This helps save space, but editing software like Final Cut Pro often struggles with VFR files. You could see audio drift or uneven playback. To avoid this, switch to a fixed frame rate like 30 fps or 60 fps whenever you can. This gives you a cleaner file that’s easier for Final Cut Pro to handle.
Tip 6. Keep Final Cut Pro Updated
Apple regularly updates Final Cut Pro to improve H.265 compatibility and support for new devices. If you’re using an older version, it might not fully support files from newer cameras or phones. By keeping Final Cut Pro up to date, you get the latest fixes and improvements, which can prevent many common errors with H.265 files.
Conclusion
Working with Final Cut Pro H.265 can be smooth if you understand the format and follow the right workflow. Start by setting up Final Cut Pro correctly. Use proxies if playback slows down. If your files get corrupted, Repairit Video Repair with Professional Mode can save your work.
Protect your files from the start. Use reliable storage, safe transfer practices, and regular backups. These will help you avoid most problems. With these steps, you can make your Final Cut Pro H.265 workflow faster, smoother, and stress-free.
FAQ
Do I need to change settings in Final Cut Pro before using H.265 files?
Yes, adjusting your playback settings, storage setup, and media import method helps Final Cut Pro handle H.265 files smoothly. Lowering playback quality can prevent lag, while using proxy media makes editing faster. Storing files on an SSD instead of an external hard drive also improves performance.Should I always transcode H.265 files to ProRes?
You don’t have to, but it’s useful if your system struggles with H.265 files. ProRes loads faster and reduces lag, making editing smoother, especially for long projects. However, ProRes files take up more space, so make sure you have enough storage before converting.How can I check if my Mac is strong enough for H.265 editing?
If your Mac has an M1, M2, or newer chip, it has built-in support for H.265, which helps with smooth playback and faster rendering. If you have an older Intel Mac, you may need proxy files or transcoding to avoid slow performance. Using Activity Monitor to check CPU and GPU usage while playing H.265 files can also show if your system is struggling.
