It's a stressful moment for every creator when you've just finished transferring hours of footage, only to discover that you can't open the files. Even though moving data is supposed to be easy, technical problems can sometimes lead to a video being corrupted after moving to a computer, leaving you with black screens or error messages instead of your important memories.
Whether the issue was caused by a broken cable, an interrupted transfer, or a damaged storage device, there's no need to panic right away. In many cases, it's still possible to repair corrupted video after moving files using the right tools and simple recovery methods. In this guide, we'll show you step-by-step solutions to help you restore your videos and get them working again safely.
In this article
Why Your Video Corrupted During Transfer
This is a common problem; your video plays perfectly on your camera or phone, but after moving it to your computer, it suddenly won't open. To fix it, we first need to understand what caused it.
Common signs of a corrupted transfer:
Not all corrupted files completely fail. Watch out for these signs:
- Audio and video don't match (sound is ahead or behind the video)
- Strange blocks or visual glitches on the screen
- Video freezes while audio still plays
- The file shows a size, but has no preview or duration
Common causes of video corruption:
Most issues happen because of a few usual problems:
- Transfer was interrupted (USB cable pulled out, power loss, or device shut off)
- Damaged storage (old SD cards or hard drives with bad sectors)
- Antivirus interference is stopping or freezing the transfer
Identifying the Symptoms of a Broken Video
When a file transfer goes wrong, the video isn't always completely unusable. Sometimes it still opens, but it acts like a "broken" or "glitchy" file. Knowing these signs can help you figure out if the problem is small or serious.
Visual and playback problems
If the video opens, you may notice these issues:
- Frozen frame - The video stops at one point, but the sound keeps playing.
- Pixelation or glitches - Strange blocks, colors, or distortions appear on the screen.
- Stuttering playback - The video keeps skipping or playing unevenly.
- Infinite loading - The player opens, but the video never starts and stays at 00:00.
System warning signs
Sometimes the problem shows before you even play the video:
- Missing thumbnail - The file shows a blank icon instead of a preview image.
- Error messages - You may see "invalid file format" or codes like 0xc10100be.
- Wrong file length - The video shows the wrong duration, like a few seconds or even hours that don't make sense.
The "Ghost file" problem
In some cases, the file appears in your folder but has a 0 KB size. This means the file name was created, but no actual video data was transferred. As a result, the file is completely empty and cannot be played.
Basic Fixes and Quick Troubleshooting
Before jumping into heavy-duty repair software, try these simple "first-aid" steps. Often, the file itself isn't fully destroyed; the computer just needs a different way to look at the data.
Fix 1. Try a Different Media Player
Standard players like Windows Media Player or QuickTime can be "picky" about minor data gaps.
Step 1. Download VLC Media Player (it's free and open-source).
Step 2. Right-click your corrupted video file. Select "Open With" and choose VLC.
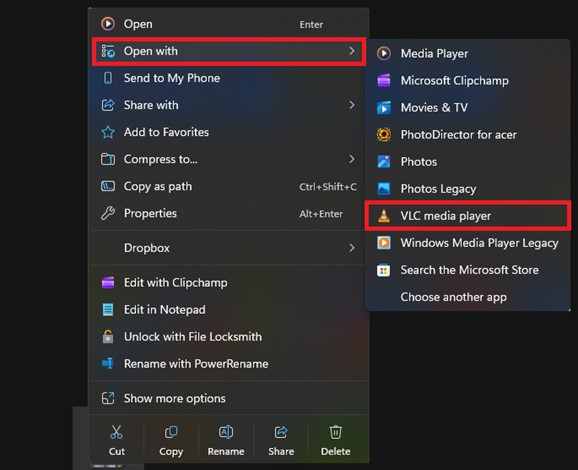
VLC has its own internal codecs and can often "ignore" minor header errors that cause other players to crash.
Fix 2. Use VLC's Built-in Repair Feature
VLC actually has a hidden tool specifically for damaged files.
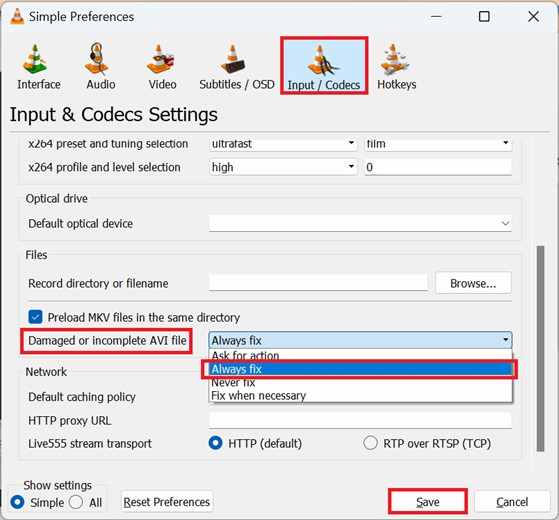
Step 1. Launch VLC, then open Tools, then Preferences and go to the Input/Codecs tab.
Step 2. Find the section labeled Files, then locate damaged or incomplete AVI files. Change the dropdown menu to Always fix. Click Save and try opening your video again.
Fix 3. Rename the File Extension
Sometimes the move confuses the system about what kind of file it is.
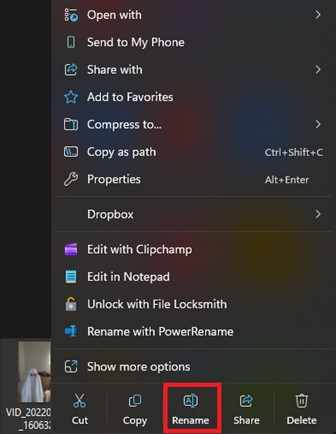
Step 1. Right-click the file and select Rename. Change the end of the file (e.g., from .mp4 to .mkv or .avi).
Step 2. Confirm the change in the warning dialogue.
This forces the media player to use a different "decoder" to read the file, which can sometimes bypass the corrupted segment.
Fix 4. Check for a "Hidden" Original
If you moved the file from an SD card or external drive, the data might still be there.
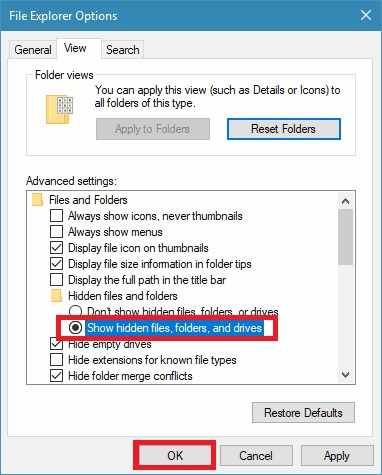
Step 1. Plug the source device back in. Search the source folder for hidden files or files with a .tmp extension.
Step 2. If the file is still on the source, Copy (don't cut) it again.
If the transfer failed, the "original" data might not have been fully erased yet.
Fix 5. Move the File to a Different Drive
Sometimes the "corruption" is actually just a communication error with your current hard drive.
Step 1. Copy the file from your computer's Desktop to a USB flash drive or an external SSD.
Step 2. Try opening the file directly from the external drive.
This forces the computer to re-read the data sectors, which can occasionally resolve temporary read/write glitches.
Advanced Fixed for Severely Corrupted Videos
When manual fixes aren't enough, professional software is the most reliable way to repair corrupted video after moving files.
What repair tools can and cannot do
It is important to have realistic expectations when using professional software.
It CAN:
- Repair broken file headers and metadata.
- Fix index errors that prevent scrubbing/seeking.
- Reconstruct frames by using a "sample file" (a healthy video from the same camera).
- Resolve sound-sync issues and codec errors.
It CANNOT:
- Recover data that was never there (e.g., if the file size is 0KB).
- "Enhance" blurry footage into 4K (that's upscaling, not repair).
- Fix videos where the physical storage media has been snapped or melted.
If you confirm the video is corrupted, a repair tool can safely restore its functionality. One example is the Repairit Video Repair, which works with common file types like MP4, MOV, MKV, and more.
Step-by-Step (Optional)
Step 1. Upload the corrupted video file.

Step 2. Start the Repair process.

Step 3. Preview and save the restored file to a new location.

Targeted Fixes for Post-Transfer Corruption
This type of problem happens when a video works fine on the camera or SD card, but gets damaged only after it is moved to a computer. In most cases, the video itself is still fine; the issue happens during the transfer or saving process on your computer. Fixes you can try:
1. Re-transfer the file (best and easiest fix)
- Delete the broken file from your computer
- Restart your computer and the source device (SD card, camera, or drive)
- Copy the file again (don't use "cut")
- Temporarily turn off antivirus software if it interrupts large file transfers
2. Check and repair your drive (Windows tool)
If the problem is caused by storage errors:
- Open Command Prompt as administrator
- Type: chkdsk C: /f (replace C: with your drive letter)
- Let the system scan and fix file errors
- This helps repair issues in how your computer reads and stores files.
3. Re-save the video using a converter (HandBrake method)
If the file opens but is still broken:
- Use a tool like HandBrake
- Import the corrupted video
- Choose a simple preset like "Fast 1080p30."
- Start encoding
This creates a new working version of the video by rebuilding its structure.
Prevention Tips to Avoid Future Video Corruption
Fixing a corrupted video is possible, but it's always better to avoid the problem in the first place. By following simple habits, you can keep your videos safe during transfers.
Best practices for safe file transfers:
- Copy first, then delete - Always copy the file first, check that it works on your computer, and only then delete it from your device.
- Always eject your device properly - Even if the transfer looks done, your computer may still be saving data in the background. Always click "Eject" to safely remove your device.
- Use good cables and ports - Use a reliable cable (preferably the original one) and plug it into a stable port, like the back ports of a desktop computer.
- Format your SD card using the camera - Instead of deleting files one by one on your computer, use your camera's Format option after backing up your files.
- Check battery levels before transferring - Make sure your laptop or camera has enough battery before starting a transfer.
Conclusion
Dealing with a video corrupted after moving to a computer can be stressful, especially if the footage is important. The good news is that in most cases, the video isn't completely lost; the problem usually happens during the transfer, not in the actual video content.
By trying simple fixes like using VLC Media Player or HandBrake, and moving to repair tools if needed, you still have a good chance of recovering your video. To avoid this in the future, always use Copy and Paste and safely eject your storage devices.
FAQs
-
Can I repair a video if the file size is 0 KB?
No. A 0 KB file means no data was transferred at all. You'll need to go back to your SD card or camera and copy the file again. -
Why does the video work on my camera but not on my computer?
This usually happens because the file got damaged during transfer, or your computer is missing the right codec. Try playing it with VLC Media Player, which supports most video formats. -
Is it safe to use free online video repair tools?
Some are safe, but be careful. They often have file size limits and require you to upload your video. For better privacy and reliability, desktop tools are usually a safer choice. -
Will repairing a video reduce its quality?
Most simple repairs won't affect quality. However, if the video is badly damaged and needs re-encoding, there might be a small drop in quality, but it's usually not noticeable. -
How do I know if my USB cable is the problem?
If your transfers keep failing, stopping, or disconnecting, your cable or port might be faulty. Try another cable or connect it to a different USB port.