It's frustrating when you have recorded great footage, transferred it to your computer, but the file won't open. You might see errors like "format not supported," a black screen, or a message saying the file is corrupted. This usually happens because something went wrong when moving the file from your SD card to your PC.
If your video won't play after transfer or you're dealing with an SD card video not playing on PC, it doesn't always mean your video is lost. In many cases, the file can still be fixed. This guide will help you understand what causes the problem and how to get your video working again.
In this article
Why Your Videos Won't Play After Transfer from SD Card to PC
When a video from your SD card refuses to play on your PC, the issue is usually not random, because it often comes from problems during transfer, file reading errors, or compatibility limitations between devices.
- Interrupted transfer - If the SD card is moved, the cable disconnects slightly, or the connection drops during copying, the transfer can be interrupted without you noticing.
- File system differences (exFAT vs NTFS) - Large video files can sometimes become incomplete or corrupted during transfer due to small write errors or system mismatches.
- Missing video support (codec issues) - This often happens with newer formats like H.265 (HEVC), especially on older systems or default media players that don't support it.
- SD card damage or aging - SD cards wear out over time, and failing memory cells can cause parts of a video to become unreadable.
- Unsafe removal of SD card - If the SD card is removed without safely ejecting it, the system may still be writing data.
Common Causes After Transfer
When a video won't play after being transferred, the problem can show up in different ways, ranging from small playback issues to the file not opening at all. Since an SD card video not playing on a PC can be caused by software limits, transfer errors, or file corruption, it helps to observe how the problem behaves so you can figure out the right fix.
- The "Ghost File" issue: Sometimes the video file appears normally in your folder with the correct name and file type, but its size shows as 0 KB.
- Codec or playback error messages: In other cases, the file is there, but your media player refuses to open it and shows an error message. You might see warnings like "file type not supported," "missing codec," or error codes such as 0xc00d36c4.
- Glitches in video or audio playback: Sometimes the video will still open, but it won't play correctly. You may notice broken visuals like pixelation, strange colored lines, or a black screen while the audio continues.
- Slow folder loading or system freezing: A more serious sign is when your computer struggles just to open the folder containing the video. File Explorer may freeze, become unresponsive, or take a very long time to load thumbnails.
- The video plays only partially: In some cases, the video may play normally at first but suddenly stop halfway or jump back to the beginning.
Basic Fixes and Quick Troubleshooting Guide
Follow these five straightforward steps to rule out common glitches when an SD card video is not playing on a PC:
Fix 1. Perform a Clean Re-transfer
Hardware bottlenecks or loose connections often cause "bit-gap" errors during the copy process. A fresh transfer using a more stable path can resolve data packet loss.
Step 1. Disconnect your SD card and close any open media players. Plug the card reader into a different USB port (ideally a direct port on the back of the PC rather than a hub).
Step 2. Delete the corrupted files from your PC. Copy the files again from the SD card and wait for the progress bar to finish completely before interacting with the folder.
Fix 2. Update Graphics and Display Drivers
Your media player relies on your GPU to decode high-resolution footage. Outdated drivers can lead to a black screen or "Display Driver Stopped Responding" errors.
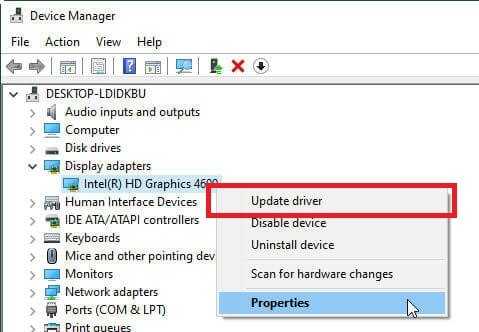
Step 1. Look for Device Manager in the search bar, then expand the Display adapters section.
Step 2. Right-click your graphics card (e.g., Intel, NVIDIA, or AMD) and select Update driver. Choose Search automatically for drivers and restart your PC once the installation completes.
Fix 3. Verify and Correct File Extensions
Sometimes, camera software or transfer glitches fail to append the correct file extension, leaving the OS unable to identify the file type.
Step 1. Open File Explorer and go to the View tab (or "Options" in Windows 11). Ensure File name extensions are checked.
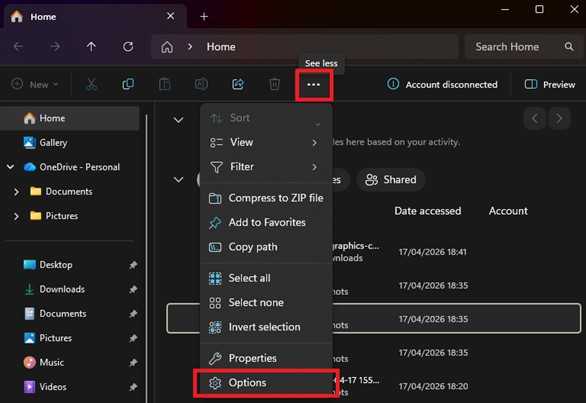
Step 2. Right-click your video file and select Rename. Add or correct the suffix to match the original format (e.g., change video123 to video123.mp4).
Fix 4. Install HEVC Video Extensions
High-resolution 4K or 8K videos often use the H.265 (HEVC) codec. If your Windows version lacks this specific "translator," the file will appear broken. Open the Microsoft Store on your PC.
Step 1. Search for HEVC Video Extensions. Download and install the extension.
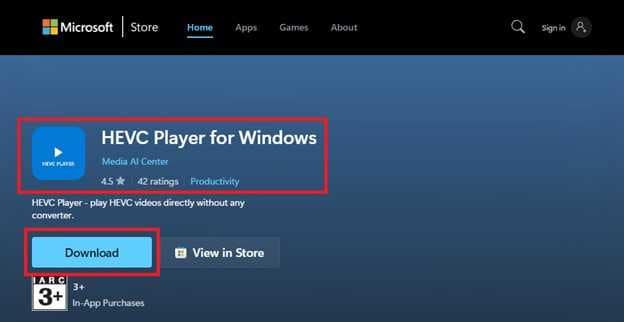
Step 2. Restart your media player and attempt to open the video again.
Fix 5. Disable Hardware Acceleration
While designed to improve performance, hardware acceleration can clash with specific file containers or older monitor refresh rates, causing playback to freeze.
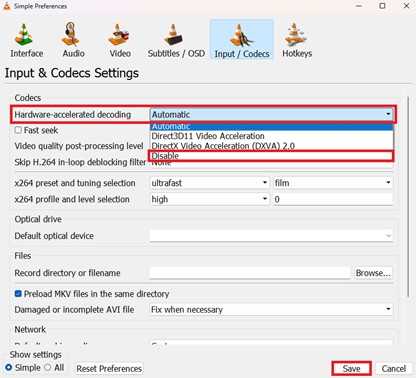
Step 1. Open your preferred media player (e.g., VLC or Chrome). Navigate to Tools or Preferences. Find the Input/Codecs or System section.
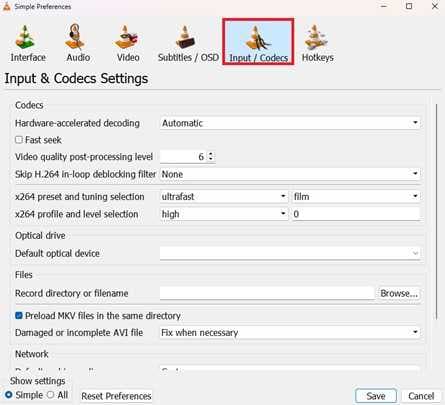
Step 2. Locate Hardware-accelerated decoding and toggle it to Disable. Save the settings and relaunch the application.
Advanced Fixed for Severely Corrupted Videos
Before spending time on repair software, look for these specific "red flags" that indicate the file structure itself is broken:
- You see "File format not supported," "0xc10100be," or "The file is header-damaged."
- Frozen Frames: The video starts to play but freezes at a specific timestamp every single time.
- Massive pixelation, green screens, or "rainbow" streaks that weren't there during filming.
- The file size looks correct (e.g., 2GB), but the duration shows as 00:00.
- The audio plays perfectly, but the video is a static image or lags minutes behind.
It is important to manage expectations. A repair tool is a reconstruction specialist, not a magician.
It CAN:
- Fix the "opening instructions" so players recognize the file.
- Re-map the file so you can seek/scrub through the timeline.
- Re-align the audio and video tracks.
- Repair multiple files from the same camera simultaneously.
It CANNOT:
- Recover "Zero-Byte" Files. If the file size is 0KB, there is no data to repair.
- Improve Quality. It won't turn a blurry 480p video into a crisp 4K video.
- Fill in Missing Footage. If 10 seconds of data were never recorded, the tool cannot "hallucinate" that footage back into existence.
If you confirm the video is corrupted, a repair tool can safely restore its functionality. One reliable example is the Repairit Video Repair, which works with common file types like MP4, MOV, MKV, AVI, and even professional formats like INSV or MXF.
Step-by-Step (Optional)
Step 1. Upload the corrupted video file.

Step 2. Start the Repair process.

Step 3. Preview and save the restored file to a new location.

How to Prevent Video Transfer Problems in the Future
By following a few simple habits, you can greatly reduce the chance of an SD card video not playing on your PC.
- Always safely eject the SD card - Always right-click the SD card drive in File Explorer and select "Eject" before physically removing it. This ensures all data is fully saved and closed properly.
- Format the SD card in your camera - Although you can format an SD card on a computer, it's better to do it inside your camera. Cameras are designed to create the correct folder structure needed for recording videos.
- Avoid using "Cut" when transferring files - Always use copy and paste. This keeps the original video safely on the SD card until you confirm the copied version works properly on your PC. You can delete the original only after checking the file.
- Avoid interruptions from low battery or sleep mode - Make sure your camera has enough battery before recording, and avoid starting transfers on a laptop running on low power or battery mode.
- Replace SD cards when they get old - SD cards don't last forever because their memory cells wear out over time. As they age, they may start causing errors or corrupted files more often. If you notice frequent playback issues, it may be time to replace the card.
Conclusion
Finding that your video won't play after transfer is a common issue in everyday digital workflows, but in most cases, it does not mean the file is permanently lost. The problem is often caused by simple codec incompatibility, unstable transfer connections, or minor corruption while copying from the SD card.
With the right troubleshooting steps, most of these issues can be fixed. Keeping your drivers updated, using stable transfer methods like copy and paste, and handling your storage devices properly can help ensure your videos stay in good condition after moving them to your PC.
FAQs
-
Why does my video play on the camera but not on my PC?
This usually happens because the camera has built-in support for its own recording format, while your PC may not. -
Is it better to transfer videos using a USB cable or an SD card reader?
Transferring through a USB cable can sometimes be slower or less stable, especially if the camera goes into power-saving mode or the battery runs low during the transfer. -
Can a "0KB" video file be repaired?
No, unfortunately, it cannot be repaired. A 0KB file means that the file was created, but no actual video data was copied into it. -
Will VLC Media Player fix my corrupted video?
It cannot fix heavily corrupted files or badly damaged file headers. For those cases, a dedicated video repair tool is needed. -
How do I know if my SD card is failing?
A failing SD card may show signs like very slow transfer speeds, files suddenly becoming read-only, or videos disappearing after being saved.