
 TL;DR:
⚡ Quick Fix: Stop CapCut Timeline Lag and Stuttering
● Optimize App Performance Settings: Turn on the Proxy feature to edit with lightweight copies, and switch the preview quality from Best Quality to Best Performance.
● Free Up System Hardware Resources: Clear CapCut's temporary draft cache files and force-close unused background applications to release memory.
● Fix Corrupted Source Video Files: Eliminate constant timeline freezes, missing audio, or frame drops by restoring damaged input clips with Wondershare Repairit.
Ask AI for a summary
 ChatGPT
 Perplexity
 Gemini
 Claude
 Grok
Grok
CapCut is a popular video editor with different creative tools and effects. But like any app, it can have performance issues. One of the most common problems users face is lag during editing. Lag can ruin your workflow. It makes previews hard to watch, slows down editing speed, and makes precise cuts or audio syncing frustrating. In some cases, it feels impossible to edit smoothly at all.
The good news is that CapCut lag is fixable. This guide shares simple, proven fixes to help CapCut run smoother, improve preview playback, and make editing easier on both PC and mobile.
Fix CapCut Video Lagging Issues
 Security Verified. Over 7,302,189 people have downloaded it.
Table of Contents
Part 1. What Causes CapCut Lag?

CapCut lag happens when the app or your device can’t keep up with the editing workload. Below are several common reasons.
- Low device RAM, storage, or weak hardware: CapCut needs enough memory and processing power. Low-end or nearly full devices may stutter or freeze during editing.
- Large or high-resolution video files: Editing 1080p or 4K clips, especially with multiple layers or effects, puts heavy strain on the app and can cause lag.
- Too many background apps running: Other apps use RAM and CPU in the background, leaving fewer resources for CapCut.
- Outdated CapCut app: Older versions may have bugs or lack performance improvements, leading to slow or unstable editing.
- Cache buildup and temporary app glitches: Stored cache files and minor bugs can slow CapCut until the cache is cleared or the app is restarted.
- Corrupted or damaged video clips: Broken or incomplete video files can cause playback issues inside CapCut.
- Slow internet connection: A weak connection can delay loading effects, assets, or online content.
Part 2. Quick Fixes to Reduce CapCut Lag
If CapCut lags while editing, it’s due to temporary system or app issues. Before trying advanced fixes, start with a few quick steps. These can clear minor glitches, free up resources, and help CapCut run seamlessly again in minutes.
1. Restart CapCut and Your Device
First, you need to restart everything. Restarting CapCut clears temporary data and resets the app’s processes. In addition, restarting your device goes one step further by freeing up RAM, stopping stuck background tasks, and fixing minor system glitches. This helps CapCut start fresh and removes lag caused by memory overload or app instability.
Here are the steps to restart CapCut:
On Mobile (Android/iPhone):
Step 1: Close CapCut completely from the recent apps screen. Then, turn off your device.
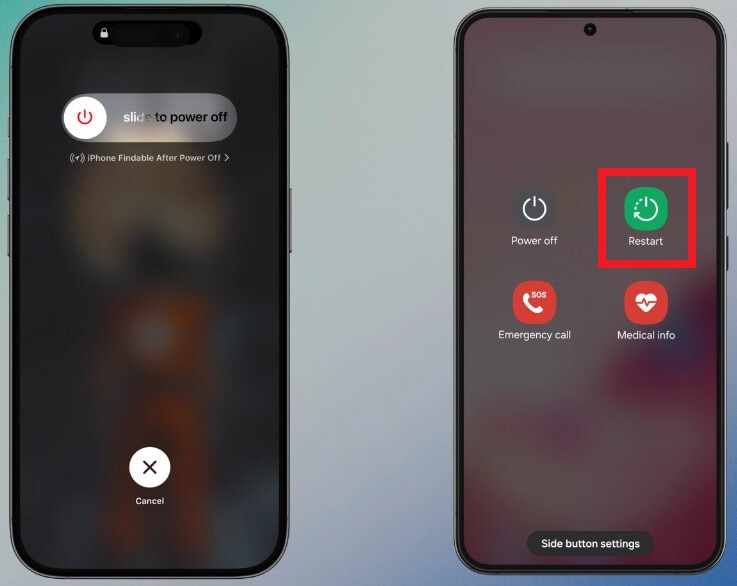
Step 2: Wait 30-60 seconds before turning your device back on.
Step 3: Open CapCut and try editing again.
On PC (Windows/Mac):
Step 1: Close CapCut Desktop fully.
Step 2: Restart your computer.

Step 3: Once the system boots up, reopen your CapCut. Load your project and check if the lag is gone.
2. Close Unused Background Apps
Apps running in the background still use RAM and CPU power. When too many apps are open, CapCut doesn’t get enough resources to handle video playback and editing. So, you need to close unused apps to free up memory and processing power. This allows CapCut to run faster without lag. Here are the steps:
On Mobile (Android/iPhone):
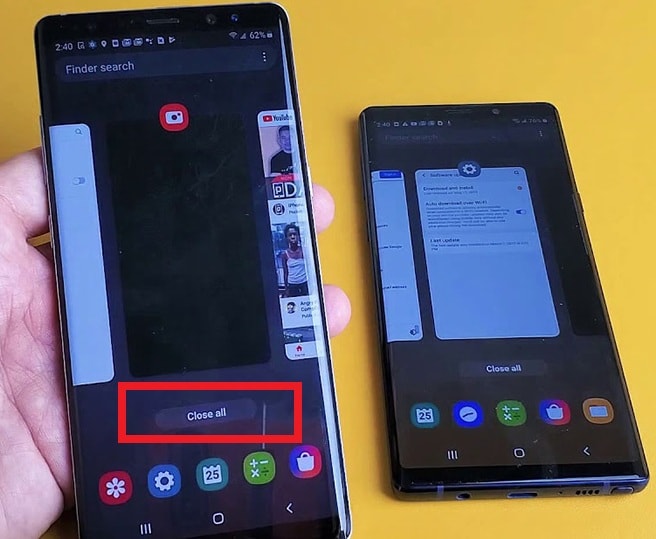
Step 1: Open the recent apps menu.
Step 2: Swipe away apps you’re not using and leave only CapCut running.
Step 3: Open CapCut again and continue editing.
On PC (Windows):
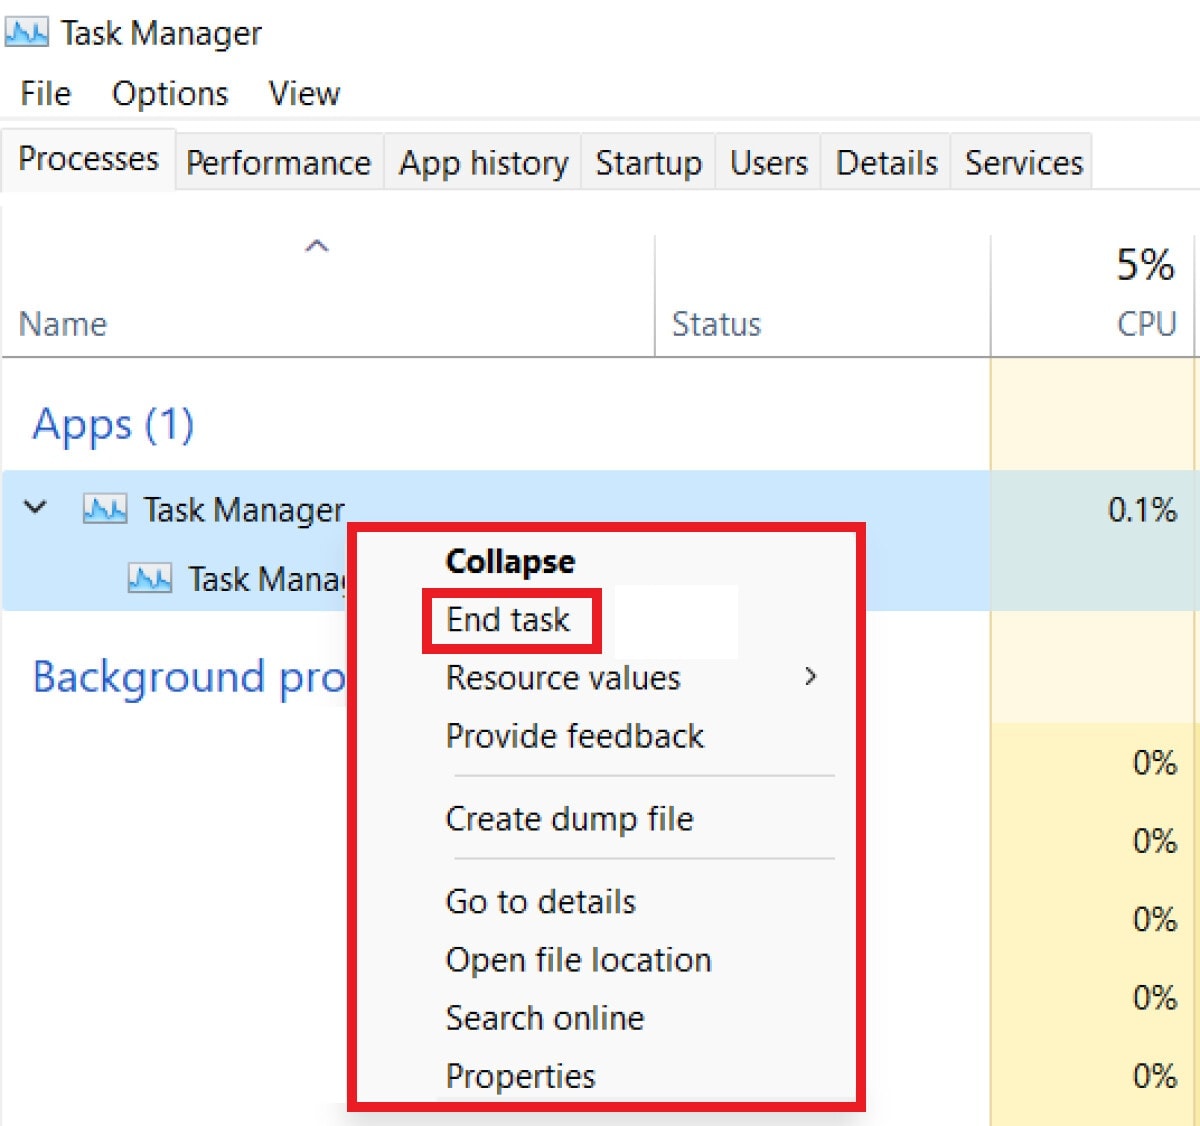
Step 1: Click Ctrl + Shift + Esc simultaneously to access the Task Manager.
Step 2: See the Processes tab and choose apps you don’t need.
Step 3: Hit End Task.
On Mac:
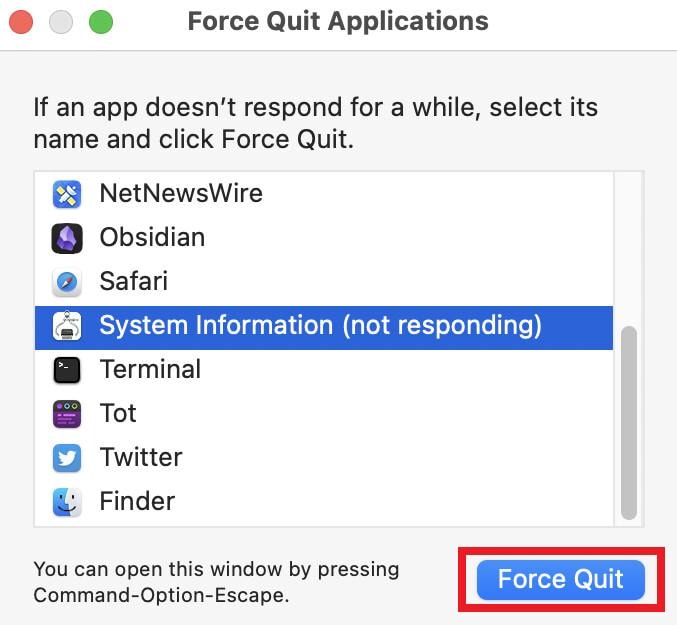
Step 1: Tap Command + Option + Esc.
Step 2: Select unused apps and hit Force Quit.
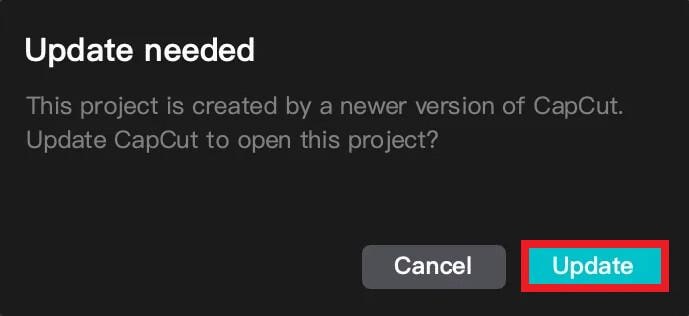
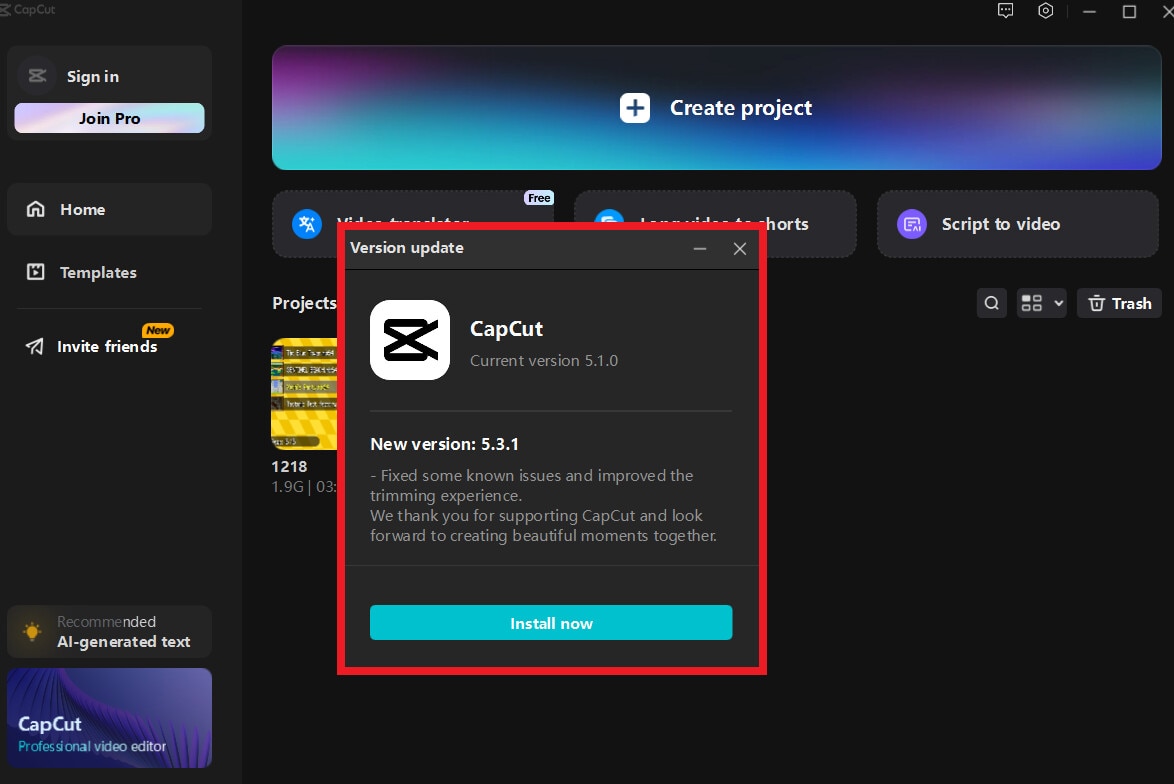
3. Update CapCut to the Latest Version
Also, using an outdated version can cause lag, crashes, or playback issues. Updating often helps reduce lag by fixing known bugs. CapCut updates include performance improvements, bug fixes, and compatibility updates for newer devices.
Here are the steps to upgrade the CapCut app to its latest version:
On Mobile (Android/iPhone):
Step 1: Find the CapCut app in the Google Play Store (Android) or App Store (iPhone).
Step 2: Tap Update if available.
Step 3: Once the updates are finished, open CapCut and test if the lag is fixed.
On PC (Windows/Mac):
Step 1: Open the CapCut desktop app.
Step 2: Go to Settings or About and check for updates.
Step 3: Download and install CapCut’s latest version.
Part 3. Advanced Fixes if CapCut Keeps Lagging
If quick fixes don’t solve the problem, CapCut lag is likely caused by heavy project files, high preview demands, or stored app data. The advanced fixes below reduce the workload on your device and help CapCut process videos more efficiently.
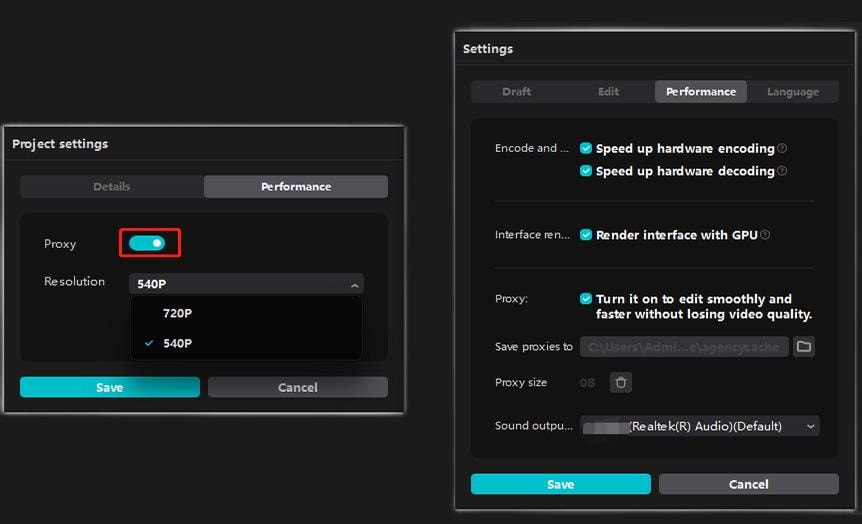
1. Turn On Proxy
Turning on proxy is one of the best ways to fix CapCut lag, especially when editing high-resolution videos like 4K. Proxy creates a low-resolution copy of your video for editing. This makes playback smoother and faster, while the final export stays in full quality.
Follow these steps to turn on Proxy in CapCut:
Step 1: Click an empty space on the timeline (do not select a clip).
Step 2: Go to the Menu and find Settings to access Project Settings.
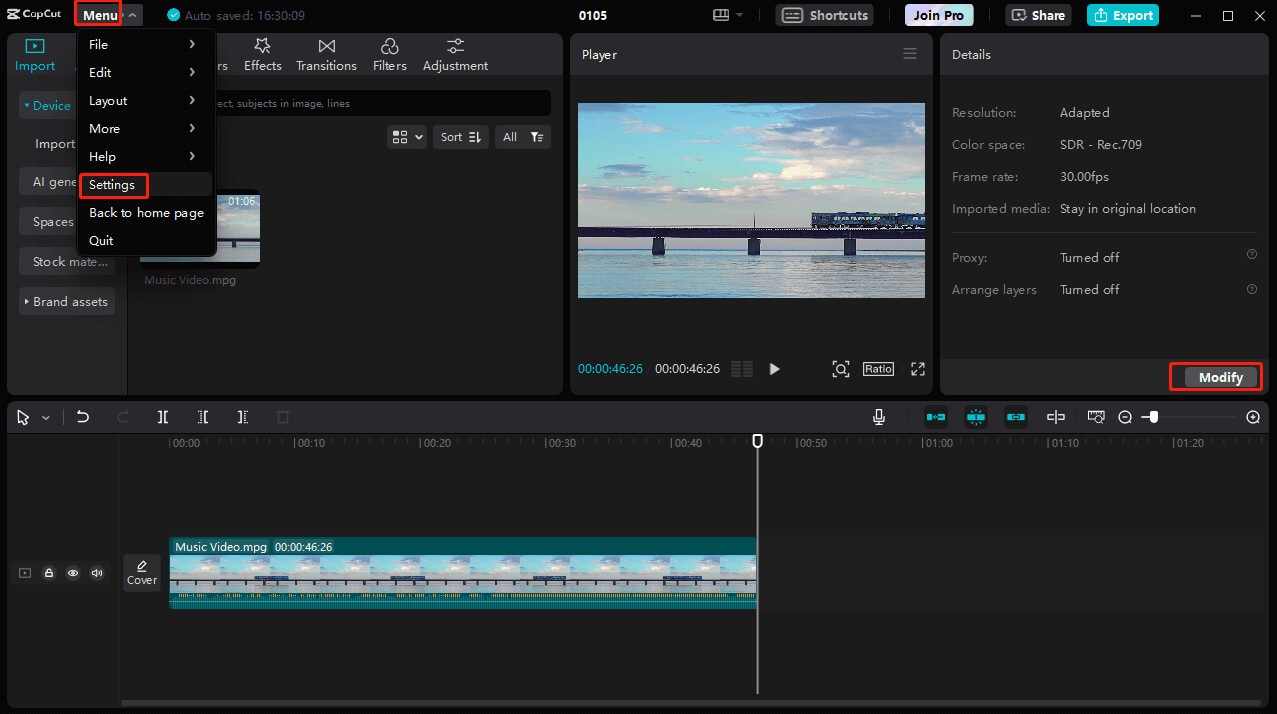
Step 3: Select the Performance tab.
Step 4: Turn on Proxy.
Step 5: Choose 720p or 540p and hit Save. CapCut will now edit using the proxy files, reducing lag without affecting export quality.
2. Adjust Preview Quality
Lowering preview quality reduces the amount of data CapCut has to render in real time. This helps eliminate stuttering and frame drops during playback, especially when working with effects, transitions, or multiple layers.
Here’s how to adjust preview quality:
Step 1: Click the three-line menu above the preview window.
Step 2: Tick Preview.
Step 3: Change Best quality to Best performance.

3. Change Graphics Settings
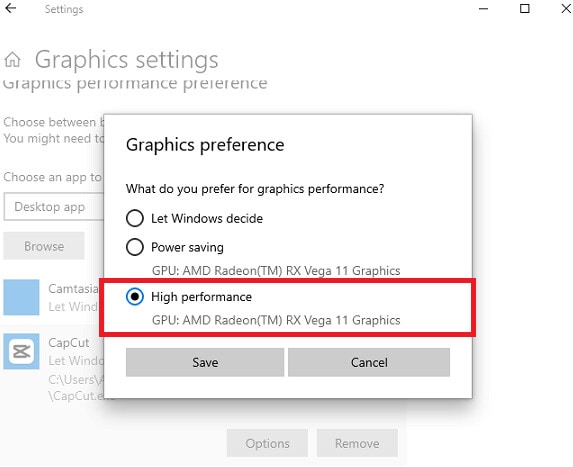
Setting CapCut to employ high performance can fix lag while editing on PC. Adjusting graphics or performance settings allows CapCut to balance quality and speed. Lower settings reduce GPU strain and prevent glitches on devices with limited graphics power, which improves timeline responsiveness.
Here are the steps:
Step 1: Open your computer Settings and go to System.
Step 2: Find Display and click Graphics.
Step 3: Press Browse and select CapCut.exe.
Step 4: Hit Options, choose High performance, and tick Save.
4. Edit in Smaller Project Sections
Large projects with many clips and effects can overwhelm your device. Splitting the project into smaller sections lowers memory usage and makes CapCut run smoother while editing each part.
Split your video manually by following these directions:
Step 1: Input your video and place it on CapCut’s timeline.
Step 2: Move the playhead to where you want to cut and click the Split icon to divide the clip.
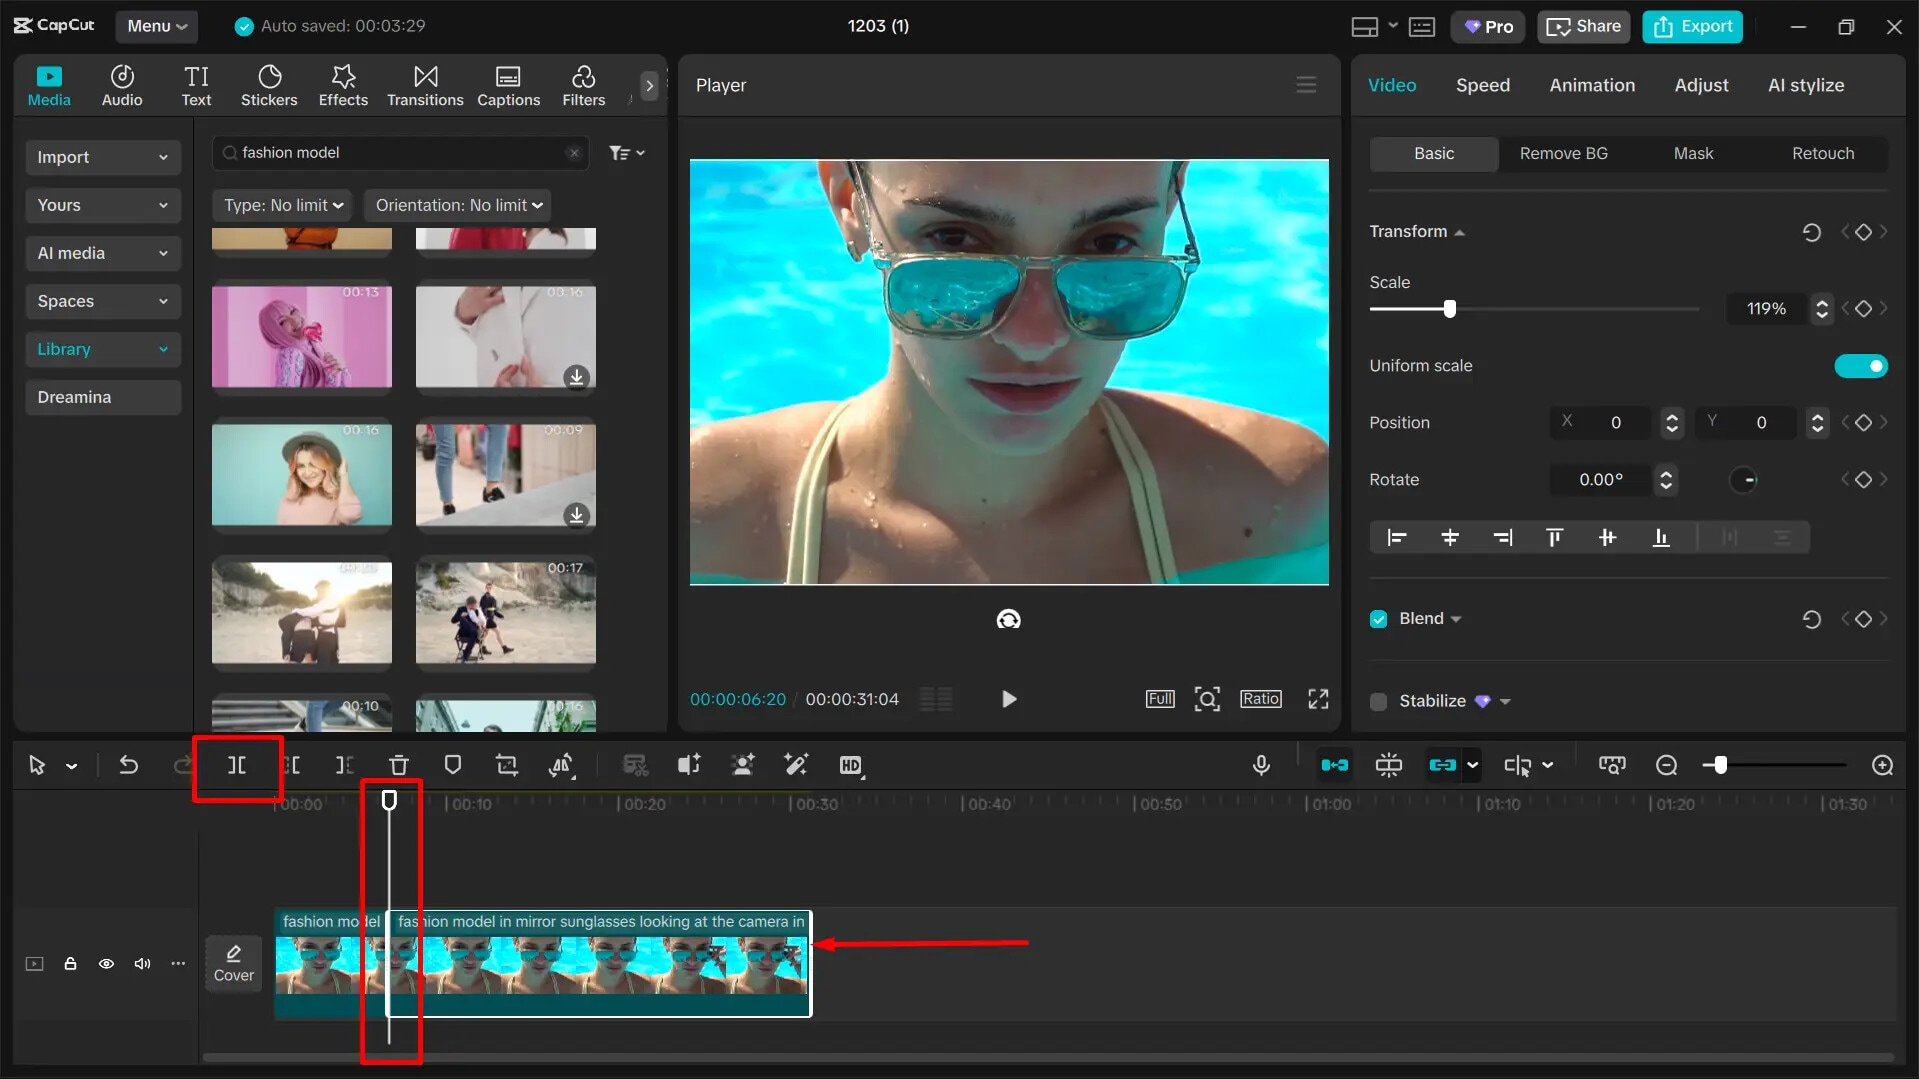
Step 3: Repeat as needed and arrange clips on the timeline.
You can also split your laggy video into parts with AI for convenience:
Step 1: Add or drag your glitchy video to the CapCut timeline.
Step 2: Right-click the clip and select Split scenes. CapCut will automatically divide the video into separate parts.
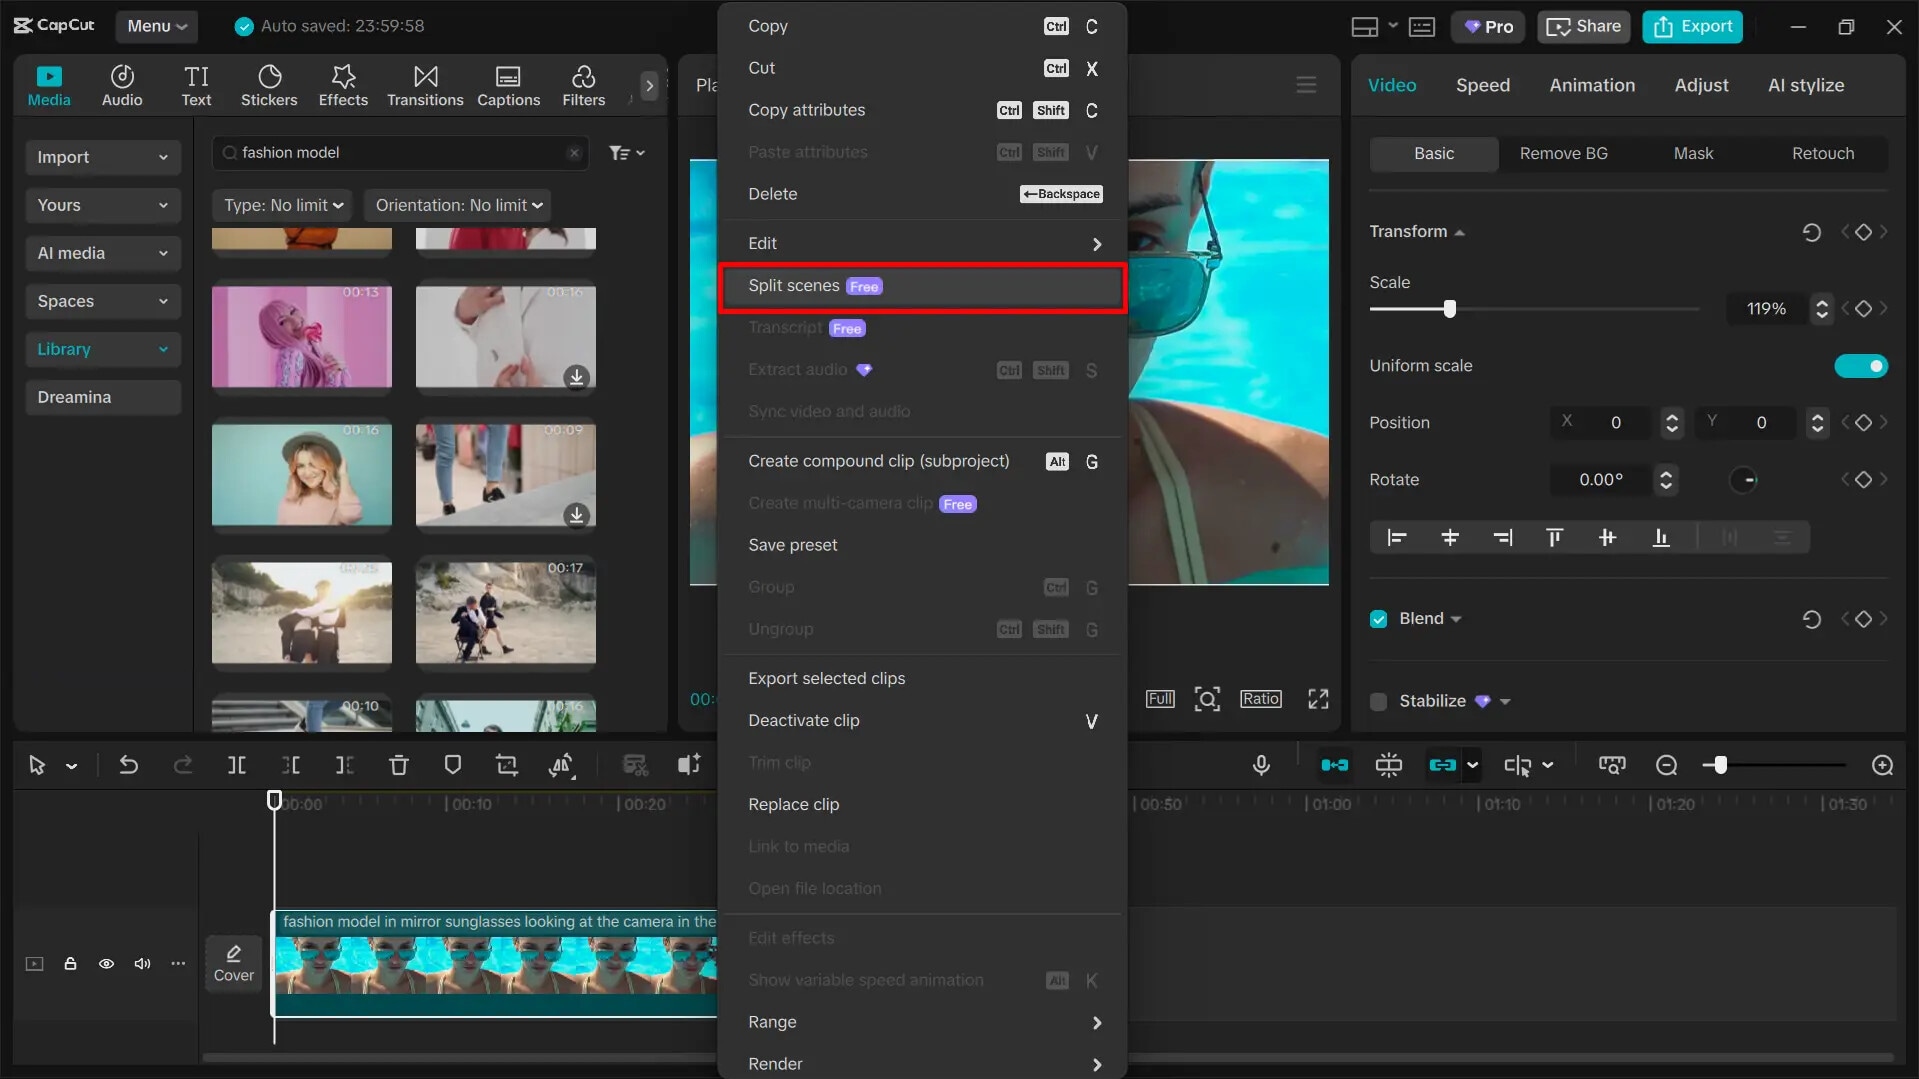
Step 3: You can edit, move, or adjust each section as needed. Check if it removes the lag.
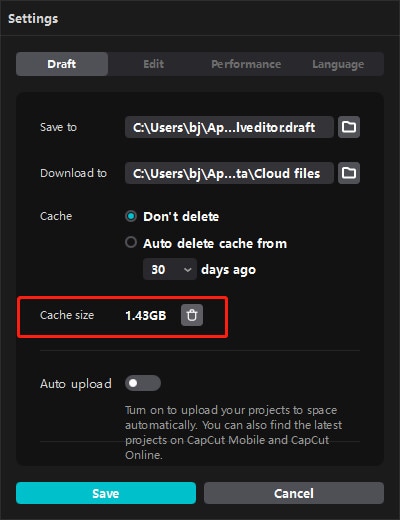
5. Delete CapCut Cache
Over time, CapCut stores temporary files that can slow the app down. Clearing the cache removes unused data, fixes minor glitches, and improves overall playback performance without deleting your projects.
On Windows (CapCut Desktop):
Step 1: Open CapCut Settings.
Step 2: Under the Draft tab, delete the cache and confirm.
Step 3: Click Save.
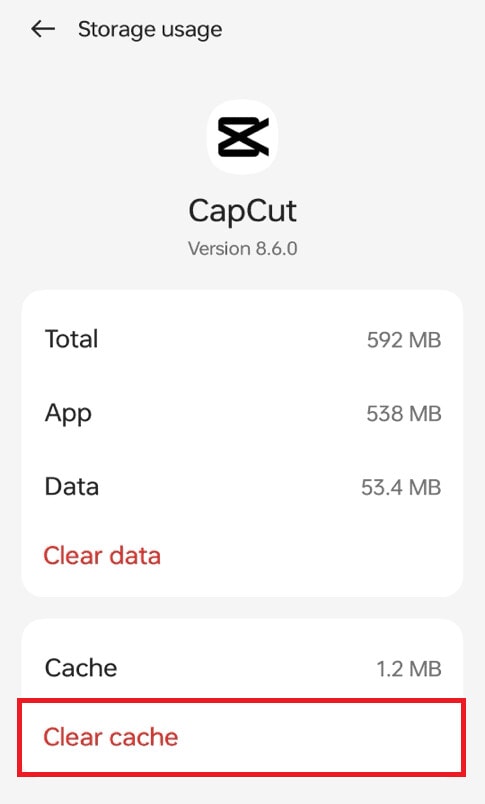
On Android:
Step 1: Open Settings, go to the Apps section and find CapCut.
Step 2: Tap Storage and select Clear cache.
Part 4. CapCut Lagging Due to Corrupted Video Files?
In most cases, CapCut lag is related to device performance, project complexity, or preview settings. However, if lag occurs only when specific clips are added to the timeline and persists despite applying all app- and system-level fixes, the issue may be related to the video files themselves.
CapCut processes every frame in real time during editing. If a video file is incomplete, poorly encoded, or structurally damaged, the app may struggle to read missing or corrupted data. This can result in repeated stuttering, frozen frames, timeline delays, or sudden slowdowns, even when the rest of the project edits smoothly.
You may be dealing with a corrupted video file if:
- CapCut lags or freezes only when a specific clip is present on the timeline
- Playback stutters or stops at the same point repeatedly
- Audio is missing, out of sync, or cuts out unexpectedly
- The clip fails to play correctly in other media players
- CapCut becomes unstable immediately after importing the clip
In these situations, adjusting preview quality, enabling proxy, or clearing cache may no longer be effective, as the problem lies in the video file’s internal structure rather than CapCut’s performance settings.
When Video Repair May Help
Video repair tools are designed to address file-level corruption, such as damaged headers, missing frames, or broken metadata. They are not intended to fix CapCut performance limits, hardware constraints, or software configuration issues.
Repairit Video Repair is one example of a tool that can be used when:
- A video clip fails to play correctly in multiple players
- The file was damaged during recording, transfer, or export
- Lag consistently appears only when editing specific clips
Limitations to be aware of:
- Repair tools cannot fix CapCut bugs, low device performance, or real-time preview overload
- Severely truncated files with missing data may not be fully recoverable
- Online or streaming content must be fully downloaded before repair
When used under the right conditions, repairing corrupted clips before importing them into CapCut can help restore smoother timeline playback.
Step-by-Step Guide:
Step 1: Open Wondershare Repairit and add the corrupted video files.

Step 2: Start the standard repair process and wait for analysis to complete.

Step 3: Preview the repaired clips to confirm playback stability. Save the repaired videos to a new location before importing them into CapCut.

For severely damaged files, Advanced Repair may be used by providing a healthy sample video recorded with the same device and format. Repair results depend on the extent of file damage.
Part 5. Tips to Prevent CapCut Lag in the Future
Want to avoid lag, stuttering, or freezes in your future CapCut projects? Follow these important tips to keep your editing fast and responsive.
- Stick to widely supported formats like MP4 or MOV for easier editing.
- Keep videos at manageable resolutions. Avoid editing huge 4K files on low-end devices. Also, consider proxy or downscaling.
- Check if your device has enough memory and storage to handle CapCut editing.
- Free up resources by shutting down background apps while using CapCut.
- Keep the CapCut app updated to get performance improvements and bug fixes.
- Remove temporary files to prevent slowdown from accumulated data.
- Make sure clips aren’t corrupted before editing to avoid timeline freezes or stuttering.
- Split large projects into smaller sections or shorter parts to reduce lag.
- Utilize lower preview quality or high-performance GPU PC settings for a no-lag playback.
Conclusion
CapCut lag can be caused by a range of factors, including limited device resources, large or high-resolution projects, background apps, and preview settings. In many cases, simple fixes—such as restarting the app, enabling proxy, lowering preview quality, or clearing cache—are enough to restore smooth editing performance.
When lag persists only with certain clips and continues across different devices or players, the issue is more likely related to video file integrity. In such cases, repairing the damaged files before editing may help prevent timeline stuttering and playback freezes.
Identifying whether CapCut lag is caused by performance limitations or file-level issues is key to choosing the right solution and avoiding unnecessary steps.
FAQs
-
Why does CapCut lag even with small video files?
CapCut can lag even with small video files if your device has low RAM, insufficient processing power, or limited storage. Background apps using system resources, temporary glitches, or an outdated version can also be the root of CapCut lagging issues. -
Why is CapCut lagging during preview but not during export?
Preview lag occurs because CapCut renders the video in real time as you edit. This requires more CPU, GPU, and RAM than exporting. During export, the app processes the video sequentially and does not need to render frames in real time, so lag disappears. -
Why does CapCut lag after adding effects or transitions?
Effects, filters, transitions, and overlays increase the app’s workload. CapCut has to render them in real time on the timeline. This can cause slower playback, skipped frames, or stuttering if the device or app cannot handle the extra processing.