The cinematic label appears on slow zooms, black bars, and muted color grades. However, those effects alone never turn an ordinary clip into cinematic footage. True cinematic results come from technical choices established through traditional film production.
These choices apply to footage you shoot or license from elsewhere. This guide explains cinematic footage and where to source it properly. Shooting methods and practical enhancement techniques follow for better final results.
In this article
Part 1. What Is Cinematic Footage?
Three terms are often used interchangeably, although each carries a different meaning. Sorting them out first makes every later decision easier, since the differences are technical rather than stylistic. The comparison below clearly draws those distinctions:
Cinematic Footage vs. Regular Video
Regular video is captured to look correct straight out of the camera, with contrast and saturation already baked in. Cinematic capture deliberately holds back, recording a flatter image that carries more information than the screen shows. The finished look arrives in the grade rather than at the sensor.
Cinematic Footage vs. RAW Footage
RAW is a capture format, not an aesthetic. Cinematic RAW footage stores sensor data with minimal processing, which leaves white balance and exposure adjustable after the fact. The files are enormous and unwatchable before grading, so RAW is a means to a cinematic result rather than the result itself.
Cinematic Footage vs. Stock Video
Stock is licensed material shot by someone else for general use. Cinematic stock video is the subset filmed to film specifications, usually at 24fps in log with a shallow depth of field. Ordinary stock is often shot at 30fps with everything in focus, which will not cut against your own footage.
Why Cinematic Videos Look More Professional
Cinematic videos look professional because every visual choice feels consistent. When frame rate, shutter speed, color, and lens selection remain steady, viewers focus on the subject rather than the camera. Amateur footage often breaks that consistency, making the video feel less polished even when viewers cannot identify the exact problem.
Key Elements of Cinematic Footage
| Element | Technical Marker |
| Frame Rate | 24 or 25fps, producing the motion signature of film |
| Shutter Angle | 180 degrees, placing shutter at double the frame rate |
| Capture Profile | Log or flat, holding detail in both sky and shadow |
| Depth of Field | Shallow enough to separate a subject from its background |
| Bit Depth | 10-bit where available, so grading does not band the image |
| Aspect Ratio | Decided at capture rather than cropped in afterward |
Part 2. Types of Cinematic Footage To Look Into
Categories matter because each type of cinematic footage has different shooting constraints and licensing requirements. Knowing where a clip belongs helps set clear expectations. These 9 types cover most available options:
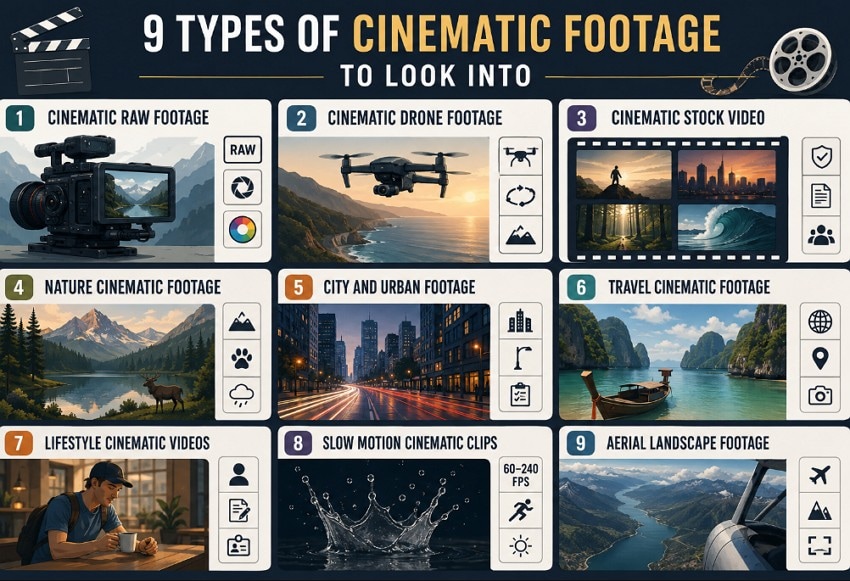
- Cinematic RAW Footage: Sensor-level captures in formats such as BRAW, R3D, and ProRes RAW. Storage and processing demands are heavy, but exposure and white balance stay fully recoverable.
- Cinematic Drone Footage: Aerial clips flown deliberately slowly, usually reveals, orbits, and top downs. Cinematic drone footage lives or dies on stick control rather than on the aircraft.
- Cinematic Stock Video: Licensed clips shot to film specifications by professional crews. The premium libraries cut against original footage far more convincingly than free ones.
- Nature Cinematic Footage: Landscapes, wildlife, and weather, typically shot long and slow. Patience matters more than gear, since the subject sets the timing.
- City and Urban Footage: Streets, architecture, and traffic, often at blue hour when practical lights balance the sky. Permits become an issue quickly for commercial use.
- Travel Cinematic Footage: Location-led material combining wide establishing shots with cultural detail. Sequences work better than isolated pretty clips.
- Lifestyle Cinematic Videos: People doing ordinary things, shot with shallow depth and natural light. Model releases are the licensing trap here.
- Slow Motion Cinematic Clips: Recorded at 60 to 240 fps and conformed down to 24. Higher frame rates need considerably more light to expose properly.
- Aerial Landscape Footage: Wide terrain shots at altitude, distinct from drone work in that helicopters and planes are often involved. Scale reads better here than speed does.
Part 3. Where to Download Cinematic Stock Video
Licensing terms vary far more than the marketing suggests, and the difference between free and premium is rarely just quality. Read the license attached to each clip rather than the one on the homepage. Both tiers earn a place in a working library.
Method 1. Free Stock Footage Websites
If shooting is not an option, cinematic footage is still within reach. These free stock footage websites are worth exploring:
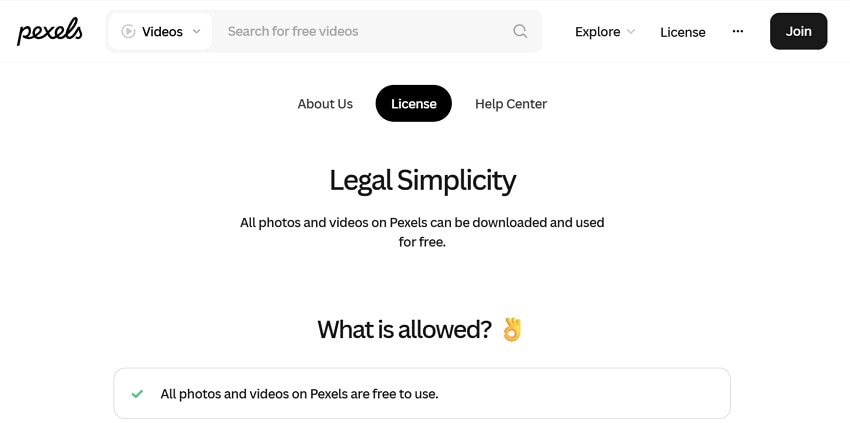
Tool 1. Pexels Videos
Community-contributed clips run under a single permissive license. The Pexels license allows commercial use with no attribution and permits modification, while barring resale of unaltered files and redistribution on rival stock platforms.
Tool 2. Pixabay Videos
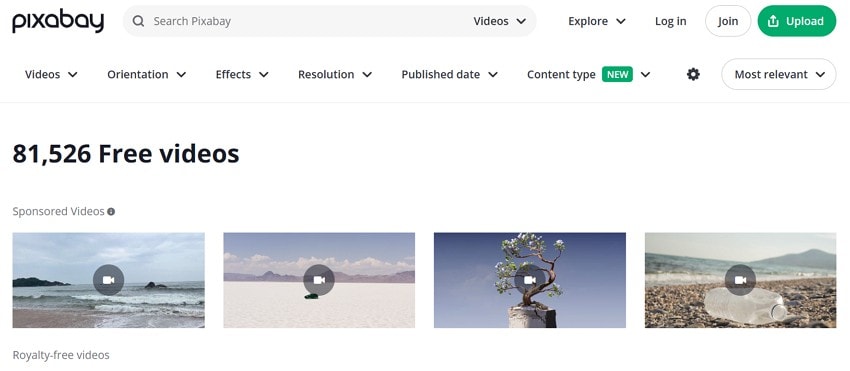
A large mixed library covering live action, motion graphics, loops, and green screen. The Pixabay Content License is similarly permissive, though full-resolution downloads require a free account.
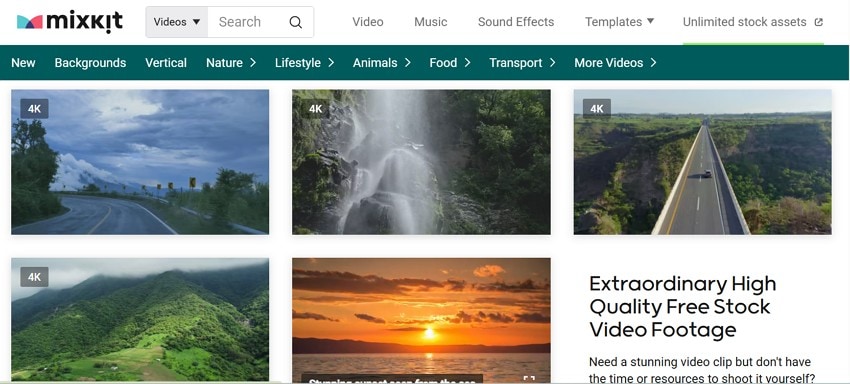
Tool 3. Mixkit
Smaller and more curated, with video, music, and templates in one place. Mixkit runs two separate licenses, and only clips under the Free License clear commercial use. The label on each individual clip therefore decides what you can do with it.
| Site | Pros | Cons | Best For |
| Pexels | No account needed, clear single license | Quality varies widely by contributor | Quick B-roll and background plates |
| Pixabay | Huge range including graphics and loops | Account required for full resolution | Niche or unusual search terms |
| Mixkit | Curated, no watermarks, bundled audio | Two licenses, commercial use not universal | Social cuts and template-led edits |
Method 2. Premium Stock Footage Websites
For higher production value and exclusive content, the following premium cinematic stock video websites become the next logical choice:
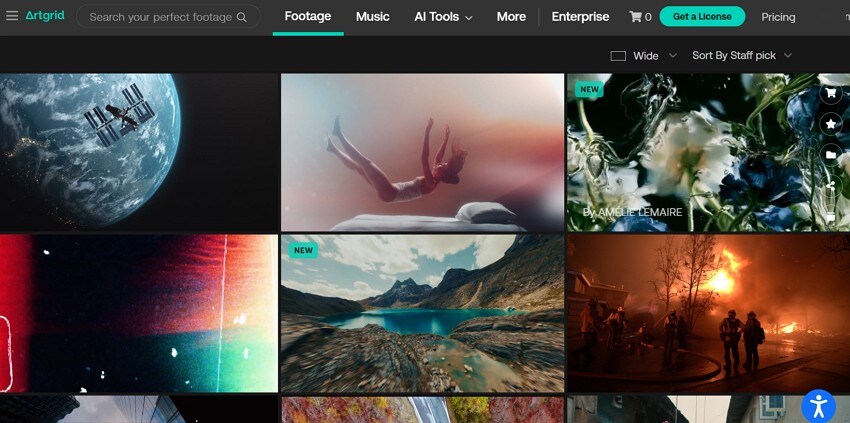
Tool 1. Artgrid
This platform offers story-driven footage shot by working cinematographers, available up to 8K and in RAW. Artgrid has been folded into Artlist, and its licenses are perpetual, meaning downloaded clips stay usable after a subscription lapses.
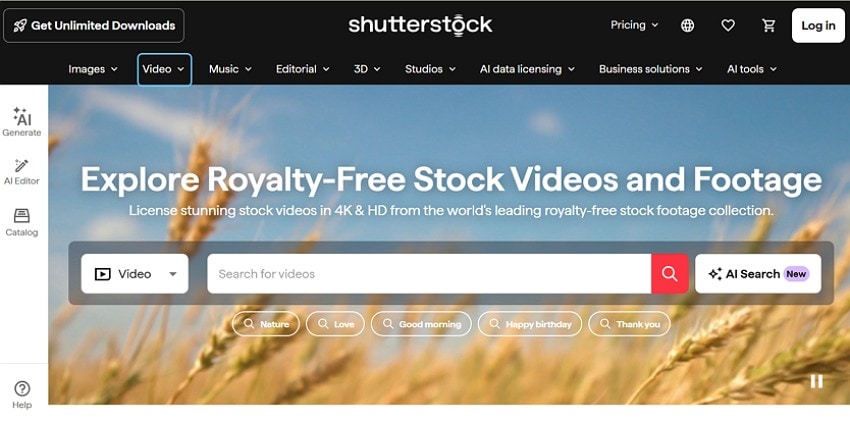
Tool 2. Shutterstock
The broadest catalog of the three, with both subscription and single-clip purchasing. Coverage depth is the draw, though quality ranges from film-grade to distinctly ordinary within the same search.
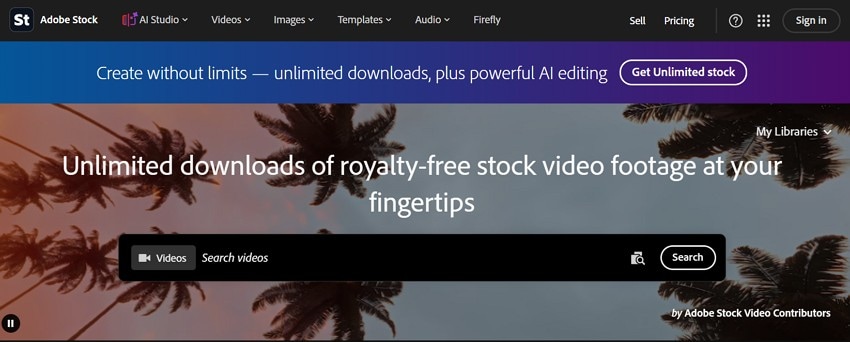
Tool 3. Adobe Stock
Licensing happens inside Premiere Pro and After Effects rather than in a browser, which removes the download-and-import step entirely. Clips can be bought individually, on credits, or by subscription.
| Site | Pros | Cons | Best For |
| Artgrid | Consistently film-grade, perpetual license | Smaller library, annual billing | Narrative and brand work |
| Shutterstock | Enormous catalog, flexible purchasing | Uneven quality, higher per-clip cost | Hard-to-find subjects |
| Adobe Stock | Native editor integration, watermarked previews | Best value only inside Creative Cloud | Editors already on Adobe tools |
Part 4. How to Shoot Proper Cinematic Footage
Proper technique makes cinematic footage repeatable. Follow these steps in order, since each one builds on the previous choice:
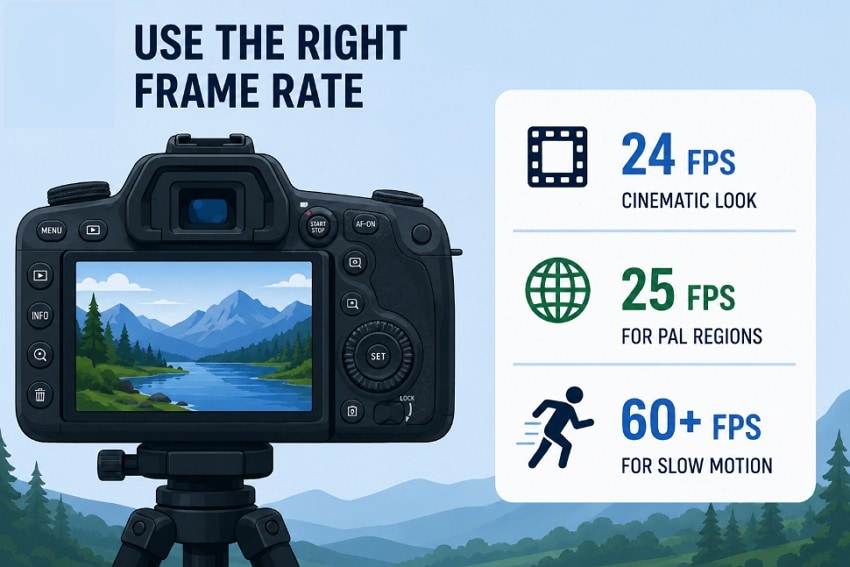
Use the Right Frame Rate
Shoot 24fps for anything intended to look like film, or 25fps where you are delivering into a PAL region. Record at 60fps or higher only for shots you plan to slow down. Footage conformed to 24 has to be captured faster than it plays.
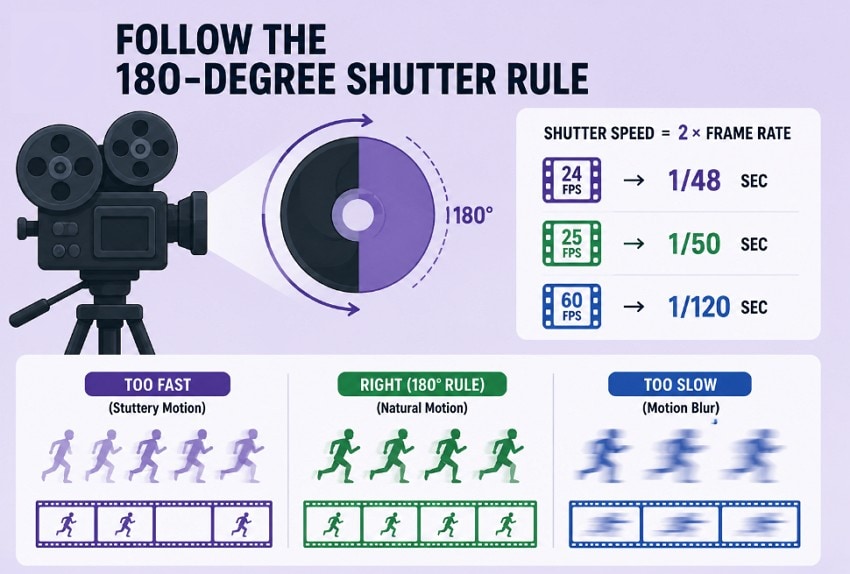
Follow the 180-Degree Shutter Rule
The rule comes from rotary shutters on film cameras, where a half-open disc exposed each frame for half its duration. Translated to digital, it means setting shutter speed to roughly double the frame rate. Faster shutters make motion stutter, while much slower ones smear it into mush.
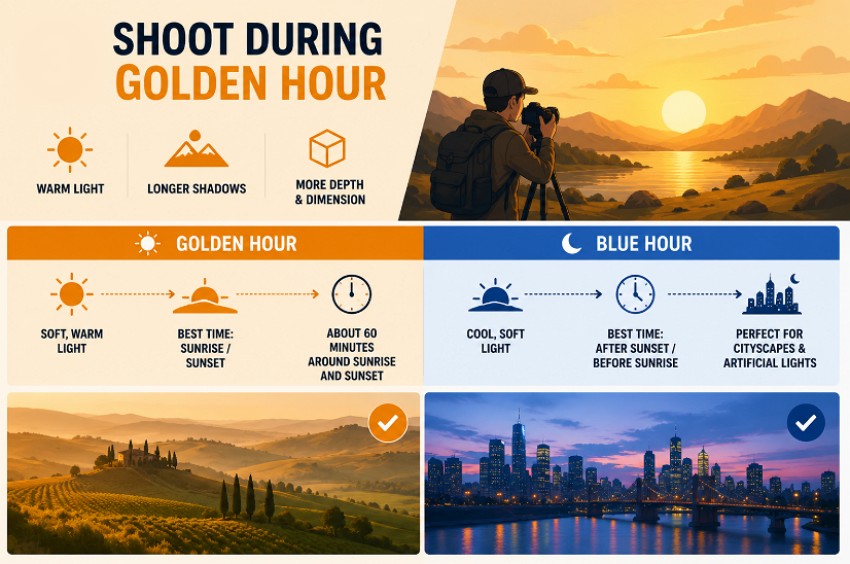
Shoot During Golden Hour
Golden hour gives cinematic stock video a warm, professional look. The low sun creates soft light and long shadows that add depth, while the blue hour after sunset produces cooler tones that suit city scenes particularly well.
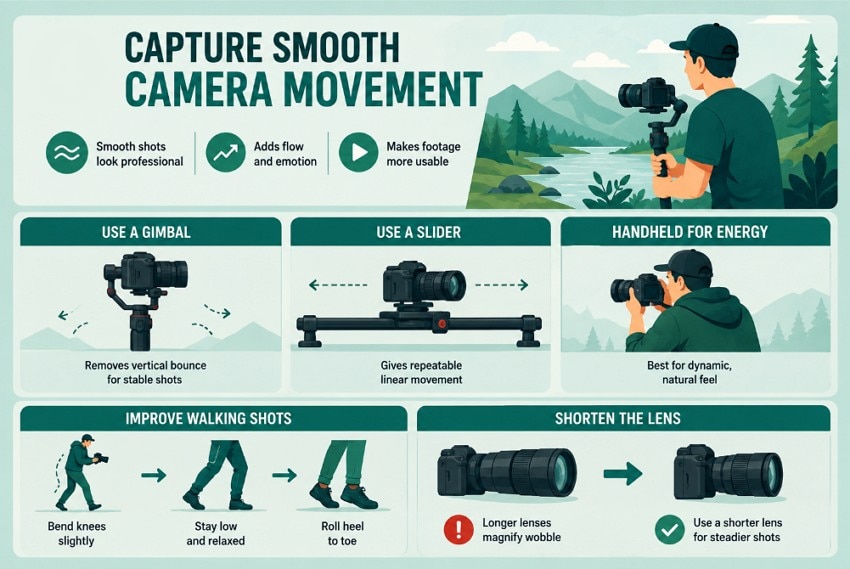
Capture Smooth Camera Movement
A gimbal removes vertical bounce, a slider gives repeatable linear moves, and handheld suits energy over polish. Walking shots improve immediately when you bend your knees slightly and roll heel to toe. Longer lenses magnify every wobble, so shorten the lens before you fight the shake.
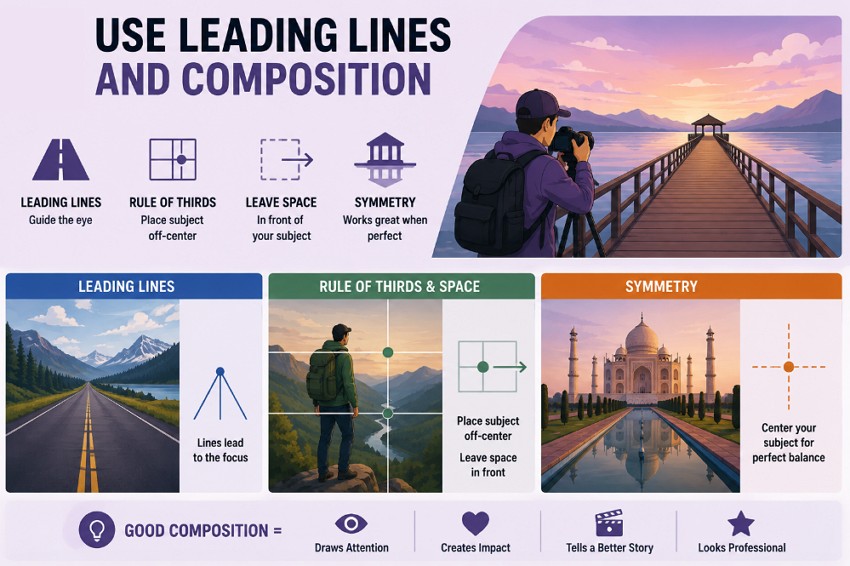
Use Leading Lines and Composition
Roads, fences, rivers, and architecture all pull the eye toward whatever sits at their vanishing point. Place your subject off-center on a thirds intersection and leave the space they are moving into rather than the space behind them. Symmetry works too, provided it is exact.
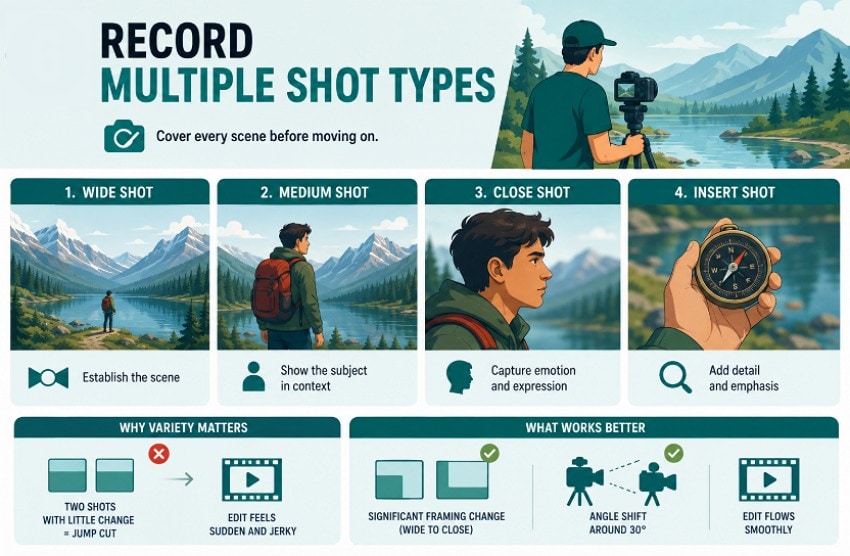
Record Multiple Shot Types
Capture cinematic drone footage with a mix of wide, medium, close, and detail shots for every scene. Varying the framing or changing the angle by about thirty degrees creates smoother edits and avoids distracting jump cuts.
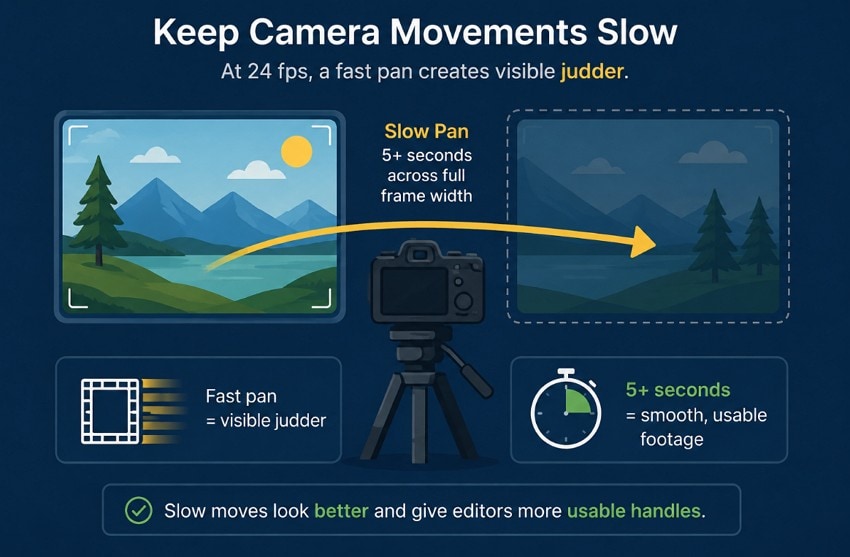
Keep Camera Movements Slow
At 24fps, a fast pan produces visible judder, because the sensor cannot sample the motion densely enough. A safe guideline is taking at least five seconds to pan across a full frame width. Slow moves also give an editor usable handles at both ends.
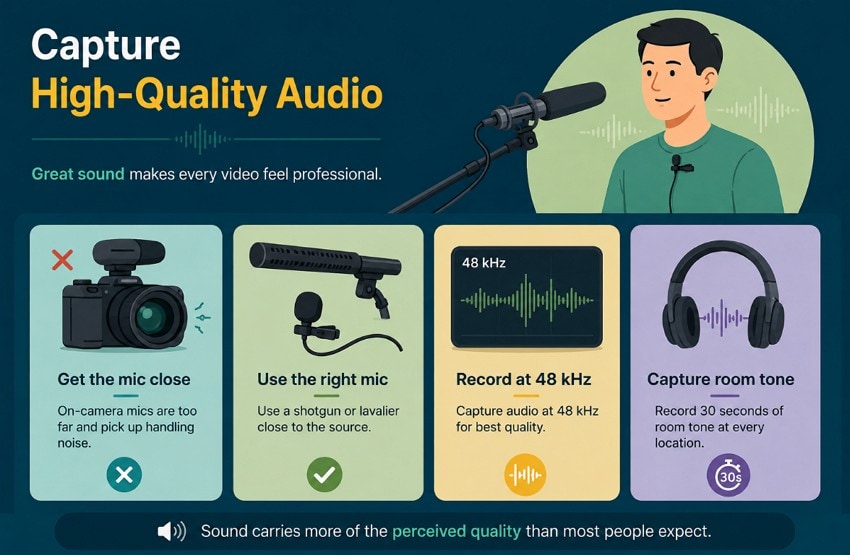
Capture High-Quality Audio
On-camera microphones sit too far from the subject and pick up handling noise from the operator. Use a shotgun or lavalier close to the source, record at 48kHz, and capture thirty seconds of room tone at every location. Sound carries more of the perceived quality than most people expect.
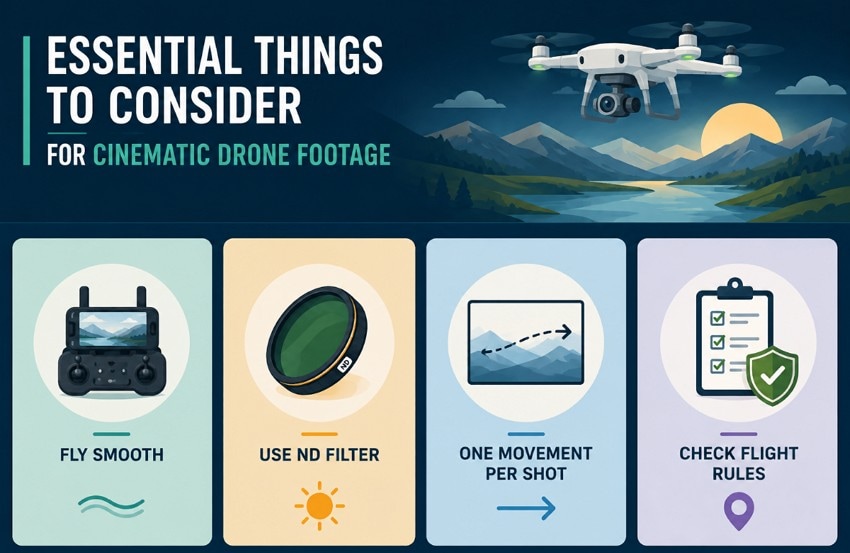
Essential Things to Consider When Capturing Cinematic Drone Footage
Fly in the cine or smooth mode your controller offers, since it damps stick input into gradual acceleration. Fit an ND filter so the drone can hold the correct shutter in daylight. One movement per shot works best for cinematic footage, and local flight rules should be checked before every launch.
Part 5. How to Improve Cinematic Footage Quality
Some cinematic RAW footage look wrong despite being framed and exposed correctly. The cause is usually technical rather than creative, which also means it is often fixable after the fact. Therefore, diagnosing it first saves you from grading a problem that grading cannot solve.
Why Cinematic Videos Sometimes Look Blurry
- High ISO in Low Light: Sensor gain introduces grain that masks fine detail, particularly in shadows and skies.
- Heavy Compression: Downloaded or re-encoded clips lose data permanently, producing blocking in gradients.
- Missed Focus: Shallow depth of field is unforgiving and autofocus hunting ruins otherwise usable takes.
- Slow Shutter With Movement: Motion smears when the shutter stays open too long relative to the action.
- Upscaled Older Sources: Archive footage stretched to a modern timeline shows every limitation of its original resolution.
Enhance Cinematic Footage With Repairit Video Enhancer

Repairit - AI Video Enhancer
Enhance blurry, compressed, and low-resolution videos before final editing.
-
AI video enhancement. Improve clarity, reduce blur, and upscale supported videos for cleaner edits.
-
Useful for cinematic footage. Helps clips affected by compression, noise, older sources, or soft detail.
-
Preview before export. Check enhancement results before saving the processed video.
Not every weak cinematic stock video deserves deleting. A shot can be perfectly framed and still fail on technical grounds, whether from sensor gain, an aggressive re-encode, or an aging source tape. Repairit Video Enhancer addresses that narrow category, reconstructing pixel detail compression discarded instead of sharpening whatever edges survived. Composition is never the fault in those cases, and rescuing a clip usually beats sourcing a replacement.
Upscaling runs up to 4 times the source resolution. That lets a 1080p clip sit inside a 4K sequence without looking soft against everything around it. The desktop application carries no cap on file count or size, while the browser tool limits each upload to 10 megabytes. Results depend on how much information the original still holds.
Key Features
- Frame-by-Frame Reconstruction: Analyzes each frame individually and rebuilds pixel detail lost to compression or gain.
- Motion Blur Removal: Reduces smearing in handheld and panning shots where shutter and movement were mismatched.
- Archive and Old Tape Restoration: Lifts older recordings and digitized tape toward a resolution that cuts against modern footage.
Guide to Enhance Cinematic Footage
Weak cinematic footage can still work with the right adjustments. Follow the 3 steps below to improve quality before the clip reaches your final edit:
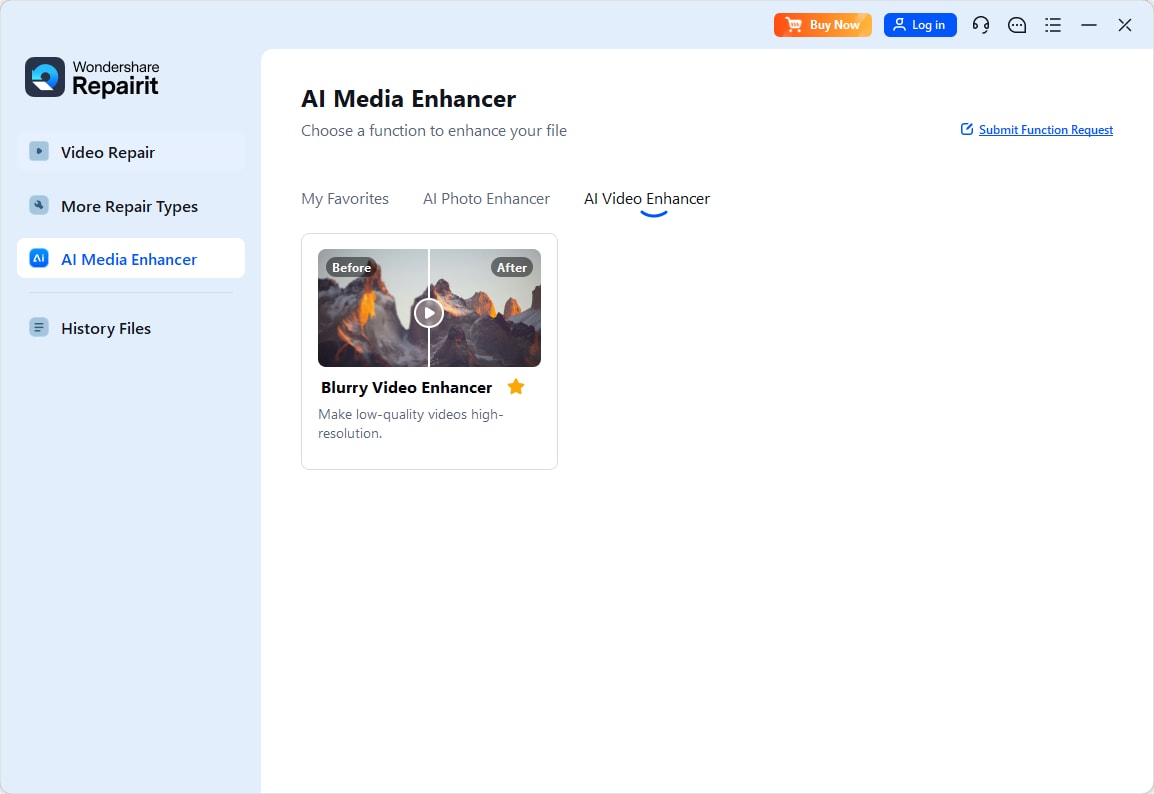
Step 1. Open the Blurry Video Enhancer
From AI Media Enhancer > switch to the AI Video Enhancer tab > select Blurry Video Enhancer.
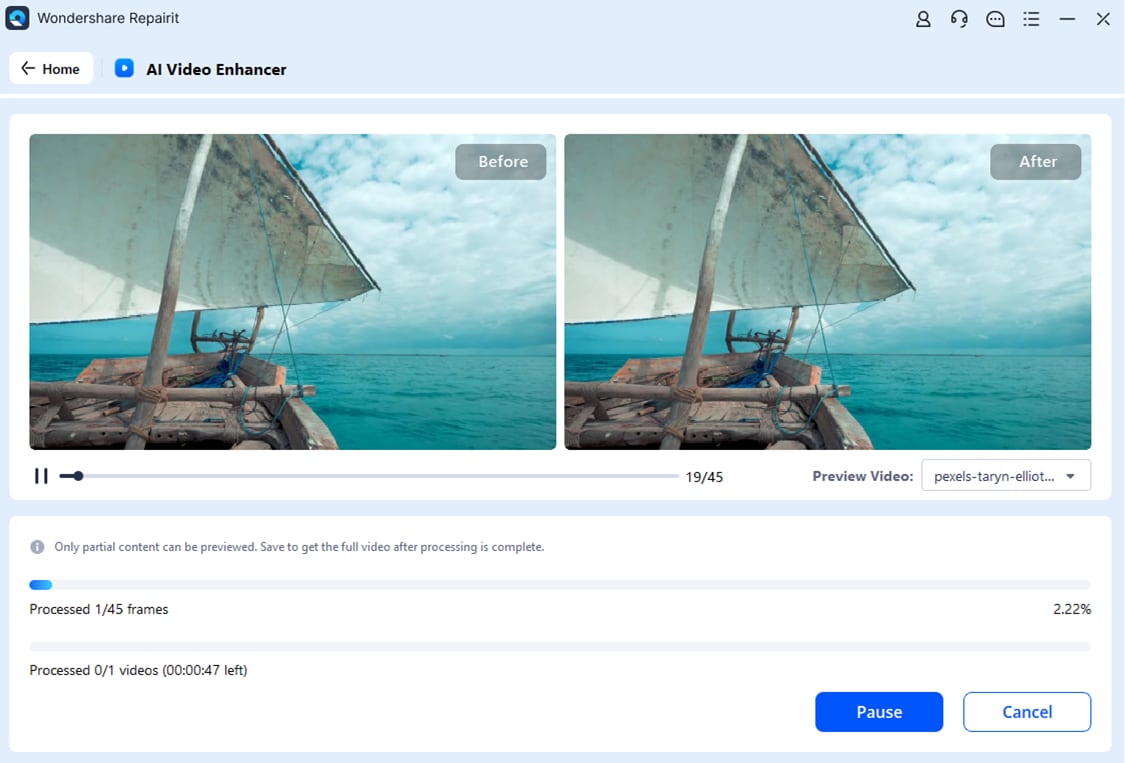
Step 2. Review the Enhancement Preview
Compare the Before and After preview while Repairit enhances the video and tracks the processing progress.
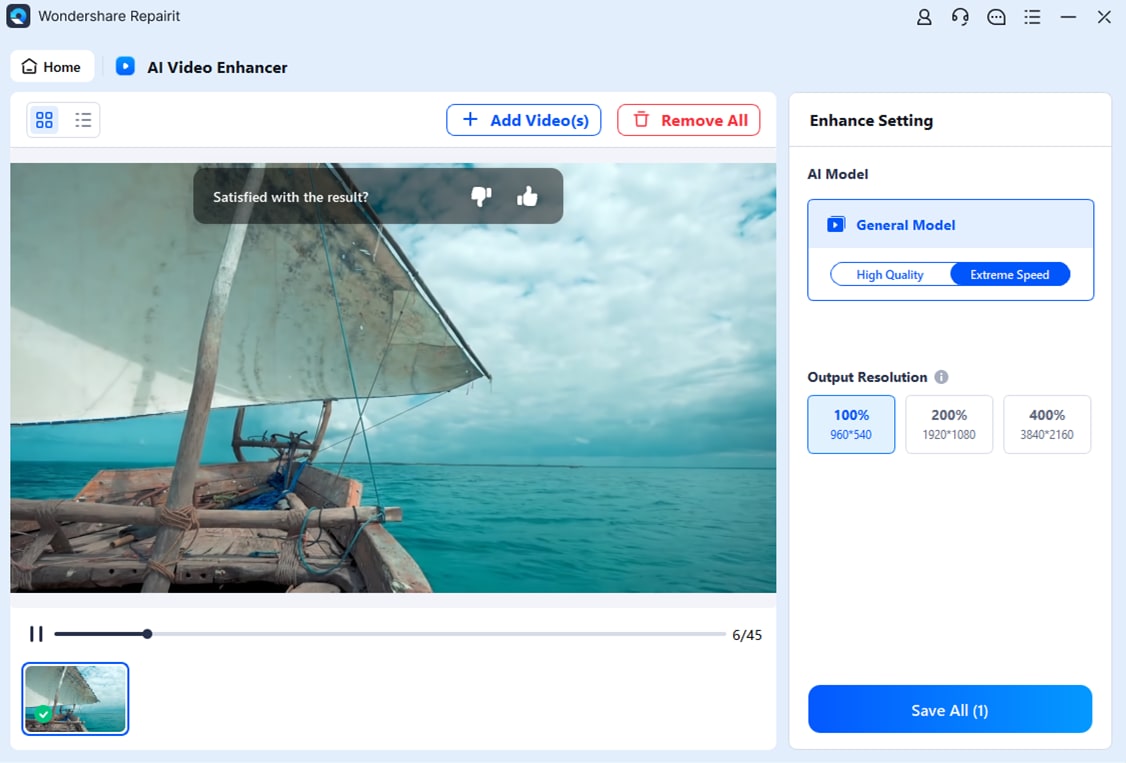
Step 3. Select the Output Settings and Save
Choose the preferred AI Model and Output Resolution > preview the enhanced clip, then click Save All to export it.
Part 6. Tips for Creating Perfect Cinematic Videos
Creating polished cinematic footage takes more than well-shot clips. These 8 practical habits help shape them into one cohesive sequence:
Plan Every Shot Before Filming
Build a reference board of frames you want to emulate before the shoot rather than a schedule of locations. Knowing the images you are chasing stops you from filming everything and choosing nothing.
Tell a Visual Story
Even a 60-second piece needs a beginning, a change, and a close. Sequences of shots that build on each other always outperform a collection of individually strong frames.
Keep Camera Movement Intentional
One movement per shot is the discipline worth holding. Combining a pan with a tilt and a zoom in the same take reads as indecision rather than as coverage.
Use Natural Light Whenever Possible
Window light and open shade flatter faces more reliably than most portable lighting kits. Mixing daylight with tungsten in the same frame creates color casts that resist correction later.
Avoid Overusing Transitions
Straight cuts handle almost everything a sequence needs. Where a transition genuinely helps, a match cut or a speed ramp does more than any preset in the effects panel.
Maintain Consistent Color Grading
Balance every clip against a reference frame first, then apply one look across the whole sequence. Judge the result on scopes rather than on a screen you have been staring at for hours.
Record More B-Roll Than You Need
Editors run short of cutaways long before they run short of main coverage. Shooting three or four times as much supporting material as you expect to use is normal, not excessive.
Export Videos in High Quality
Keep a high-bitrate master alongside whatever compressed copy a platform receives. Re-encoding from a delivery file rather than the master compounds quality loss every time you repurpose the clip.
Conclusion
To conclude, cinematic footage depends on the right frame rates, shutter settings, composition, smooth camera movement, and clear audio. Licensed stock clips can also help complete scenes you cannot capture yourself. If your footage looks blurry or lacks detail, Repairit Video Enhancer can help improve its quality before the final edit.
Frequently Asked Questions
-
Does shooting in 4K make footage cinematic?
No, resolution and cinematic quality are unrelated. A 1080p clip at 24 fps with correct shutter and a considered composition beats a 4K clip shot at 60 fps on automatic settings. -
Is free cinematic stock video safe for client work?
Usually, though it depends on the individual clip rather than the site. Check whether the license covers commercial use and remember that identifiable people and visible brands may need releases the platform does not provide. -
Can Repairit improve cinematic footage that looks blurry or low-quality?
Yes. Repairit's AI Video Enhancer can reduce blur, improve clarity, and upscale resolution. Preview the result first, since enhancement cannot fully restore details missing from the original recording.