

Does anyone have a solution for keeping this data a little more permanently attached to the clip? My first thought was to do something in fusion when I need to stabilize, but the quick stabilization from the edit page doesn't appear to have a fusion effect counterpart. I'm willing to pay for a third party solution if needed- I'd rather only set track points and go the manual route when I really have to." - Reddit
Most people are here looking for a DaVinci Resolve stabilizer to fix shaky footage and create smooth, professional videos. And many of you face issues when their stabilized clips revert after editing. If you're one of those people who's struggling to maintain stabilization, this guide will show you how to use the DaVinci Resolve stabilizer. Let's get started.
Perform Repairit to Stabilize DaVinci Resolve Video
 Security Verified. Over 7,302,189 people have downloaded it.
In this article
Part 1. DaVinci Resolve Video Stabilization Features You Should Know
Video stabilization in DaVinci Resolve is a feature that helps remove unwanted camera shakes and create smooth, steady footage. DaVinci Resolve’s stabilizer analyzes motion data and applies adjustments. It offers multiple stabilization modes, allowing you to fine-tune the level of correction based on your needs.
DaVinci Resolve has three stabilization modes to fix shaky footage in different ways:

- Translation Mode. Focuses on simple movements like panning and tilting. It’s a basic option and may not be enough for strong camera shakes.
- Similarity Mode. Handles more movements, including pan, tilt, zoom, and rotation. It’s great for shots with moderate motion.
- Perspective Mode. The most advanced mode, correcting perspective shifts and complex camera movements. Best for footage with a lot of motion.
Stabilization Controls
DaVinci Resolve also provides easy-to-use controls for adjusting stabilization:
- Stabilize Button. Starts the stabilization process with default settings.
- Stabilization Toggle. Turn stabilization on or off as needed.
Additional Features
- Camera Lock. Makes the footage look like it was shot with a tripod by removing all motion.
- Zoom. Removes black bars that appear after stabilization for a cleaner look.
- Cropping Ratio. Adjusts how much the video is cropped to avoid black bars.
- Smooth. Controls how natural the stabilized movements appear.
Part 2. How to Stabilize Video in DaVinci Resolve?
The best way to get stable footage is to prevent shakiness while filming. But if that’s not possible, you can use DaVinci Resolve’s stabilization tools in either the Edit page or the Color page.
1. Preparing for Stabilization: Before Filming
Before pressing record, you can take steps to make stabilization easier later:
- Shoot at a higher resolution and frame rate to give DaVinci Resolve more data to work with.
- Understand the different stabilization modes (Translation, Similarity, Perspective) so you can choose the right one for your footage.
- Use features like a camera lock to help keep shots steady.
2. Preparing for Stabilization: After Filming
Once you have your footage, review your clips to identify shaky shots that need stabilization. Focus on the most important clips and consider how stabilization will affect the overall look of your project. This preparation ensures better results when stabilizing footage in DaVinci Resolve.
3. Stabilizing Video in DaVinci Resolve: Edit Page

To stabilize the video in DaVinci Resolve using the Edit page:
- Select the clip in the timeline.
- Open the Inspector window and enable the Stabilization toggle (red switch).
- Choose the stabilization mode (Perspective, Similarity, or Translation).
- Adjust Cropping Ratio, Smooth, and Strength as needed.
- Click Stabilize and review the results.
4. Stabilizing Video in DaVinci Resolve: Color Page

To stabilize the video using the Color page:
- Make sure your playhead is over the clip you want to stabilize.
- Go to the Color page and find the Tracker icon in the toolbar (it looks like a target).
- In the Tracker panel, click the Stabilizer icon (a small camera with shaky lines).
- Adjust the stabilization settings similar to the ones in the Inspector panel.
- Click Stabilize and review the results.
Stabilize DaVinci Resolve Video
Security Verified. Over 7,302,189 people have downloaded it.
More related articles to Adobe
How to Stabilize Video in After Effects?
How to Stabilize Videos in Adobe Premiere Pro [100% Working]
Part 3. One Time DaVinci Resolve Stabilizer Worth to Try!
Are you struggling with shaky footage and looking for an effective DaVinci Resolve stabilizer? Well, Repairit Video Stabilizer V6.5 is the number one candidate for you! Repairit Video Stabilizer V6.5 is a video enhancement tool that can stabilize footage with advanced repair features and professional mode options. It automatically detects unwanted shakes and smooths out movements for a more polished and professional look.
Key Features of Repairit Video Stabilizer V6.5
- AI-Powered Stabilization. Uses intelligent algorithms to detect and correct shakiness with minimal effort.
- One-Click Process. No need to adjust complex settings; simply upload your video and let the tool stabilize it.
- Fast and Efficient. Processes videos quickly without affecting quality, saving time for editors.
- Multi-Format Support. Compatible with popular video formats, ensuring flexibility for different projects.
- Preserves Original Quality. Stabilizes footage without compromising resolution or sharpness.
- No Learning Curve. Beginner-friendly interface makes it easy to use, even if you have no prior experience with video stabilization.
How to Use Repairit V6.5 to stabilize DaVinci Videos?
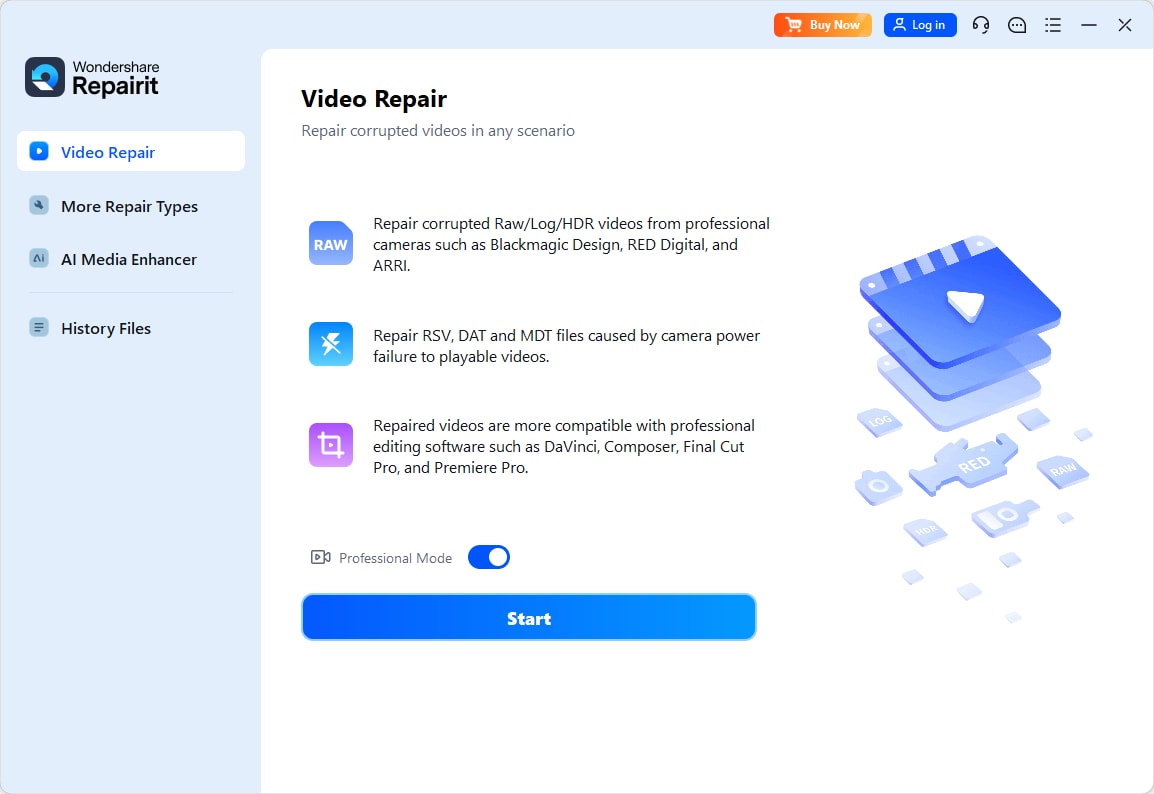
Step 1. Download and launch Repairit, then select "Professional Mode." Click "Start" to enter advanced repair mode. On the main screen, click "Add" to upload your unstabilized DaVinci footage, or simply drag and drop it into the box.
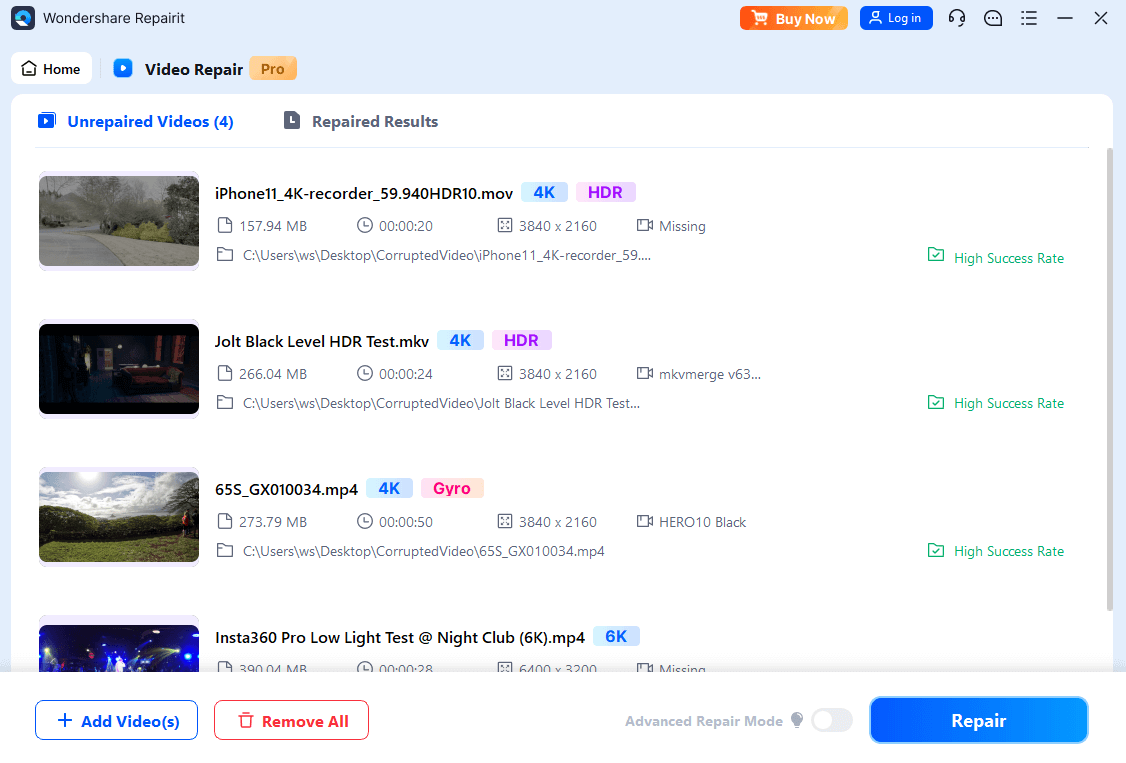
Step 2. Click "Repair" to begin the procedure after adding your DaVinci videos, then "Save" to save them to your smartphone after a few seconds of waiting for the fix to finish.
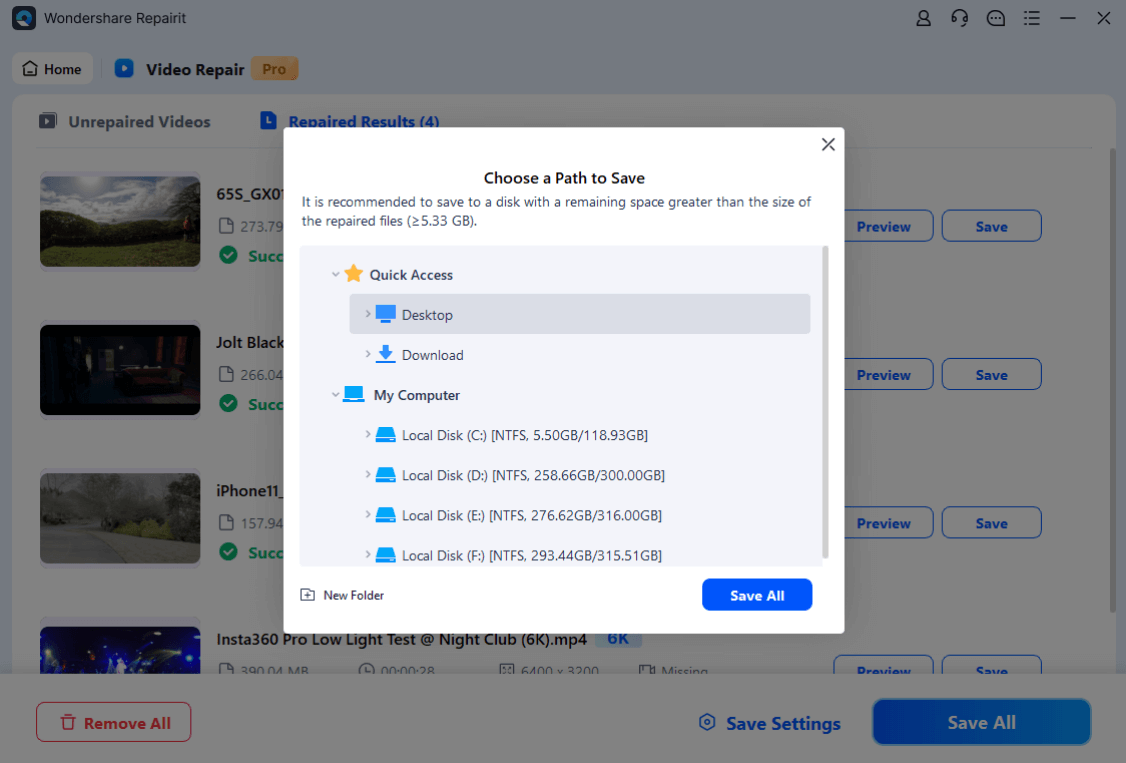
Step 3. To save the stabilized DaVinci videos, click "Save" and select a location. Avoid storing them in the same spot where they were lost or destroyed.
Perform Repairit to Stabilize DaVinci Resolve Video
Security Verified. Over 7,302,189 people have downloaded it.
Part 4. Common Stabilization Pitfalls and How to Avoid Them?
DaVinci Resolve’s stabilization tools are powerful, but there are some common mistakes to watch out for:
- Too Much Stabilization. Overdoing it can make your footage look unnatural or wobbly, like a "jello" effect. Keep it balanced.
- Low Light Issues. Stabilizing dark footage can make it look jittery or grainy. Try to shoot in well-lit conditions.
- High Noise Problems. If your video is already grainy, stabilization can make the noise even worse. Good lighting helps prevent this.
- Lens Flares. If your footage has lens flares, stabilization might cause them to move in a strange, unnatural way.
- Rolling Shutter Effect. Fast-moving shots can have a rolling shutter effect, which stabilization might not fully fix, making the footage look warped.
- Improper Cropping. Not cropping enough after stabilization can leave black bars or edges in the frame.
- Wrong Stabilization Mode. Choosing the wrong mode for the type of movement can lead to shaky or overly aggressive stabilization.
- Not Testing the Results. Always review your footage after stabilizing. Play it back carefully, or even in reverse, to catch any weird effects.
Conclusion
Stabilizing shaky footage is a crucial step if you want a professional-quality video. DaVinci Resolve provides powerful tools to smooth out movements and enhance video stability. By understanding its stabilization modes and fine-tuning the settings, you can achieve natural and visually appealing results. Just remember to preview your footage after stabilization and make adjustments as needed. If you are too busy and have no time for manual editing, you know what is the best recommended DaVinci resolve stabilizer here.
FAQ
-
Why does my stabilized video still look shaky in DaVinci Resolve?
Sometimes, stabilization settings need fine-tuning to match the movement in your footage. Try adjusting the stabilization mode, cropping ratio, or smoothness settings to improve results. -
Can I stabilize a specific part of my video instead of the whole clip?
Yes, you can cut the clip into sections and apply stabilization only to the shaky parts. This helps maintain natural motion while fixing unstable areas. -
Will stabilization reduce my video’s quality?
Stabilization may crop the edges of your video slightly, but if done correctly, it won’t significantly reduce quality. Using a higher resolution while filming can help minimize any loss.
