
 TL;DR:
Editing JPEG files in Adobe Lightroom does not reduce image quality because the software utilizes non-destructive editing, applying all changes only during the final image export to prevent repeated compression.
● Adobe Lightroom is designed for basic color adjustments, tone curves, and RAW conversion without a "Save as" option, while Adobe Photoshop is necessary for advanced pixel-level editing.
● When exporting JPEGs from Lightroom, set the quality slider to 80 for Facebook, 60-70 for website uploads, or 100 with 300 pixels per inch and the "Limit file Size" option unchecked for printing.
● To fix corrupted images, Wondershare Repairit offers an online version for files under 300 MB, and a desktop version that provides offline access with no file size or quantity restrictions.
Ask AI for a summary
 ChatGPT
 Perplexity
 Gemini
 Claude
 Grok
Grok
Maintaining the Image quality of the JPEG images is very important to ensure the pictures are clear and aesthetic. Most of us are not aware that even opening and viewing a JPEG file on a video editor or image viewer can reduce its quality. The more you open and close it, the more you save the newer versions, less will be the resultant quality. That is why you should make a copy of the original image and then start viewing or editing it.
Does this mean editing JPGs in Lightroom reduces image quality? Do you need to look for any Adobe Lightroom edition without reducing image quality?
Well, we say a big ‘NO’. Lightroom has nothing to do with the image quality unless you embrace the wrong route for the export of images. We will get into all the details in this article and tell you how Lightroom is not to be blamed and it is possible to get the work done without compromising on JPGs Image quality.
Part 1: What is Adobe Lightroom?
In simple words, Adobe Lightroom is a photo editing app that was introduced under Adobe Inc.’s Creative Cloud subscription family. It is used for editing images that are taken on cameras and phones. You can also organize, view, tag and also share images using the Adobe Lightroom application. You can edit color contrast, white balance, tweak the image anomalies and also make lens corrections.
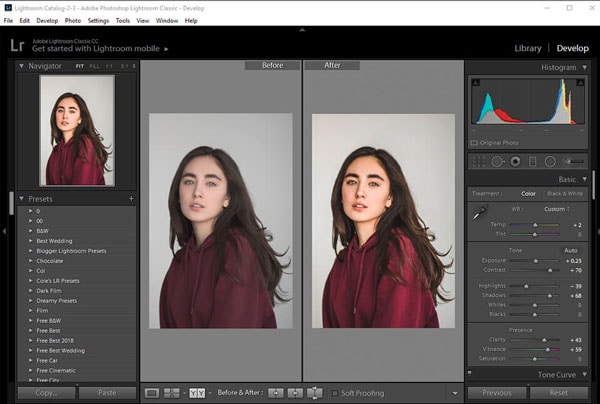
If you consider editing selfies or human figures, Adobe Lightroom lets you edit marks and spots on the face, red eyes, red spots, gradual and radial filters. You can safely say that editing JPGs in Lightroom reduce image quality is not an issue because the application is made to safeguard quality while effective editing happens.
Many photographers are turning to Adobe Lightroom because it is easy to navigate through all the tools and ensure that the end result is satisfactory. However, there was a time when everyone was praising Adobe Photoshop. How is Adobe Lightroom different from Photoshop? We will know all about it in the next section.
Notes: Here is a complete guide for you: Lightroom Edit in Photoshop Not Working.
Part 2: Adobe Lightroom vs Adobe Photoshop - when to use what?
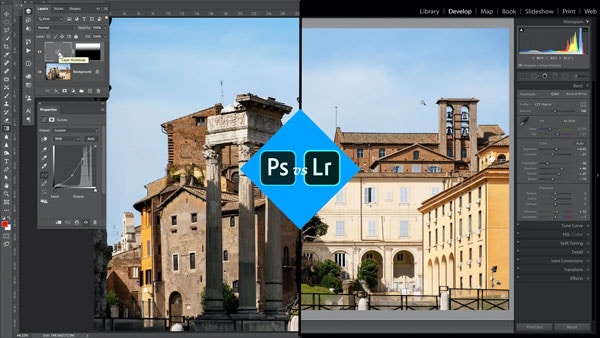
Adobe Photoshop has been in the market for a very long time. The first name that comes to anyone’s mind when photo editing is concerned. However, it was initially a basic application that added several feathers to its hat in the course of time. It has one of the best interfaces. People who are editing photographs, graphic designers, architects, and even logo makers rely on Adobe photoshop because of the pixel-level editing help that it provides.
When you compare Lightroom with Adobe Photoshop, there are differences that are definitely significant. They can decide which app is apt for your JPEG file editing. If you plan on maintaining the aesthetics of the image along with the JPGs image quality, you should continue reading.
Editing JPGs in Lightroom Reduce Image Quality is one of the major public concerns. However, both Photoshop and Lightroom do not degrade the image quality.
1. Pixel editing - Photoshop allows pixel-level editing options whereas Lightroom helps you adjust colors and tone curves. It doesn’t have pixel-level editing skills.
2. RAW Conversion - Lightroom acts as a RAW converter. In other words, the RAW format files that you get from Canon and Nikon can be edited directly here. Photoshop lacks that.
3. Extent of image editing - Photoshop acts as an Image editing software only whereas Lightroom is an image management software that also helps you share and organize images.
4. Image Saving - There is no ‘Save as’ option on Lightroom. They are automatically saved to the catalog.
Photoshop has several editing tools that you need to acclimatize with. But Lightroom has everything laid down in an easy way for you.
Looking at these differences, we can easily figure out when you should be using Lightroom and Photoshop. We will spell it out for you. Lightroom has a user-friendly interface, especially for beginners. If you want to start off on your editing journey, we strongly suggest that you go with Lightroom. You can get all the basic jobs done.
However, Photoshop offers the basic options along with advanced tools. You can get overwhelmed with the choices you have there. Beginners and Professionals both can rely on Lightroom. However, if you want advanced Pixel settings then go with Photoshop.
Related Reading:
1. Fix Damaged Photos in Photoshop.
2. Restore Old Photos in Photoshop.
3. Photoshop Problem Parsing the JPEG Data.
Part 3: How to work with JPEG files on Lightroom?
The reason why your images are not degraded on the Lightroom editing application is because of a simple technique that they employ. They save all your edits for later and apply all of them only at the time of saving and image exporting. This helps to preserve the quality that is usually compromised when you keep saving every tiny detail.
With minimum compression and one-time change, the image quality is going to be of the highest resolution. Here are some of the steps that ensure proper editing and exporting of your images.
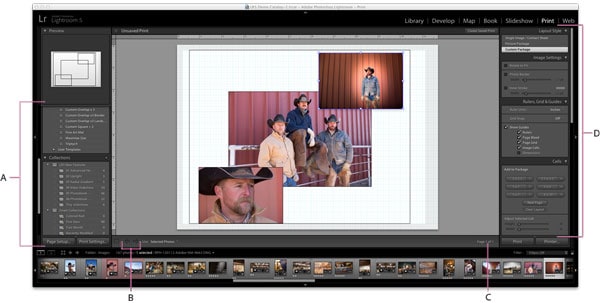
Step 1: Choose an image that you want to work with and import that JPEG into Lightroom
Step 2: From the Library Module, select a file. These can be pre-existing ones or those that you just added.
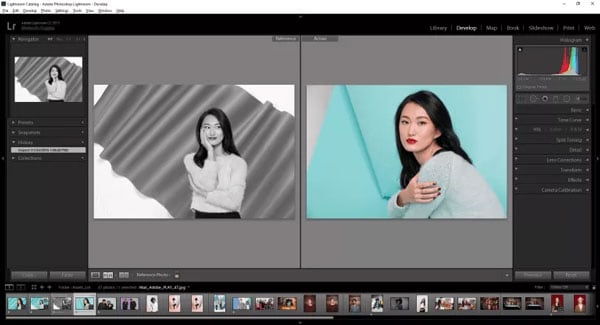
Step 3: To start with the editing, go with the Develop module option. Now you can alter the lighting, color, tone, shadows, and more. As you keep making changes, you will find the newly formed file on the bottom of the screen,
Step 4: To go with the editing, select your image from the grid. Then click Export in the Library Module.
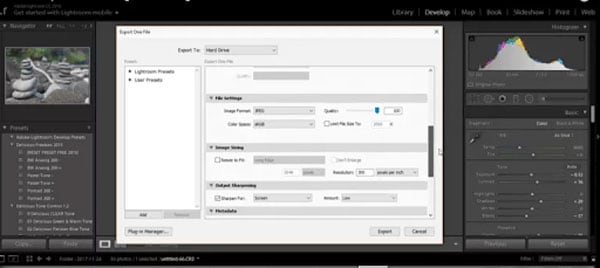
Step 5: In the export window, choose ‘export to’ and select Hard drive. Now you can add the location where you want the file.
Instead of saving to the hard drive, you can also choose to send images through email, upload on social media, copy to external storage devices, and more.
Part 4: Exporting High-Resolution Imagery using Lightroom
Editing JPGs in Lightroom reduce image quality is the biggest misconception of people and we have seen how. Like we have earlier mentioned, you can choose to upload images on social media, websites, or web pages, print them, and more. The export method will differ for each. Here’s how you go about each one of them.
For Facebook photos
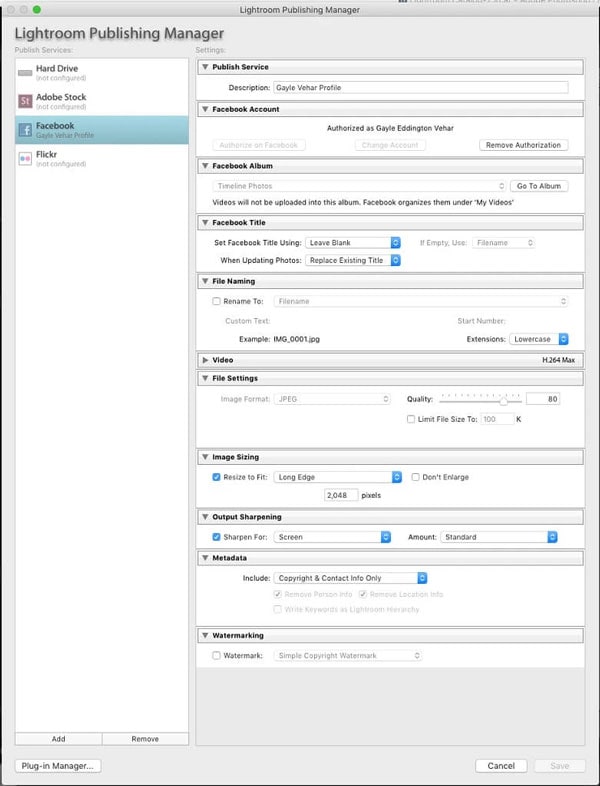
Whenever you are uploading images to social media platforms, the size of your image is of utmost importance. If you upload the wrong size, the platform either compresses the image (reducing quality) or rejects the image. That is why you should size the slider of the image around 80 while editing. This reduces file size by 40%
For Web
We can categorize our images for direct website uploads or as a thumbnail. So, if you are planning on making a thumbnail, the quality slider at 0 is also fine when using lightroom. However, for website upload, keep the slider around 60-70. This helps in quicker uploads and transfers.
For Print
The JPEG image print requires a high-resolution image. Be it birthday pictures or wedding photography, the slider should be on 100. Take care of pixels too! A good image should have 300 pixels per inch to get quality prints. Make sure you are not limiting the file size. Uncheck the ‘Limit file Size’ option.
Now that we have understood how to edit imagery on Lightroom without degrading the quality, let us go a step ahead and understand how to deal with images that are corrupted while editing.
Part 5: Tip for corrupted JPEG file: Using Wondershare Repairit
No matter how brilliant an image editing app is, accidents do happen. You can never be 100% sure that your images won’t be corrupted. In that case, you should have a third-party application backup to repair these damaged files.
In a simple three-four step process, Wondershare Repairit will help you get back the damaged files in the finest condition. It can work with 1000+ formats that also include Image files.
If you only have a few photos to repair, I'd like to suggest you using the Online Photo Repair, because it has a free trial, and it's more convenience to use. However, if the file amount is large, then the desktop version is needed.
Here are some comparisons between the 2 modes:
|
Accessibility: Repairit Online is accessible from any device with an internet connection, allowing users to access them from anywhere at any time. |
Offline Access: Repairit for Desktop can be installed directly on your computer, allowing them to work without an internet connection, which can be beneficial in areas with limited connectivity. |
|
Online Version Offered: If you just have several photos smaller than 300 MB to repair, try the online free version. |
More You Can Repair: The desktop version can fix more PPTs larger than 300 MB, and it has no limit to the file size and number. |
|
Automatic Updates: Repairit Online are regularly updated by the provider, ensuring users have access to the latest features and bug fixes without the need for manual installations. |
Data Control: With desktop products, users have more control over their data since it is stored locally on their computer, reducing concerns about data privacy and security. |
For Online Photo Repair access, please enter the official website. Here I will show you how to use the desktop version in detail.
Here’s how to use it:
Step 1: Click on More Types Repair > Photo Repair > Add the damaged or corrupt photos

Step 2: Let the application repair the file.

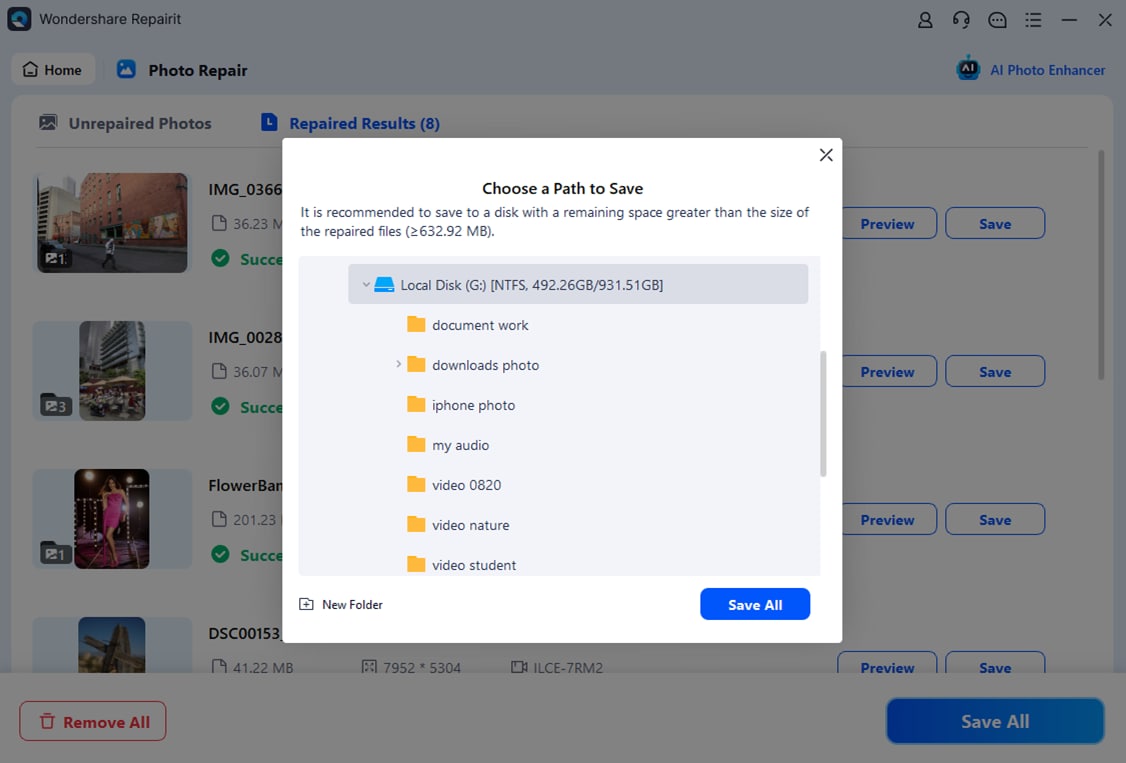
Step 3: Preview the files after the repair is done.

Step 4: Save the repaired files.
Final Words
The JPGs image quality doesn’t depend upon Lightroom. You don’t have to keep looking for the lightroom edition without reducing image quality. The way you deal with the editing process and the correct way of Image export can do magic! Invest your time and energy in the right apps like Photoshop and lightroom.
If something goes wrong, keep the backup of software like Wondershare Repairit. You will be good to go.