
Do you know why you need to convert images to CMYK before printing? Because you can’t print in the RGB color mode. CMYK is a printable format best used for preparing visual materials for printing by converting them to an image format a printer can understand.
Color conversion is an essential step in the printing process. It determines the final printing outcome and how well the final product represents your colors. Today, we’ll discuss the importance of the color conversion process and give you a step-by-step guide to converting images to CMYK in Photoshop for printing.
In this article
Color Conversion Is Much Simpler Today

Long gone are the days of spending hours manually converting the RGB colors to CMYK to ensure your printing material looks perfect. Today, you have a wide range of top-grade tools, like Photoshop, that can automatically convert RGB colors to CMYK to help you save time, effort, and resources.
Color conversion used to be a confusing, tiresome, and difficult process. People used to spend hours manually correcting colors only to end up with a final product that didn’t match their original vision. What does it mean to convert colors for printing?
It means adjusting every color in a digital file to its equivalent value used for print. Finding the perfect match manually is time-consuming and risky due to the high possibility of ruining your original vision.
Thankfully, you can streamline color conversion using professional tools to find equivalent colors and fit your chosen printing.
Why Are Cmyk Colors Important in Printing
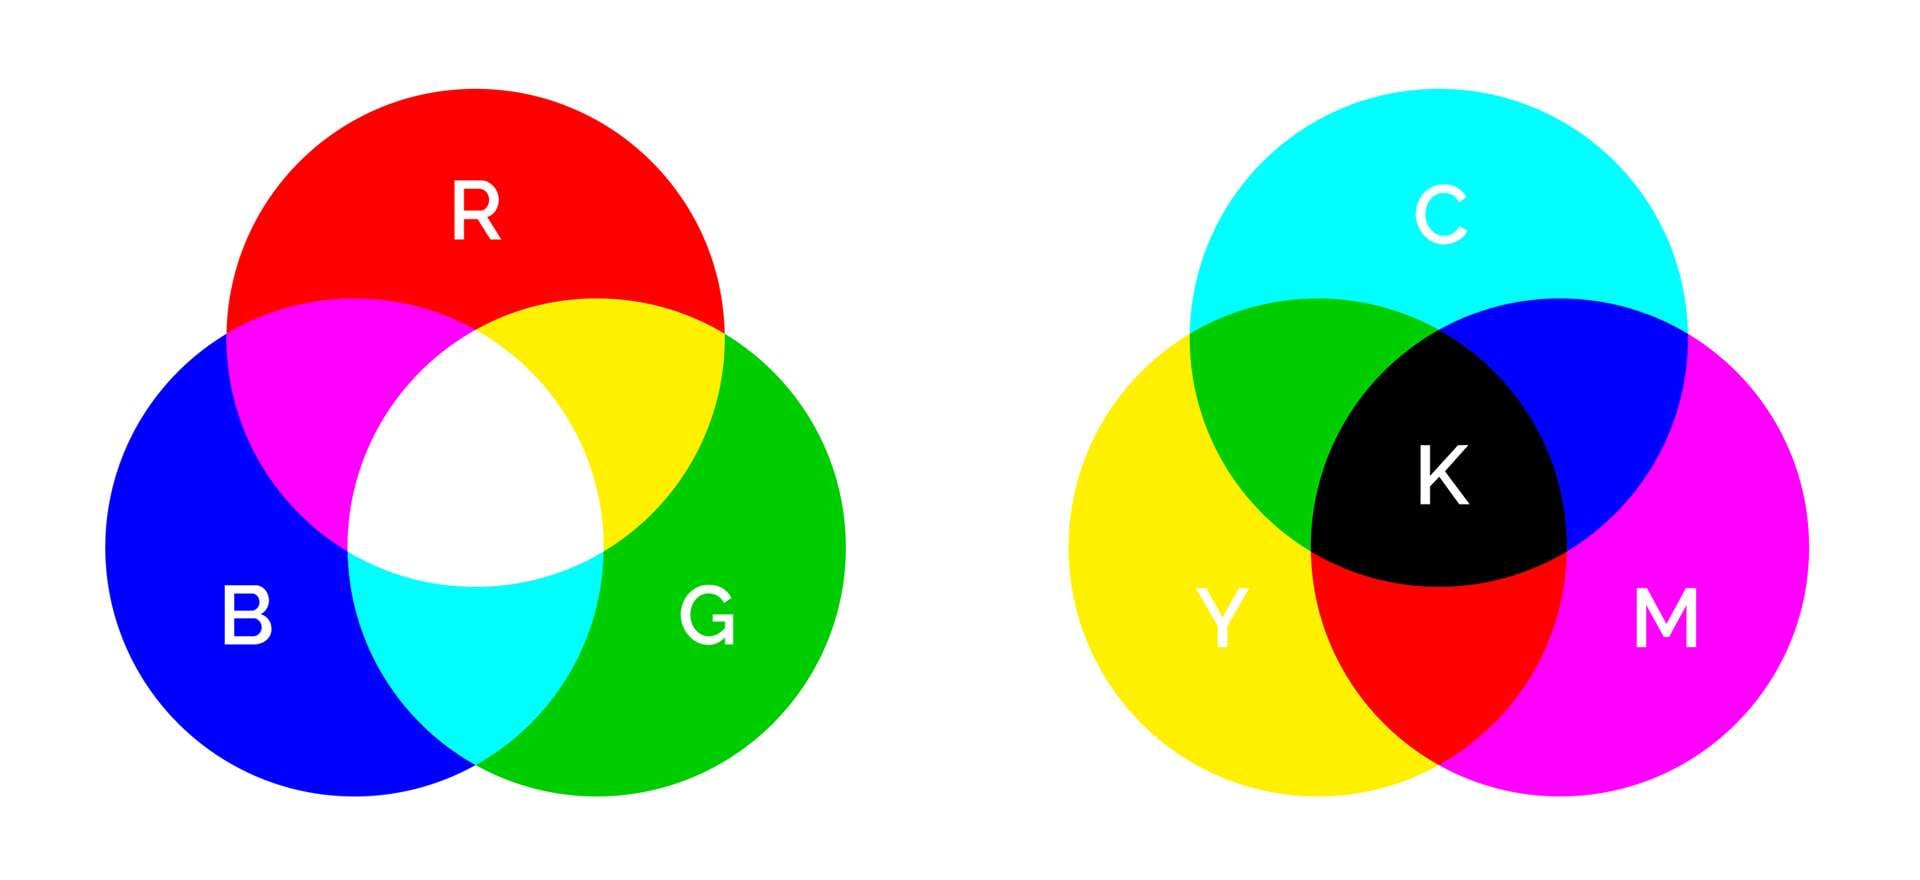
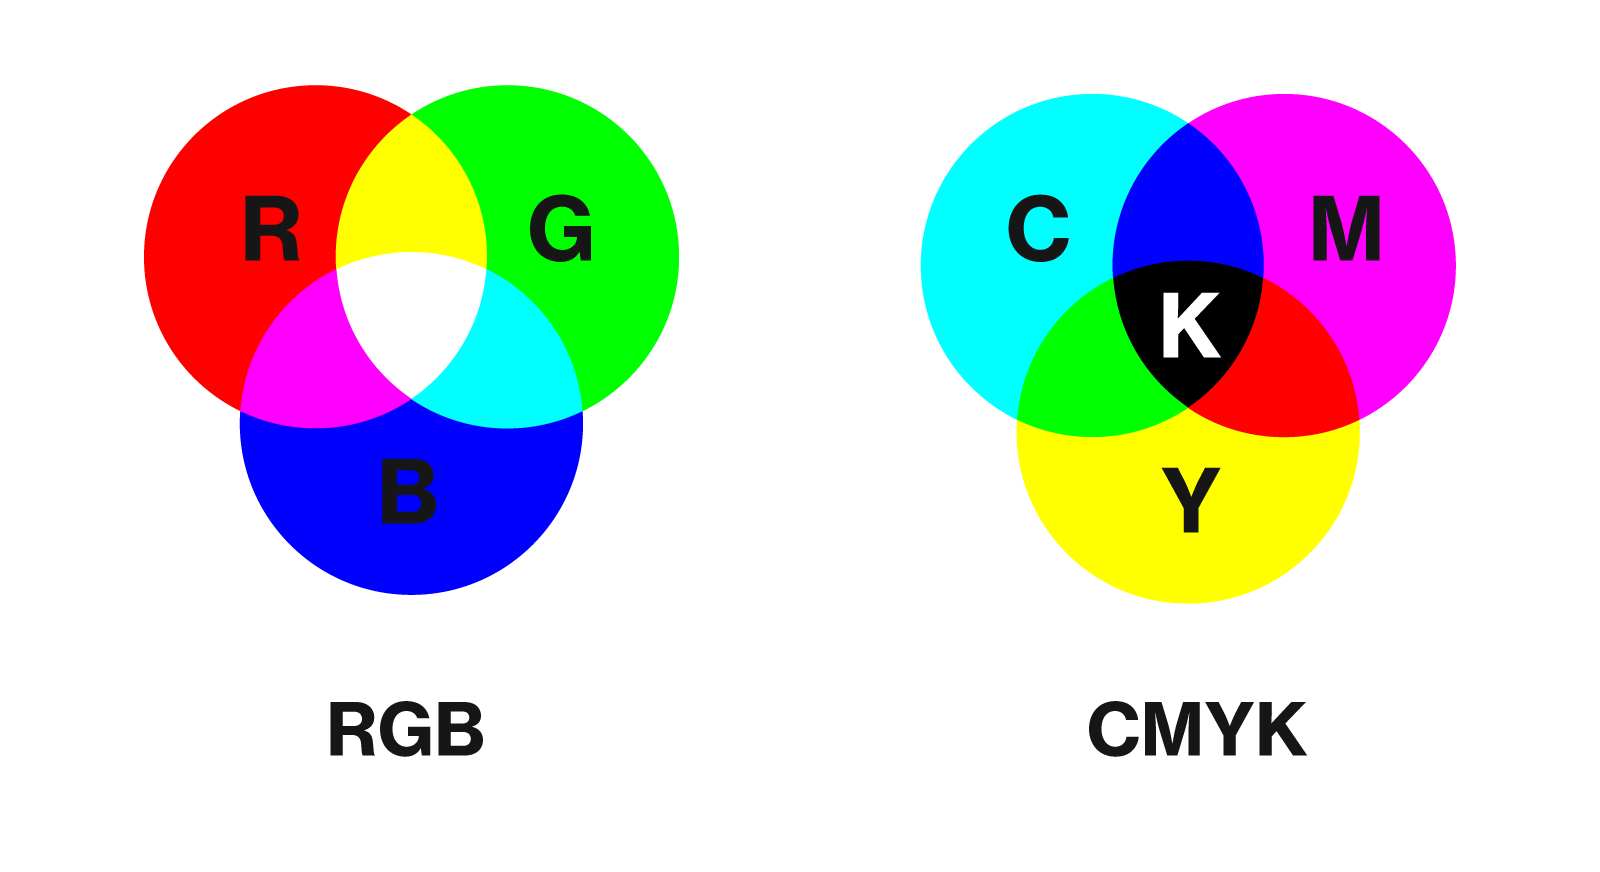
CMYK, or process color, is a popular color mode used in modern-day printing to generate top-grade images, visuals, and full-color graphics. The CMYK color mode combines varying versions of cyan, magenta, yellow, and black ink to generate printing materials and produce the full-color spectrum.
Aside from CMYK, the other popular color mode is RGB. This mode uses three main colors to produce a full-color effect – red (R), green (G), and blue (B). RGB is ideal for representing your visuals across digital communication channels like websites, social media platforms, etc.
However, you need the CMYK color mode to design your visual artwork for printing because it ensures your visuals and background color look great when printed.
How to Convert Colors to CMYK for Printing in Photoshop
Here’s how to convert colors to CMYK in Photoshop in three easy steps.
Open the Image in Photoshop
Create a copy of the image you want to convert to CMYK and open both in Photoshop by following the steps below.
Step 1: Open Photoshop, navigate to the Home Screen, and select Open;
Step 2: Select the image you want to open in Photoshop using File Explorer (Windows) or Finder (Mac) and double-click the file to open it.

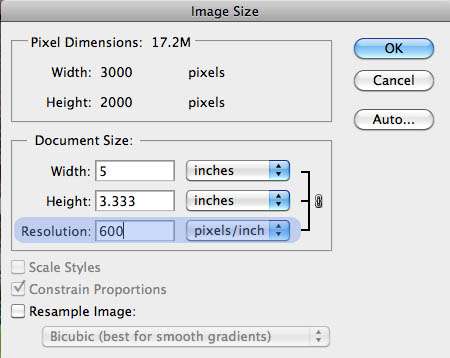
Check and Adjust Image Resolution
The next step is to check and adjust the image resolution. Here’s how to do it.
Step 1: Click the Image tab and select Image Size;
Step 2: When an Image Size window appears, uncheck the Resample Image box;
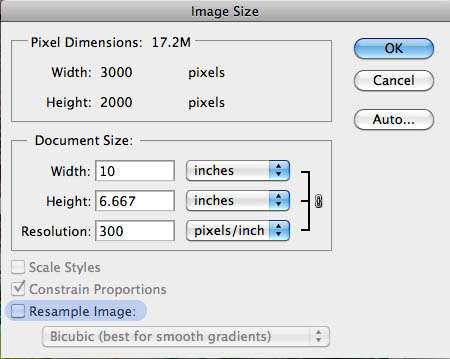
Step 3: Enter your preferred image resolution in the Resolution field and click OK.
Convert the Images to Cmyk
Once you’ve selected the desired image resolutions, it’s time to complete the CMYK conversion.
Follow these steps to find an ideal image mode:
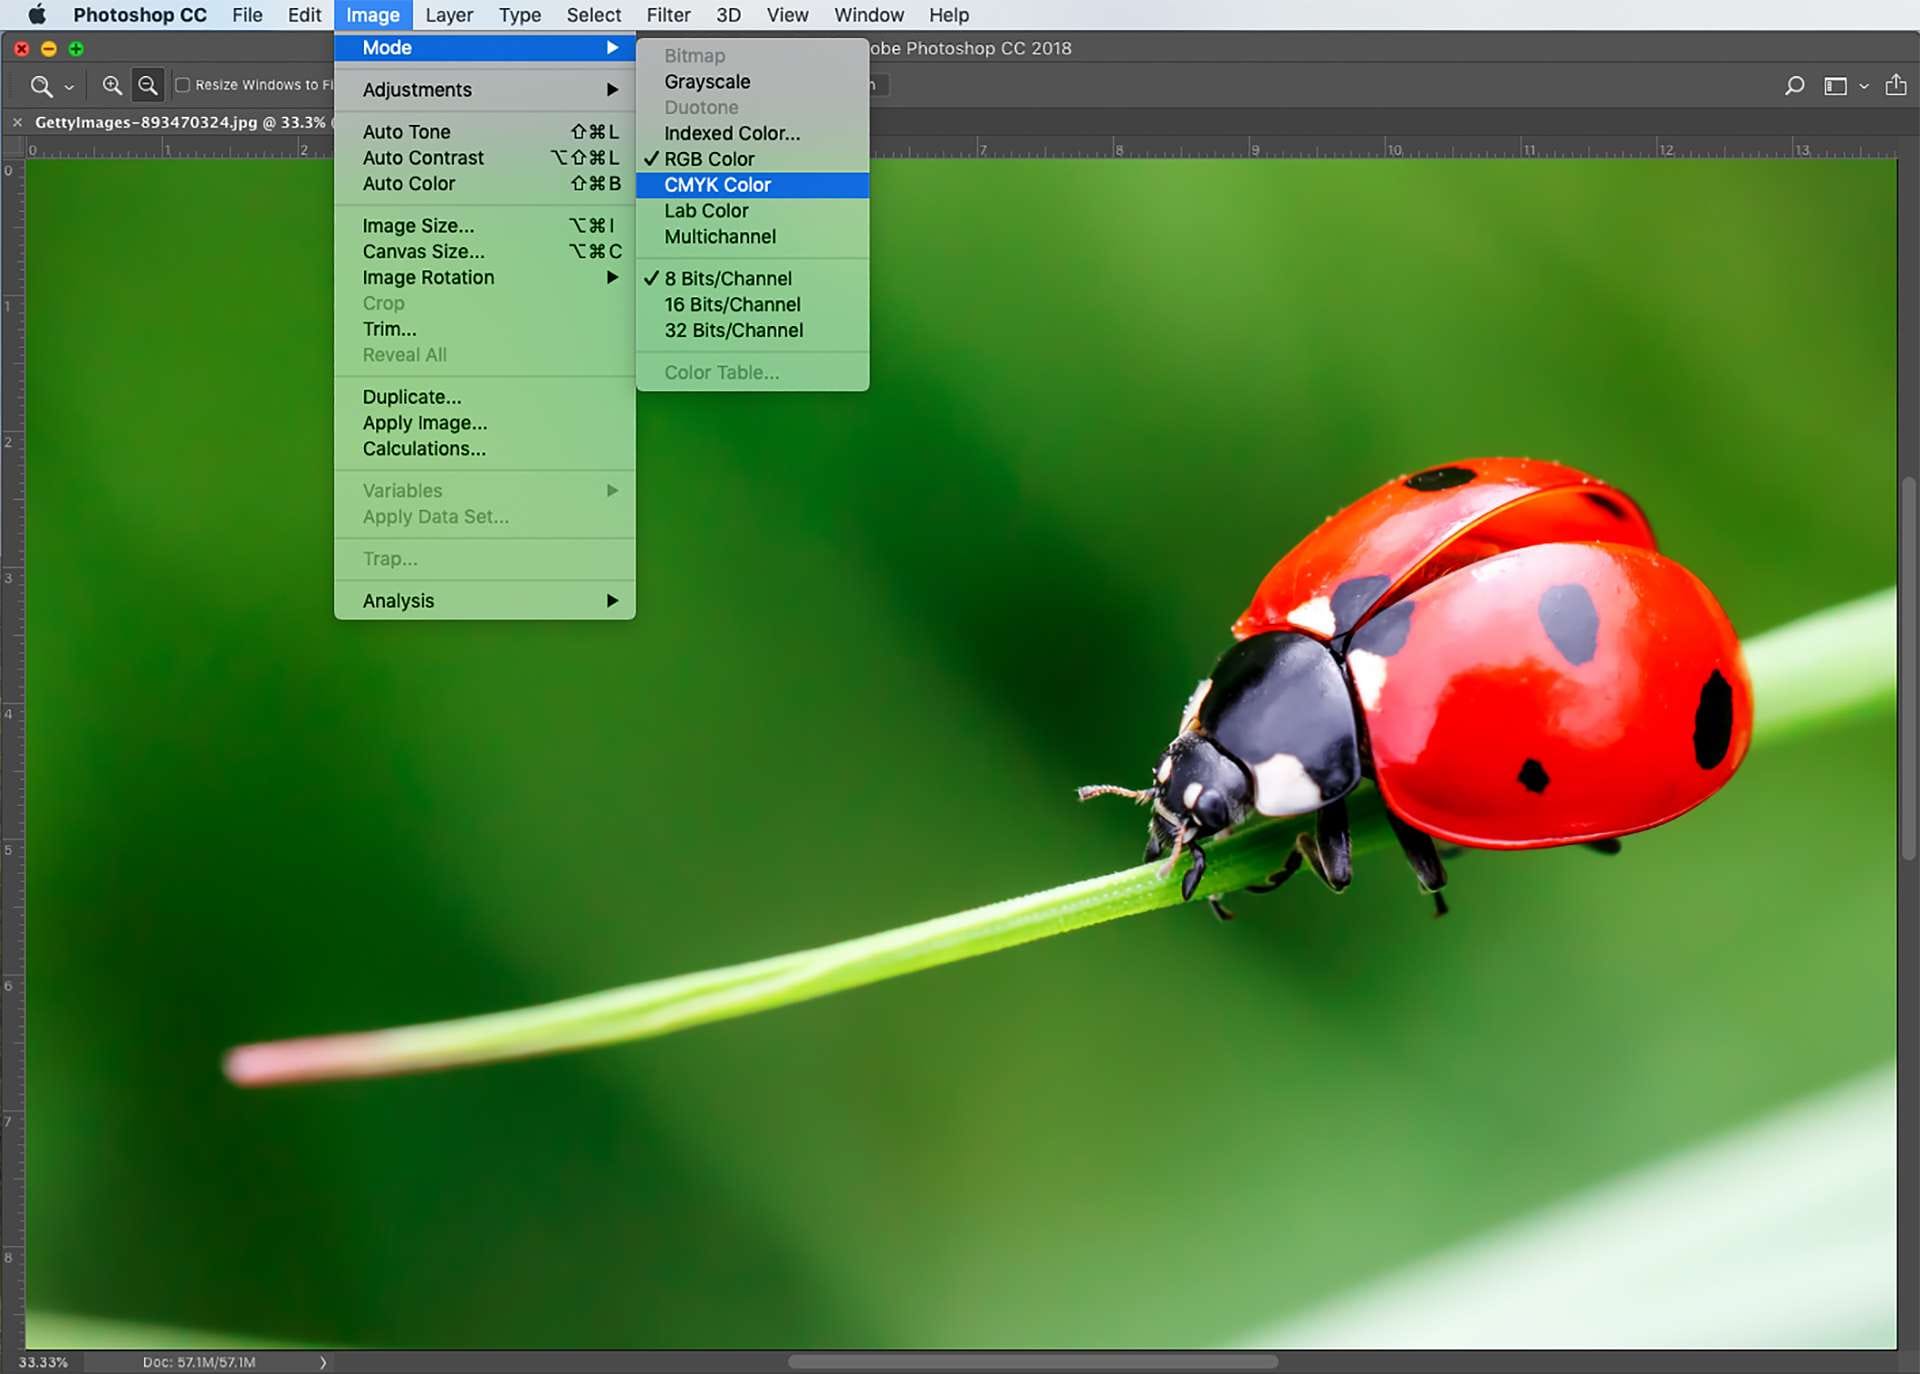
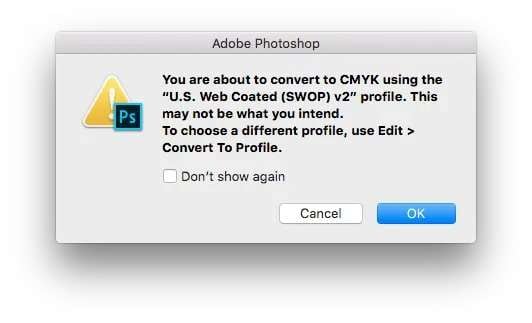
Step 1: Navigate to Image > Mode;
Step 2: Select CMYK Color;
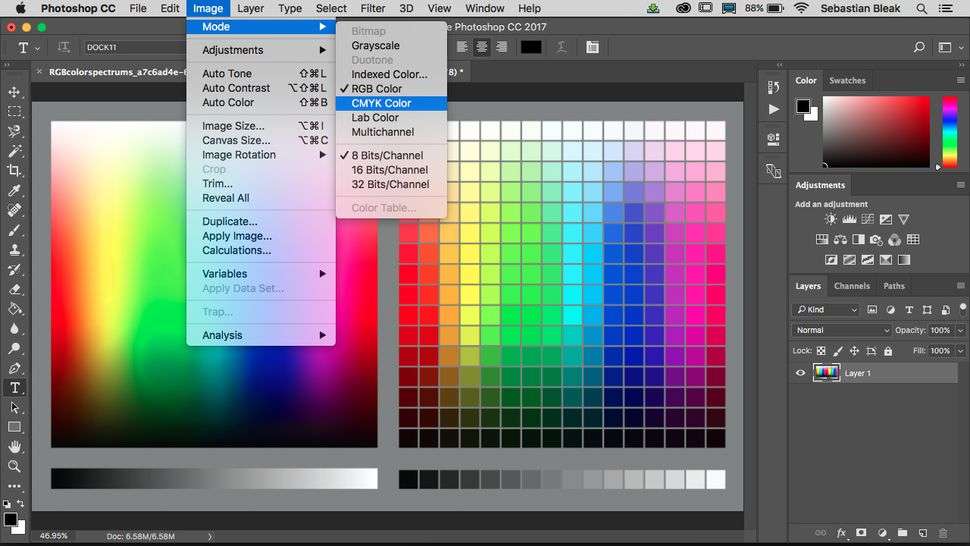
Step 3: Click OK to convert to CMYK using the selected color mode.
Photoshop also provides an alternative way to convert to CMYK as shown in the steps below.
Step 1: Open your image in Photoshop;
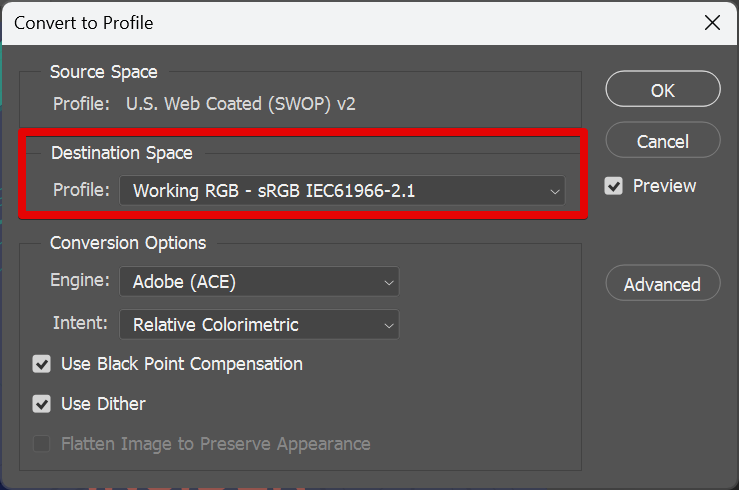
Step 2: Select the Edit tab;
Step 3: Click Convert to Profile;
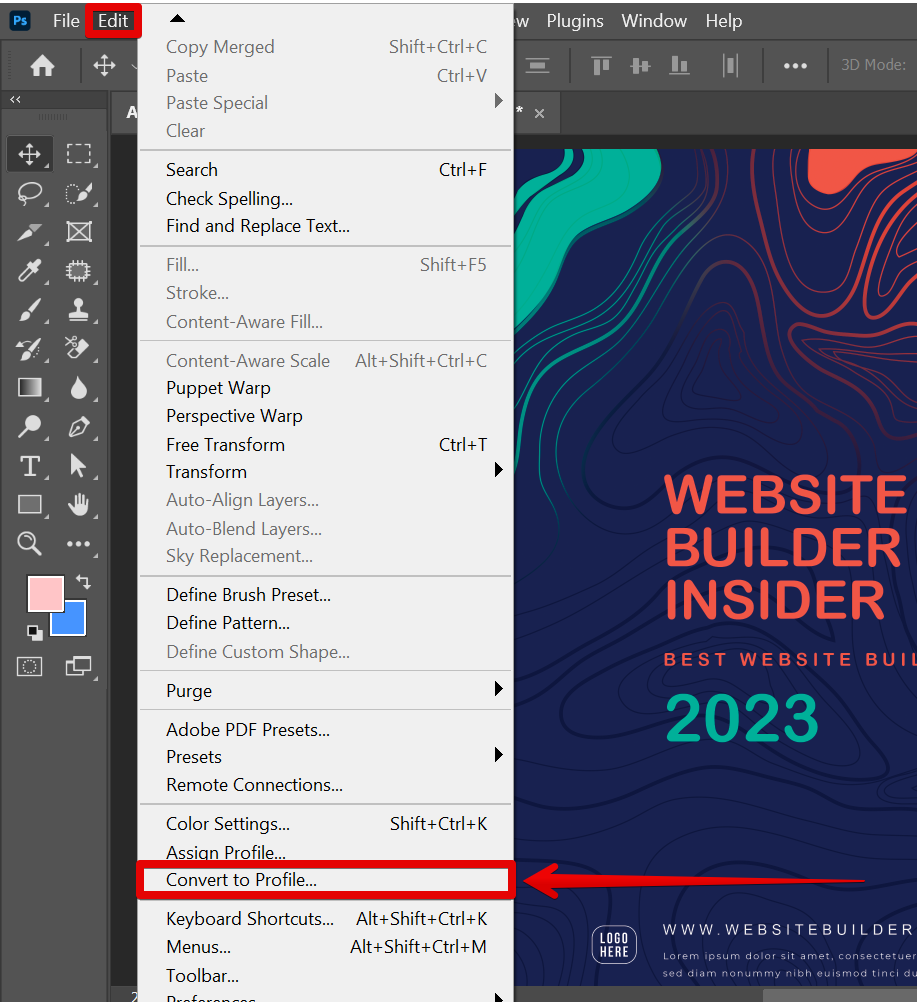
Step 4: In the Destination Space, select the CMYK model and click OK.
Additional Tips for Converting Images to Cmyk in Photoshop for Printing
Now that you know the basics of converting images to CMYK in Photoshop, here are a few tips to keep you on top of your color conversion game.
Make Sure to Check and Adjust the Colors
CMYK is a complicated color model that requires a few adjustments here and there to ensure you get the best results. Since converting to CMYK combines different shades, tints, and hues of cyan, magenta, yellow, and black, you should check and adjust the colors before making the final image outcome.
In most situations, converting to CMYK alone won’t be enough to get the best results. The color model may produce limited color combinations when you convert to CMYK. That’s why you should tap into color adjustment options available in Photoshop to generate a more vibrant spectrum of colors.
Set clear color objectives to visualize the perfect image. Experiment with different CMYK percentages and mixtures until you’ve accomplished your goals.
Use Color Proofing
Color proofing allows you to check how your images will look when reproduced on various output devices. It lets you tap into Photoshop’s proofing settings to create custom color profiles corresponding to the output vision you want to reproduce.
Photoshop offers different color-proofing presets and options you can rely on to create a handpicked selection of colors using the current CMYK working space. Each option helps you specify how the colors will appear across different types of devices.
Use color proofing to create custom color profiles for specific printer and paper combinations for the most accurate outcome.
Save a Copy of the Original Image
You should save a copy of the original image before converting to avoid leaving any room for error. If the colors don’t turn out as expected, you can use the copy to start the process again. So, create a copy of the original image and store it safely to protect it from file corruption and data loss.
In addition, don’t forget to save the converted image in the appropriate CMYK format. Simply click File, select Save As, and choose the desired file type to finalize the conversion process.
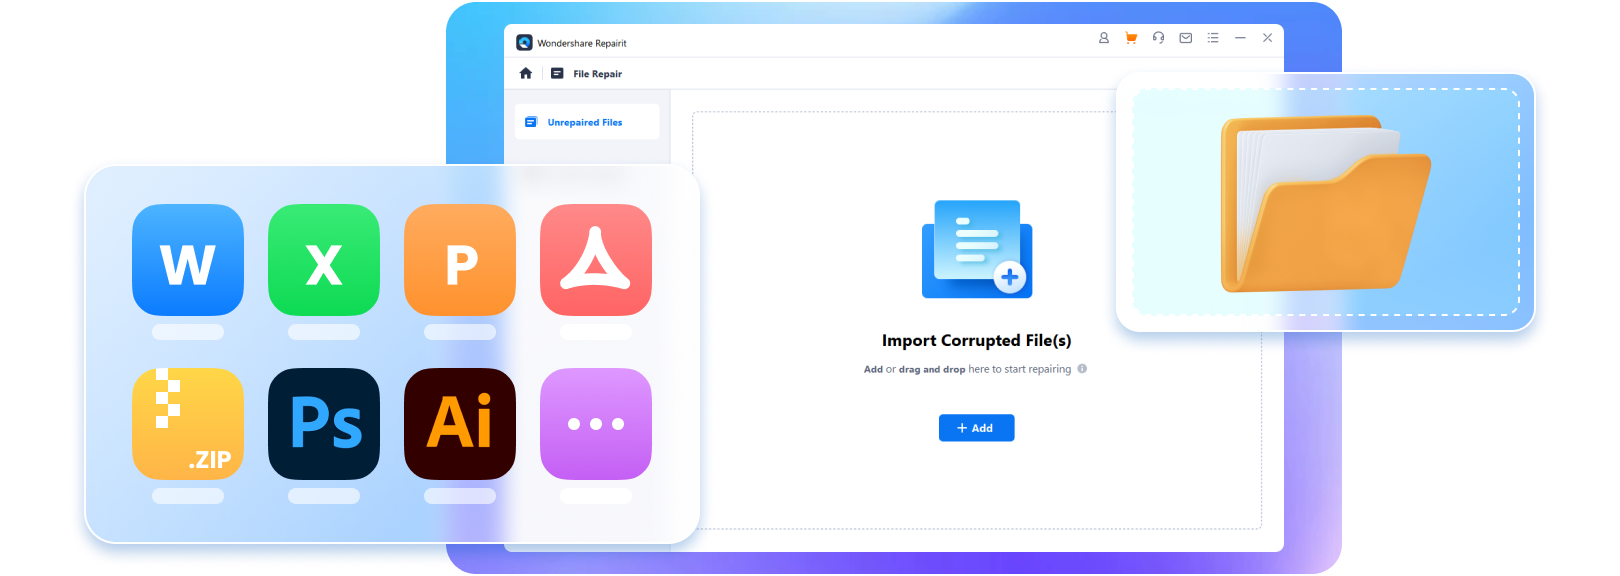
How to Repair Corrupted Photoshop Files

If you’re dealing with corrupted Photoshop files, fear not. You can quickly fix the corruption and restore your files using an AI-powered tool, like Wondershare Repairit Adobe File Repair, to repair damaged and corrupted Photoshop files, photos, videos, etc.
The app is compatible with Windows and Mac devices and allows you to easily repair damaged or corrupted Photoshop files with a few clicks. More importantly, the app is so versatile that it can work with all files, file formats, and corruption scenarios.
Aside from repairing your Photoshop files, Repairit supports other options, such as online old photo restoration, image enhancement, AI-powered image enlargement, and online photo colorization. Download, install, and launch the app on your computer and follow these steps to repair the corrupted Photoshop files.
Step 1: Navigate the main Wondershare Repairit menu to the More Types Repair section;
Step 2: Select File Repair;
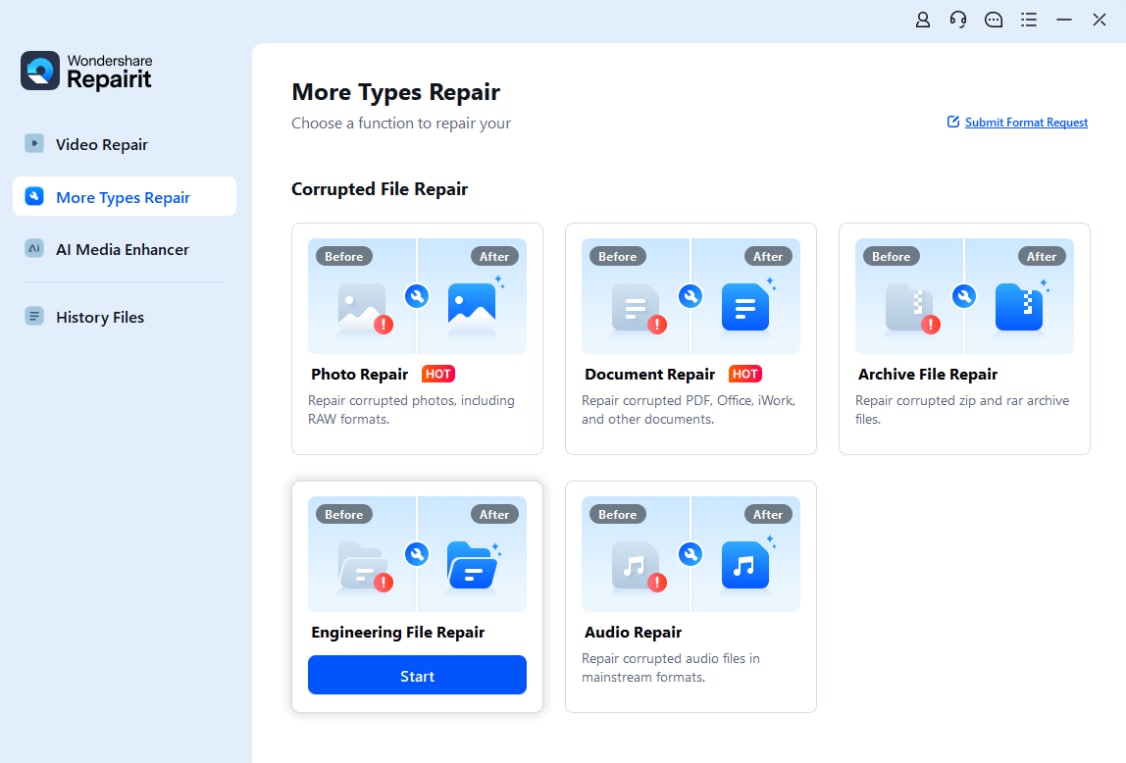
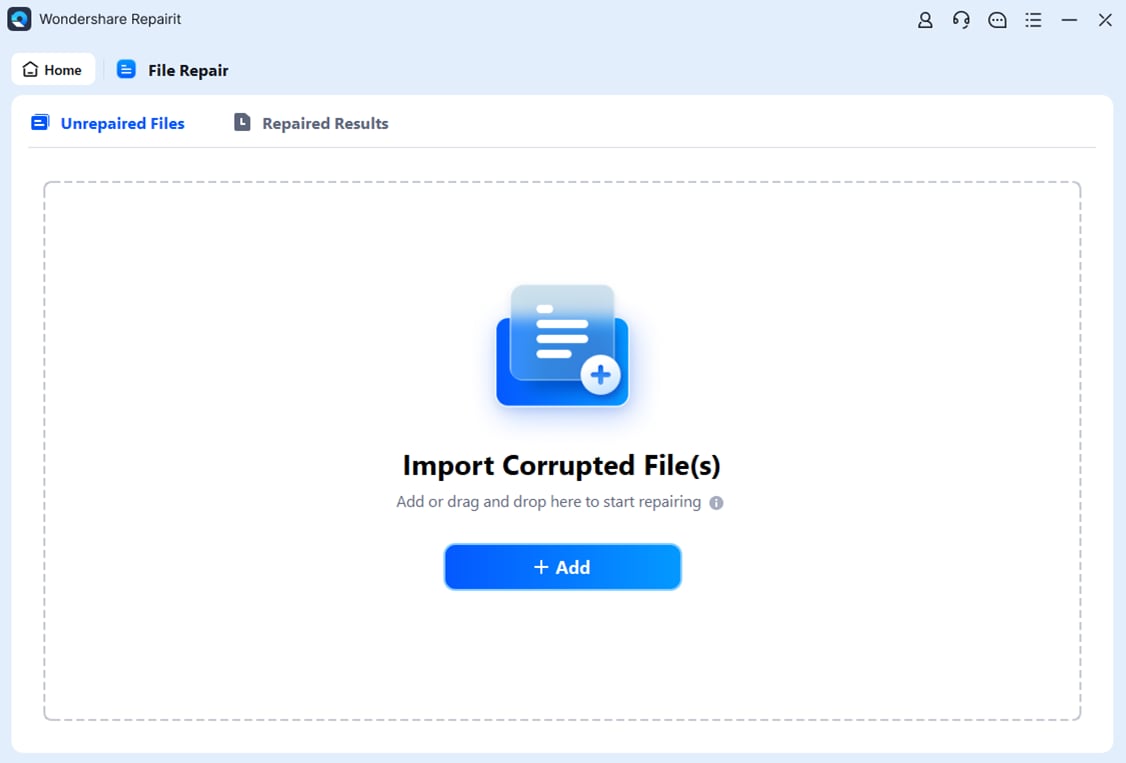
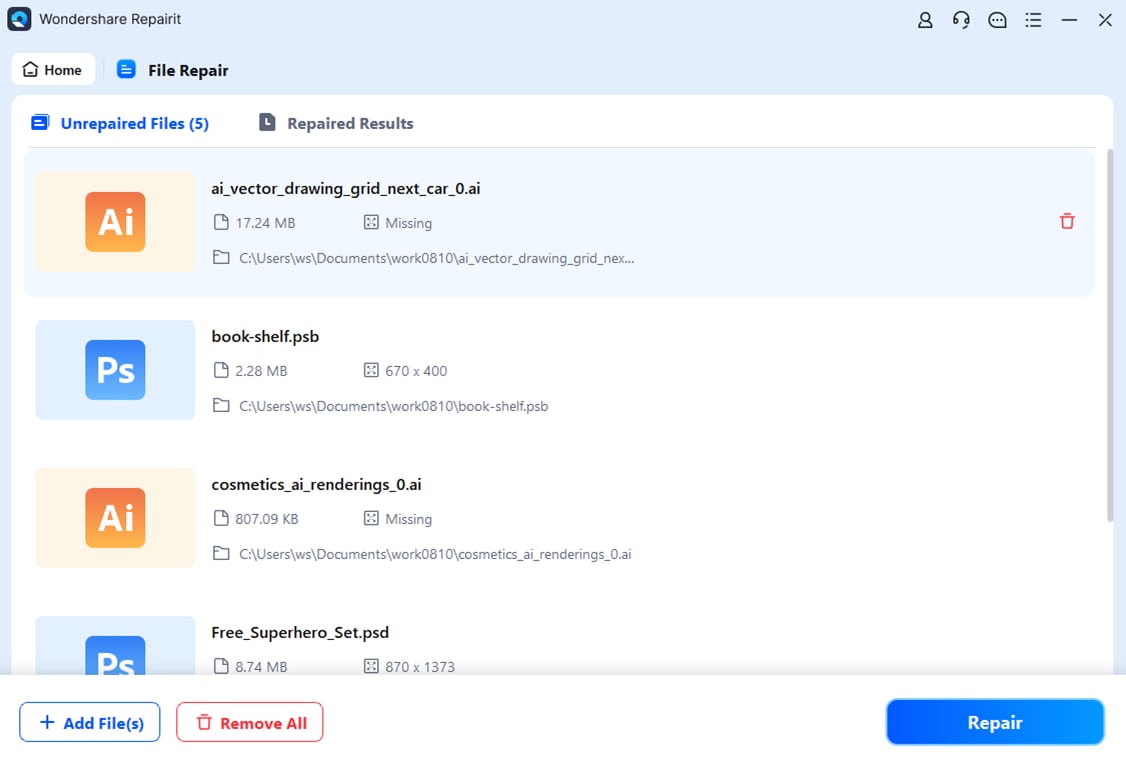
Step 3: Drag and drop the corrupted files or click the + Add button to start repairing;
Step 4: Click Repair to start repairing your corrupted Adobe files;
Step 5: Wait for the app to complete the repairing process;
Step 6: Preview fixes files and click Save to download and save them to your computer.

Conclusion
Color conversion empowers you to generate professional, vibrant, and photorealistic print materials by simplifying the process of turning your digital art into printable content.
If you haven’t been able to print your images due to incorrect color mode, you can solve that problem with Photoshop’s intuitive color conversion mode that streamlines the process of converting images to CMYK for printing.
Remember to adjust image resolution and try different color adjustment options for the best results. If you end up with corrupted Photoshop files, use Wondershare Repairit Adobe File Repair to fix and restore your files.
