

In professional photo and videography, color balance is an important step for crafting visually appealing pictures. This step ensures your images remain true to life in different lighting conditions. As an advanced set of editing tools, Photoshop offers extensive color-balancing features for editors worldwide. However, the tool might confuse beginners with its bulky interface, which is difficult to navigate.
Therefore, this guide will explain why this feature is important and share detailed steps to adjust the white balance in Photoshop. We will also share a bonus tool to help you repair the pictures in case they get corrupted while editing or saving.
In this article
Part 1. How Does White Balance Affect Our Pictures?
When you mismanage color balance in Photoshop, the final result would appear unnatural and dull. This particular feature plays a crucial role in maintaining the accuracy of colors in a photograph. In addition to making pictures look natural, this feature affects your photos in the following ways:
- Maintains Color Accuracy: This feature ensures that whites remain pure and colors stay true to life under various lighting conditions. It is especially useful in product photography, where true representation of hues can impact consumer decisions.
- Compensates for Lighting Variations: Different conditions, such as natural sunlight or tungsten lights, can create unwanted color casts in photos. Therefore, proper white balancing can remove the effects of such harsh or dim lighting.

- Prevents Oversaturation: Proper white balance keeps the image from becoming overly warm or cool. In this way, it prevents oversaturation and maintains a realistic look.
- Enhances Depth and Detail: When the white balance is correctly adjusted, the contrast in your photo improves significantly. As a result, you get a more detailed picture that is sharp and engaging.
Part 2. The Most Simplified Tutorial to Adjust Color Balance/White Balance in Photoshop
As said above, Photoshop is the ideal choice for every editor worldwide due to its advanced editing features. From capturing nature to promoting products, it provides a comprehensive editing package. However, beginners find it hard to navigate its feature-rich interface. The plethora of options on the main editing screen is enough to scare any beginner away.
As for color balancing, it is easier to access but needs attention to detail. By using its color adjustment feature, you can play around with the tone of the pictures. Additionally, users can add additional curve layers to adjust the white color balance in the picture. To learn how to adjust the white balance in Photoshop, you can follow the given steps:
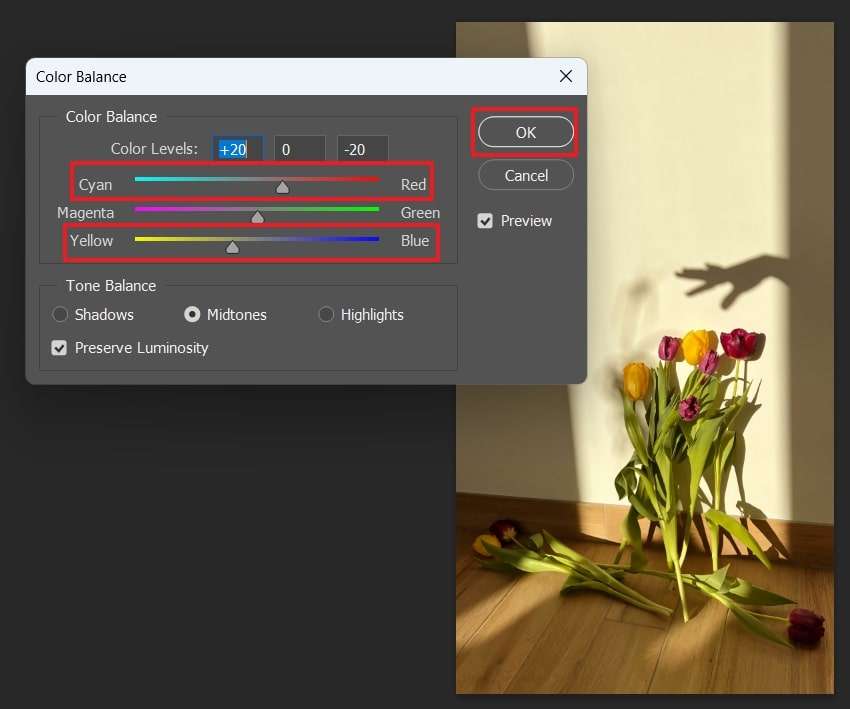
Step 1. After importing the desired image in the tool, click the “Image” tab from the top menu bar. Now, hover over the “Adjustments” option in the drop-down menu and pick “Color Balance” from the next one.

Step 2. When the small window pops up, adjust the “Cyan” and “Yellow” color levels by dragging them in equally opposite directions. After that, hit the “OK” button to apply changes to the image.
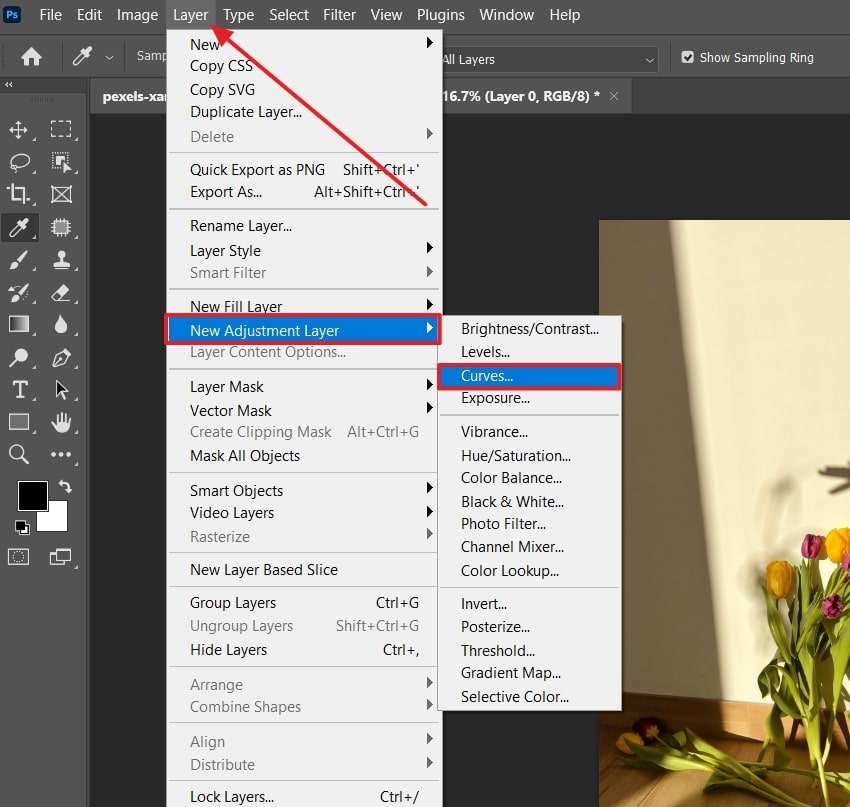
Step 3. To change the white balance in Photoshop, navigate to the “Layer” option from the top menu bar. When a new drop-down menu appears, press the “New Adjustment Layer” option and then “Curves.”
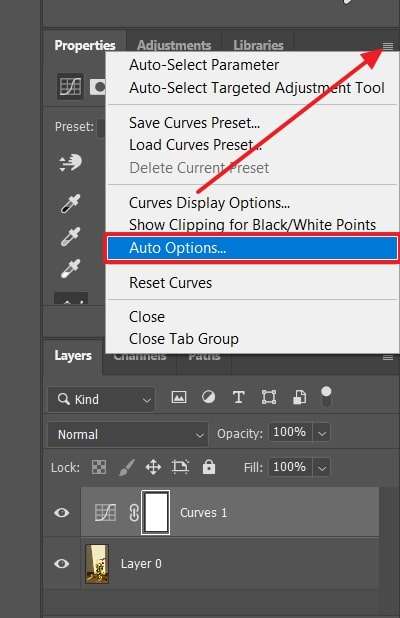
Step 4. Once it creates the new layers, click the “Hamburger” icon beside the “Properties” tab. Another drop-down menu will appear, from which you have to choose “Auto Options.”
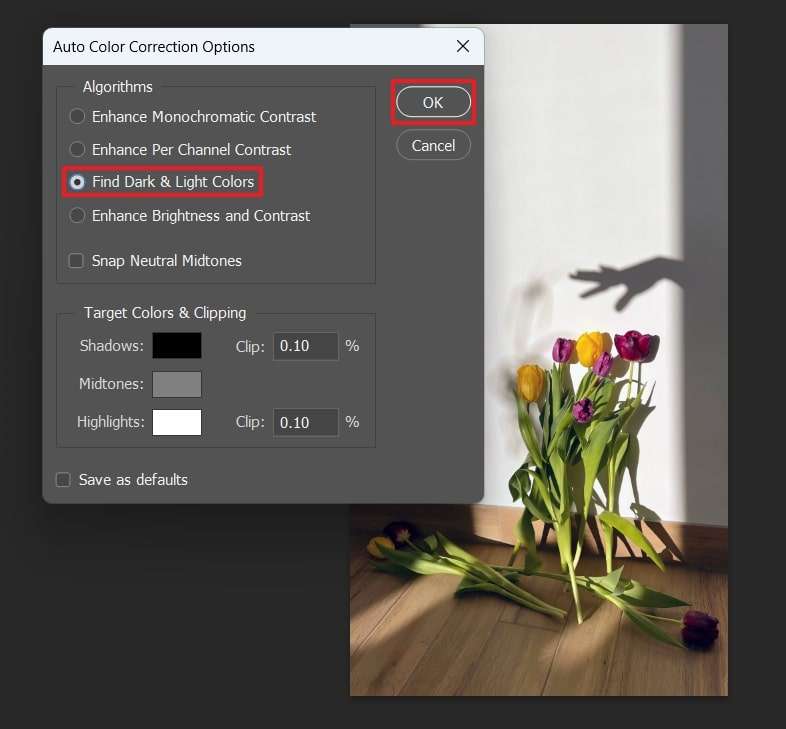
Step 5. When the small window appears, select the “Find Dark & Light Colors” option. Finalize the process by clicking the “OK” button and exporting the corrected image.
Part 3. Discover the Most Powerful Photo Repair Tool to Fix Corrupted/Damaged Photos
It is evident that navigating the interface and performing color balance in Photoshop is complex. Besides, you need strong specs to function properly; otherwise, photos may get corrupted while editing and processing images. If that happens, you need a reliable tool to fix and restore these damaged photos. For that purpose, users can depend on Repairit, as it offers extensive photo repair features.
This tool's powerful AI features analyze and fix the corrupted images not opening on your device. Similarly, you can use it to unblur the photos with incomplete data and retrieve the high-quality versions. As for images that are greyed out, you can also use Repairit to recover their lost charm. Additionally, you can use it for all types of storage devices, including USBs and SSDs, to fix damaged pictures.
Key Features of Repairit Photo Repair
- Batch Restoration: Instead of repairing photos individually, you can add them together for convenient correction.
- Multiple Format Support: This photo repair software supports the repairing process on more than 18 types of photo formats.
- Image Upscaling: Users can upscale their childhood memories and old photographs up to 800% using Repairit’s advanced AI.
- Diverse Format Availability: Besides repairing media files, this tool can even fix corrupted document files online in PowerPoint, Word, or Excel formats.

-
Repair damaged photos with all levels of corruption, such as grainy photos, dark photos, pixelated photos, faded photos, etc.
-
Repair images of diverse formats, such as JPG, JPEG, PNG, CR3, CR2, NEF, NRW, etc.
-
Repair critically damaged or corrupted photos available on SD cards, phones, cameras, USB flash drives, and more.
-
Repairit has a quick and advanced repairing mode. You can use either depending on the level of corruption the photos has undergone.
-
The "AI Image Upscaler" feature can enlarge the repaired photos to 2X, 4X, and 8X.
-
Intelligently restore old/scatched photo and colorize black and white photos with various AI effects.
-
No limit to the number and size of the repairable photos compared with the online version of Repairit.
-
Support Windows 11/10/8/7/Vista, Windows Server 2003/2008/2012/2016/2019/2022, and macOS 10.10~macOS 13.
Simplified Guide to Use Wondershare Repairit for Quick Image Repairing
After learning about the tool’s capabilities, let’s move on to the steps to use it. By following the given steps, you’ll be able to correct the images corrupted while fixing the white balance in Photoshop:
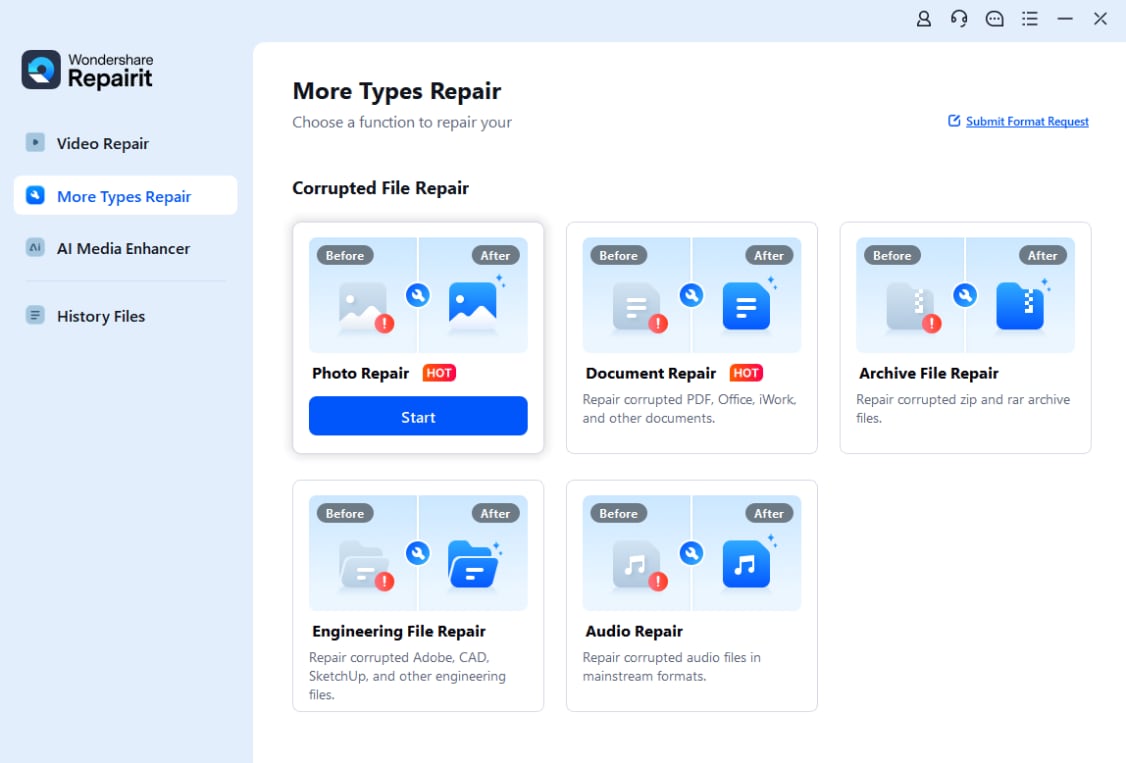
Step 1. Access the Photo Repair Feature
Click the “Photo Repair” feature under the “Corrupter File Repair” section.
Step 2. Import the Corrupted Photos into the Tool
When it takes you to the new window, click the “+ Add” button to choose and import the corrupted photos in the tool.

Step 3. Start the Photo Repairing Process
Once the tool loads the damaged or corrupted images, use the “Repair” button to initiate the process.

Step 4. Save the Repaired Pictures on Your Device
Finally, click the “Save All” button on the bottom side of the screen once all images are repaired.

Repair Corrupted Photo Files
 Security Verified. Over 7,302,189 people have downloaded it.
Conclusion
In short, fixing white balance in Photoshop is important for creating visually appealing images. With hundreds of different features, Adobe's editing suite can be too much for your PC's hardware. As a result, hardware errors can occur, and they may corrupt your edited media.
To solve such issues, users need to use external programs that repair photos easily. Out of all the available options, we highly recommend Wondershare Repairit, as it provides comprehensive photo repairing solutions.
FAQ
-
Q1. What is the difference between color balance and white balance in Photoshop?
Color balance focuses on adjusting the intensity of a specific color to enhance an image, while white balance deals with correcting the color temperature to make whites appear neutral. Both methods are vital for creating images that are realistic, yet they address different aspects of color correction. -
Q2. What should I do if my images become corrupted while adjusting the white balance?
During intensive editing tasks like adjusting white balance in Photoshop, images can become corrupted due to software crashes or hardware limitations. If this happens, Repairit Offline and Online is the ideal solution. It can restore corrupted images quickly and efficiently to preserve their quality and details. -
Q3. Can beginners use Photoshop to adjust color balance easily?
While Photoshop offers powerful tools for adjusting color balance, beginners may find its interface overwhelming due to the numerous options available. However, beginners can learn to use the tool effectively by following simple tutorials, like the steps mentioned in this article.
