
In this article
Smartphone cameras continue making waves, some beating their traditional digital counterparts and many featuring AI functionalities that transform photos. Still, some of your photographs may have tonal problems, being too dull or overly bright.
That’s where Photoshop comes into play. Color correction is among its most valuable features, helping you fix tonal issues and convert any image into a mesmerizing masterpiece.
However, mastering this photo editing software takes time and effort. Luckily, you can find all the answers in this color correction Photoshop tutorial. It’s an excellent starting point for learning about adjustment layers and levels, the essentials for quality color correction in Photoshop.
Explore this feature’s benefits and steps before discovering an excellent Photoshop alternative.
Benefits of Color Correction in Photoshop
Color correction in Photoshop helps fine-tune images to create accurate, realistic colors. For instance, poor lighting or improper camera settings can make photos too bright, dark, or dull.
Facing a bright light source like the sun while shooting an object can also cause a lens flare, primarily when reducing your aperture to a minimum.
You can quickly correct white balance in Photoshop to fix these and other tonal issues and achieve natural-looking coloration. Additionally, you can experiment with Photoshop skin tone correction to ensure people in your photos have smooth skin without unwanted or unnatural complexion tones.
Let’s not forget about the red-eye correction in Photoshop. Who wants a photo where their pupils look red? Photoshop lets you fix this common problem with its Red Eye Tool and not worry about it ruining your perfect pictures.
Adjusting Default Levels in Photoshop
Levels in Photoshop let you darken the highlights, brighten the shadows, and modify midtones in your photos. Learning to use them will help you transform any image, so let’s dive into the basics before adjusting the defaults:
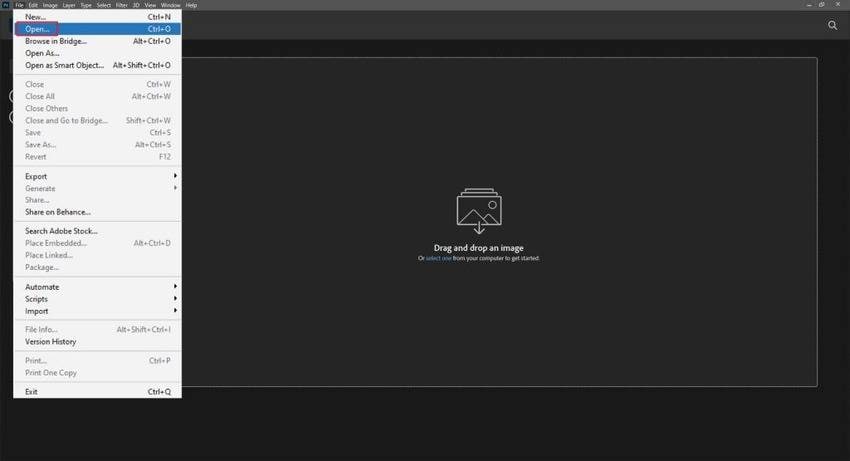
Step 1: Go to File > Open to add an image in Photoshop or use the drag-and-drop functionality.
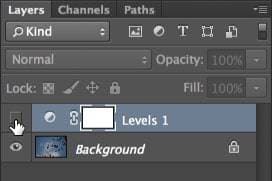
Step 2: Go to Layer > New Adjustment Layer > Levels. You can also access the setting in the right-side Layers tab.

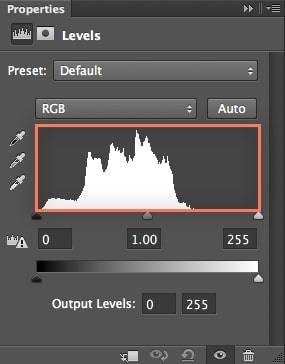
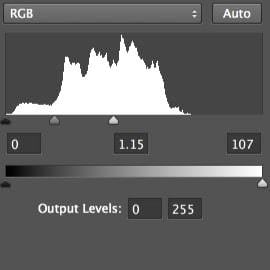
Step 3: You’ll see a Properties panel with a histogram representing the photo’s highlights, shadows, and midtones. Notice the space on its right side – where the highlights should expand. That shows underexposure, while a gap on the left side would signify overexposure.
Step 4: Use these input-level sliders to adjust the highlights and shadows. Experiment until you achieve the desired result.
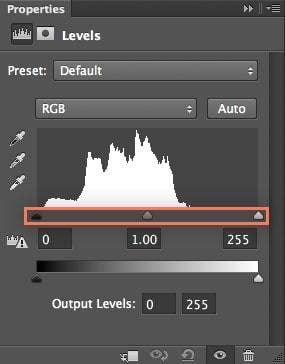
Step 5: Dragging the white slider to the end of this histogram will brighten the underexposed photo. You don’t need to move it if it’s already in that place.
Step 6: The black slider in this example is where it should be – you can move it to correct overexposed photographs.
Step 7: You can tick this box to disable your adjustments for comparison and enable them again. The best part is you can create multiple levels for nondestructive editing.
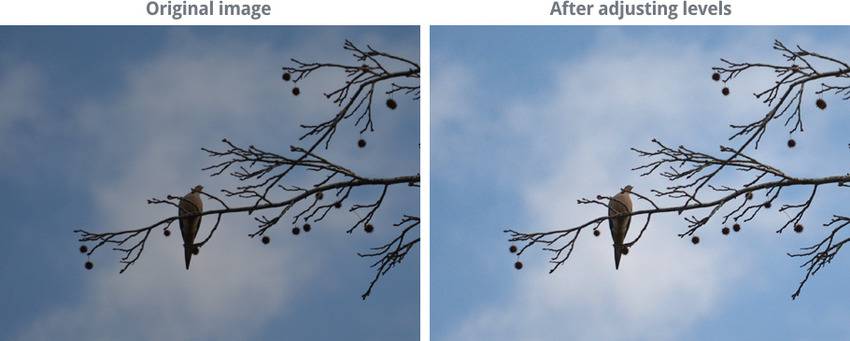
Here’s a comparison of our underexposed photo before and after level adjustments.
Here are a few examples of the so-called clipping to help you better understand levels in Photoshop:
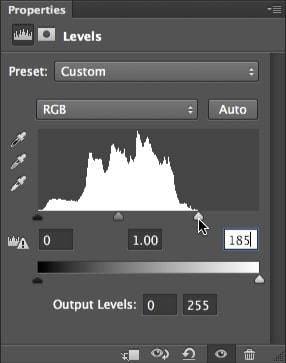
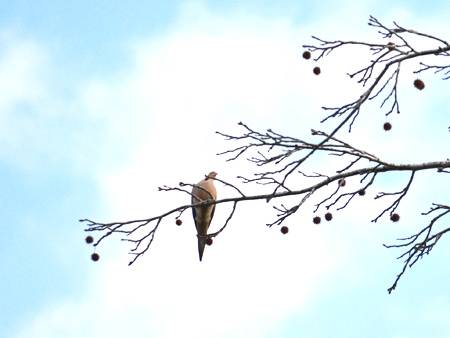
Example 1: Moving the white slider more to the left than you should makes the highlights dominate the picture. That means robbing it of many details.
Here’s how that looks:
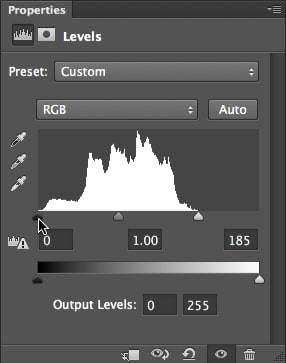
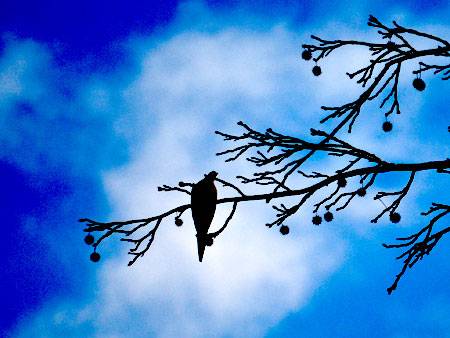
Example 2: Dragging the black slider to the right removes many details because the shadows are more prominent.

Here’s how that looks in our photo:
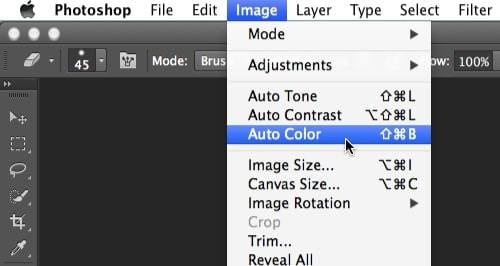
Example 3: You can play with the input level sliders to hone your skills, but you can also use another valuable feature – auto color correction in Photoshop. The program can automatically adjust your picture’s tonal range for the most realistic effect. Go to Image > Auto Color to run the command.
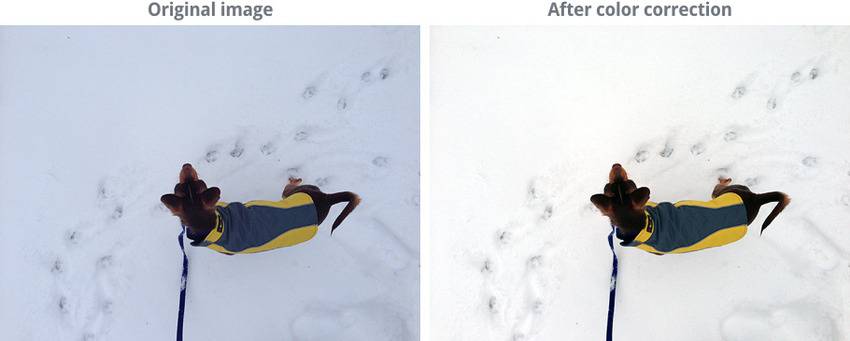
Here’s how automatic color correction in Photoshop adjusts the levels to brighten the snow in this example photo:
Let’s see how you can adjust the default levels in Photoshop:
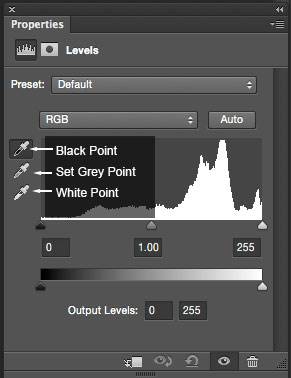
Step 1: You’ve likely noticed the eyedropper icons in the Properties panel. You use them to set black, gray, and white points in adjustment levels. Click the black point eyedropper – the uppermost icon – to adjust the shadow defaults.
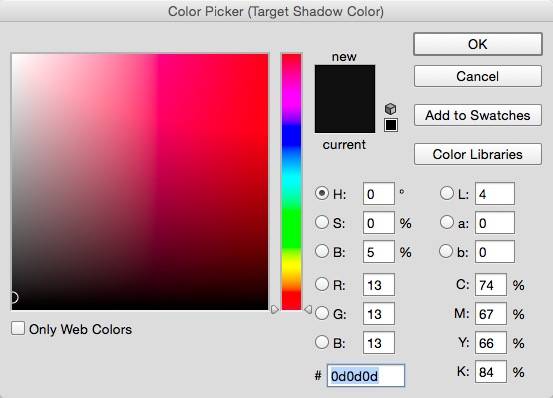
Step 2: Change the B (brightness) setting to 5% to set your default shadow color to 95%. Then, modify the RGB (red, green, blue) settings – anything between 10–13 works well to ensure the shadows keep their details. Click OK.
Step 3: Click the white point eyedropper to adjust the highlight defaults.
Step 4: Set the B setting to 95% and adjust the RGB levels – anything between 245–242 works. Maxing it out to 255 would eliminate details in the highlights. Click OK to apply the changes.
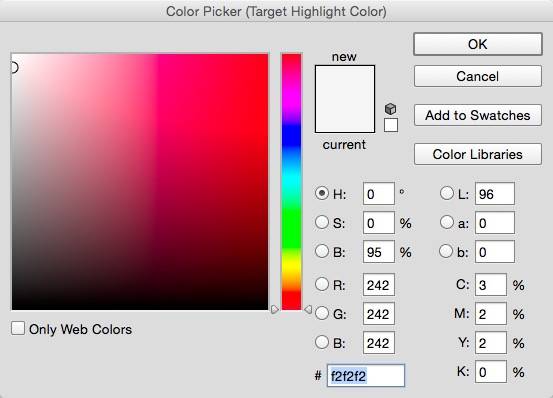
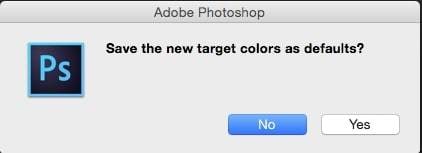
Step 5: Click Yes in the dialog box to save your new target colors as defaults.
This part of our color correction Photoshop tutorial may have taken a while, but it’s crucial for fixing highlights and shadows in your photos – and it’s pretty straightforward. Now that you’ve set up your default shadows and highlights, it’s time to fix the color issues in your photo.
Create an Adjustment Layer Threshold for Finding the Lightest Areas
An adjustment layer threshold in Photoshop helps detect the lightest and darkest areas in an image. They’re sometimes nearly impossible to spot, making this feature valuable in color correction.
Here’s how to create an adjustment layer threshold:
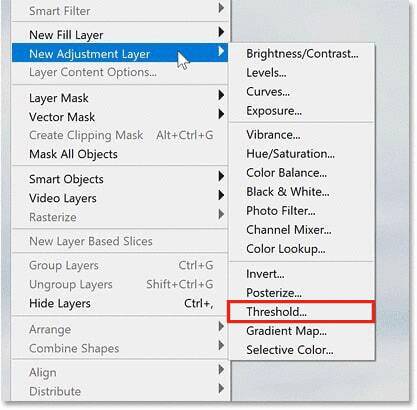
Step 1: Go to Layer > New Adjustment Layer > Threshold.
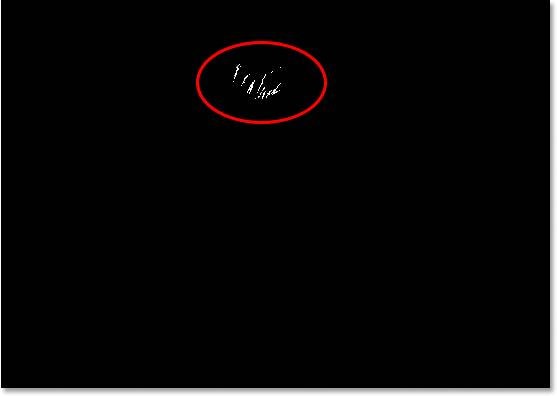
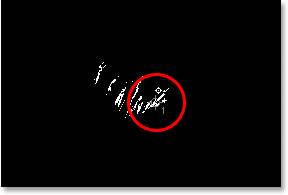
Step 2: Once a dialog box with a histogram pops up, drag the white slider to the right, making your photo black. Then, move it slowly to the left until you see the lightest areas.
Check out the photo below to understand the next steps and the result better:

Here are the lightest areas after dragging the white slider to the right:
Using Target Markers on White Surfaces
You’ve already set your target markers, so here’s how to use them:
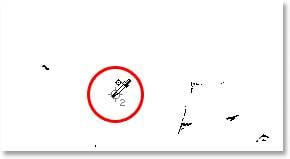
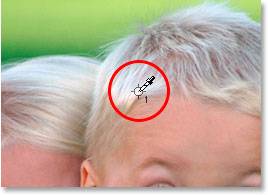
Step 1: Move your cursor over any white area so that it can become an eyedropper icon.
Step 2: Hold the Alt key if you use Windows or the Option key if you use Mac, and click any part of the white area to place your marker.
Detecting the Darkest Areas With the Same Threshold
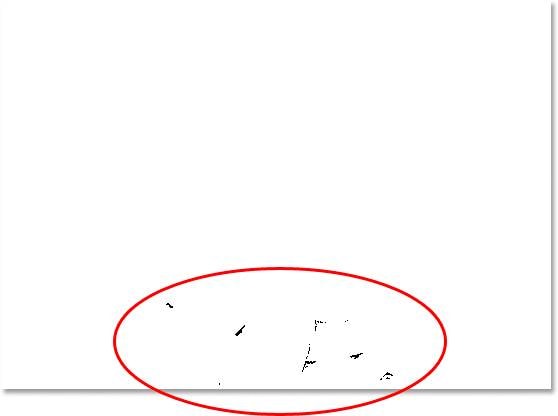
You don’t need to create another adjustment layer threshold to detect the darkest areas in your photo – the dialog box with a histogram is still open. Drag the black slider to the left to make your picture white, and slowly move it to the right until you see the darkest areas.
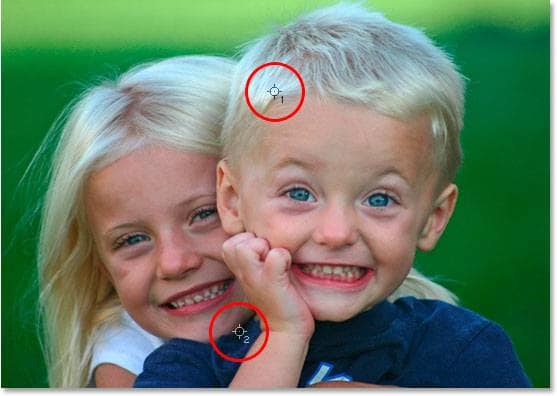
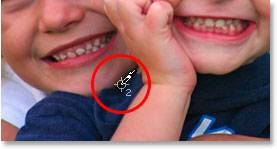
Using Target Markers on Black Surfaces
Repeat the steps for white markers, except move your cursor over the black areas to place the second marker.
Remove the Adjustment Layer Threshold
You no longer need the threshold, so hit Cancel in the dialog box where you moved the threshold-level sliders. Your target markers will disappear, but you’ll access them in the next step.
Create a “Levels” Adjustment Layer
Creating a “Levels” adjustment layer will bring your target markers back, enabling you to correct the colors. Go to Layer > New Adjustment Layer > Levels to open the Properties panel (the one with the photo’s histogram, input-level sliders, and eyedropper tools). Your target markers will reappear.
Configuring the White Point Eyedropper
Once your target markers appear, follow these steps:
Step 1: Click the white point eyedropper in the Properties panel.
Step 2: Click your first target marker.
Configuring the Black Point Eyedropper
Now follow these steps:
Step 1: Click the black point eyedropper in the Properties panel.
Step 2: Click your second target marker.
Here’s the final result in our photo:

Here’s a comparison of the original photo and its corrected counterpart:
Adjusting Midtones
Midtones in Photoshop can help you brighten or darken a photo if adjusted highlights and shadows don’t meet your expectations. Moving the middle slider in the Properties panel to the left will make the highlights more prominent while dragging it to the right will do the opposite.

You can now remove your target markers:
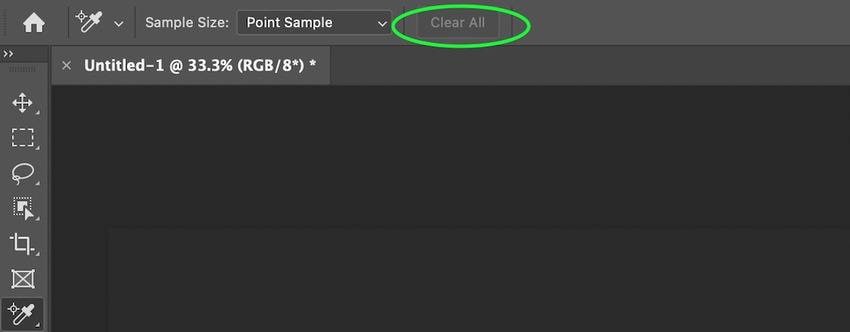
Step 1: Click the eyedropper icon in the left-side Tool palette and select the Color Sampler Tool.

Step 2: Click Clear All in the Options palette at the top of the Photoshop window.
That’s it! Go ahead and apply everything you’ve learned to another photo. You’ll get the hang of it in no time.
Photoshop Alternative: AI Photo Colorizer & Auto Color Correction
Photoshop has its benefits, but mastering its features takes time and effort. Although the steps above are straightforward, they’re only the tip of the colossal iceberg.
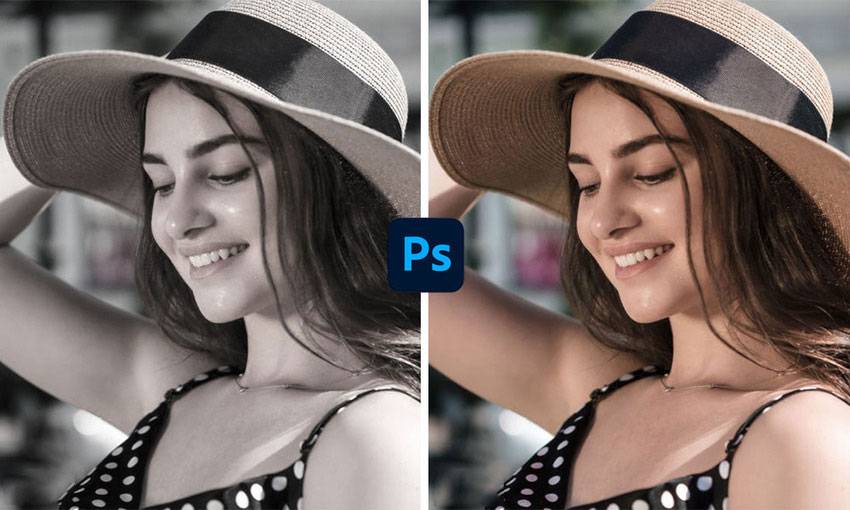
What if you wish to colorize black-and-white photos? You’d have to use many filters and adjustments, spending hours fine-tuning the pictures.
Fortunately, there’s an alternative – Wondershare Repairit’s AI Photo Colorizer. This AI-powered online tool lets you automatically colorize any black-and-white photo – whether they’re old or you shot them with a black-and-white filter. Additionally, you can restore old, damaged photographs to return them to their former glory.
The process takes only three steps:
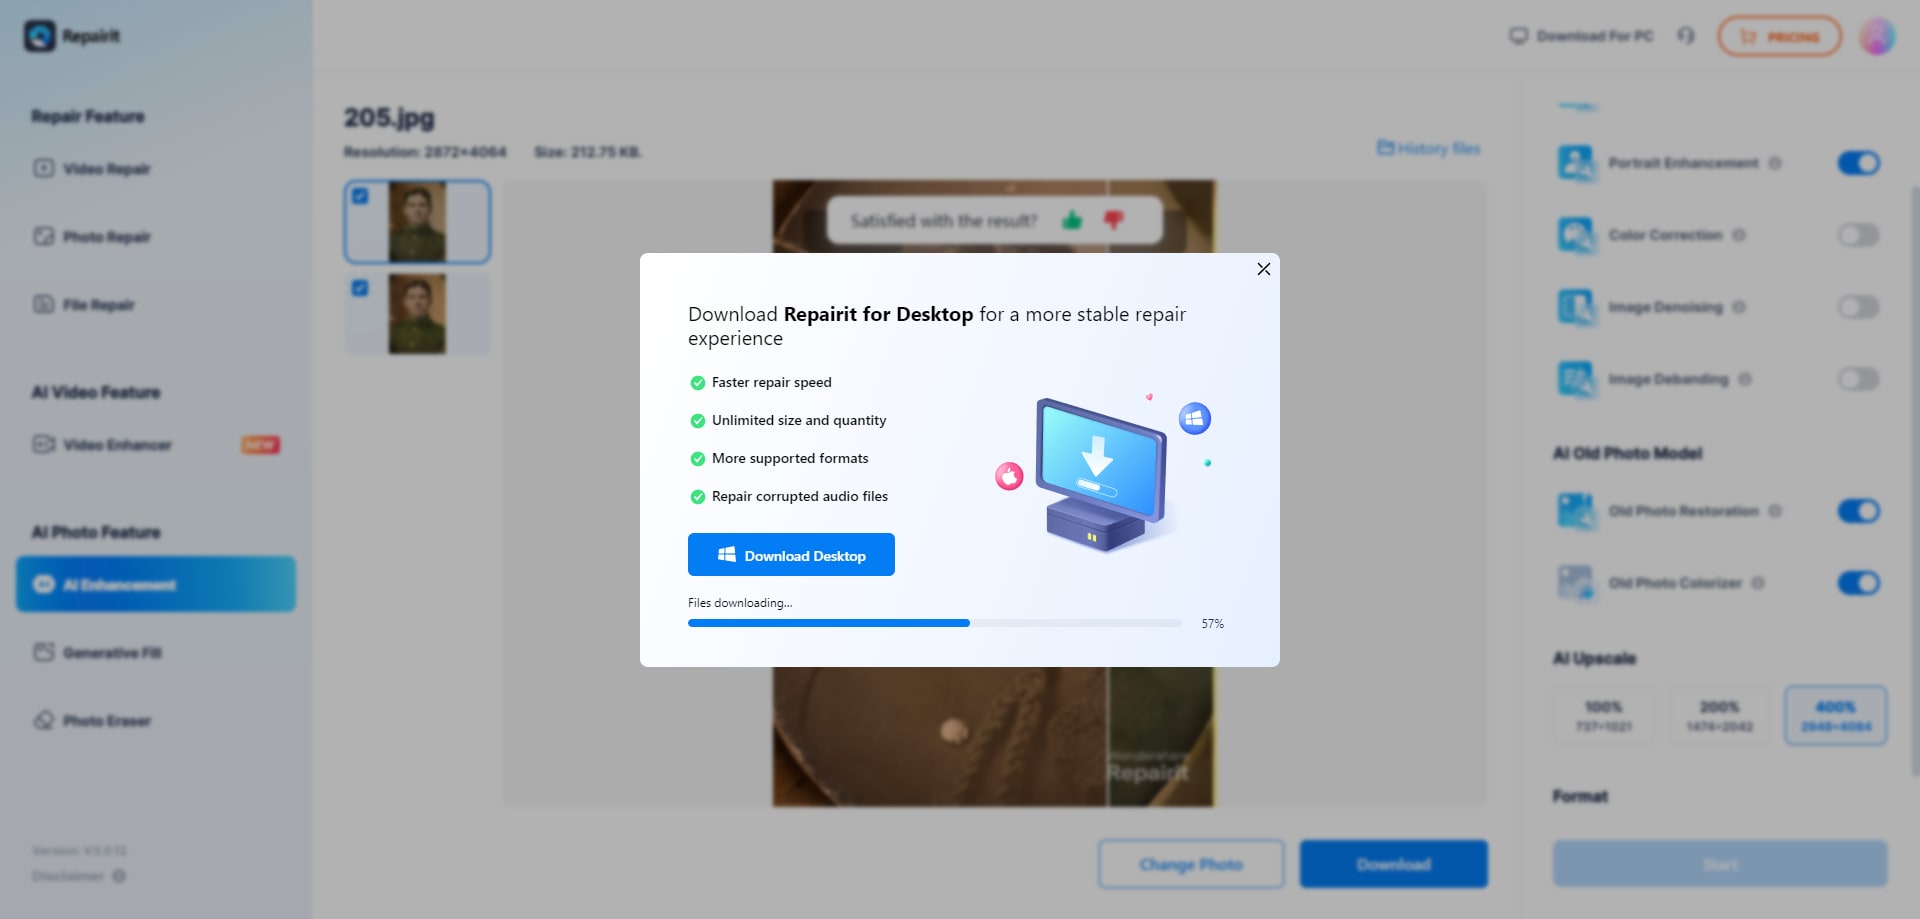
Step 1: Click Upload Image to add a black-and-white photo to the online tool.

Step 2: Select Photo Colorize and click Start.
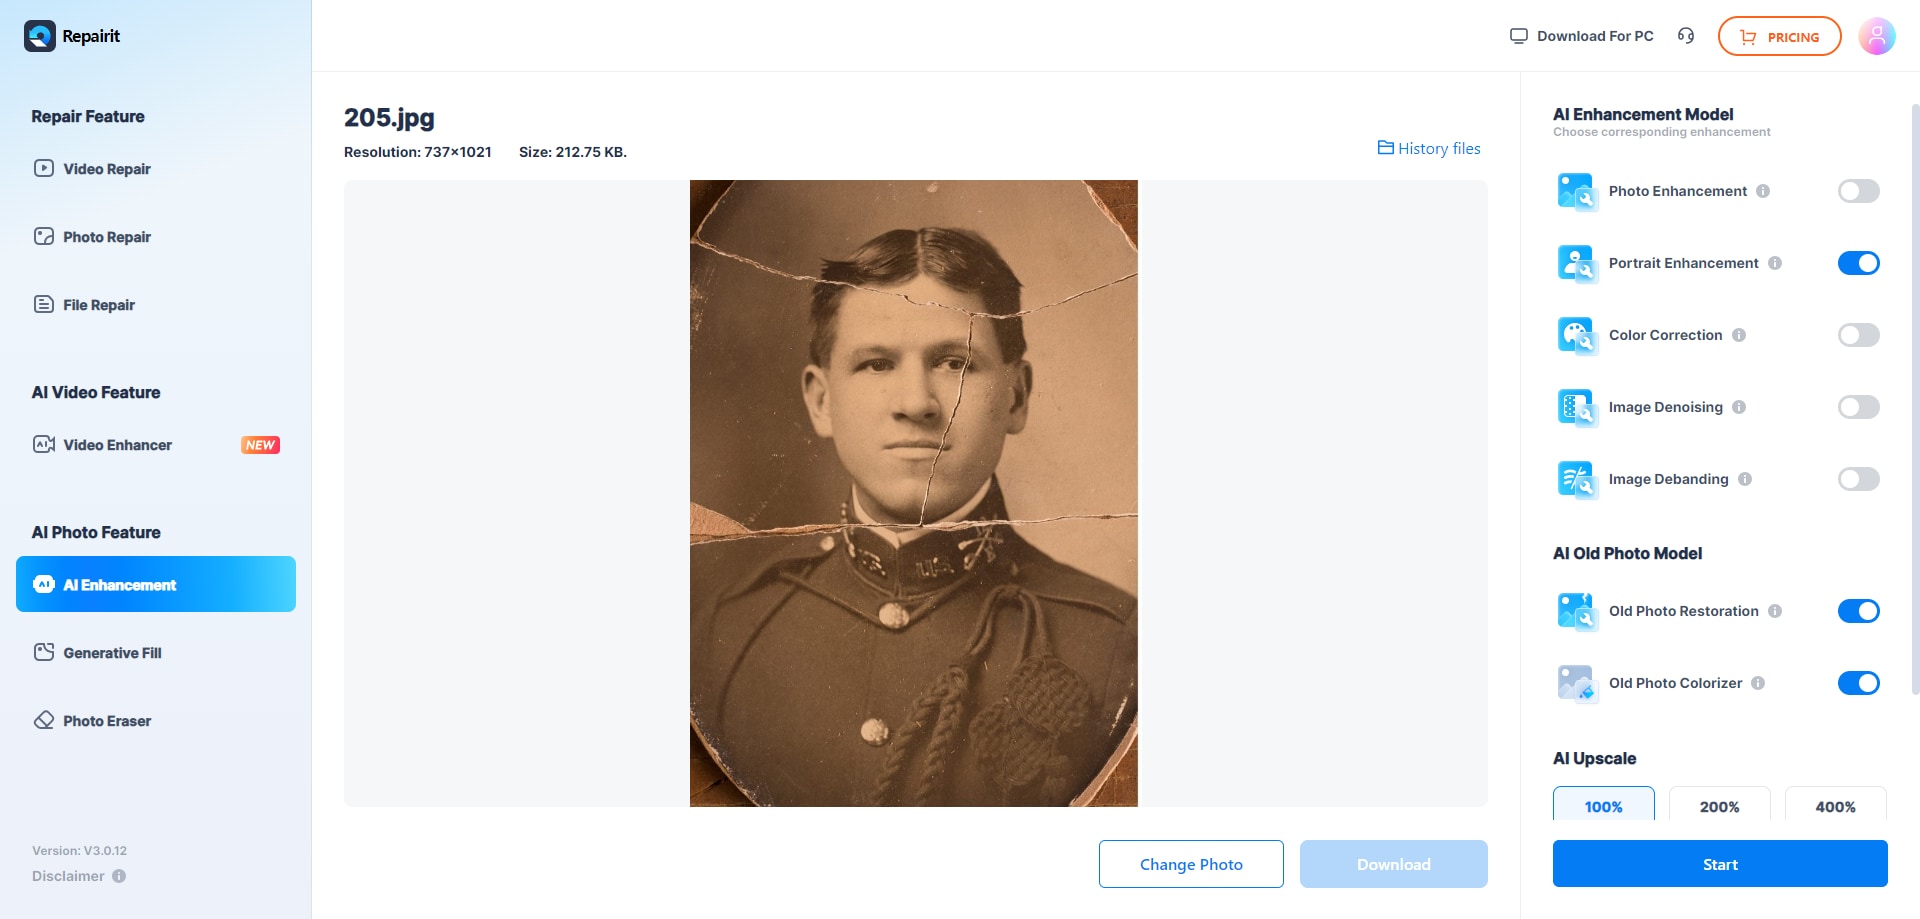
Step 3: Preview the three colored options, select any you wish to save, and click Download.
Not having to tweak any settings makes the AI Photo Colorizer a fantastic Photoshop alternative. The best part is you get multiple colorizing results!
Conclusion
Color correction in Photoshop is excellent for adjusting tonal issues in photos. However, this tutorial covers only the basics, so explore other features to master the program and transform your photographs.
If colorizing black-and-white photos becomes too complicated, use Wondershare Repairit’s online AI Photo Colorizer to restore their original color automatically.
