
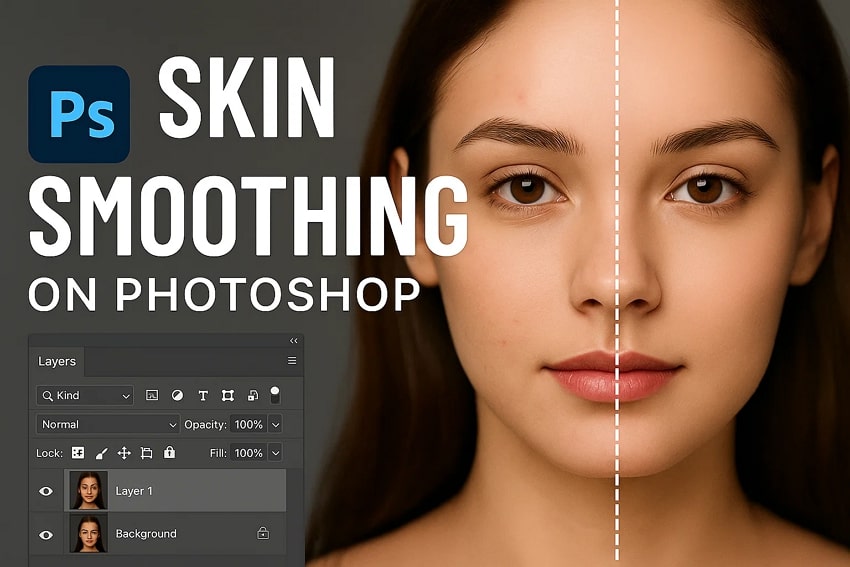
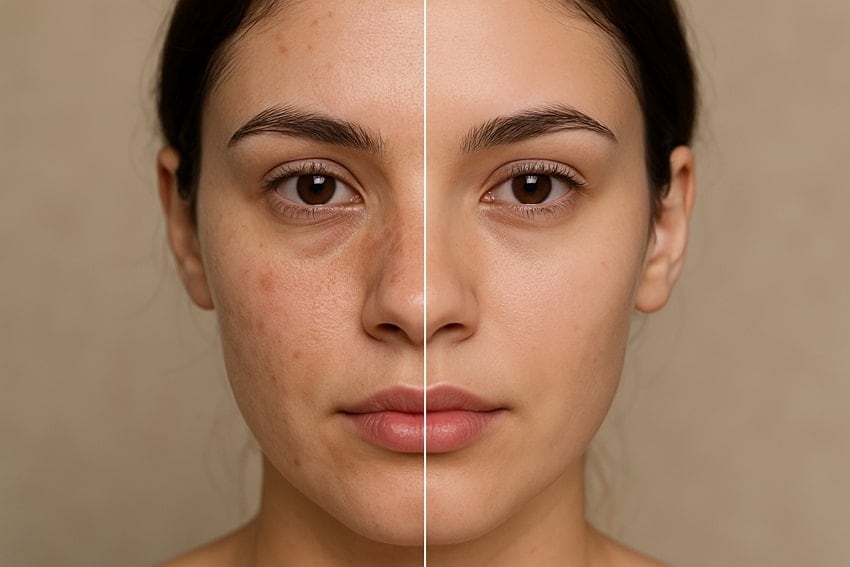
In this digital world, having a picture with perfect skin is not only a beauty standard, but also a visual power play. Today, even small flaws, such as uneven textures or small lines, can easily ruin the pictures’ overall impression. However, thanks to the innovations and professional image editors like Adobe Photoshop, achieving a smooth and refined skin is possible.
Using retouching tools and non-destructive editing, skin smoothing in Photoshop enables you to make your subject look more beautiful in its natural way. To master these techniques, read the following article packed with guided tutorials on each skin smoothing approach. Besides, if you’re wondering who exactly benefits most from these editing techniques, then keep reading to explore key usage scenarios.
In this article
Part 1. Who Needs to Utilize Skin Smoothing on Photoshop? (Usage Scenarios)
Go through the following section to understand who needs to utilize skin retouching Photoshop tools and how it enhances their work:
High-End Portrait Photographers: In portrait photography, skin smoothing helps to remove temporary blemishes or redness without losing the subject’s natural tone. With Photoshop, you can delicately refine skin tones and maintain core details, creating images that clients admire.
Fashion and Editorial Creators: Within the fashion industry, skin retouching techniques are important to meet high-end publishing standards. Skin smoothing tools enable the editor to make models look their very best by airbrushing flaws and balancing lighting variations.
Social Media Influencers and Content Marketers: They frequently utilize skin smoothing to maintain an aesthetic look across their feed. This tool’s non-destructive retouching tools can enhance your selfies and lifestyle shots, which can be used as thumbnails.
Beauty and Skincare Brands: When marketing skincare or cosmetic products, brands depend on skin smoothing to portray flawless complexions. Photoshop even provides these skin-touching techniques, which assist in expressing trust in the product, leaving a credible image.
Wedding and Event Photographers: While special occasions deserve timeless photos, wedding photographers thus use skin smoothing to improve the couple’s natural glow. Here, it's all about refinement and fixing minor imperfections that clients will appreciate for years.
Part 2. Advanced & AI-Powered Skin Smoothing on Photoshop: Step-by-Step Tutorials
From subtle corrections to advanced editorial edits, the section below covers 6 powerful Photoshop smoothing techniques with step-by-step instructions:
Technique 1. Neural Filters (Skin Smoothing)
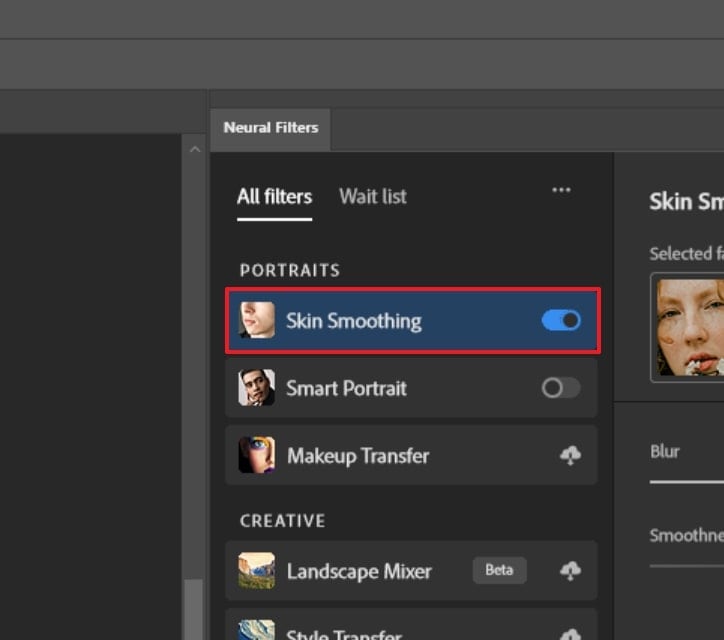
In Photoshop, its Neural Filters are AI-driven tools that are ideal for users who want professional results without getting into manual retouching. It even allows batch editing with filter options like smart portrait, makeup transfer, and skin smoothing. More impressively, all the modifications are applied on a separate layer, making your edits fully reversible. To do it yourself, follow the provided tutorial and get started:
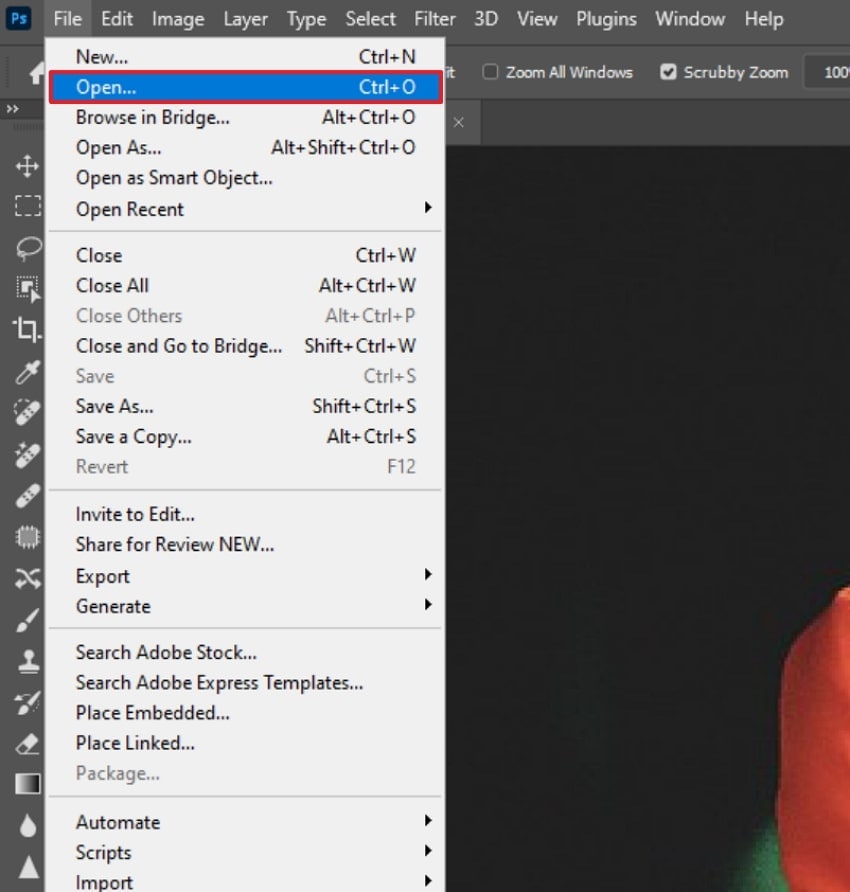
Step 1. Deploy the program and press the “File” tab from the top toolbar after launching. After this, choose the “Open” option from the drop-down menu and add your image file to the program.
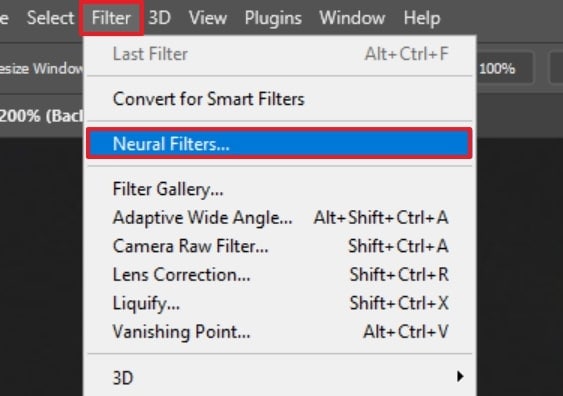
Step 2. From the layers panel, right-click on your background layer and select the “Duplicate Layer” option. Now, navigate to the “Filter” tab and choose the “Neural Filters” option.
Step 3. Now, enable the “Skin Smoothing” option under the All-Filters list to retouch your portrait.
Technique 2. Healing Tools (Spot Healing Brush)
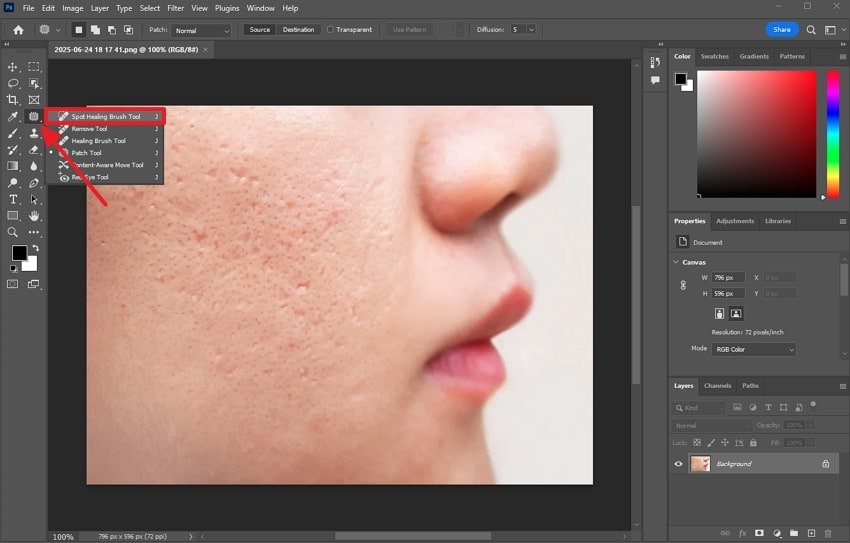
When skin retouching on Photoshop is concerned, the Spot Healing Brush enables editors to remove every minor detail. Here, with the help of a brush, you can highlight the area you want to fix. Besides, you’re allowed to adjust the brush size and hardness to make modifications appear more natural. Follow the instructions and learn how to remove imperfections with a brush:
Instructions: To do so, simply add your photo to Photoshop and select the “Spot Healing Brush Tool” from the left toolkit. Now, press “J” on your keyboard and paint over the imperfect area to smooth it out.
Technique 3. Clone Stamp Tool
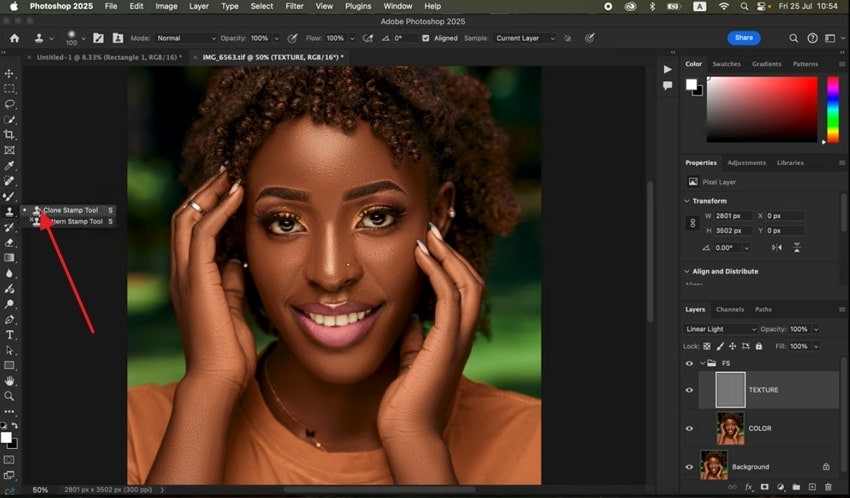
This Photoshop smoothing technique, through the Clone Stamp tool, allows users to smooth out large problem spots. It works by allowing you to sample an unblemished area of skin to paint it over imperfections or uneven areas. When utilized with a thinner brush and lower opacity, the Clone Stamp creates natural-looking skin. Explore the provided tutorial and master how to use Clone Stamp in Photoshop:
Step 1. Add your photo in Photoshop, proceed to the “Stamp” icon, and choose the “Clone Stamp Tool” option from the menu.
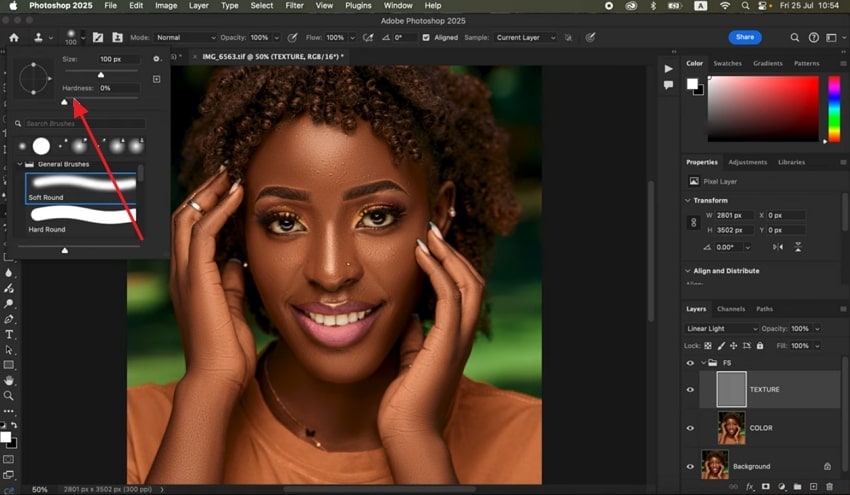
Step 2. Now, adjust the hardness of brush and opacity between 10-30% for more natural blending. Once done, hold the “ALT” (Windows) or “Option” (Mac) and click the part of the skin you want to correct. Afterward, release the respective keys and gently paint over the blemishes or uneven skin areas.
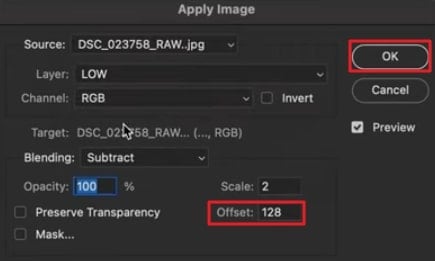
Technique 4. Frequency Separation
It's a convenient approach for high-end beauty retouching, which allows editors to separate skin textures from color and tone. The High and Low frequency separation enables one to smooth out skin discoloration without affecting details like pores. It's valuable when working on close-up portraits, as the goal is to achieve flawless skin without an airbrushed look. To master skin retouching Photoshop, follow the provided manual:
Step 1. Access your image in Photoshop, create 2 duplicates of your image layer by pressing “Command” and “J”. Now, name the lower layer as “Low” (color tone) and the top duplicate as “High” (texture, detail). After this, hide the High Frequency layer by clicking the Eye icon and select the Low Frequency layer.
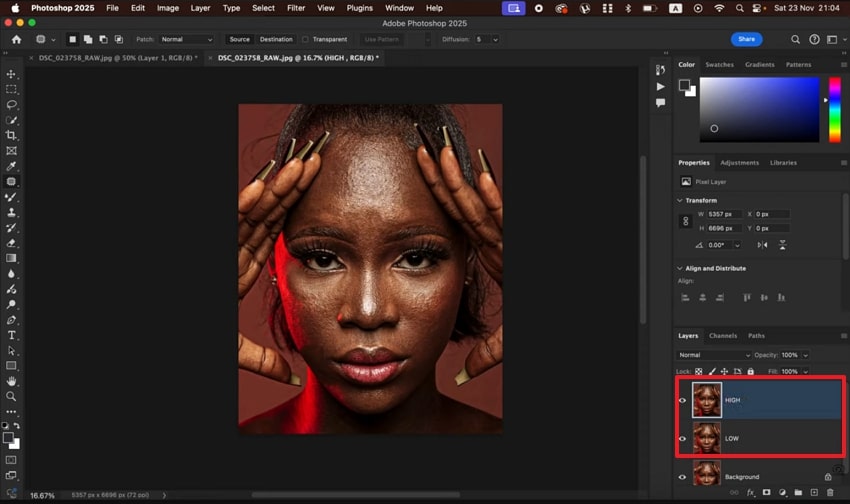
Step 2. Now, access the Filter tab and expand the menu for Blur to choose any blurring effect. Once you've applied the changes, make the High Frequency layer visible and select it later. Afterward, press the Image tab, choose the “Apply Image” option, and set the Layer to “Low.” Put the Offset to “128” and press the “OK” to change High Frequency layer’s blend mode.
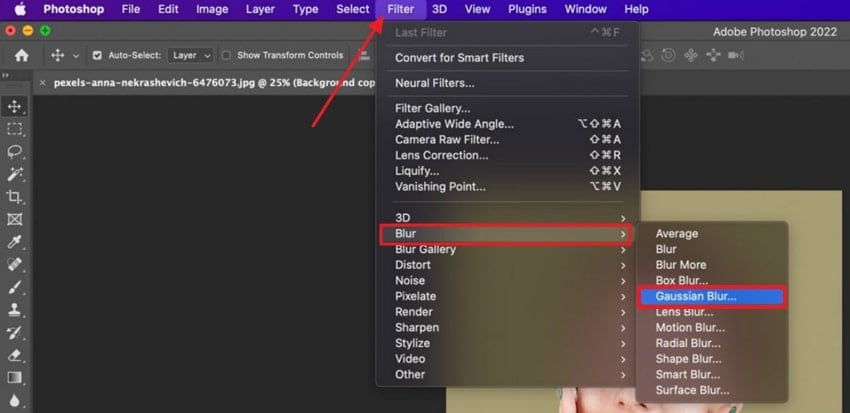
Technique 5. Gaussian Blur Technique
For skin smoothing on Photoshop, you can refer to Gaussian Blur approach when you’re short on time or new at editing. It works by applying a soft blur to the skin, which minimizes the visibility of minor imperfections. When you combine it with feathered selection and layer masking, you can control where and how blur is applied. Read the tutorial and get a smooth, radiant finish:
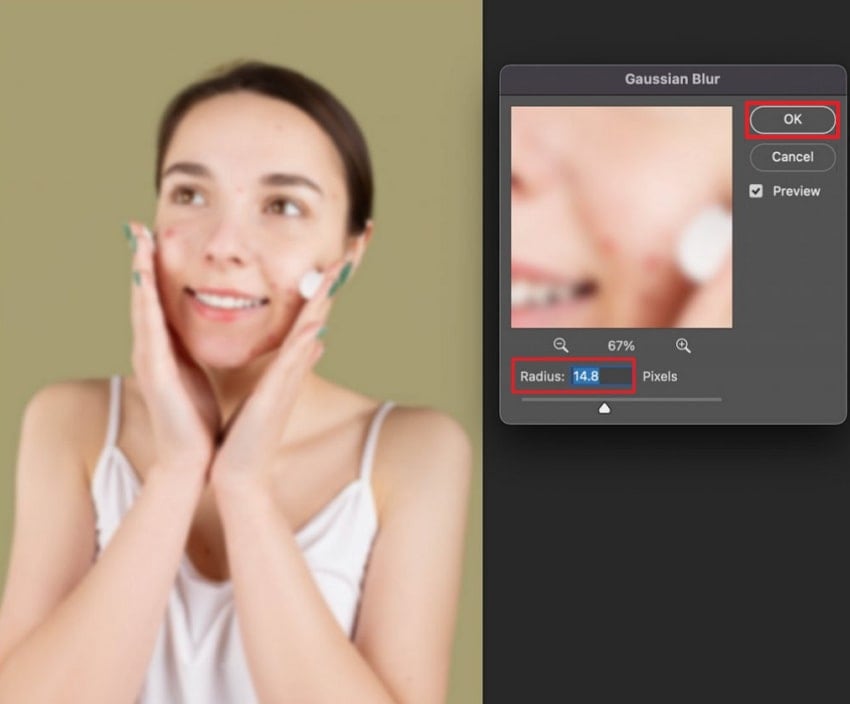
Step 1. Enter Photoshop, add your image file, and navigate to the “Filters” tab from the top toolbar. Now, right-click the background layer and select the “Duplicate Layer” option; repeat until you have 3 layers. Press the “Filter” tab, extend the menu for “Blur” and choose the “Gaussian Blur” option from submenu.
Step 2. In the pop-up window, set the Radius between 20 and 30 pixels, which you can alter based on your image resolution. For instance, here we need “14.8” pixels, as skin starts looking smooth, before pressing the “OK” button.
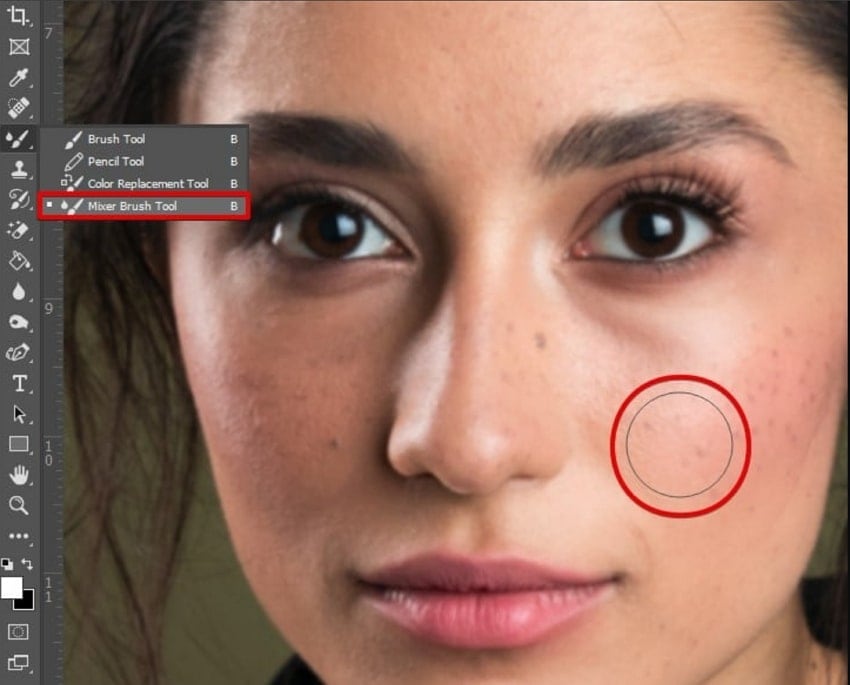
Technique 6. Mixer Brush Tool
The Mixer Brush tool is a digital paintbrush that blends existing pixels to even out skin tones in Photoshop smoothing task. It's perfect for addressing the freckled or patchy areas without introducing blur or losing details. On a new layer, it creates beautifully blended skiing with zero destruction to the original image. For better understanding, adhere to the given tutorial and perform it yourself:
Instructions: Select the “Mixer Brush Tool” option from the panel at left, and then choose a soft round brush. Next, create a new blank layer and enable the “Sample All Layer” option to work non-destructively. Now, highlight uneven skin tone or harsh lines to blend them while zooming in for detailed areas.
Pro Tip. Try an Easy but Effective Alternative for Skin Smoothing - Repairit
After learning skin smoothing on Photoshop, many users find it difficult to achieve results and seek better alternatives. Among the available options, we highly recommend Repairit, which lets you enhance photos. It also has an inbuilt AI Photo Enhancer that enhances the quality of images and color balance using AI. In addition, it brings blurry pictures to life using advanced algorithms that make them clear and with extra detail.
This tool enables you to improve several images simultaneously, which is timesaving and boosts productivity when editing photos. While enhancing, you can opt for your desired output resolution quality by selecting the available options, from 100% to 800%. Repairit lets users view results in real-time before saving to ensure image quality improvements.
Key Features

Wondershare Repairit - AI Photo Enhancer
1,010,994 people have downloaded it.
-
Image Denoising: It even reduces visual noise in blurred or compressed images for a much cleaner photo finish.
-
Overexposure Fix: Users can even correct washed-out images by adjusting brightness and contrast, which restores natural lighting and color distribution.
-
Resolve Printed Grid: While enhancing, editors even remove distracting printed patterns or grids from scanned images.
Comprehensive Guide to Perform Skin Smoothing Technique Using Repairit
Take guidance from the steps below to enhance your photos effortlessly when the Photoshop smoothing procedure seems complex:
Step 1. Access AI Photo Enhance to Upscale Your Photos
Navigate to the “AI Media Enhancer” tab and access the “AI Photo Enhancer” section. After that, opt for the “Facial Detail Enhancer” feature to move further.

Step 2. Choose the AI Model and Resolution to Enhance Photos
Press the “+Add” button to import photos to enhance them and choose the “Portrait Enhancer” AI model. Here, select your desired “Output Resolution” and press the “Start Enhancing” button.

Step 3. Export Skin Enhanced Images to Your Device
After waiting some time, preview the result, and press the “Save All” button, which will transfer improved pictures into your storage.

Make Your Skin Smoothing with Ease
 Security Verified. Over 7,302,189 people have downloaded it.
Conclusion
To sum up, perfect skin in portraits is not an option of expensive studios or professional retouchers anymore. All the discussed techniques for skin smoothing on Photoshop empower photographers and the fashion industry to improve skin textures naturally. In case your photo is blurry enough, Photoshop alone might not be enough. For this purpose, Repairit is suggested as an easy and effective alternative for skin smoothing.
FAQ
-
Q1. How can I avoid over-editing while smoothing skin?
When undergoing the Photoshop smoothing process, you can work with low-opacity brushes to avoid over-editing. Not only this, but you zoom in frequently to check details and toggle the "before" and "after" views. Following this, you can improve outcome by preserving natural textures such as pores and fine lines. -
Q2. Is frequency separation necessary for skin smoothing?
The Frequency Separation technique is not necessary for every image, because it's for high-level control and professional skin retouching. This approach is ideal for beauty and fashion photography, where preserving skin textures and fixing blotchiness is important. -
Q3. Will skin smoothing make my image look fake or plastic?
It can make your skin look fake if overused because the key to effective skin smoothing is subtlety. Besides this, lower opacity settings and a little natural skin texture should be maintained to retain a flattering look. In addition, you are not expected to remove the natural nature of the skin, but to improve it in order to maintain the picture natural.
