
Many people feel stressed when their computer breaks, and simple fixes stop working. This common issue can appear suddenly and confuse users who depend on stability. One major issue occurs when the "Windows Resource Protection could not start the repair service" error appears, as it prevents basic checks from running and leaves your system unsafe. Thus, this guide outlines simple steps anyone can follow to restore normal use today.
Table of Contents
-
- Fix 1. Enable and Start the Windows Modules Installer Service (TrustedInstaller)
- Fix 2. Use Command Prompt to Set TrustedInstaller
- Fix 3. Run SFC in Safe Mode
- Fix 4. Run DISM to Repair the System Image
- Fix 5. Disable Third-Party Anti-Virus or Security Software
- Fix 6. Check for Windows Updates
- Fix 7. Add a TrustedInstaller Expandable String Value to the Registry Editor
Part 1. What Causes the “Resource Protection Could Not Start the Repair Service” Error
It's essential to understand why this error appears before applying any fixes. Below are some points explaining why the system shows the “resource protection could not start the repair service” message:
- Service Failure: A core system service fails when the Windows Modules Installer is disabled or blocked. This failure stops internal repair functions and prevents essential system components from loading normally.
- File Damage: Corrupted system files stop important checks and cause errors. This file damage weakens important operations and prevents key modules from responding.
- Wrong Setting: Incorrect system settings stop tools from talking to each other and block repairs. These misconfigurations confuse internal mechanisms and stop modules from reading accurate system data.
- Security Conflicts: Extra security programs can interfere with Windows processes and prevent repair tools from running. These conflicts disrupt normal operations and interrupt communication between critical protection services.
- Registry Errors: Wrong registry entries mislead system tools and block repairs. These mistakes make the computer read incorrect settings instead of the right ones.
Part 2. 7 Fixes for “Windows Resource Protection Could Not Start the Repair Service” Error
Many users get frustrated when Windows stops performing essential repairs. This section gives fixes for the “Windows Resource Protection could not start” error:
Fix 1. Enable and Start the Windows Modules Installer Service (TrustedInstaller)
Enabling the Windows modules installer service, also called TrustedInstaller, helps repair tools run. This service supports Windows in managing important updates and fixing corrupted system files. Besides, it allows background checks to be completed and repairs to be executed when active. Follow the steps below to solve this issue via Services Console:
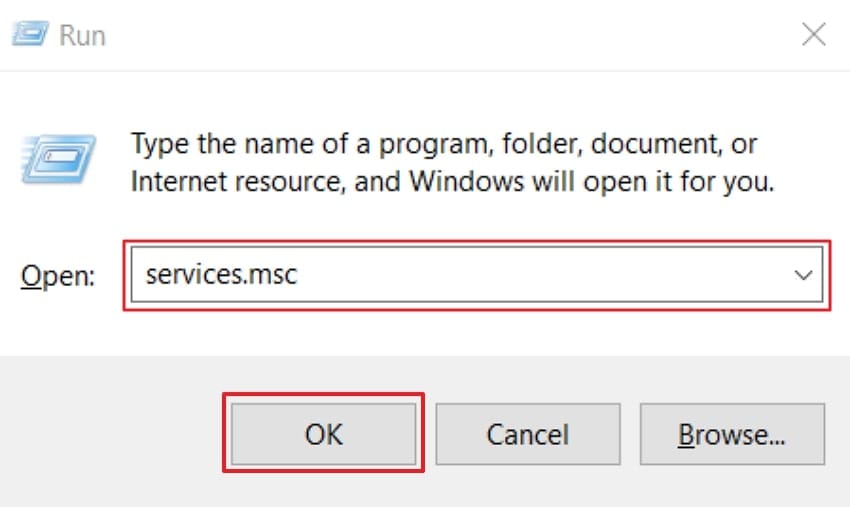
Step 1. Press “Windows + R" to open the Run dialogue box, type “services.msc,” and click the “OK” button.
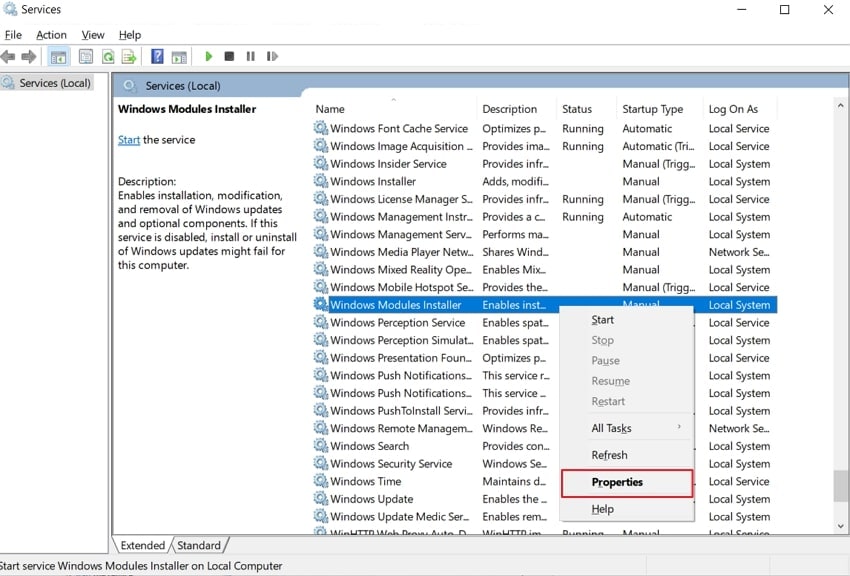
Step 2. Now, find "Windows Modules Installer" and right-click on it and open its "Properties”.
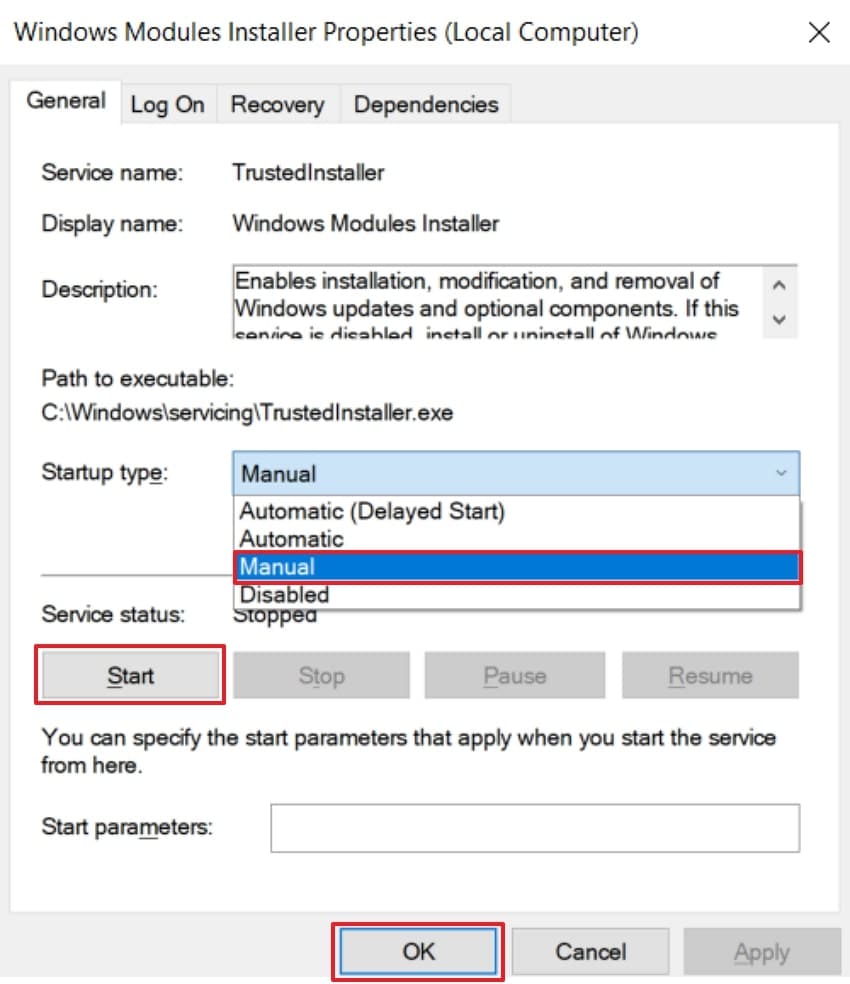
Step 3. As you access properties under the “General” tab, choose “Manual” from the “Startup type” drop-down list. Lastly, click the “Start” button under the “Service Status” section and then click the “OK” button.
Fix 2. Use Command Prompt to Set TrustedInstaller
You can also use Command Prompt to set TrustedInstaller, helping Windows tools regain proper access permissions. This action resets TrustedInstaller so Windows can access and fix important system files. It quickly restores smooth communication between repair tools and essential system services. Go through the given guide to fix the Windows resource protection could not start the repair service error:
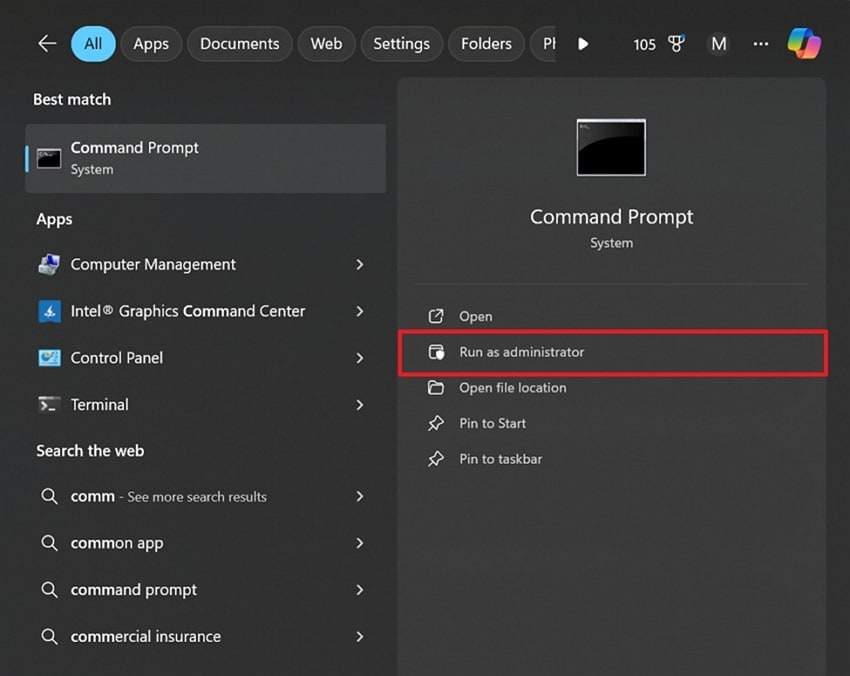
Step 1. Open “Command Prompt” on your PC and then choose “Run as Administrator.”
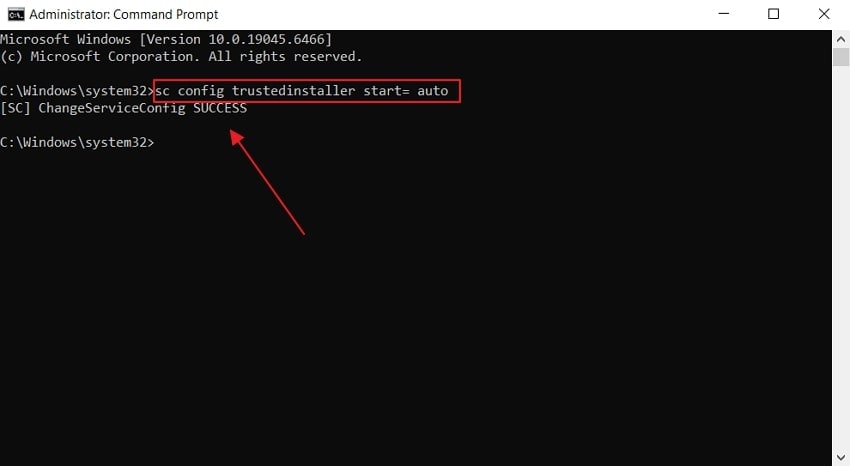
Step 2. In the CMD window, type “sc config trustedinstaller start= auto” command and press “Enter.” Once it's done, you’ll see a “ChangeServiceConfig SUCCESS” message. To complete the process, run the “net start trustedinstaller” and try the SFC command.
Fix 3. Run SFC in Safe Mode
When you run SFC in Safe Mode, Windows loads only the essential services you need. This stops extra apps and drivers from blocking repair actions. As a result, SFC can access files that remain locked during normal use. It also helps the TrustedInstaller service start more reliably and prevents corrupted drivers from interrupting the scan. Here are the following steps to run SFC in safe mode to resolve the issue:
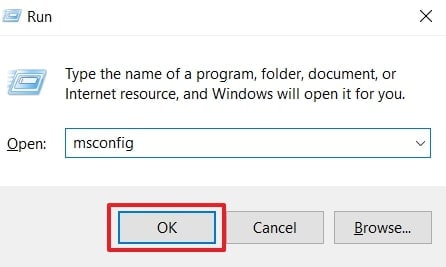
Step 1. Press “Windows + R" to open the Run dialogue box and type "msconfig.”
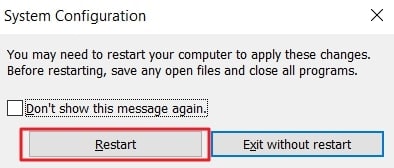
Step 2. Go to the “Boot” tab, choose “Safe Mood,” enable the “Minimal” option, then click the “OK” button.
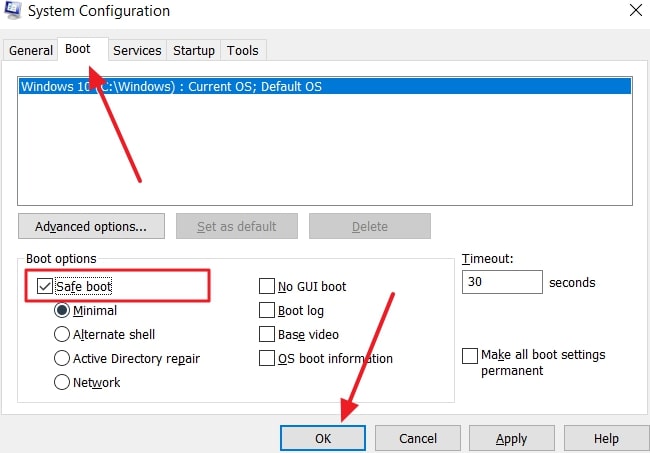
Step 3. After that, hit the “Restart" button to enter Safe Mode.
Step 4. Afterward, search for “Command Prompt” in the Safe Mode and choose “Run as Administrator.”

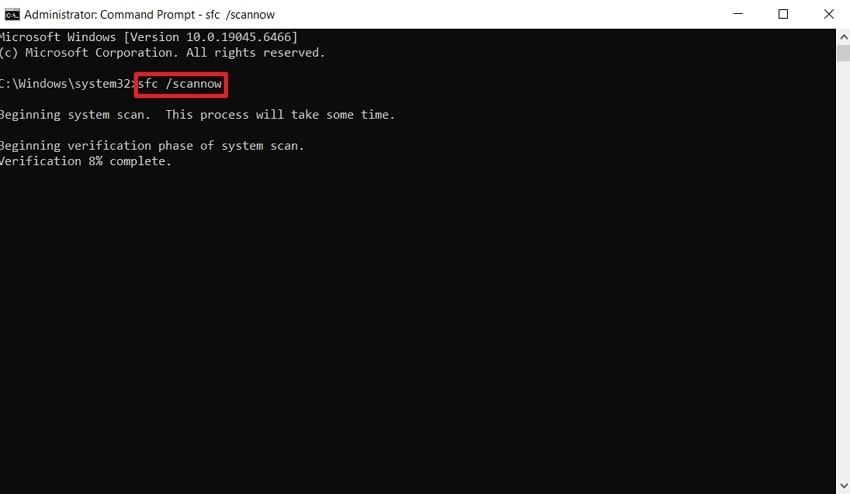
Step 5. Run “sfc /scannow" to repair files without interruptions from anti-virus or other programs. The command will scan your system to find any corrupted or damaged files.
Fix 4. Run DISM to Repair the System Image
This process helps fix the “Windows Resource Protection could not start” error by repairing the system image. Running DISM repairs the system image and fixes broken Windows files, causing errors. It also restores important system parts so that automatic tools can work again. Follow the steps below to learn how to run DISM to repair system images:
Instructions. Open CMD and run it as administrator, type “DISM /online /cleanup-image /restorehealth” and press the “Enter” key.

Fix 5. Disable Third-Party Anti-Virus or Security Software
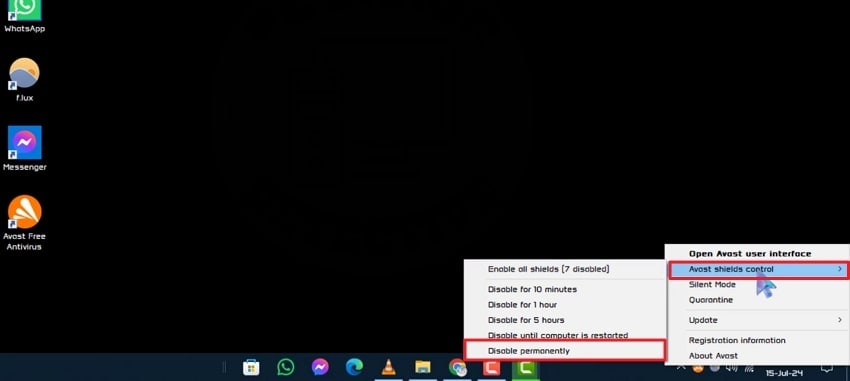
In some cases, the Windows repair service cannot be executed due to the blocking of anti-virus or security programs by third-party developers. This step lets repair actions run and improve the chances of fixing system errors. Besides, disabling the third-party anti-virus or security software removes these conflicts. Go through the given instructions to turn off the Avast anti-virus software:
Instructions. Right-click on the anti-virus and choose the "Avast Shield Controller” section. Next, press the “Disable Permanently" option to deactivate it.
Fix 6. Check for Windows Updates
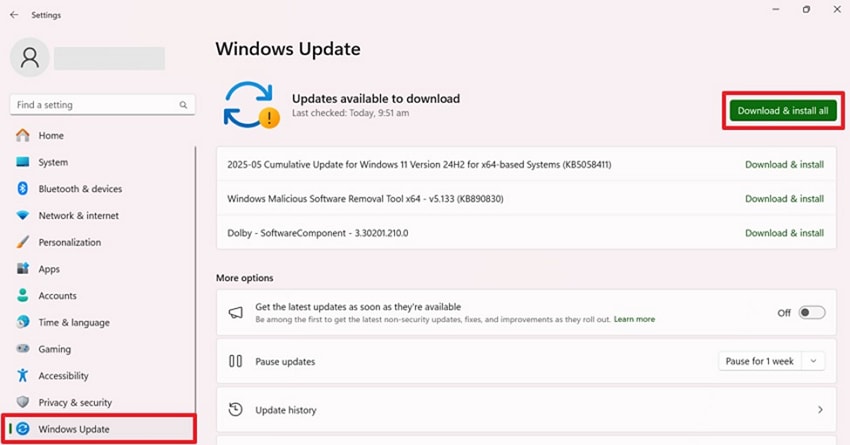
Checking for updates ensures your system has the latest fixes for stability improvements. These updates provide bug corrections that help Windows repair tools function correctly again. Keeping Windows updated strengthens core operations and reduces errors, such as Windows Resource Protection could not start the repair service. Learn the instructions below to update Windows to solve the issue:
Instructions. After accessing your computer settings, go to the “Windows Updates” tab. If updates appear, click “Download and Install” to download and apply them.
Fix 7. Add a TrustedInstaller Expandable String Value to the Registry Editor
Add a TrustedInstaller expandable string to boost system trust and repair functions. This adjustment helps Windows recognize important services, so the tool runs without interruption. It directly resolves the error where Windows Resource Protection could not start the repair service. Go through the given guide below to add a TrustedInstaller expandable string value:
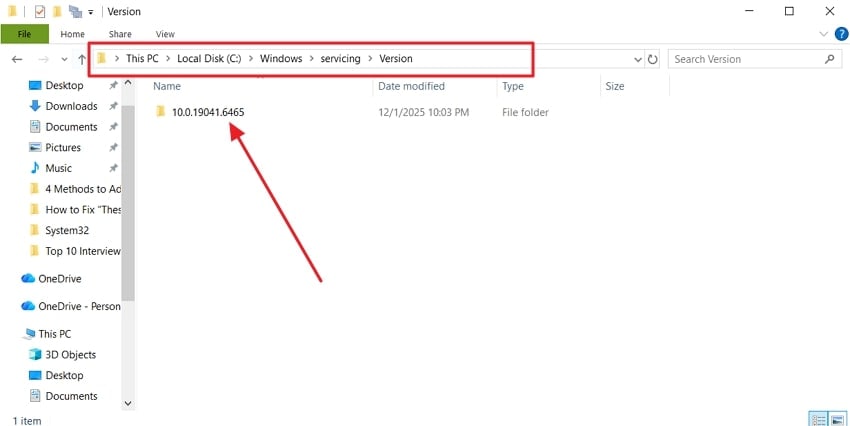
Step 1. Press “Windows + E” and open “File Explorer”, then go to “C:\Windows\Servicing\Version.” Look for a folder named “10.0.19XX.X,” this is your TrustedInstaller ID that you need to copy.
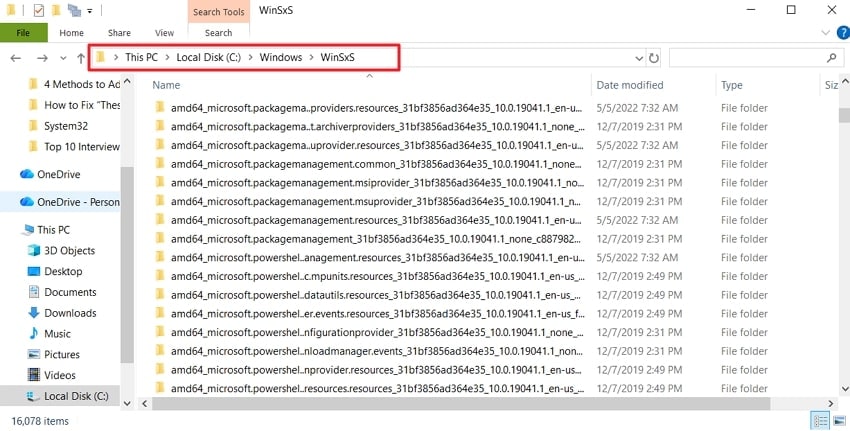
Step 2. Next, open the “C:\Windows\WinSxS” directory. Find “amd64_microsoft-windows-servicingstack_31bf3856ad364e35_{TrustedInstaller ID} (64bit Windows)” or “amd64_microsoft-windows-servicingstack_31bf3856ad364e35_{TrustedInstaller ID} (64bit Windows)” in the search bar.
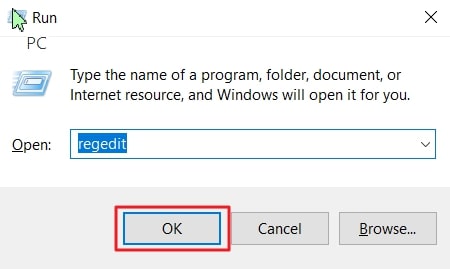
Step 3. Launch the Run dialog box, enter “regedit,” and press “Enter.”
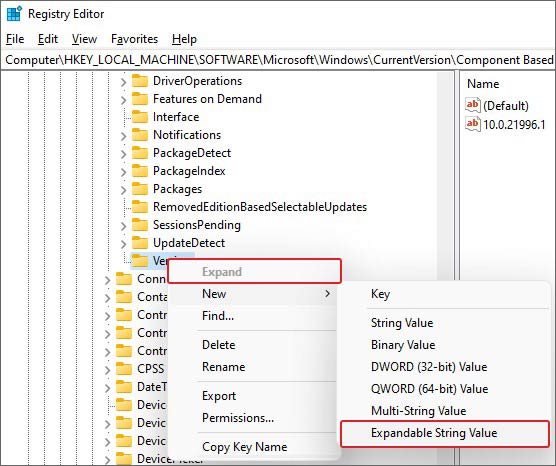
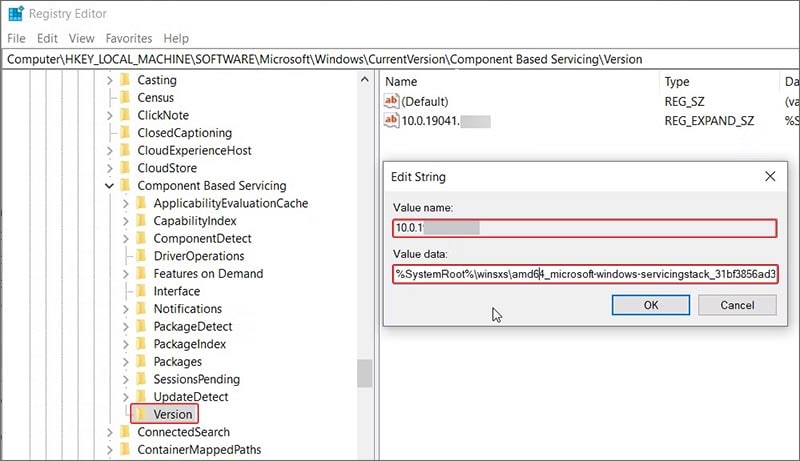
Step 4. Now, copy-paste “HKEY_LOCAL_MACHINE\SOFTWARE\Microsoft\Windows\CurrentVersion\Component Based Servicing\Version” and press “Enter.”

Step 5. Now, right-click the “Version,” then choose “New,” and click “Expandable String Value.”
Step 6. Lastly, change the “Value Name” to TrustedInstaller ID. Then, double-click the new value and input the folder path “%SystemRoot%\winsxs\amd64_microsoft-windows-servicingstack_31bf3856ad364e35_10.0.19041.1XXX_none_7e3d47227c694b34.” Afterward, click “OK” to apply the changes and exit the editor window.
Pro Tip. How to Turn Broken Files into Working Ones in a Single Click with Repairit
Besides that, another problem that most users encounter is that of broken or corrupted files. In order to fill this requirement, Repairit will be the appropriate choice to recover the damaged or corrupted files. It enables batch repair for ZIP or RAR archives even if the archives are larger than 1 GB. The tool also repairs loading errors and corrupted PDF pages without losing data.
You can also restore corrupted calculations and content in damaged Excel files safely. Plus, it preserves text, images, hyperlinks, and fonts when repairing Word documents. Repairit also lets you preview files before saving to confirm successful repairs. Furthermore, it supports 30+ file formats covering common office and media file types. Besides, the platform repairs files without altering the original damaged files.
Key Features

-
AutoCAD Repair: Fix corrupted DWG or DXF files accurately and recover your detailed 2D or 3D drawings effortlessly.
-
SketchUp Repair: Restore corrupted .skp files and recover 3D models without data loss.
-
Photoshop Restore: Restore corrupted PSD or PSB files and recover layers, masks, channels, and vital resources easily.
Detailed Guide to Restore Your Damaged or Corrupted Files Using Repairit
Go through the given step-by-step manual below to recover your broken files using Repairit:
Step 1. Add Your Corrupted/Damaged Files
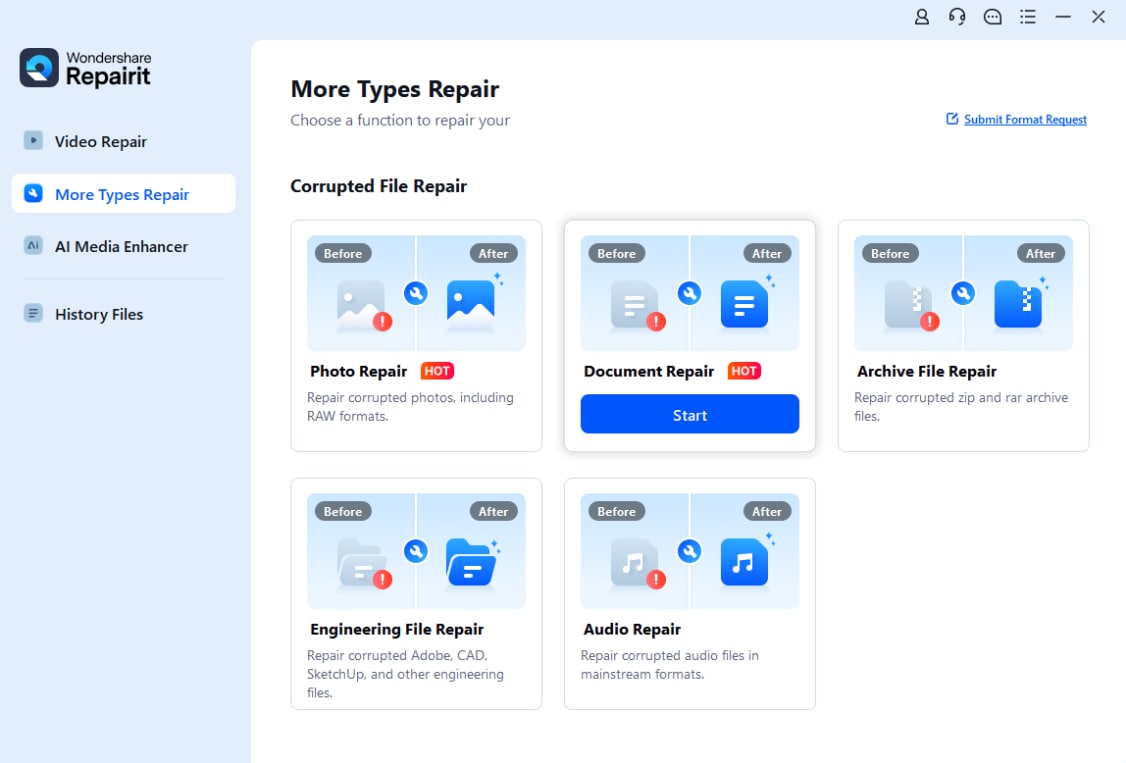
First, head to the “More Types Repair” tab and opt for “Document Repair” by pressing the “Start” button.
Step 2. Select & Load Corrupt Files
Afterward, click the “+Add” button to import the damaged files and hit the “Repair” button.

Step 3. Export Your Fixed Files
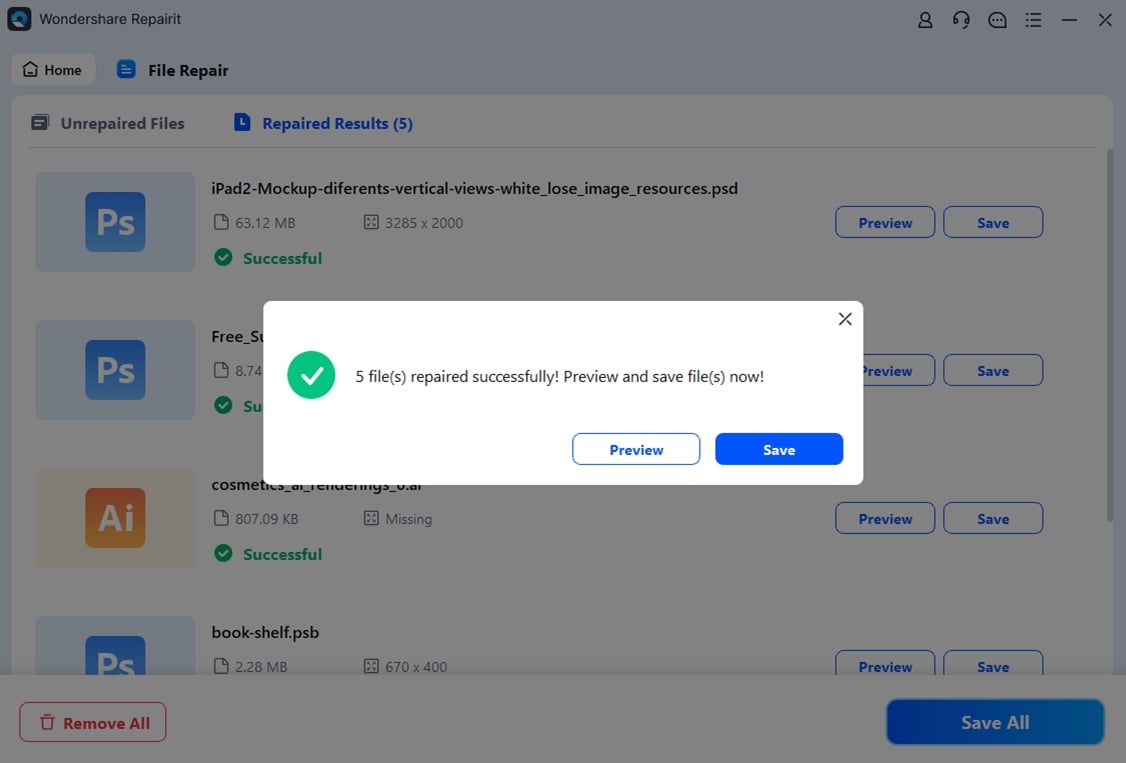
After repairing the damaged files, press the “Save All” and then the “Save” button to export your repaired files.
Restore Your Damaged or Corrupted Files Using Repairit
 Security Verified. Over 7,302,189 people have downloaded it.
Conclusion
In conclusion, many users struggle when Windows stops performing essential repairs unexpectedly. One common error is that Windows Resource Protection could not start the repair service, which can disrupt normal functions and slow down daily tasks. Following the fixes above helps restore system stability and smooth operations efficiently.
Along with this, many users also face file corruption issues and want a safe way to recover their content. Using Repairit helps restore broken files without losing a single piece of data while keeping everything organized and easy to access.
Frequently Asked Questions
-
1. Can a missing update cause Windows Resource Protection to fail?
Yes, outdated Windows versions lack essential files needed for the repair tool's operation. Missing an update causes an error like Windows Resource Protection could not start. Therefore, always keep the system updated to ensure smoother operations and prevent interruptions. -
2. How do I restore multiple corrupted files quickly?
Repairing multiple documents is time-consuming and error-causing, requiring specialized software assistance. In this case, Repairit allows batch repair of all types of files, like Office, iWork, Engineering, Archive, etc., efficiently. It detects corrupted files and restores content while preserving formatting and formulas. -
3. Is it safe to run DISM for system image repair?
Yes, DISM repairs broken system images without affecting personal data or applications. It restores essential Windows files and improves stability for automatic repair tools. Moreover, running DISM is often necessary when SFC alone can’t fix the underlying system problem.
