

Effective email management across platforms is essential for many to maintain the workflow. One widely used app for this purpose is Outlook, which is available for both Windows and Mac. The problem arises when you try to interchange the files used from one version to another. Mac Outlook uses OLM files, and Windows Outlook employs PST files, but both formats have unique file structures.
It is where specialized OLM to PST converters come in, helping users effortlessly transition between systems. With various options available, selecting the best one requires careful evaluation. This guide covers reliable solutions to simplify your workflow and maintain data integrity.
In this article
Part 1. What are the Primary Reasons to Convert OLM Files to PST?
Understanding why you will need to perform this conversion is an important aspect of this discussion. Converting OLM files to PST files is a common need for individuals and organizations navigating platform changes. Following are some of the primary reasons why converting an OLM file to PST is necessary:
1. Cross-Platform Compatibility
OLM files are exclusive to Mac Outlook, making them incompatible with Windows Outlook. Organizations or individuals moving from Mac to Windows systems need to convert OLM files to PST to access their email data in the new environment without compatibility issues.
2. Organizational Migration and Expansion
Companies expanding to new locations or integrating with others often have mixed IT infrastructures. Therefore, converting OLM files to PST allows businesses to streamline communications. It ensures all employees can access emails in a standardized format, regardless of their machines.
3. Data Backup and Archiving
PST files are widely used in archiving and storing data on Windows systems. Users often convert OLM files to PST to create backups, which can be essential for data repair, regulatory compliance, or long-term storage, especially for businesses.
4. Data Repair and Corruption Prevention
Accessing Mac-based emails on a Windows machine can be challenging without the right conversion. In cases of OLM file corruption or damage, converting to PST might facilitate easier recovery using Windows-based data recovery tools.
5. Accessibility and Portability
PST files provide greater portability and flexibility for users. Once data is in PST format, it can be easily imported into various Windows email clients, enhancing accessibility and enabling easier data sharing across platforms.
6. Cost Efficiency in Resource Management
Maintaining separate Mac-based and Windows-based email systems can increase IT overhead. By converting OLM files to PST, organizations can simplify email management, potentially saving costs associated with supporting dual platforms or acquiring additional software licenses.
Part 2.Best OLM to PST Converters to Try in 2024/2025
When it comes to performing this conversion, choosing the right platform is essential for a smooth transition. You have many options available to you for selecting a suitable OLM to PST converter for your needs. The following list highlights 6 of the top platforms currently being used by a vast majority of the users:
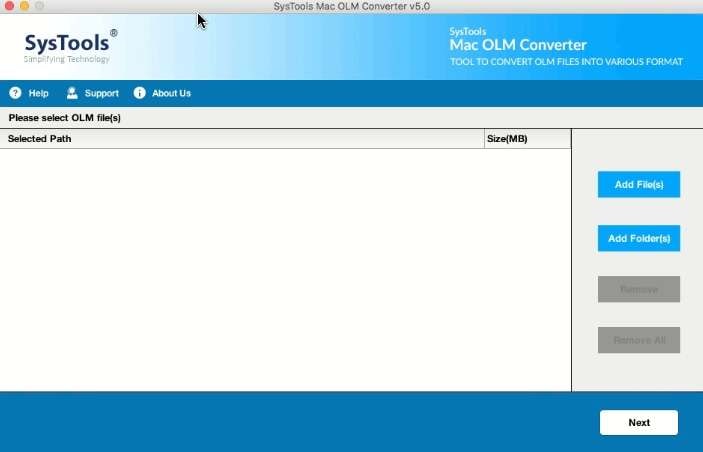
1. SysTools OLM to PST Converter
It is a widely recognized solution for converting OLM to PST format with high efficiency and reliability. Known for its fast processing, SysTools simplifies the migration of emails, contacts, calendars, and other data to Microsoft Office. This tool is particularly well-suited for businesses, as it supports bulk conversion and offers advanced filtering options. It also prioritizes data integrity, ensuring no information loss or corruption during the conversion.
Key Features
- It provides a preview option for emails, attachments, and other data before conversion to dispel any concerns.
- You do not need to have Outlook installed for this tool to work, and it supports all macOS versions.
- When you export the targeted PST files, you can apply different naming patterns to organize the data.
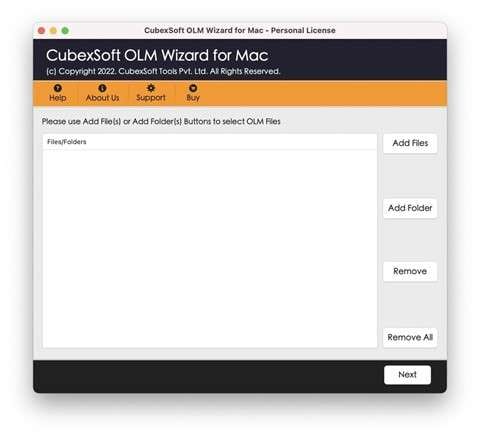
2. CubexSoft OLM to PST
A reliable and efficient solution for migrating data from Mac Outlook to its Windows counterpart, it is also a widely used option. This tool preserves the integrity of emails, attachments, contacts, calendars, and other data throughout the conversion. With the support for batch conversion and separate folders to save attachments, CubexSoft easily handles your files. Additionally, it supports the Outlook 2011 versions of OLM files.
Key Features
- To address your concerns, it shows the loading and scanning process of the OLM files beforehand.
- This tool can convert selective folders from the files to ensure you only get what you want.
- There are no limitations on file size when performing conversion or any restriction on the number of files.
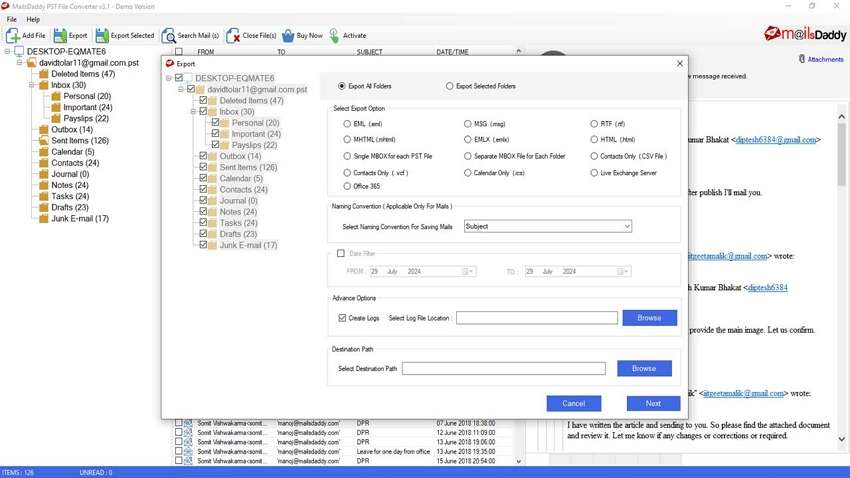
3. MailsDaddy OLM to PST Converter
For an effortless conversion process, this tool is well-regarded due to its quick operation and high efficiency. MailsDaddy OLM to PST Converter is particularly appreciated for its ease of use, allowing even non-tech users to perform the conversion. Moreover, it ensures all the information in the original file is transferred as accurately as possible during the process of converting the OLM file to PST.
Key Features
- With its ability to maintain the original folder hierarchy and email formatting, it stands out as a dependable choice.
- This tool also supports batch conversion, which is ideal for users handling OLM files in bulk.
- You can also use this software to export your OLM file in formats like MHTML, RTF, EMLX, etc.
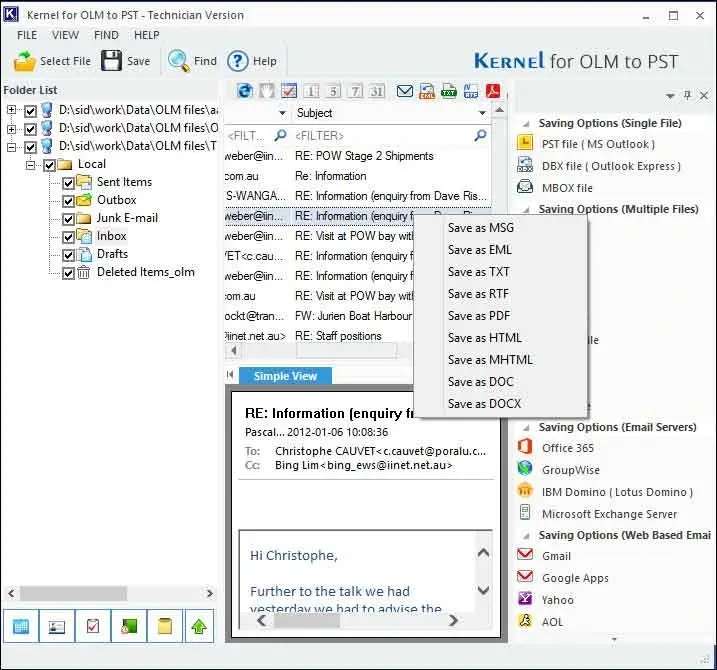
4. Kernel for OLM to PST Converter
Designed to streamline the conversion of OLM files to PST format, this tool offers a reliable solution for user transition. Kernel for OLM to PST Converter allows for batch processing, making it ideal for users with multiple files to convert. Besides, it offers a PST split feature to break down large files into manageable files. With this advanced program, you can also import the OLM files to Office 365.
Key Features
- It can generate detailed analysis reports from your OLM file content, including parameters from item type to date and senders.
- This tool supports exporting OLM files to MBOX email clients like Eudora, Thunderbird, The Bat, etc.
- You can utilize this program to restore missing user mailboxes from Outlook for Mac to Exchange Server.
5. Mailvita OLM to PST Converter
Specially developed for MacBook users, this converter offers a straightforward and effective way to migrate your Outlook files to Windows. Mailvita OLM to PST Converter for Mac enables users to transfer emails, contacts, calendars, and attachments. It supports a single-panel interface, which makes the software extremely fast and lightweight. Additionally, you can use it to export even archived OLM files to PST.
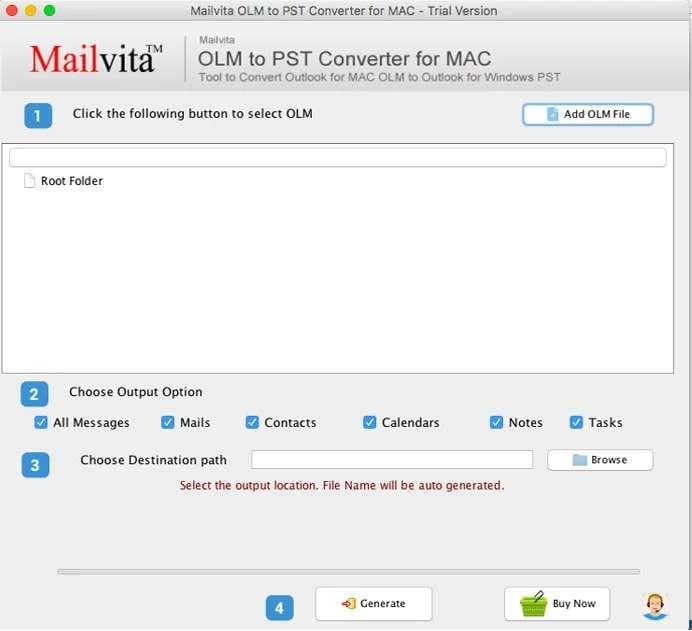
Key Features
- You do not have to convert the entire OLM file; it lets you export specific folders to make the process precise.
- Once you import an OLM file into the software, its content is instantly previewed.
- The conversion process is highly accurate, with near-zero style, hierarchy, and content changes.
6. MacSonik OLM to PST Converter
Known for its efficient performance, this program is a reliable choice for those with little technical skills. It has the ability to migrate OLM files directly to various email clients with high accuracy. The tool’s batch conversion feature saves time by processing multiple files at once. Additionally, MacSonik’s ability to maintain folder structure and data integrity makes it a trusted option.
Key Features
- It makes the conversion of files in bulk a lot easier by providing a special function to filter out duplicate emails.
- When using this tool, users can exclude email attachments to make the procedure much faster.
- This software can export OLM files to formats such as PDF, EMLX, MBOX, and many others with precision.
Part 3. The Most Superior Email Repair Toolbox to Fix Corrupted PST/OST Files
Regarding email file handling, corruption and data loss can be significant challenges. Outlook primarily uses PST and OST files to work, which can cause serious issues if they become damaged or inaccessible. Repairit for Email is one comprehensive tool that can help you recover your corrupted email files. Built with a powerful repair engine, it thoroughly scans damaged files and repairs all issues.
It also supports all Outlook versions, ensuring users with older or newer systems benefit from its robust repair capabilities. In addition to repairing damaged files, the tool excels at preserving the structure and content of the original data. With a preview option for inspecting data before the final recovery, it offers users more control and confidence.
Benefits of Using Repairit for Email

-
Supports all major versions of Microsoft Outlook and is compatible with both 32-bit and 64-bit Windows operating systems.
-
Restore Outlook Emails deleted for a long time and extract the Email messages, folders, calendars, etc. within seconds.
-
Repair corrupted Emails and restore deleted Emails with a 100% success rate.
-
Repair Emails in bathes without size limits and support to preview all of them before saving.
-
Compatible with Windows 7/8/8.1/10/11, Windows Server 2012/2016/2019, and MacOS X 10.12~ MacOS 13 (Monterey).
Instruction Needed to Repair Corrupted PST/OST Files via Repairit for Email
Utilize the detailed steps given below to ensure your email files are fully restored to their original state with intact content:
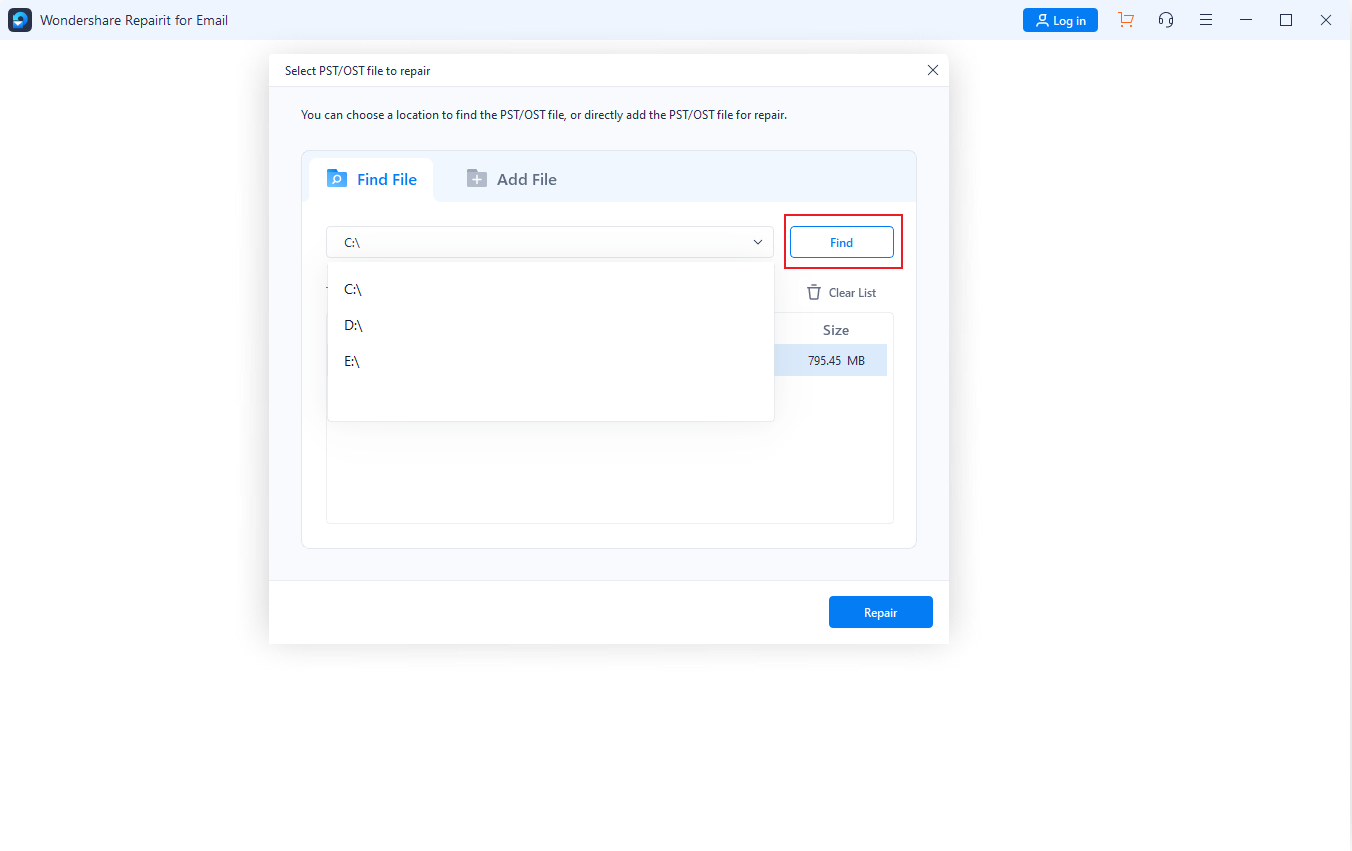
Step 1. Add the PST/OST Files to Repairit for Email
When the program runs on your machine, click "Select File" from the main interface to import damaged files. A pop-up window will then open, allowing you to choose either "Find" or "Add File" to add the OST/PST files.
Step 2. Secured the Emails You Recovered via Repairit
Select "Repair" to initiate the email restoration process, which should take only a few moments to complete. At the end, employ "Save" to specify your preferred location for storing the restored emails.

Conclusion
In summary, efficient data migration and file integrity are crucial when dealing with cross-platform needs. Converting OLM files to PST can simplify workflows and enhance compatibility between Mac and Windows environments. The top 6 OLM to PST converters for free highlighted here provide effective solutions for managing this transition. Alongside conversion needs, dealing with corrupted PST and OST files is an unavoidable challenge for many Outlook users.
For anyone facing this issue, Repairit for Email stands out as a reliable and powerful solution for restoring damaged files. Its advanced repair features and compatibility across Outlook versions ensure valuable information remains accessible and intact.
FAQ
-
1. Can I split an OLM file into smaller files?
No such feature is offered by Outlook for Mac, and you will not find many options for it otherwise, either. The general practice is to convert the file to PST and then split it into manageable entities. -
2. Are OLM files more prone to corruption?
While they can become damaged like any other data type, the risk of that is considerably lower than that of the OST/PST format. It mainly has to do with the more strictly closed and secure environment of Mac systems. -
3. What is the optimal size for an OLM file?
This format does not have any strict size limit set by Outlook for Mac, meaning the file size can grow. However, it has been reported that OLM files larger than 10GB are prone to severe performance issues.
