
The error “The file has an unsupported compression type" can be disturbing, especially when you are in a hurry to edit videos. This is a common issue among many editors who use the Premiere Pro software. It normally comes up while importing or opening a video file, reflecting that the program cannot read it properly. This message can eventually be confusing, especially when you do not understand video settings or editing tools.
That’s the reason it's essential to understand what causes the error and how to fix it without using any complex methods. Hence, this guide explores the main reasons behind it, followed by an easy solution that anyone can try, whether they are a beginner or someone with editing experience. Besides, if your video won't open and keeps showing this error due to corruption, you will also discover how to repair it.
In this article
-
- Solution 1. Change File Extension/Format
- Solution 2. Videos Refusing to Play? Use Repairit & Make them Playable Again Now!
- Solution 3. Delete Media Cache Files in Premiere Pro
- Solution 4. Alter the File Location
- Solution 5. Update or Reinstall Premiere Pro
- Solution 6. Ensure You Are Using the Paid Version
Part 1. What Are the Causes of Unsupported Compression Types in Premiere Pro?
In Premiere Pro, the file has an unsupported compression type error appears when a video can’t be imported or played. This usually happens when the file uses a video format that the editing program doesn't support. Common causes include missing video types, damaged files, or rare codecs like HEV1 or AV01. Below, we will discover a few more common reasons that actually cause this problem:

Video Decoder: Some videos use special formats that Premiere Pro does not recognize or support by default on your computer. When the file’s video type is not included in the software’s list, the error message may appear during import.
Software Version: Older versions of this editing tool may not support newer video formats or file types released after your update. As a result, you can’t import new format video files and ultimately see such errors.
Corrupted File: In case your video file is damaged or broken, the tool can fail to read and show this error instead. This issue can happen for various reasons, such as during downloading or even transferring.
File Extension: A file might show a video label, but its inside format may not match the name or type shown. Thus, Premiere Pro can’t read it and will show an error message when the extension is wrong.
File Location: When a video is saved on an external drive or a restricted folder, the tool can struggle to read it. This happens because the program sometimes faces access issues or delays when reaching specific storage locations.
Part 2. How to Fix "The File Has an Unsupported Compression Type" Error
When you see that the file has an unsupported compression type, Premiere Pro error, this section covers 6 ways to fix it:
Solution 1. Change File Extension/Format
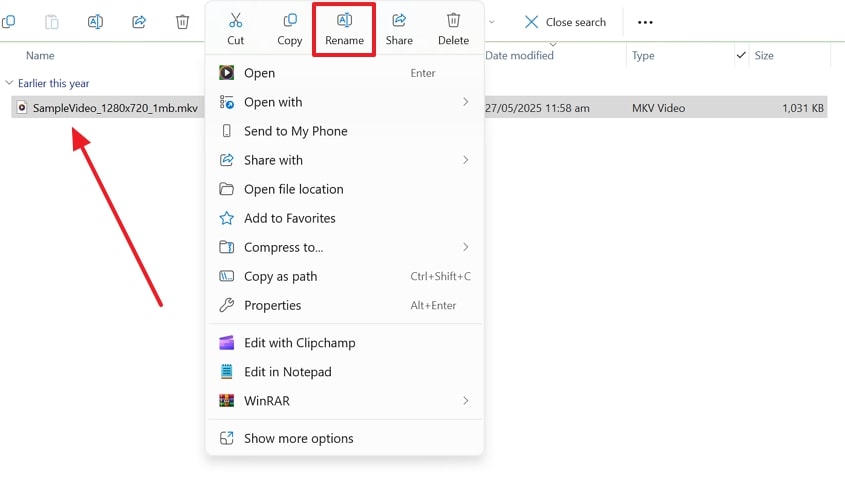
The file has an unsupported compression type error can occur when you import video formats like MKV, FLV, F4V, or RMVB. Since these formats are not readable, you should consider converting them to supported formats, such as MP4 and MTS. These ultimately help you effortlessly import your videos into this tool and start editing. Thus, take guidance from the steps below and learn how you can convert your video file format:
Step 1. Initially, access the video file that shows an error and right-click it to opt for the “Rename” option.
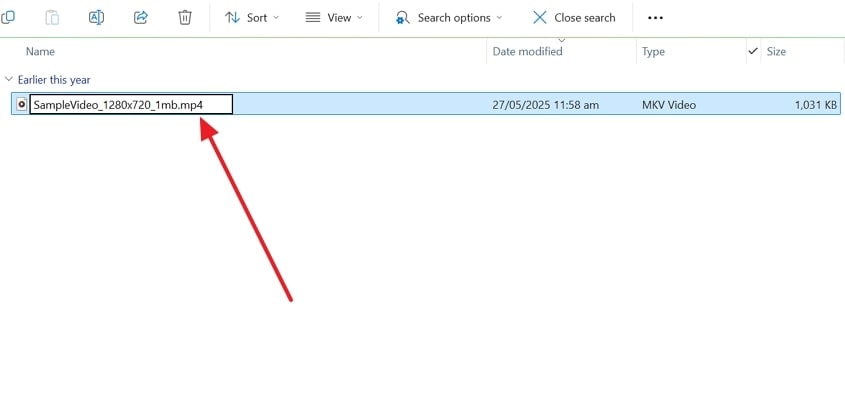
Step 2. Subsequently, rename the file extension to “.mp4” or any other supported format and finish the task.
Solution 2. Videos Refusing to Play? Use Repairit & Make them Playable Again Now!
When your videos refuse to open or play, it often points to a deeper problem, like file damage or corruption. If you are still facing the “Premiere Pro, the file has an unsupported compression type” error after converting its format, you should use Repairit. The tool’s dedicated Video Repair feature lets you repair 25+ video formats, such as MP4 and M2TS, effortlessly.
Even when your video completely fails to open or lags, the software can resolve it without hassle. It offers up to a 99.5% success rate and allows you to fix multiple corrupted files simultaneously that refuse to play in Premiere Pro. Besides, this program keeps the exact video resolution and clarity even after fixing deep file errors. You can unblur or sharpen your repaired video to improve its overall visual quality.
Key Features
Professional Format: This tool supports advanced formats like RAW and LOG, making it useful for even professional creators.
Advanced Repair: It repairs badly damaged videos by using a sample file from the same device and format.
Gyroscope Data Repair: Editors can fix motion sensor data in GoPro footage, which helps restore proper stabilization and video flow.
Guide to Repair Your Videos Refusing to Play Using Repairit
As you explore some advanced features of Repairit, go through the steps to fix your video that refuses to play:
Step 1. Access the Tool to Repair Your Videos Refusing to Play
When you head to the “Video Repair” module on this tool, press the “Start” button to move forward.

Step 2. Import and Repair Your Videos That Refuse to Play
Click the “+Add" button to import the videos, and then hit the "Repair” button when they appear in the “Unrepaired Videos” section.

Step 3. Download Your Fixed Videos That Previously Couldn’t Play
After waiting for a while, hit both the “Save All” and “Save” buttons to export the repaired video files.

Solution 3. Delete Media Cache Files in Premiere Pro
Another solution to resolve the file has an unsupported compression type Premiere Pro error is to delete the media cache files. These are basically temporary files that help the editing software run faster, but can create problems over time. Upon deleting them, you ultimately refresh the software and remove hidden errors blocking video import. Anyhow, adhere to the steps given to find out how you can perform this procedure:
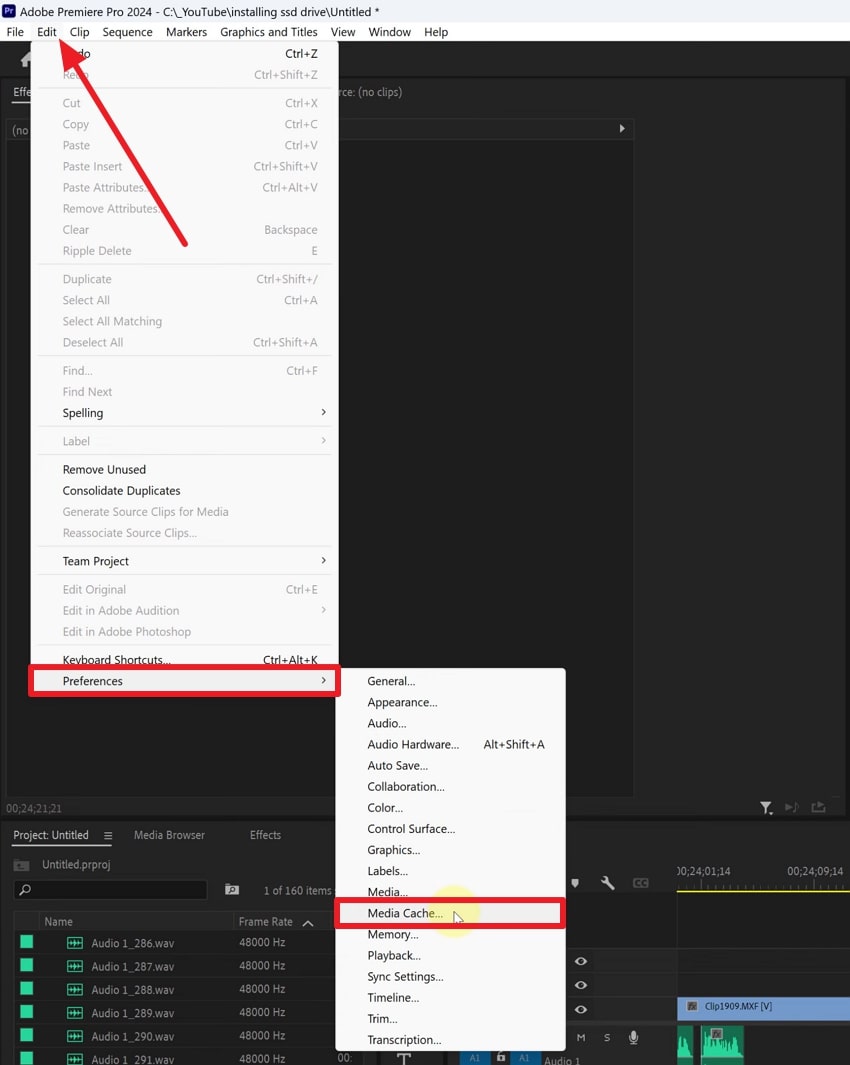
Step 1. To initiate, click the “Edit” tab to navigate to the “Preferences” menu and choose the “Media Cache…” option.
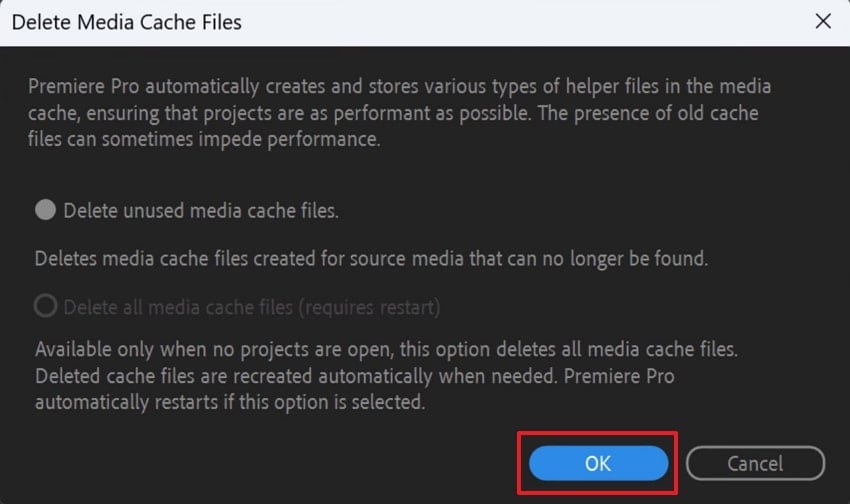
Step 2. As you see a new display, hit the “Delete” button next to the “Remove Media Cache Files” option.
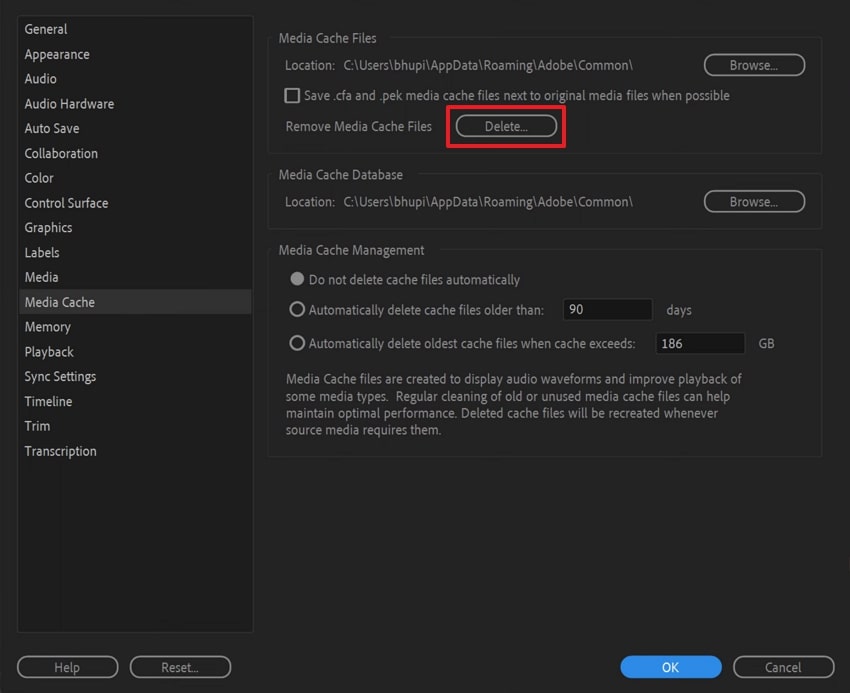
Step 3. Following that, hit the "OK” button to delete the media cache files and complete the process.
Solution 4. Alter the File Location
At times, the file has an unsupported compression type error shows up due to the video's saved location. Premiere Pro might not read the file properly if it is saved in an external drive, a long folder path, or a restricted system folder. Therefore, you must transfer the video to an easy place, such as your desktop or primary drive, which helps the software load it without confusion.
Solution 5. Update or Reinstall Premiere Pro
When still getting the “Premiere Pro the file has an unsupported compression type” error, using an outdated version might be the cause. At this particular time, you need to update your editing software, which helps support newer video formats and improve stability. Besides, you can try to reinstall Premiere Pro to clear any broken files or settings causing trouble. Let’s explore how to update this tool to resolve such video file errors:
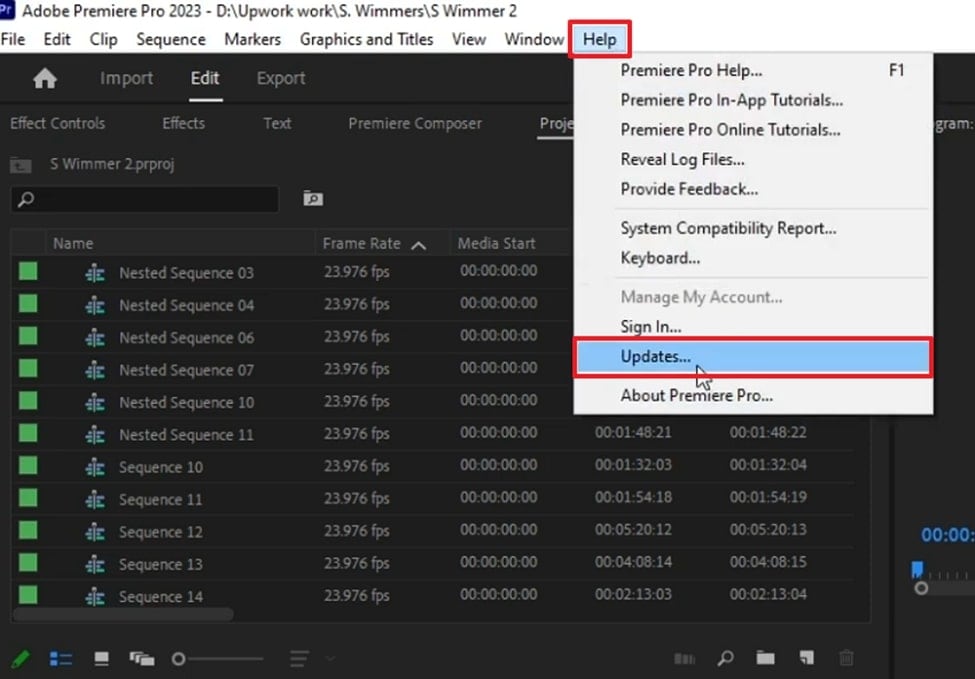
Instruction. Once you run this editing tool, you need to head to the “Help” tab and choose the “Updates…” option.
Solution 6. Ensure You Are Using the Paid Version
Many times, the “the file has an unsupported compression type Premiere Pro” error appears if you are using a free trial version. The unpaid version may limit support for some formats or features needed for effortless editing. When you upgrade it, this ensures the software handles all the file types without showing errors. Thus, go through the instructions and find out whether you are using a Premiere Pro paid version account:
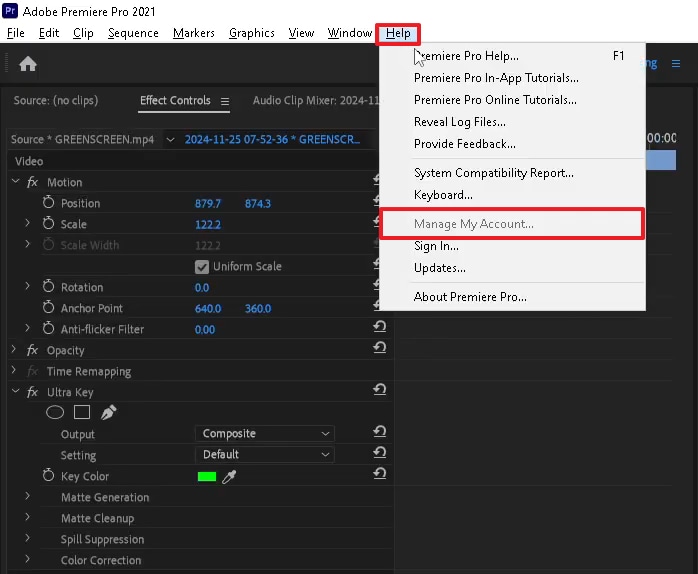
Instruction. From the software, click the “Help” tab to choose the “Manage My Account” option and check your license. If you are on the trial version, you can follow the on-screen instructions and purchase a full version effortlessly.
Conclusion
In summary, resolving the "the file has an unsupported compression type" error in Premiere Pro becomes straightforward with the right steps. This article has explored several effortless fixes that you can try to address this issue.
Besides, it is possible that this specific error occurs because your media file has become corrupted or damaged. In that case, you should use Repairit, which lets you repair 25+ video formats without changing their quality.
FAQ
-
Q1. Is it okay to use third-party converters to fix the error?
Yes, this could be solved by an external video converter in case the file format or codec is the issue. Nonetheless, you should be careful when selecting a tool, as some converters reduce video quality or add watermarks. Therefore, always seek specialized ones that support MP4 output, which is fully supported by Premiere Pro. -
Q2. Can antivirus software block video files in Premiere Pro?
They may block specific video files if they detect unusual or suspicious behavior. Alongside that, such software can mistakenly treat compressed or large files as threats and stop them from loading. As a result, this interference may cause the "The file has an unsupported compression type” error. -
Q3. Can I fix the compression type error without changing the video format?
When the issue is due to corruption or internal file damage rather than format, changing it won’t help. In this case, use a dedicated tool like Repairit, which restores damaged or unreadable videos without altering their format. It allows you to repair your video files, whether they are corrupted due to an issue or from a specific device.
