Have you ever taken a photo that looked perfect, but turned out blurry? Fuzzy pictures can be disappointing. They may happen because of shaky hands, low light, or old images.
Good thing this article will let you know how to fix fuzzy pictures on iPhone using easy tools and methods, and know when your phone may need repair. You’ll also learn how to take clearer pictures in different situations for future purposes.
Table of Contents
Part 1. Fuzzy Pictures on iPhone: Quick Diagnosis Checklist
Are your iPhone photos fuzzy? Do they look clear in one app but blurry in another? This quick checklist helps you find the reason.
✅iPhone Pictures Fuzzy When You Zoom In? It May Not Be Real Blur
When you zoom in, the iPhone does not add new details. It only makes the picture bigger. This can make the photo look fuzzy. The photo may still be clear at normal size, and it looks blurry only because you zoomed in too much.
✅Fuzzy Pictures on iPhone Only in Messages or WhatsApp? It’s Compression
Messages and WhatsApp make photos smaller before sending. This helps them send faster. Some details are removed, which can make the photo look fuzzy in the chat. But the original photo in your Photos app is usually clear.
✅iPhone Pictures Fuzzy Only in the Camera App? Check Focus, Motion, or Lens
If photos look fuzzy right after you take them, it might be because the camera didn’t focus. Also, moving your hand can cause blur. Low light can make it worse, and a dirty lens can block light. These are all common reasons photos look blurry in the Camera app.
Part 2. Common Causes of iPhone Pictures Looking Fuzzy
Sometimes, iPhone photos look fuzzy or blurry. Knowing why this happens can help you take clearer pictures. The main reasons include the following:
- Camera Shake: If your hands move while taking a photo, the picture can be blurry. This happens more in low light because the camera uses a slower shutter speed to capture more light.
- Motion Blur: If your subject moves while you take the photo, it can look blurry. Fast-moving subjects like kids, pets, or vehicles can appear blurry.
- Wrong Focus: Incorrect focus happens when the camera focuses on the wrong area. This can happen in low light, low contrast, or busy scenes, making your main subject look blurry.
- Dirty Lens: A dirty lens can block light and confuse the camera’s autofocus. Smudges, fingerprints, or dust on the lens reduce sharpness.
- Other Possible Issues: Poor lighting, wrong camera settings, a blocking phone case, or app glitches can also make photos blurry.
Part 3. Quick Fixes for Fuzzy Pictures on iPhone (That Actually Work)
Sometimes iPhone photos look fuzzy or blurry, but the good news is that many issues can be fixed quickly. Here are simple steps you can follow to make your photos sharper and clearer.
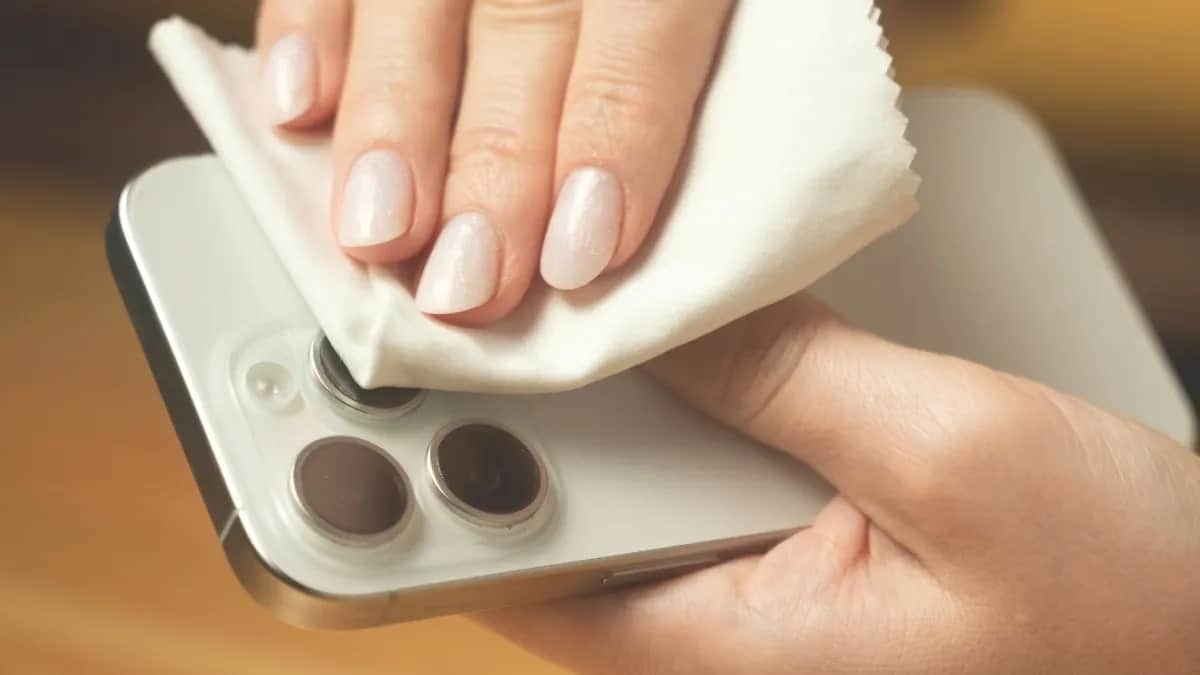
1. Clean the Lens the Right Way
A dirty lens is one of the most common causes of fuzzy photos. Smudges, fingerprints, or dust can block light and confuse the camera. Get a soft and lint-free cloth to gently wipe the lens. Avoid using rough materials or liquids that could damage it. Keeping your lens clean helps every photo stay sharp.
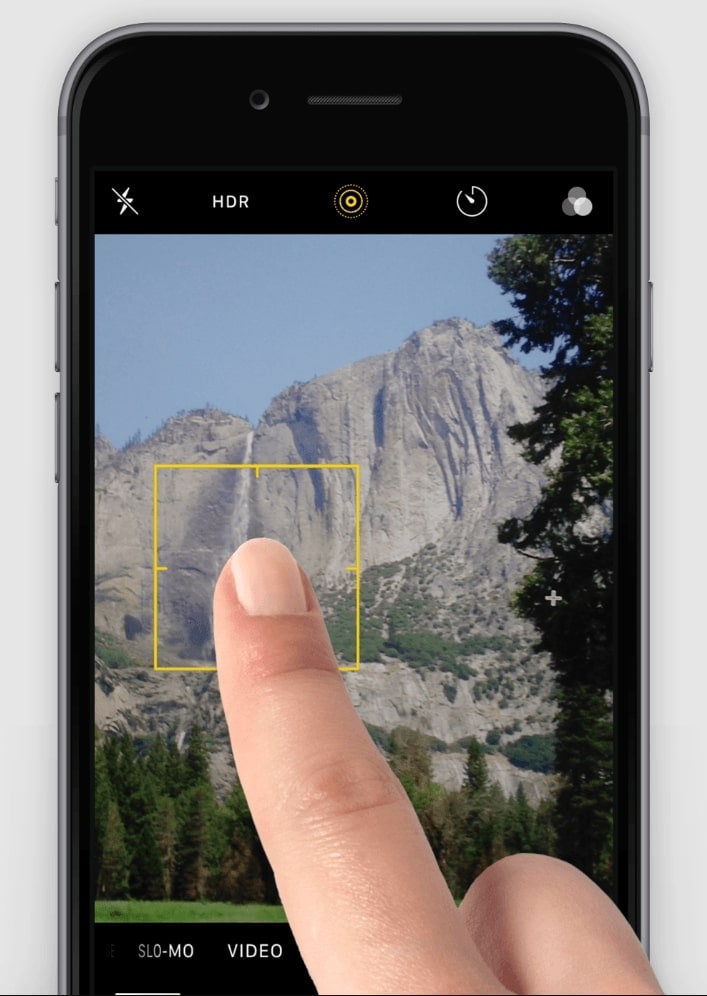
2. Lock Focus & Stabilize the Shot
Blurry photos can happen if the camera focuses on the wrong area or if your hands move while taking the shot. Tap the screen on your main subject to lock focus, and hold your iPhone steady. Using both hands or resting your phone on a solid surface can prevent camera shake.
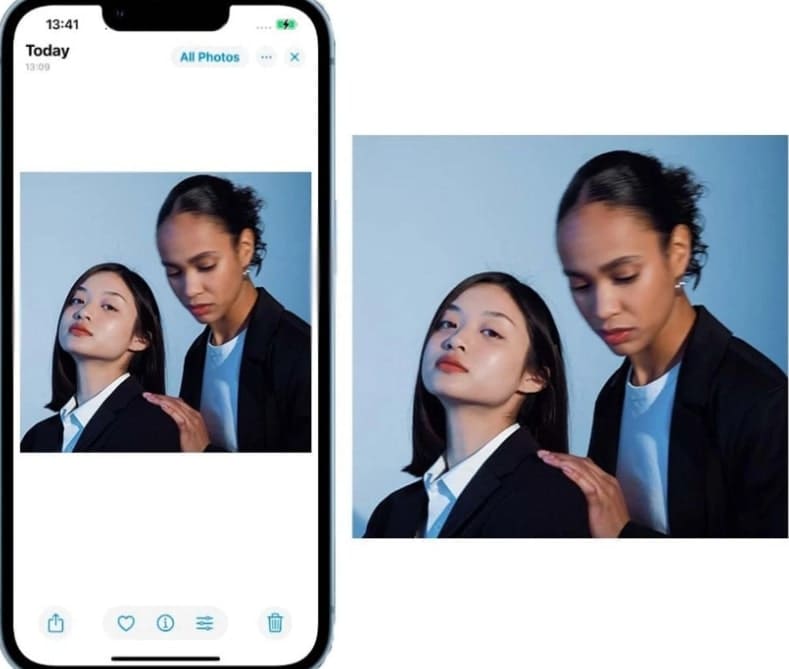
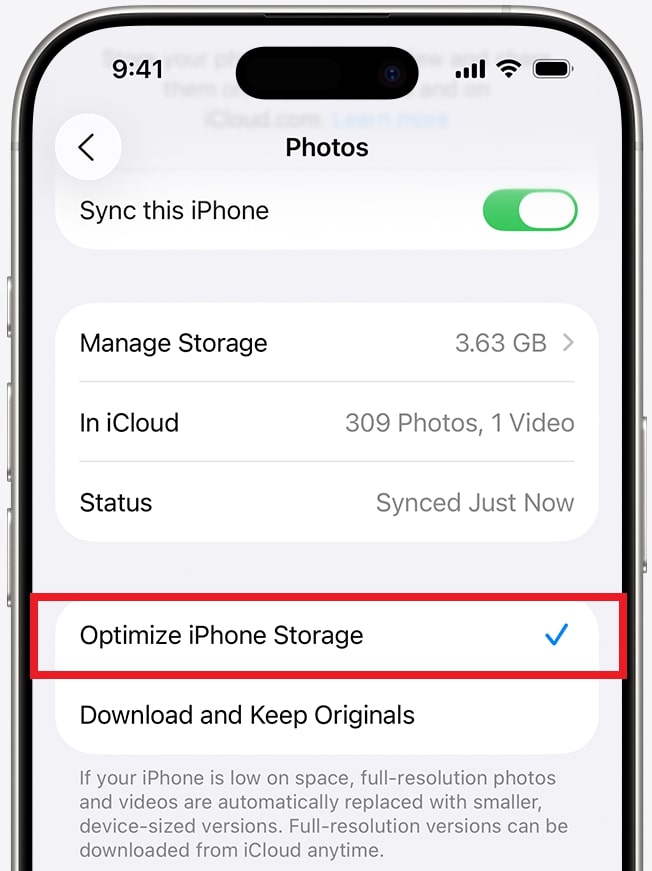
3. Turn Off iCloud “Optimize Storage” (When Possible)
iCloud sometimes stores smaller versions of your photos to save space. This can make images look fuzzy when viewed on your iPhone. If you have enough storage, turning off “Optimize iPhone Storage” will make it clearer.
Step 1: Open your iPhone Settings and find Photos.
Step 2: Disable Optimize iPhone storage when enabled.
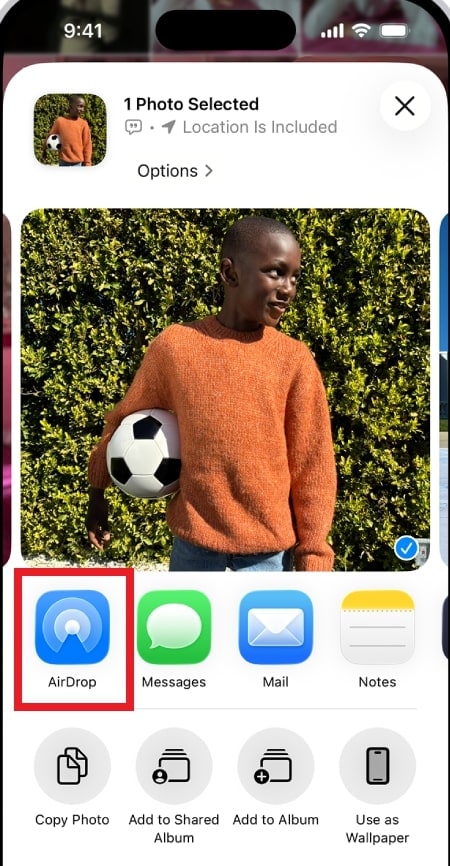
4. Fix iPhone Pictures Fuzzy After Sharing
Photos can look fuzzy after being sent through apps like Messages or WhatsApp because these apps compress the image to save data. To fix this, view the original photo in the Photos app or send it using options that keep full quality, like AirDrop or email.
Part 4. How to Sharpen Fuzzy Pictures on iPhone (Post-Capture)
Even after taking a photo, you can make fuzzy pictures clearer using editing tools. These tools help improve sharpness, add definition, and sometimes even fix motion blur. Here are the most effective ways to sharpen your iPhone photos after capture.
Apple Photos App Sharpness & Definition Tools
The easiest way to sharpen a photo is with the iPhone’s built-in Photos app. Here are the steps to follow:
Step 1: Look for the Photos app and find the fuzzy photo. Tap Edit.

Step 2: Swipe the editing tools below the photo until you find Sharpness.
Step 3: Move the slider to make the photo sharper.
Step 4: When you’re happy with it, tap Done. This quickly improves clarity without needing extra apps.

Note: You can also combine sharpness with other adjustments (exposure and color correction) or filters to improve your photo further. Experiment with different iPhone settings to get the best outcomes.
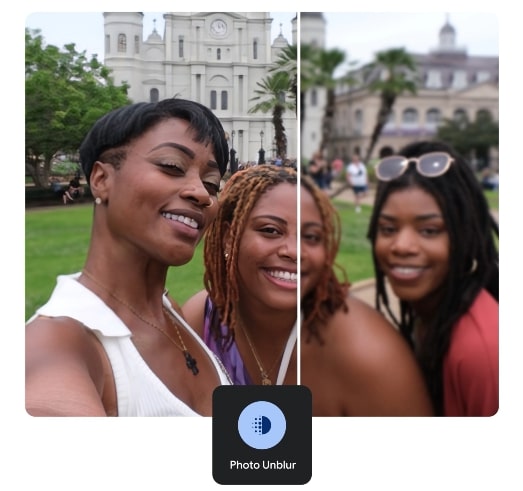
Google Photos “Unblur” & Similar AI Tools
Google introduced a new feature called “Photo Unblur” available to everyone using Google Photos for free. These tools also work on more devices, including Pixel tablets.
Step 1: Launch your Google Photos and look for the blurry photo. Tap Edit.
Step 2: Go to Actions (or Edit Tools) and select Unblur.
Step 3: Adjust the photo, then tap the checkmark and save.
Best Manual Editing Apps
If the Photos app can’t fully fix your blurry photos, you can use third-party apps for more advanced editing. Popular choices include Adobe Lightroom and Snapseed. These apps have tools to sharpen photos and improve overall quality.
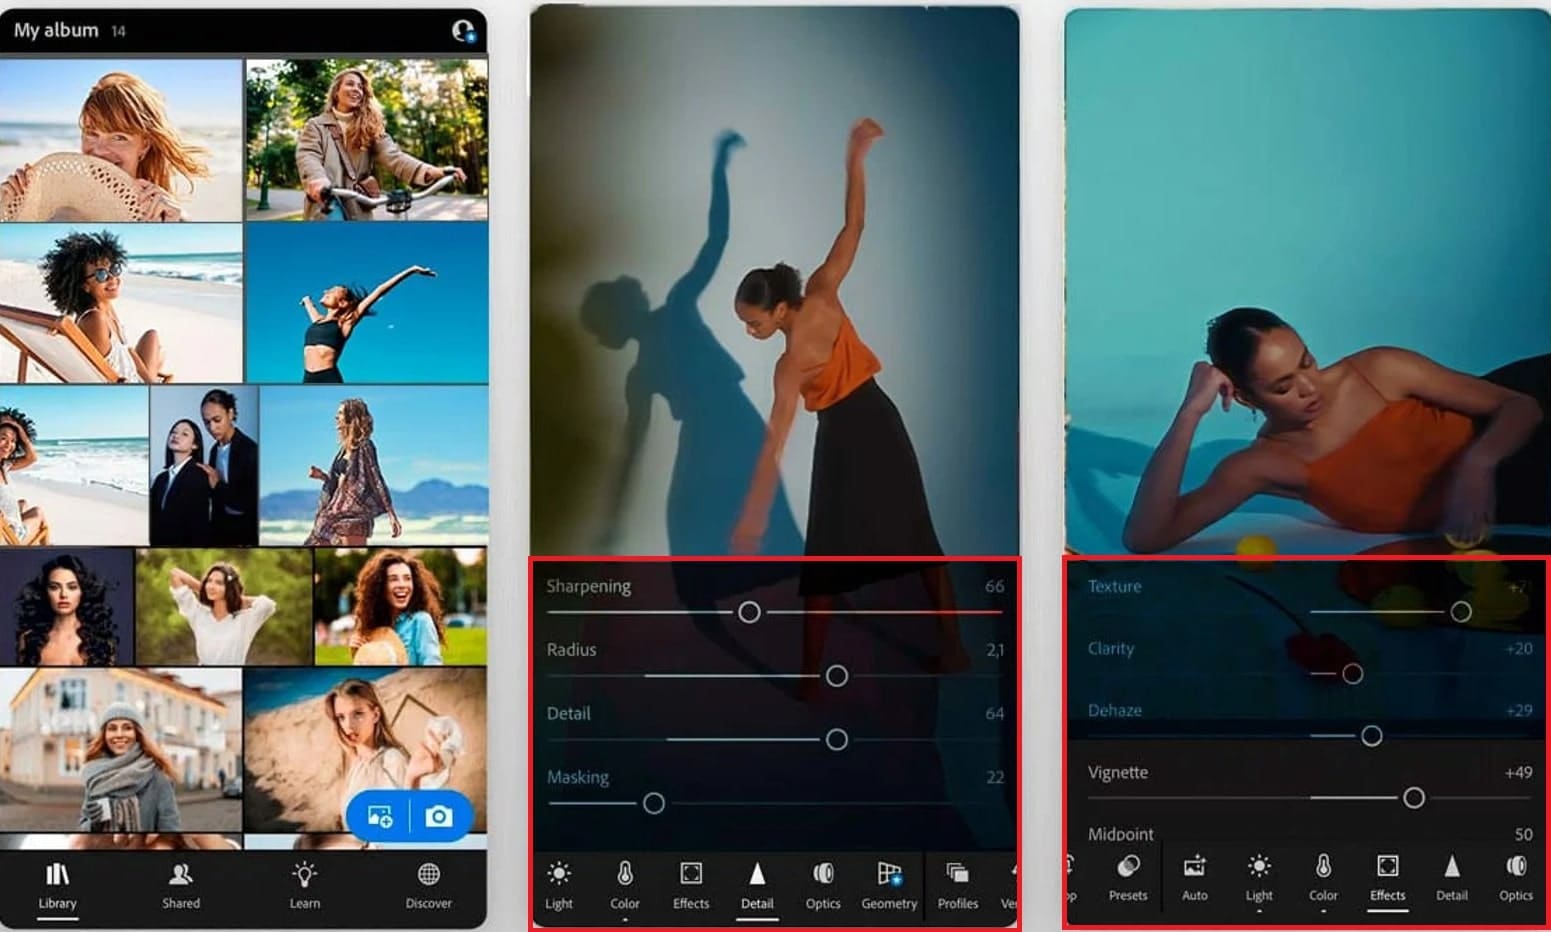
Adobe Lightroom
Adobe Lightroom Mobile is easy to use and comes with powerful editing tools. Its sharpening feature can help unblur photos and make them clearer. Besides sharpening, you can also organize, save, share, and even take HDR photos using the app. Lightroom Mobile offers a free seven-day trial. After that, you can subscribe monthly. Different plans are available, including options with cloud storage and extra apps.
Follow these steps to sharpen photos in Lightroom:
Step 1: Open Lightroom and import your photo.
Step 2: Tap the photo, then go to Detail.
Step 3: Adjust the Sharpening and Noise Reduction sliders.
Step 4: Experiment with other settings until the photo looks clear. With a little patience, Lightroom can help improve fuzzy pictures on the iPhone.
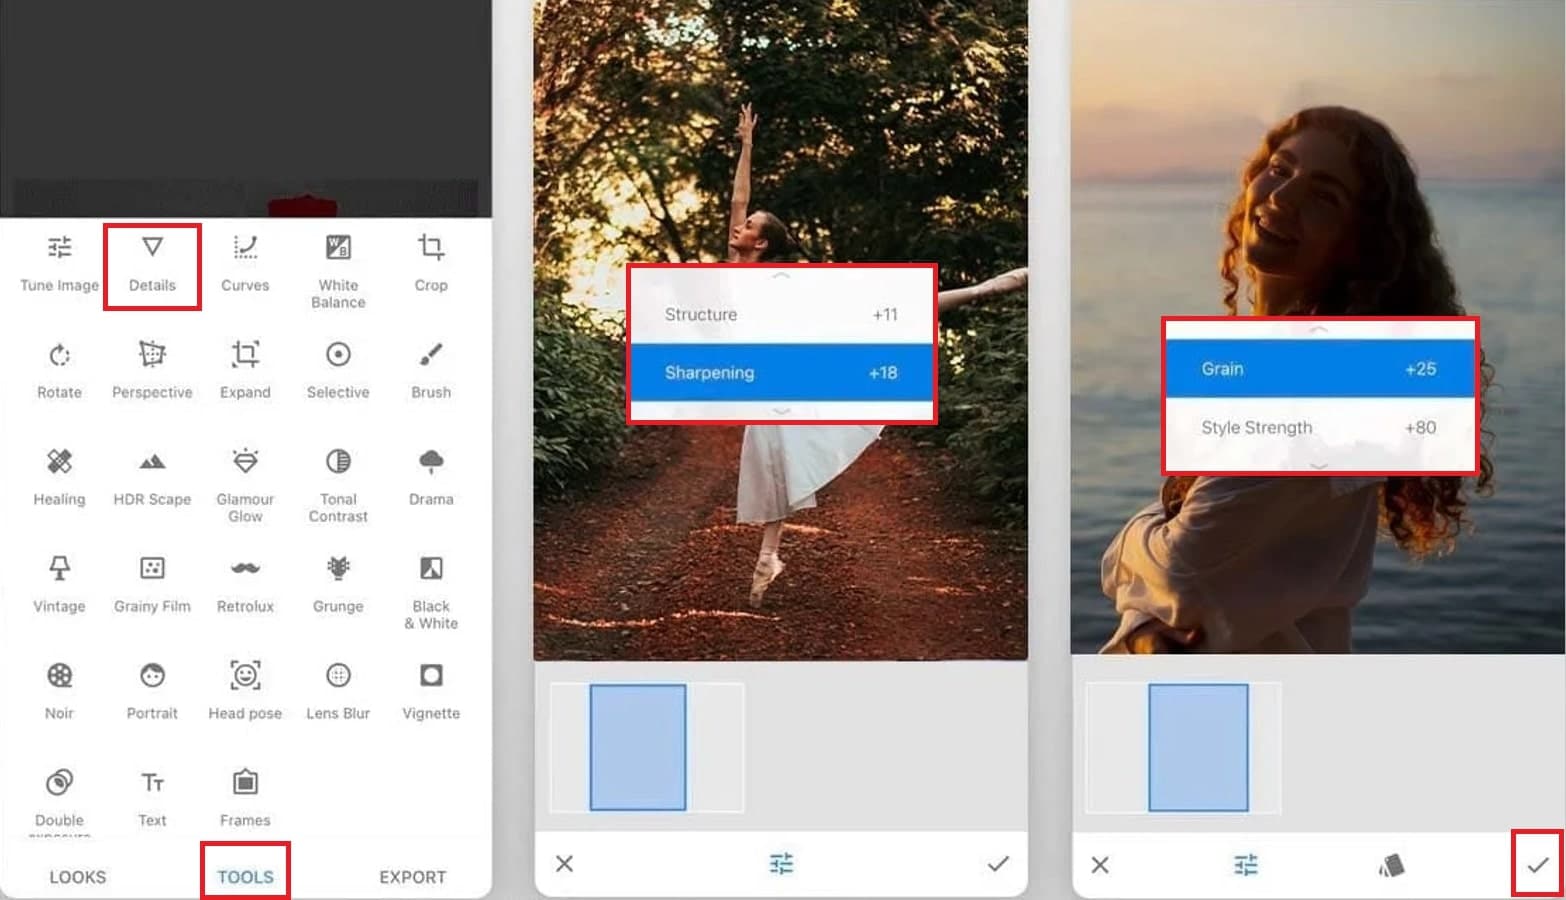
Snapseed
Snapseed is an optimized and free photo editing app made by Google. It has tools for tuning, brushing, healing, and texturing to fix blurry and dull iPhone photos. This also includes selective edits for specific areas which you can experiment with different effects and filters.
Here’s how to sharpen a photo in Snapseed:
Step 1: Open Snapseed and import your photo.
Step 2: Tap Tools, then tap Details.
Step 3: Swipe down to choose Sharpening or Structure.
Step 4: Adjust the level until the photo looks clear.
Step 5: Hit the checkmark to keep the changes.
Part 5. Fuzzy Pictures on iPhone Still Not Fixing? Repair the Photo File
Sometimes, sharpening tools is not enough. If your iPhone photos stay fuzzy after editing, the problem may be the photo file itself. This happens when images are low quality, corrupted, or damaged during transfer, storage, or backup.
Sharpening only improves visible details. It cannot fix photos that are already damaged or heavily compressed. In these cases, using a photo repair tool is a better solution.
The Repairit App is designed to fix blurry, damaged, or unopenable photos. It can restore image clarity and repair file issues without needing advanced skills. The app is easy to use and works well for iPhone photos that editing apps cannot fix.
Key Features:
- Fixes blurry and low-resolution iPhone photos by restoring sharpness, facial details, and clarity while keeping the image clearer without looking fake or over-smoothed.
- Repairs damaged or unreadable photo files and restores missing data from formats like JPG, and PNG.
- Improves old or scanned photos by reducing blur, fixing damage, and adding natural color while preserving original details.
- Removes unwanted people or objects while keeping the background clean and realistic.
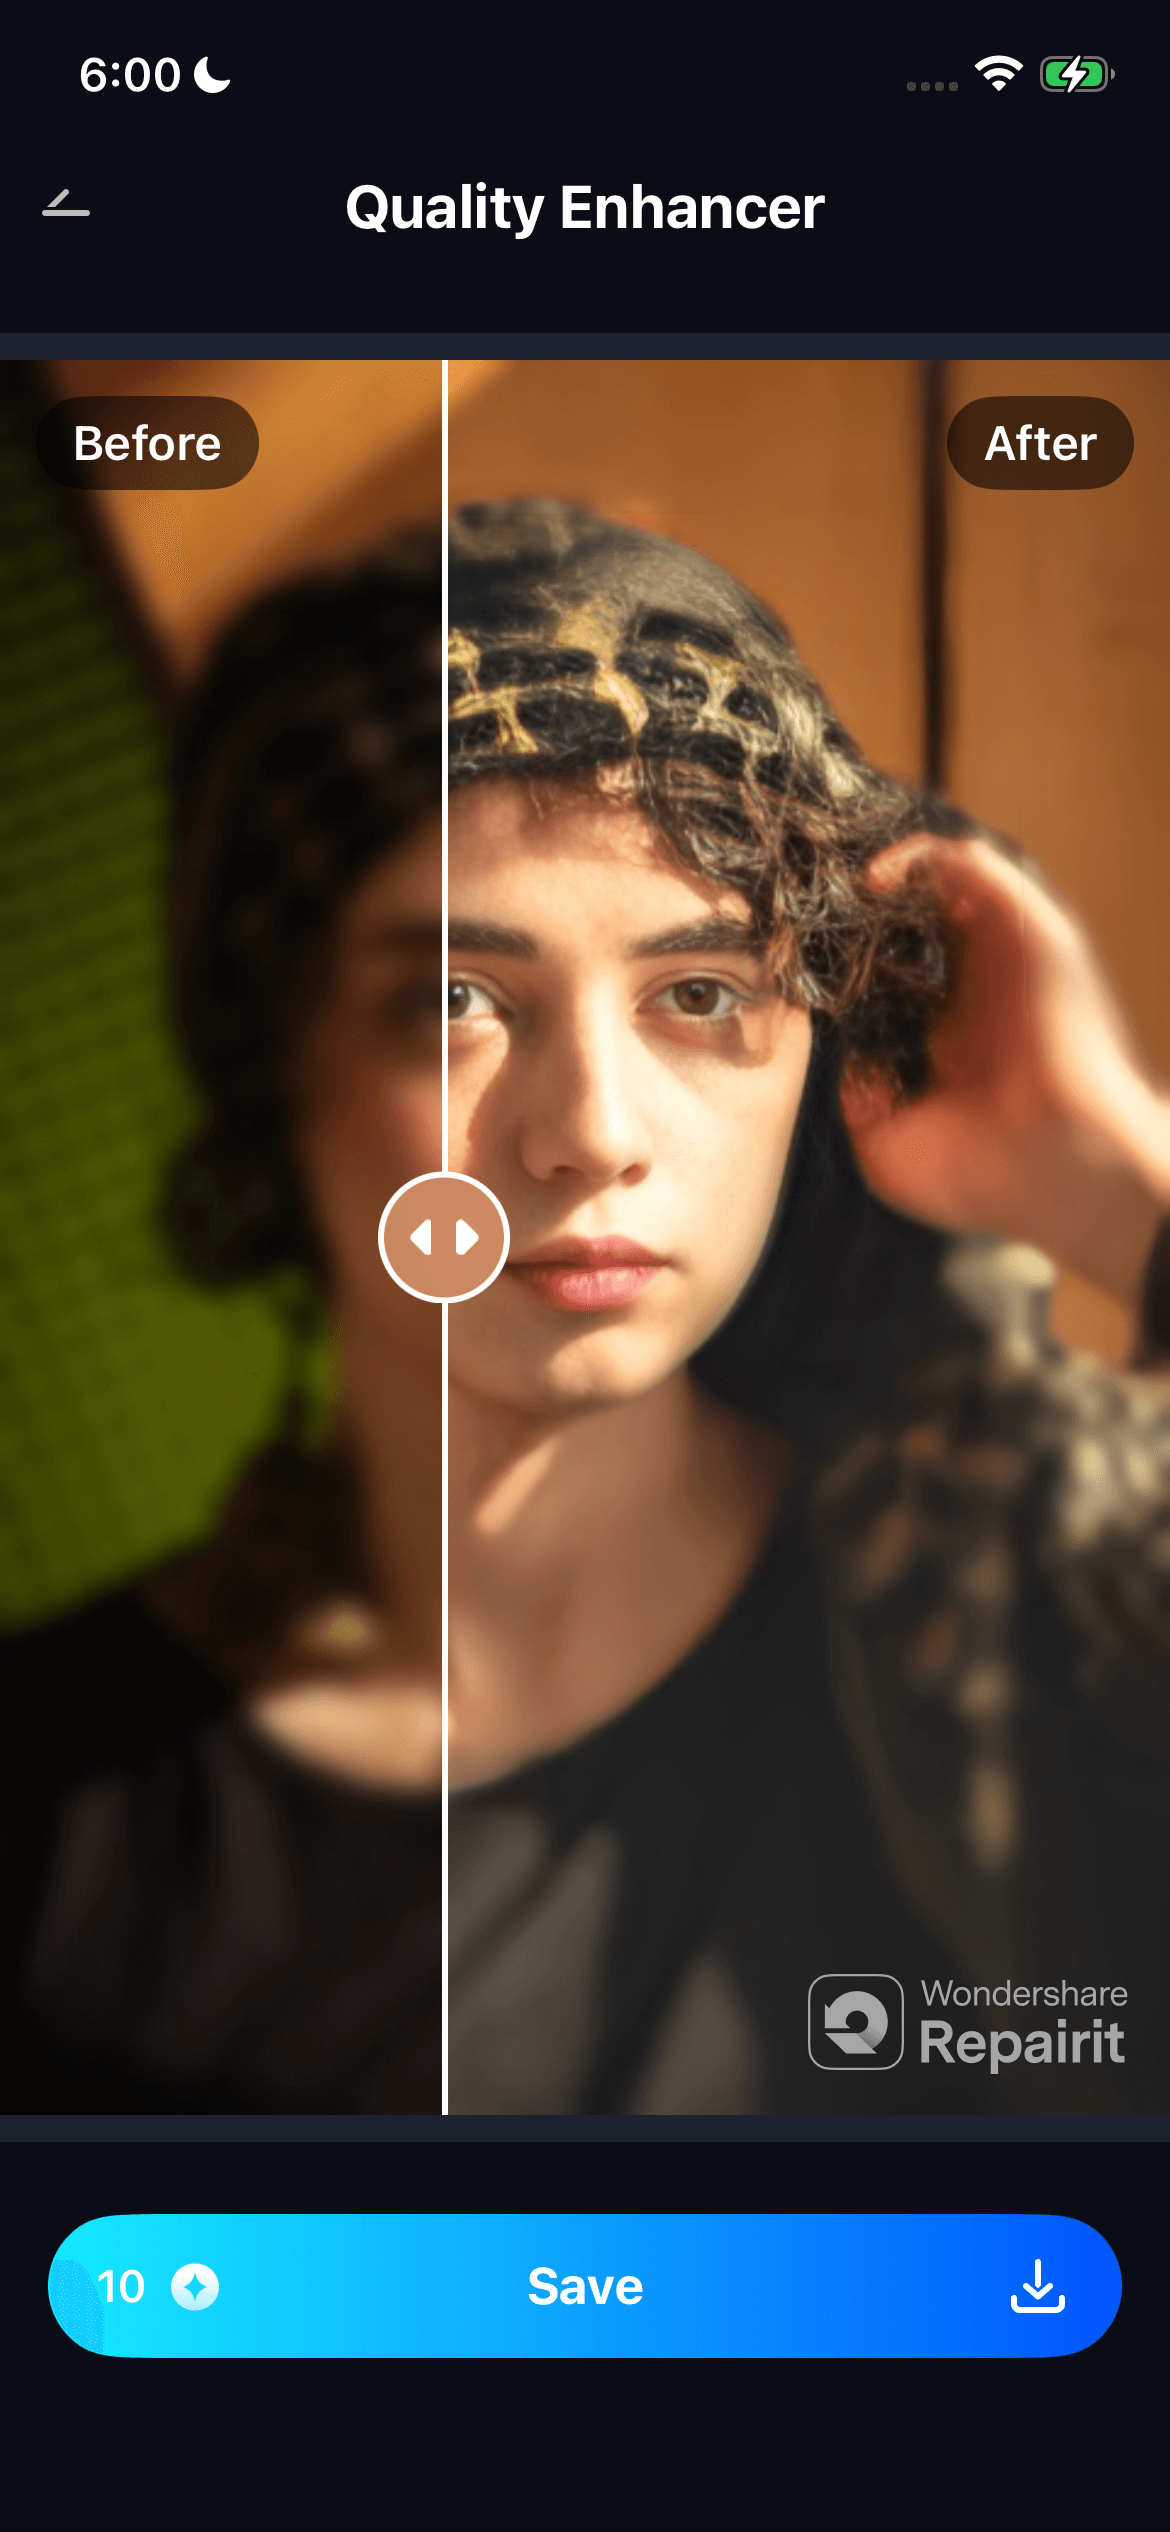
Step 1: Open the Repairit app and tap the Quality Enhancer on the homepage. Choose a photo from your iPhone’s Photos library.

Step 2: The app automatically analyzes and improves the image. You can stop the process anytime if needed.

Step 3: Use the preview slider to compare before and after results. Hit Save to keep the enhanced iPhone picture in your gallery.
Part 6. Pro Tips to Prevent Fuzzy Pictures on iPhone
Dealing with fuzzy pictures on iPhone can be frustrating—especially when you expect sharp, high-quality photos from your device. The good news is that most blurry or fuzzy iPhone photos are preventable with a few simple habits and camera settings adjustments.
Below are practical tips to help you reduce the chances of fuzzy pictures on your iPhone and maintain consistently clear photo quality.
- Clean the Camera Lens Regularly. Dust, fingerprints, or oil smudges on the lens are a common cause of fuzzy pictures on iPhone. Gently wipe the camera lens with a soft, lint-free cloth before taking photos.
- Use Proper Lighting. Low-light conditions often lead to blur and image noise. Whenever possible, take photos in bright or well-lit environments to help the camera focus accurately and reduce motion blur.
- Keep Your iPhone Steady. Shaky hands lead to motion blur. Use both hands or rest your arms on a stable surface.
- Avoid Digital Zoom. Digital zoom reduces image quality and often causes softness. Instead of pinching to zoom, move closer to your subject to maintain sharper detail.
- Tap to Focus Before Shooting. Always tap your subject on the screen to ensure proper focus. This simple step helps the camera lock onto the right focal point and reduces accidental blur.
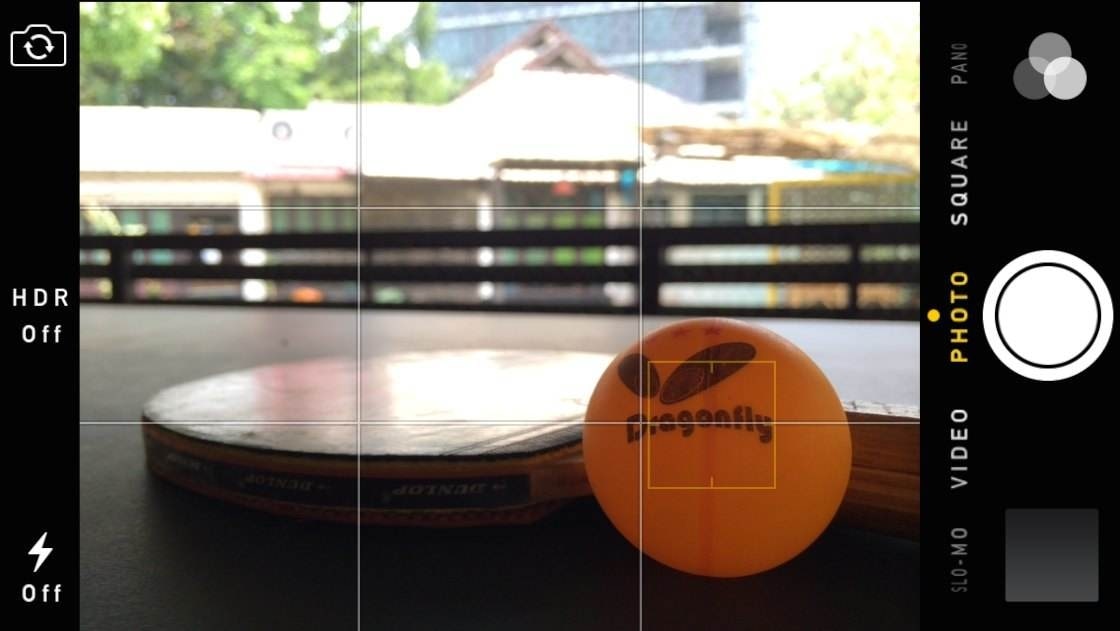
- Turn On Camera Gridlines. Gridlines help with alignment and stability, especially when shooting at angles. They can also reduce slight tilts that may affect focus and composition.
- Go Easy on Filters and Edits. Heavy filters and aggressive editing can soften details. Apply adjustments lightly to preserve sharpness and avoid making photos look artificially fuzzy.
Conclusion
Fuzzy iPhone pictures are quite troublesome, but they are usually easy to fix once you know the cause. By checking your camera settings, improving how you take photos, and using the right editing or repair tools, you can restore clarity and prevent blur in the future. And when sharpening tools are not enough, AI-powered repair apps can help fix damaged or low-quality iPhone photos.
FAQs
-
Why are my iPhone pictures fuzzy in the Photos app but clear later?
This usually happens when iCloud is still downloading the full-resolution image. At first, iOS shows a low-quality preview, then replaces it with the clear original once the download finishes. -
How do I fix fuzzy pictures on an iPhone without an app?
You can clean the camera lens, tap to focus before taking a photo, hold the phone steady, use good lighting, avoid digital zoom, and adjust sharpness using the built-in Photos app editing tools. -
Why are iPhone pictures fuzzy after sending on WhatsApp or text?
WhatsApp and Messages compress photos to reduce file size and send them faster. This compression removes image details, which makes photos look fuzzy compared to the original. -
Can damaged photo files cause fuzziness?
Yes. Corrupted or incomplete photo files can lose image data, causing blur or reduced clarity that normal editing or sharpening cannot fully fix.