
 TL;DR:
You can restore photos corrupted during a macOS update by utilizing built-in macOS repair utilities to resolve indexing glitches or by using dedicated recovery software for deep structural file damage.
● Trigger the built-in Photos Repair Library Tool by holding the Command and Option keys while opening the Photos app to rebuild a poorly indexed database without deleting media.
● Isolate third-party app conflicts by booting your Mac into Safe Mode, which requires holding the Power button for Apple Silicon models or the Shift key for Intel processors.
● Utilize third-party tools like Repairit Photo Repair to reconstruct severely damaged image files suffering from broken headers, missing pixels, or "file format not supported" errors.
Ask AI for a summary
 ChatGPT
 Perplexity
 Gemini
 Claude
 Grok
Grok
Updating your Mac should be smooth, but it can be frustrating when you find your photos corrupted after a macOS update. This can happen due to system glitches, library issues, or errors during the update process, leading to missing or unreadable images. The good news is that your photos are usually not permanently lost. In this guide, we’ll show you simple and effective ways to repair photos after a macOS update, from basic fixes to more advanced recovery methods, so you can restore your photo library.
In this article
Why Media Integrity Fails After an Update
When macOS updates, the Photos app often re-indexes and upgrades your photo library. If this process is interrupted or fails, it can lead to photos corrupted after a macOS update.
Common Signs
- Distorted or blank images
- Photos app crashing unexpectedly
- Missing or empty thumbnails
- Error messages like “file format not supported”
Main Causes
- Incomplete library update or migration
- Software or plugin conflicts
- Low storage space during the update
Other Factors
- Issues with external drives or interrupted transfers
- File system differences between storage formats (like HFS+ and APFS)
Signs of a Damaged Photo Library
Corruption doesn’t always mean complete loss. Sometimes, it shows up as small glitches or performance issues inside the Photos app.
Common Symptoms
- Endless loading - Images stay on “Loading…” but never open
- Missing details - Photos lose metadata like location, date, or face tags
- Export problems - Images fail to export even if they look normal
- Sync issues - iCloud or backup uploads get stuck or stop working
Other Warning Signs
- Repair prompts - The library asks to be repaired every time it opens
- Invisible files - Photos appear in Finder but can’t be opened in the app
- Slow performance - The app lags when scrolling through your library
Basic Recovery and System Fixes
Before trying advanced recovery methods, you can use built-in macOS tools to fix common issues that may cause photos corruption.
Fix 1. Use the Photos Repair Library Tool
This built-in feature checks your photo library for errors and repairs database issues without deleting your images.
Step 1. Hold down the Command and Option keys while clicking to open the Photos app.
Step 2. In the window that appears, click Repair and enter your Mac password to begin the restoration process.

Fix 2. Check Disk Using Disk Utility
Run Disk Utility to find and fix storage errors that may prevent your photos from loading properly.
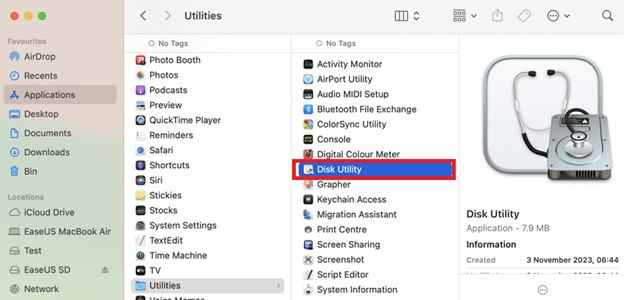
Step 1. Open Disk Utility from the Applications, Utilities folder and select your startup disk (usually Macintosh HD).
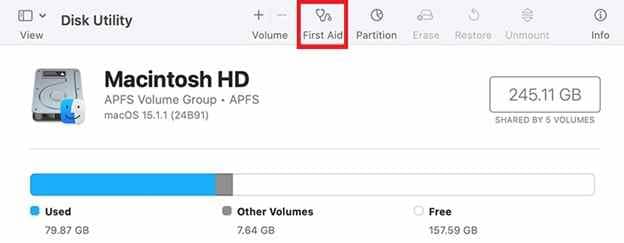
Step 2. Click the First Aid button at the top of the window and select Run to check for and fix directory structure errors.
Fix 3. Reset File Permissions
Sometimes updates change file permissions, making your library hard to access. Resetting permissions can help restore proper access.
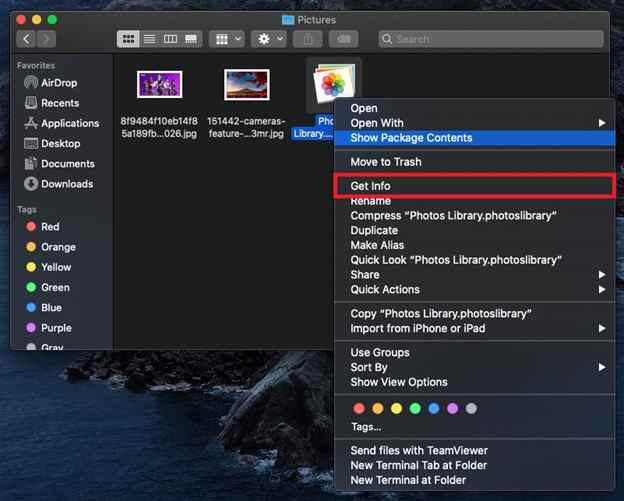
Step 1. Right-click your Photos Library file in Finder, select Get Info, and ensure your user account has Read & Write access under Sharing & Permissions.
Step 2. Click the Action (three dots) menu at the bottom and select Apply to enclosed items to force-update all subfolders.
Fix 4. Start in Safe Mode
Booting in Safe Mode removes temporary files and disables third-party extensions that may be causing conflicts with the Photos app.
Step 1. Shut down your Mac, then press and hold the Power button (Apple Silicon) or Shift key (Intel) until you see the login window or startup options.
Step 2. Log in and open the Photos app to see if the files display correctly; if they do, a background app is likely the culprit.
Advanced Fix to Restore Severely Corrupted Image
If built-in macOS tools don’t fix the issue, the problem may be deeper and affect the actual image data or file structure. In this case, advanced repair tools can help restore damaged photos.
It CAN:
- Repair broken headers and metadata so images can open properly
- Restore corrupted pixels that cause glitches like color distortion or gray lines
- Recover photos that the Photos app cannot recognize
- Fix multiple corrupted images at once, saving time
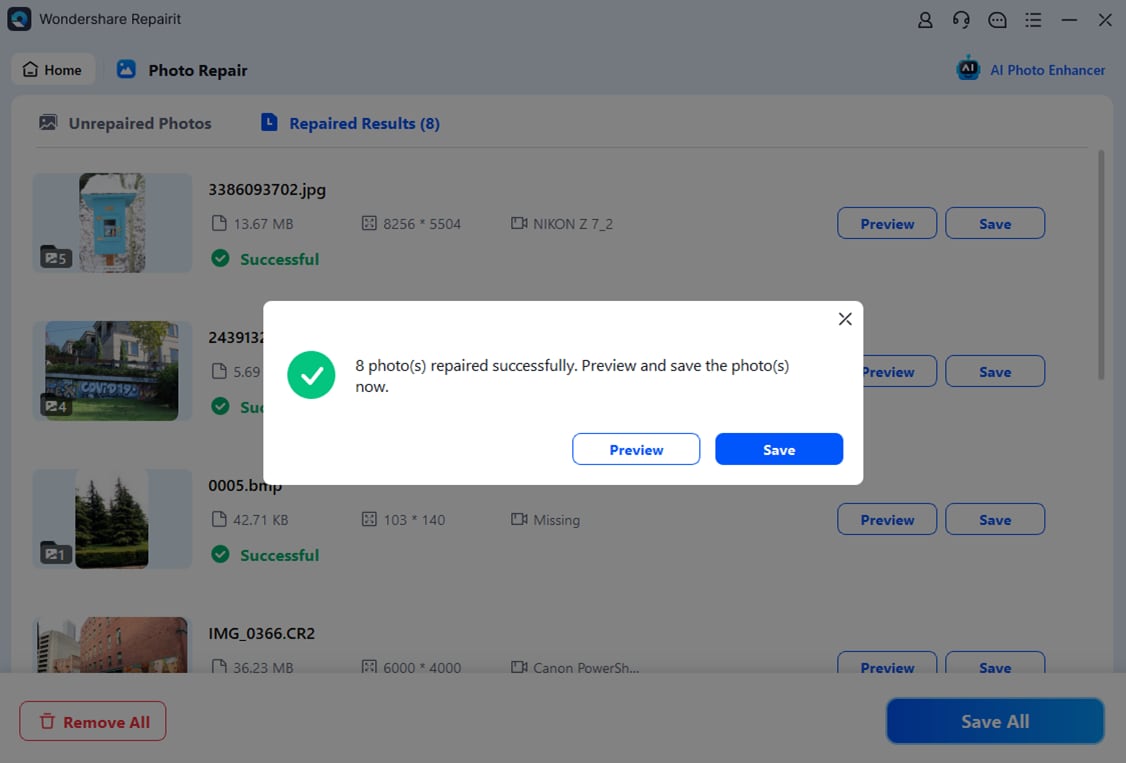
If your photos are still damaged, tools like Repairit Photo Repair can help repair common formats such as JPEG, PNG, HEIC, and some RAW files. It works by analyzing healthy files of the same type to rebuild missing or damaged parts of the image
Step-by-Step (Optional)
Step 1. Upload the corrupted image.
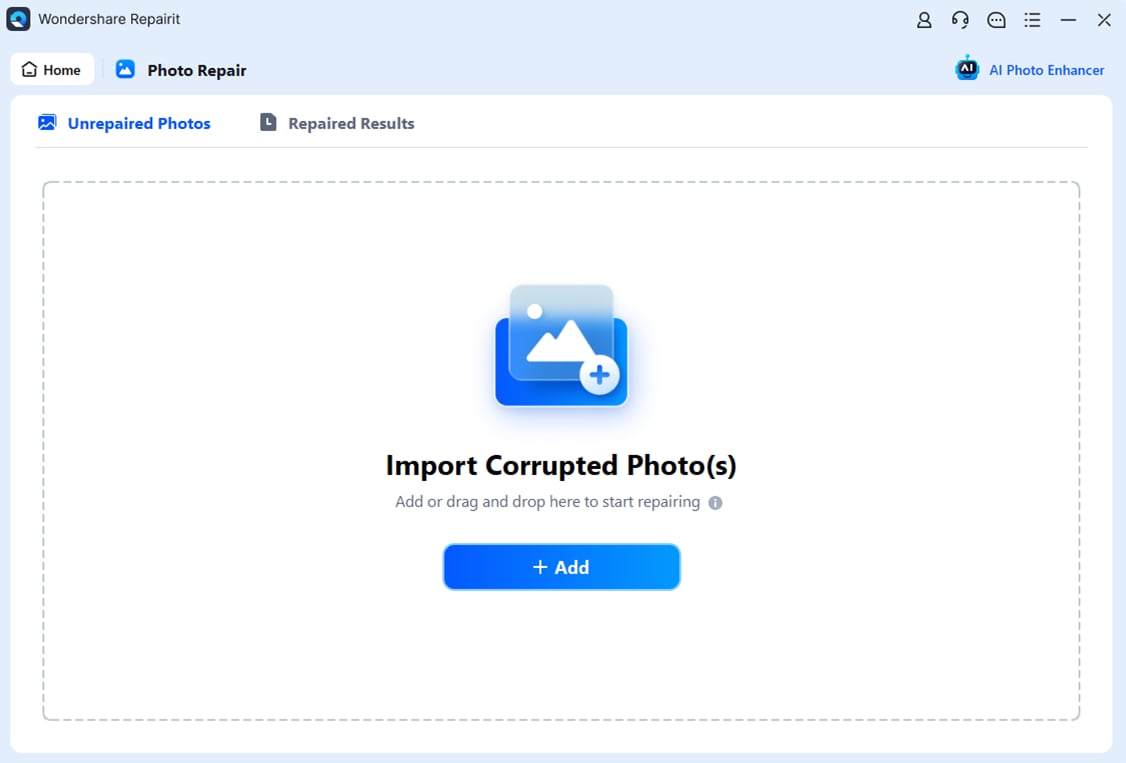
Step 2. Start the Repair process.
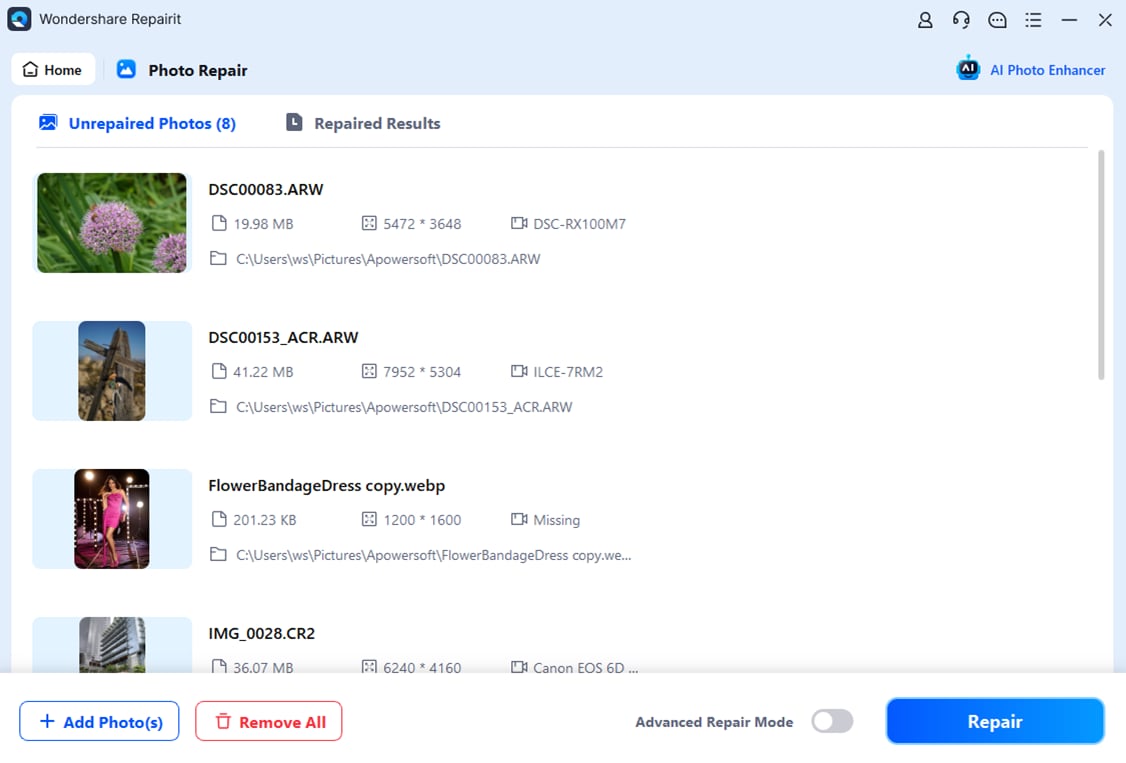
Step 3. Preview and save the restored file to a new location.
How to Prevent Photo Corruption After Updates
macOS updates are important, but they can temporarily stress your system as files are reorganized. Taking a few precautions can help protect your photo library from damage.
Best Practices for Safety
- Back up before updating - Use Time Machine or an external backup before installing any macOS update
- Keep enough free space - Leave at least 15-20% of your storage free for smooth system migration
- Check disk health - Use Disk Utility’s First Aid to fix small errors early
- Be careful with external drives - Use reliable cables and avoid unplugging drives while files are being processed
Extra Tips
- Update gradually - Avoid skipping multiple macOS versions at once if possible
- Ensure stable power - Keep your Mac plugged in or use a UPS to prevent shutdowns during updates
Conclusion
Seeing your photos corrupted after a macOS update can be stressful, but in most cases the issue can be fixed with proper troubleshooting. Start with built-in tools like Photos Repair Library or Disk Utility, and if needed, use advanced methods to repair photos after a macOS update. With the right steps, you can usually restore your photos and get your library working again. To avoid future issues, always keep backups and enough free storage before updating.
FAQs
-
Why do photos get corrupted after a macOS update?
This usually happens when the photo library update is interrupted or affected by low storage, system glitches, or software conflicts. -
Is the Photos Repair Library tool safe?
Yes. It is a built-in macOS feature that fixes library issues without deleting your actual photos or videos. -
Why are my thumbnails blank or missing?
This is often caused by cache or database issues. Repairing the library or restarting in Safe Mode can usually fix it. -
Can I recover photos showing an unsupported format?
In many cases, yes. This error often means the file structure is damaged, which can sometimes be repaired using advanced tools. -
How can I prevent this in the future?
Make sure you back up your files, keep enough free storage space, and maintain a stable power connection before installing macOS updates.