
Have you ever captured that perfect moment, only to later discover that your cherished photo turned out fuzzy? It's a frustrating experience that many of us have encountered.
Blurriness can rob your precious memories of their clarity and detail. But fear not because we know what to do!
In this guide, we are going to first tell you why photos go fuzzy. Moreover, we'll reveal four effective methods to fix those fuzzy photos. These include Photoshop, inbuilt paint software, Snapseed, and Wondershare Repairit.
Say goodbye to fuzzy photos and hello to picture-perfect memories!
In this article
Part 1: Why Are My Photos Fuzzy?
Most times, we wonder why our photos are fuzzy. Several people face this issue when they take pictures and wonder why it happens. If you're also wondering, below are some reasons why it may be occurring.
Shutter Speed Isn't High Enough:
One of the leading causes of blurry photos is slow shutter speed. When the shutter remains open for an extended period, even the slightest movement can result in blurriness.
This often occurs in low-light situations or when trying to capture fast-moving subjects. To combat this, increase the shutter speed to freeze the action and eliminate motion blur.
Out of Focus:
Focusing issues are another common source of fuzziness. If your camera doesn't accurately focus on your subject, the resulting image will lack sharpness.
Ensure that your camera is set to auto-focus or manually adjust the focus until your subject appears sharp and clear.

Unstable Tripod:
Using a tripod can significantly improve image sharpness, especially in low-light conditions. However, if the tripod isn't stable or is subject to vibrations, it can still lead to blurry photos. Make sure your tripod is on solid ground and free from any potential sources of movement.
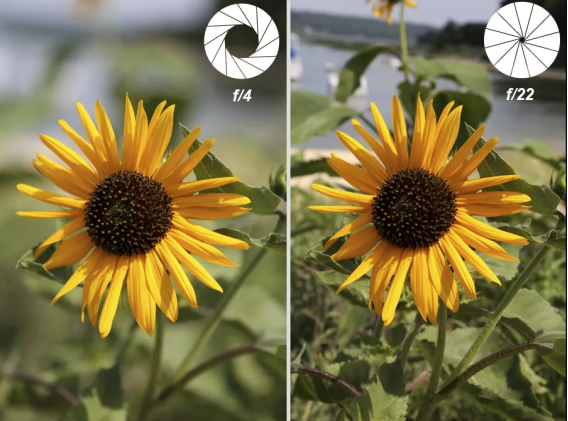
Bad Aperture:
Aperture settings play a crucial role in photography. If the aperture is too wide (a low f-number), it can result in a shallow depth of field, causing parts of the image to be out of focus. On the other hand, using a very narrow aperture (a high f-number) may lead to diffraction, reducing overall image sharpness. Finding the right balance is essential.

Part 2: How To Fix a Fuzzy Photo and To Make Pictures Clear
When you open a photo on your smartphone or PC and discover it's fuzzy, it can be annoying. The exciting news is that there's a fix for your fuzzy images.
If you want to learn how to fix a fuzzy photo, keep reading.
Method 1: Use Photoshop Sharpen Filter
Many would argue that Photoshop is the best photo editing app. It can remove all the fuzziness in your photos when you learn to fix a fuzzy picture using its sharpening tools. They are pretty helpful in making your images clearer without increasing any noise from the photo. Below are details on how to fix a fuzzy photo using Photoshop's sharpening tool.
Step 1: Open Photoshop on your PC.
Step 2: Next, go to the 'File' tab and choose 'Open' from the options displayed. Choose the fuzzy photo you would like to fix.
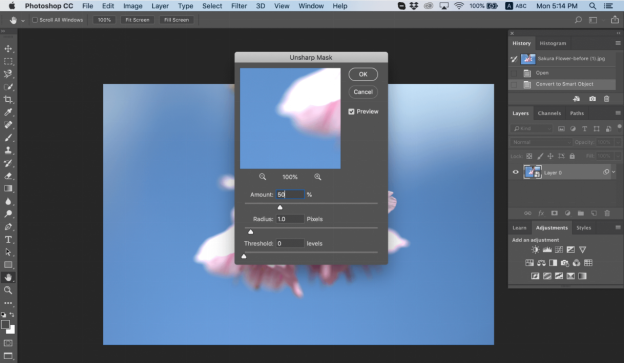
Step 3: In the Filter menu, choose Sharpen > Unsharp Mask.

Step 4: In the Unsharp Mask dialog box, drag the sliders to achieve the desired effect.
Step 6: Save your photo once it's clear.
Next up, we have the option to explore the built-in Paint software.
Method 2: Use the Built-in Paint Software
Another option you have when learning how to fix a fuzzy photo is using the built-in paint software. The paint software is mostly overlooked on many PCs but can be pretty beneficial in clearing up your image. Keep reading for details on how to use the inbuilt paint software to fix fuzzy photos.
Step 1: Open MS Paint on your PC.
Step 2: Open the file you want to fix on the software.
Step 3: Choose “Effects” from the tabs at the top and then select “Photo.”
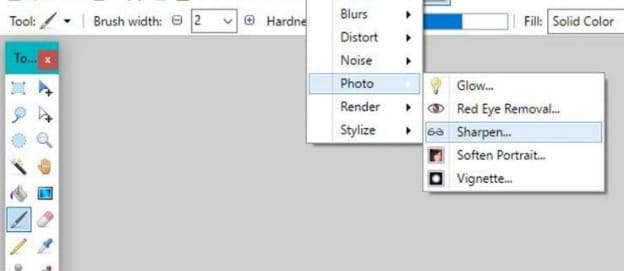
Step 4: Then click on "Sharpen."
Step 5: Once the fuzziness is clear, you can save the photo. If the above two methods don’t work for you, try out Snapseed.
Method 3: Use Snapseed
If you want to fix a fuzzy photo on your smartphone, a great app that will come in handy is Snapseed. It allows you to repair multiple images with various damages, including fuzziness. Below are the simple steps you can use to fix fuzzy photos on your device.
Step 1: Download the Snapseed app on your smartphone.
Step 2: Launch the app and select the fuzzy photo you would like to fix.
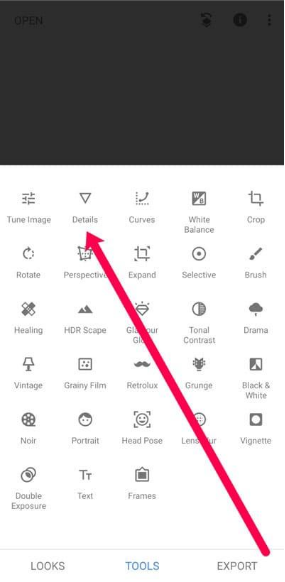
Step 3: Once you select the picture, tap on “TOOLS” at the bottom of the screen.

Step 4: Next, choose “Details” from the options available.
Step 5: Tap on the “Sharpening” button from the list of options displayed.

Step 6: Adjust the Sharpening level and then save your photo. If all else fails, then move to our last option.
Method 4: Most Effective and Fast Repairit - Online Solution
Another solution when you're learning how to fix a fuzzy photo is to use professional repair software. While there are many on the internet, only a few can truly deliver what they offer. That's why you shouldn't look any further than Wondershare Repairit. This software helps to fix your photos in a few seconds. It repairs damaged and corrupt images, so you never have to lose another picture again.
Wondershare Repairit Online will have your pictures back to their perfect form. With this repair tool, your pictures can still turn out sharp. It fixes fuzziness, distortions, and several other problems in a photo.
To fix blurred images using Repairit Online, follow the steps outlined below.
Step 1: Go to Wondershare Repairit Online.

Step 2: Click on “Online Photo Repair.”

Step 3: Click on “Add” to add your fuzzy photos or drag and drop files.
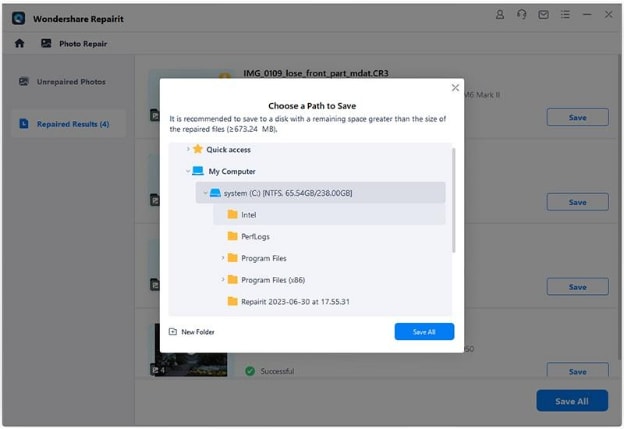
Step 4: Repairit will fix the fuzziness of your photo.

Once done, you can save your photo on your desktop.
Part 3: Tips to Prevent Fuzzy Photos
Now that you know how to fix fuzzy photos, you can repair your fuzzy images using any of our methods. However, the best solution is to avoid taking fuzzy pictures altogether. Below are some quick tips to follow when shooting photographs to prevent them from being fuzzy.
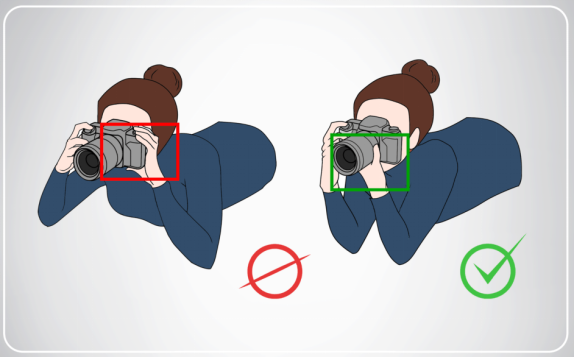
Tip # 1: Keep your Camera Stable
Camera shake is a common cause of fuzziness. To avoid this, use a tripod or any stable surface whenever possible. If you're shooting handheld, practice steady breathing and consider using image stabilization technology if your camera supports it.
Tip # 2: Make Sure the Subject is Not Moving
If your subject is continuously moving, you should wait till the subject stops moving before you shoot the picture. Doing this will help you avoid motion blur.
Some cameras will allow you to choose a movement feature like sports or children. These movement settings recognize movements and help provide faster speeds.

Tip # 3: Use High-Resolution Camera
Higher-resolution cameras capture more detail, making it easier to produce sharp, high-quality images. If you're frequently disappointed by blurry photos, consider upgrading to a camera with better resolution.
Tip # 4: Set a High Shutter Speed
A high shutter speed is your best friend when it comes to preventing motion blur. Adjust your camera's settings to ensure that your shutter speed is fast enough to capture your subject crisply. Do this, especially in challenging lighting conditions.

Tip # 5: Use Smaller Aperture
Selecting a smaller aperture (a higher f-number) can increase the depth of field in your photos. This results in more elements in focus, which can help ensure that your subject and its surroundings remain sharp.
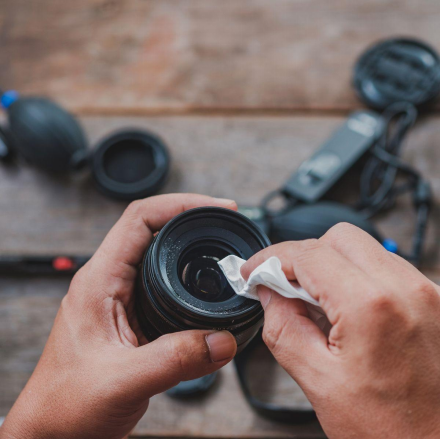
Tip # 6: Ensure Clean Lens
A dirty or smudged lens can significantly impact image quality. Regularly clean your camera's lens to remove dust, fingerprints, or smudges that can lead to blurriness. Use a microfiber cloth to do so.
Final Words
When shooting photos, fuzzy photos can be quite a letdown. But no worries! We've explored why this fuzziness happens and shared easy fixes like Photoshop, Snapseed, and Wondershare Repairit. Plus, we've got some handy tips to stop fuzziness from happening in the first place.
With these tips and tools in your arsenal, you'll turn your not-so-great photos into clear, beautiful memories. Say goodbye to the frustration of fuzzy pics and get ready to snap sharp, vibrant images. Your photographic journey is about to get a whole lot clearer and more enjoyable!
