
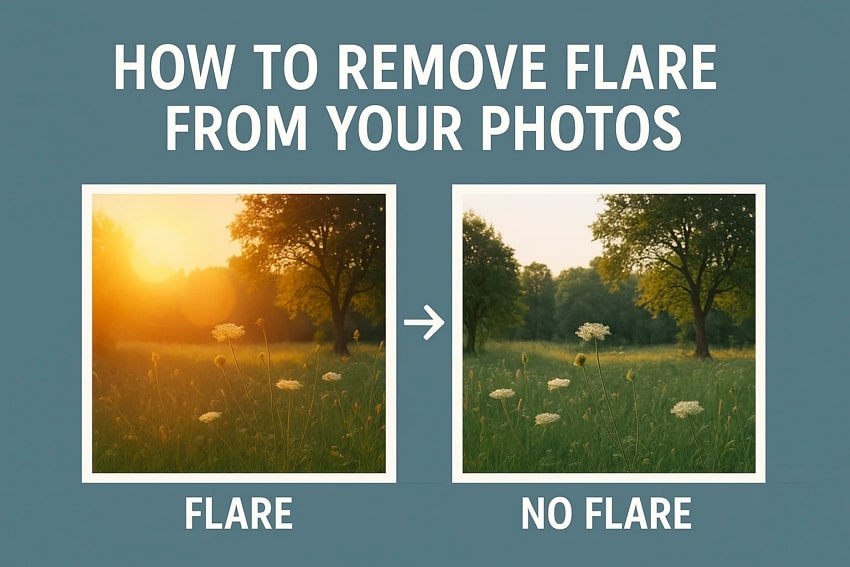
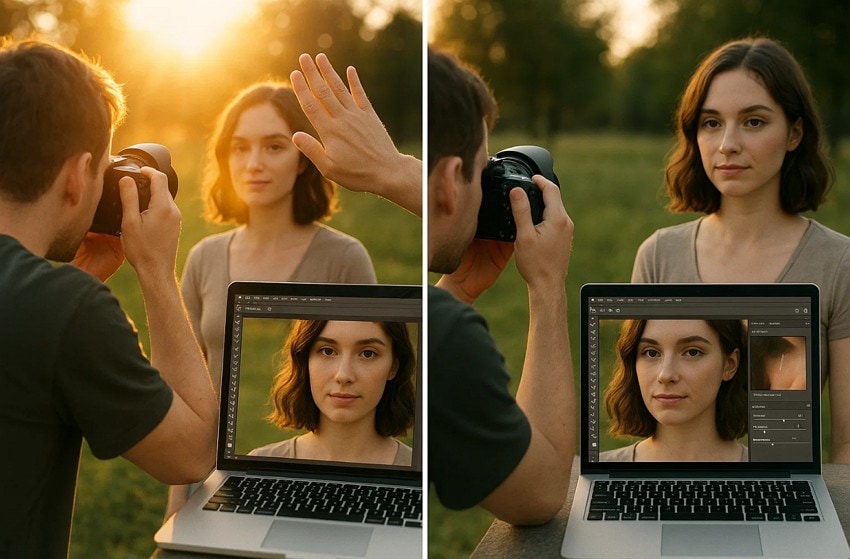
Imagine you have just taken a beautiful outdoor portrait or a scenic landscape, but when you check it, you see an odd burst of light or a hazy area that wasn’t part of the image. This is actually the lens flare that appears unintentionally when the sunlight or intense light strikes your lens. Not only does this frustrating problem erase the important details, but it produces unnatural artifacts as well.
Being stuck in this situation, many enthusiast photographers then wonder how to remove lens flare with fixes that won’t affect their image's originality. So, whether you want to fix an existing image or prevent flare in future shoots, this guide has got you sorted. Here, we’ll uncover effective solutions with expert guides to overcome this daunting situation in the future.
In this article
Part 1. Looking to Perform Lens Flare Removal in Photoshop? 3 Ways
To remove lens flare from a photo, this section covers 3 solutions that you can use in Photoshop if the flare is distracting or unwanted.
Way 1. Use the Spot Healing Brush Tool for Photoshop to Remove Flare
Photoshop comes with a Spot Healing Brush that you can use to reduce lens flare. It's a highly effective way to remove small details. Unlike others, this tool works by automatically sampling the nearby pixels and blending them over the selected area. The healing brush then intelligently matches the color while making visible adjustments that you can perform through the steps mentioned below:
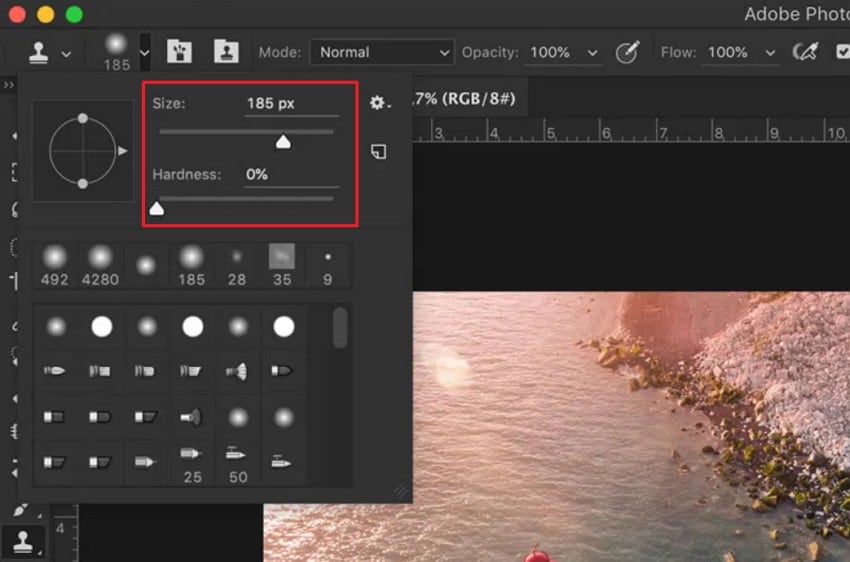
Step 1. On Photoshop, access the “Spot Healing Brush” tool from the left toolbar and right-click to change the brush properties from the menu that appears.
Step 2. Then, hold the “ALT” or “Option” buttons on your keyboard, left click on the area where you seek to remove glare, and let the tool smooth out details.
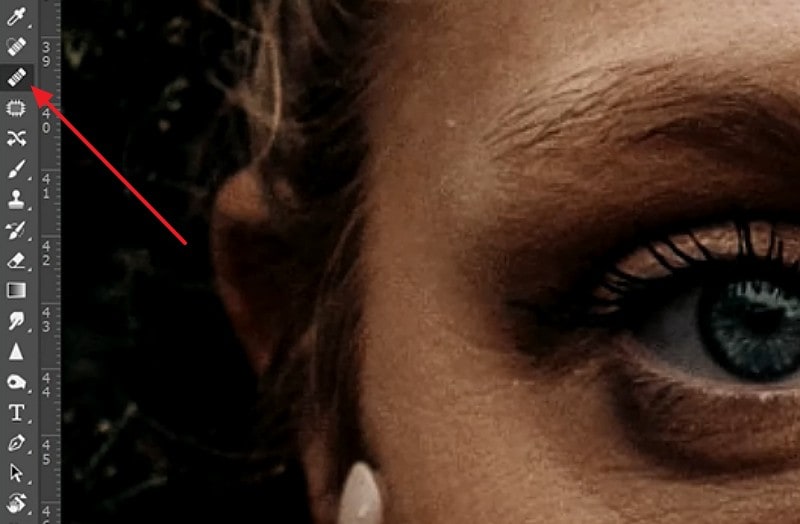
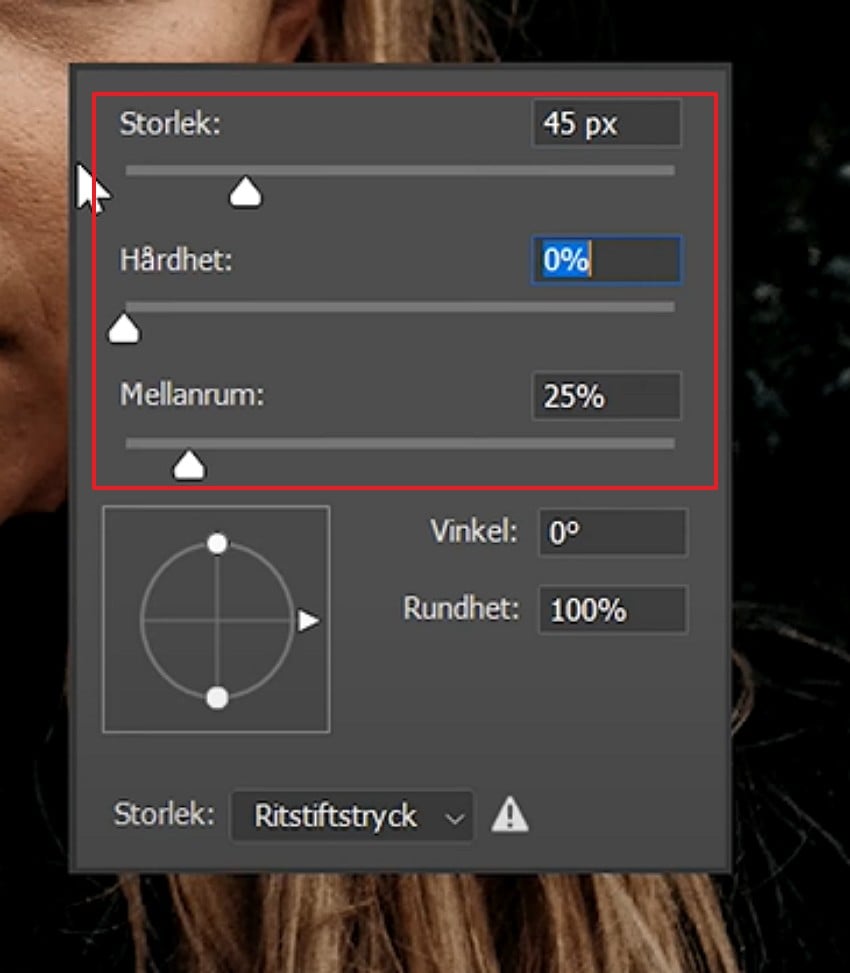
Way 2. Photoshop Remove Light Flare with the Clone Stamp Tool
In terms of Photoshop remove flare, you can also consider using the Clone Stamp tool to eradicate the glares, since the solution offers you total control. This means you can choose exactly which source pixel to copy and where to paste it. For strong color transitions and complex backgrounds, this tool is an ideal option where you can also work non-destructively on a new layer and remove flare, as mentioned:
Step 1. On the left toolbar, pick the “Clone Stamp Tool” and fetch the new menu to start the lens flare removal process.
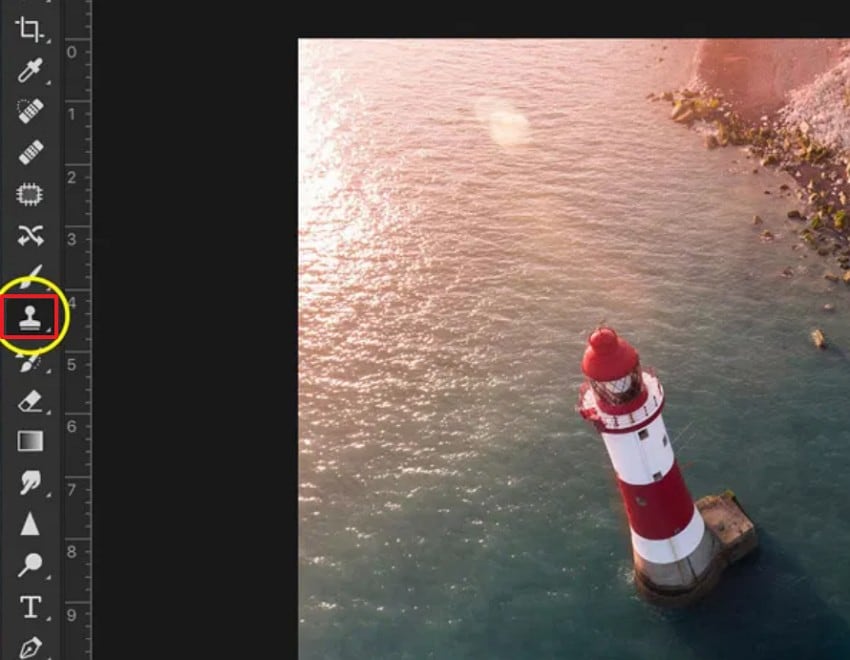
Step 2. Here, adjust the brush size and hardness to “0” and hold the “Alt” key for Windows and “Option” key for Mac to click areas affected with lens flare. Precisely mark the areas and wait till the tool removes them, making your image clear and glare-free.
Way 3. Reduce Lens Flare Photoshop via Content‑Aware Fill
Content Aware Fill is another effective solution for Photoshop to remove light flare because it intelligently analyzes images. After the detailed analysis, it precisely fills the selected areas with nearby contextually appropriate pixels. Most importantly, the tool allows you to preview the fill and make corrections to new layers as shown in the steps given below:
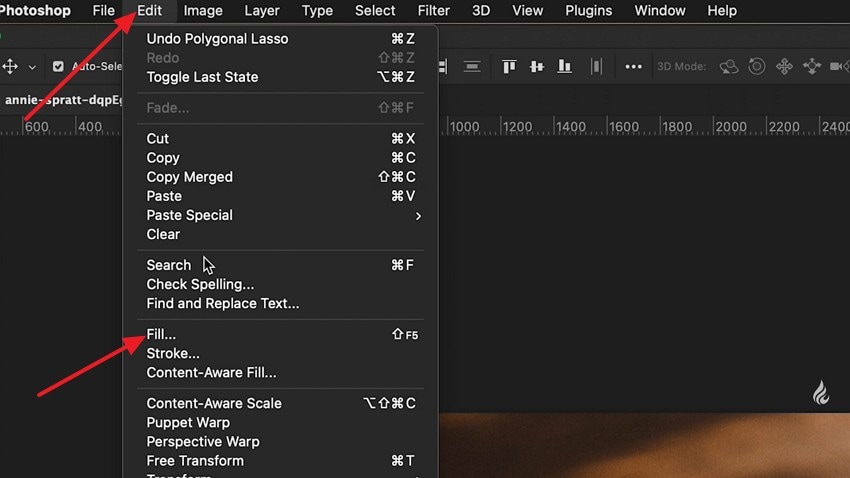
Step 1. Start by selecting the selection tool, like Lasso, from the left toolbar, select the flare affected areas, and head to the "Edit” tab to choose the “Fill” option.
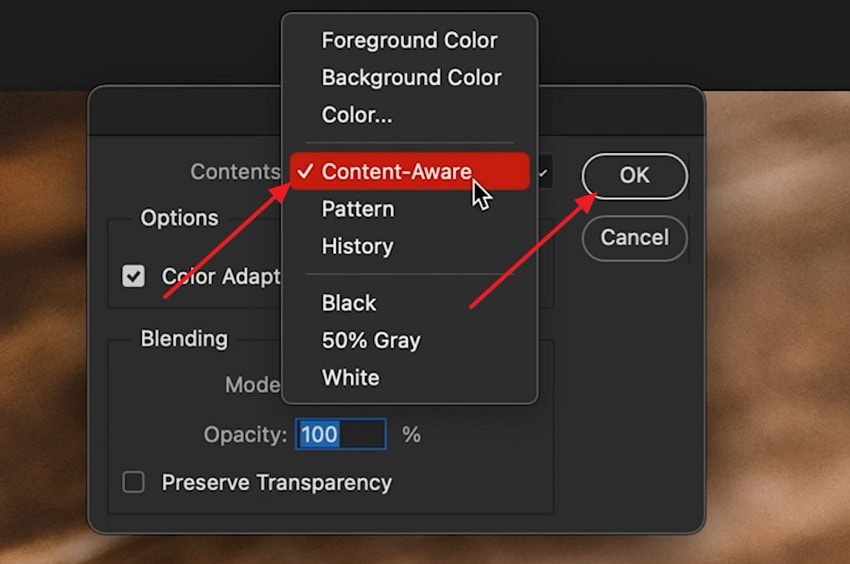
Step 2. Now, from the appearing menu, pick the “Content Aware” option and tap on the “OK” button, after which the tool will eliminate the flares for you.
Part 2. Remove Lens Flare from Photo Without Any Manual Effort with Repairit AI Photo Eraser
Though you know how to remove lens flare from a photo with Photoshop, beginners often find these tools confusing and complex. Therefore, options like Repairit come with an AI Photo Eraser that features a Brush tool to highlight unwanted objects. The foremost aspect is that users can resize the brush to highlight the minor and extensive details like a pro.
In contrast to other tools, it is available online and enables you to process images in batches to add additional convenience. As the flare-affected areas are highlighted, users also have the privilege to undo and redo the results to have more control over the edits. Above all, the tool is user-friendly, with simple and easy-to-use tools, and it is the most suitable tool for beginners.
Key Features

-
History Tab: For users who want to access the previous file, the tool has a History tab that keeps a record for a specific time.
-
Preview: Unlike other editors, users can easily preview the changes made before exporting them to the device.
-
Zoom in and Zoom out: For highlighting flares precisely, users can zoom in and zoom out on images, without requiring them to use any shortcuts or extra tools.
Expert Guide to Eliminate Lens Flare from Images with AI Photo Eraser
Besides the lens flare removal in Photoshop, here is how you can use Repairit’s AI Photo Eraser to remove flare without needing expert skills:
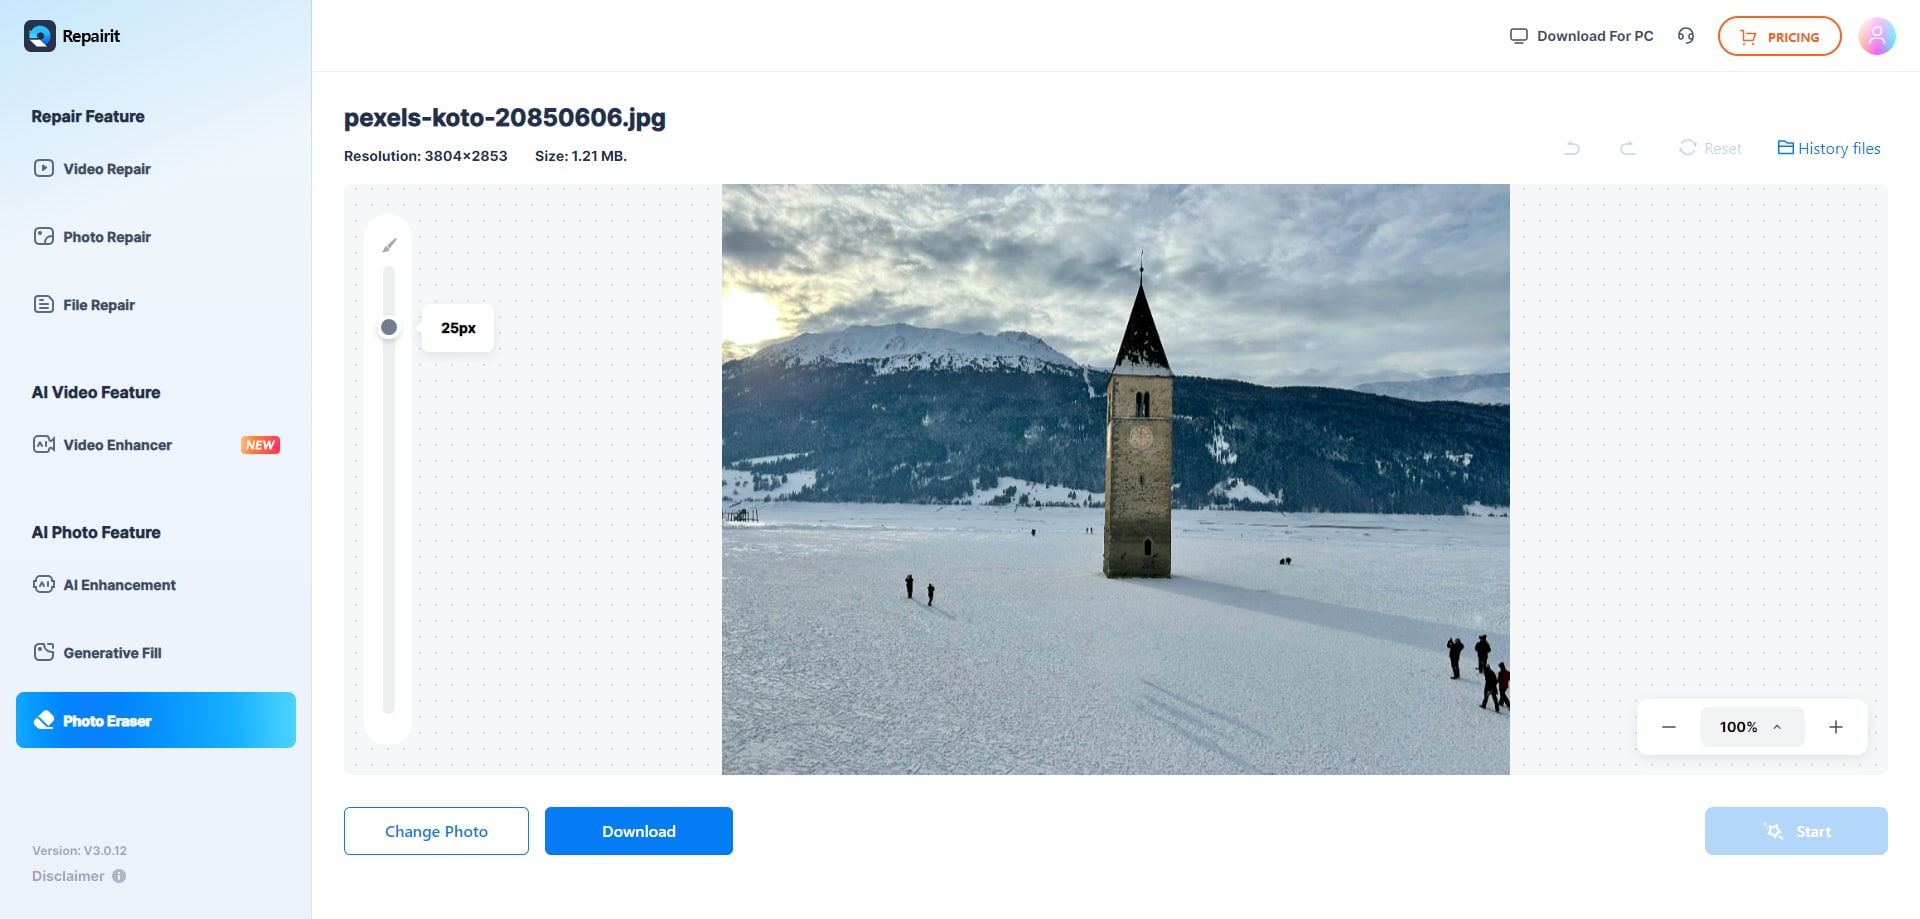
Step 1. Access the Photo Eraser and Insert the Flared Image from the Device
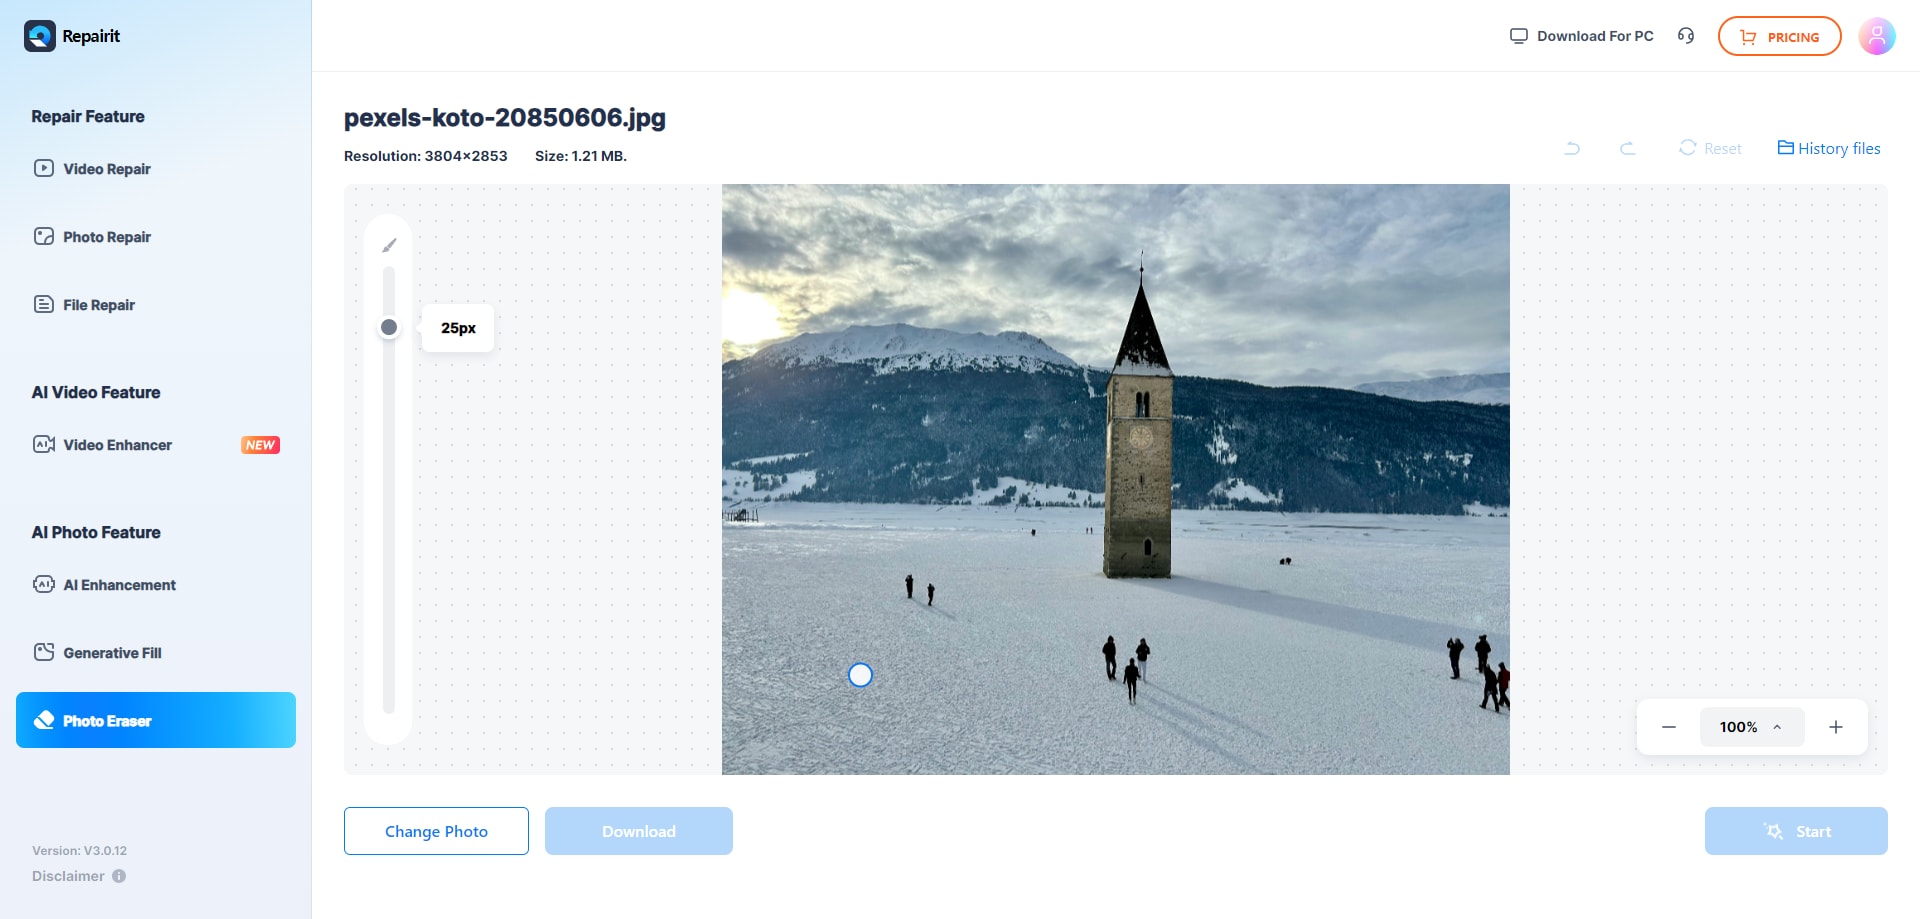
From the “Photo Eraser” tool of the Repairit Online, pick the “Add Photo” button and insert the flare-affected image from the device.

Step 2. Highlight the Unwanted Details and Let the Tool Remove Them
Next, adjust the brush size, highlight the flare parts, and press the “Start” button to remove the unwanted details.
Step 3. Download the Final Results Without Lens Flare
When the image is ready, determine if the results are worth saving through the “Download” button. If not, use the “Change Photo” button and start the same process again till you get the results.
Part 3. How to Deal with Lens Flare During Photography: 6 Tips & Tricks
Before using Photoshop remove light flare or Repairit AI Photo Eraser methods, it's better to opt for some expert ways to avoid having this issue. Which is why this section comes with 3 before shooting and 3 after shooting tips that you can easily follow.
Before Shooting
- Use a Lens Hood: To prevent stray light from entering the lens, it is suggested to equip your lens with a lens hood that fits your lens model. It helps minimize reflections and improves overall contrast in bright conditions.
- Change Camera Angle or Position: Always adjust your shooting angle or try moving your feet to prevent direct sun exposure. Even a slight repositioning can dramatically reduce or eliminate unwanted flare.
- Shield the Lens with Your Hand or an Object: Use your hand, hat, or a paper outside the frame to make a shade for the lens to stop the light that will cause flare. Just be careful not to let the object appear in the shot while blocking the light effectively.
After Shooting
- Clone Stamp or Spot Healing Brush in Photoshop: Opt for the retouching tools to paint over or blend the flared spots perfectly. These tools are ideal for small or isolated flares that disrupt specific areas of the image.
- Content-Aware Fill in Photoshop: In Photoshop, choose the flare-affected area, and pick the Content-Aware Fill tool from the Edit menu to match and replace it with neighboring pixels. It works best for larger or more complex flare spots that blend into textured backgrounds.
- Adjust Contrast and Highlights: During the post-processing, always use the selective adjustments or minimize the highlights to tone down washed-out areas due to flare. This helps restore depth and balance to images where flare has dulled the overall exposure.
Conclusion
Summing up, outdoor shoots become chaotic when images are exposed to direct sunlight, leading to unwanted flare. Facing this, users seek simple and effective ways to remove lens flare, which is handled in this guide by offering 4 effective solutions. Among all, we recommend using Repairit AI Photo Eraser since the tool is beginner-friendly and supports batch processing to save hours of manual effort.
FAQ
-
1. Can lens flare be removed entirely in Photoshop?
Yes, using tools like Clone Stamp, Healing Brush, and Content-Aware Fill, you can easily remove flare effects while filling them with nearby pixels. However, these solutions require some learning curve, so you can consider using Repairit's AI Photo Eraser. This tool is intuitive and offers a 3-step, simple solution to remove flares with the Brush. -
2. Is lens flare always a bad thing in photography?
Not every time, as most of the photographers use a flare to add mood and a modern vibe to the images. It becomes an issue when it affects the original object's appeal, making editors seek simple ways to remove lens flare from a photo. -
3. Does using a UV or protective filter increase lens flare?
Yes, UV or protective filters can greatly increase the probability of lens flare because additional glass sends the light into the lens. This occurs mostly when the filter is dirty, of poor quality, or does not have an anti-reflective coating. -
4. Are specific lenses more prone to lens flare than others?
Older and wide-angle lenses with less sophisticated coatings tend to have lens flare because they are more sensitive to light and have a greater field of view. Such abilities allow the stray light to enter and reflect in the lens elements with ease.
