
For visual artists and creators, exporting transparent video from After Effects is essential for creating blended animation and videos. Moreover, instead of getting stuck with a solid background, you can try to float the graphic over any underlying video. With the right settings, users can render these videos in seconds and add a professional and fun touch to their creative clips.
This article will cover all the necessary details on why there is a need to transport background and how you can achieve that with simple steps. Users can learn to enhance their work by exploring various tips and creating engaging content. This guide will also provide you with advanced video repair software that can fix any damaged video in seconds.
Table of Contents
Part 1. Why the Need for After Effects Export with Transparent Background Arises?
If not convinced, read the following points that explain why you need to export a transparent background in After Effects:
- Professional Visual Effects: When you are a motion designer or editor, you need to export transparent backgrounds to create seamless transitions and advanced visual effects.
- Overlay and Composition Needs: Another main reason is for overlaying animations, graphics, and logos onto the videos without showing the solid background underneath.
- Alpha Channel Support: Users can ensure that only the intended parts are visible over the chosen footage if they export only the transparent backgrounds.
- Asset Reuse: Instead of creating new assets, you can use the same elements, like graphics and titles, across multiple projects and scenes.
- Efficient Workflow: Exporting transparent video from After Effects reduces the extra steps of doing manual background removal and speeds up work with efficiency.
Learn from this article: Transparent Video Files: A Quick Overview
Part 2. How to Export Transparent Background After Effects: A Step-by-Step Guide
When creating stunning motion graphics for your video, the best solution is to use Adobe After Effects. This software offers powerful features, allowing you to control colors, simplify workflow by animating faster, and apply built-in effects.
These customize your video into something unique and stunning, such as sharpening, color correction, and video enhancement. Hence, the guide on how to export After Effects transparent background on Adobe is given below:
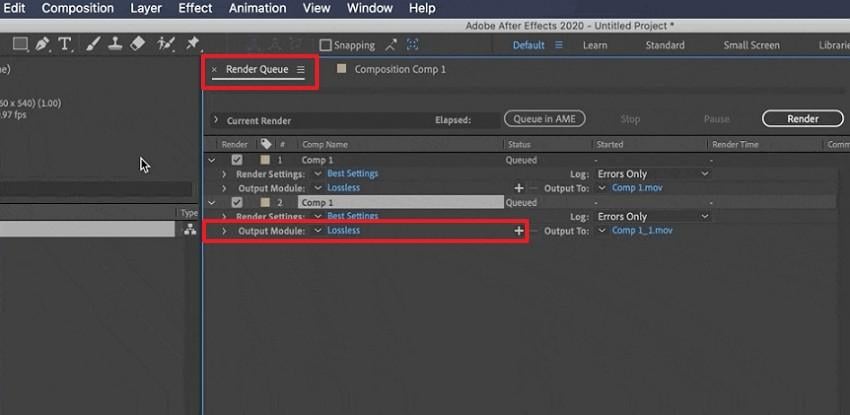
Step 1. Open the program on your device and toggle the “Transparency Grid” under your main composition. After that, extend the “Composition” tab at the top toolbar and choose the “Add to Render Queue” option from the menu.

Step 2. When the “Render Queue” window is opened, click “Lossless” next to the “Output Module” to access its complete settings.
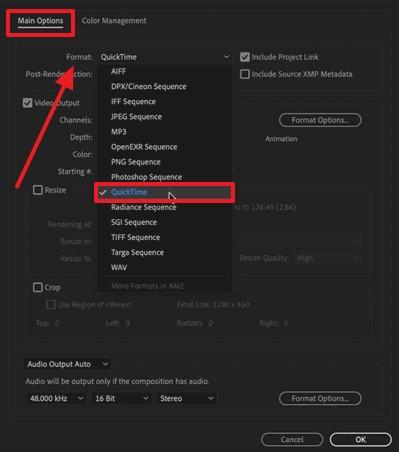
Step 3. From the “Main Options” tab, expand the “Format” section, and select “QuickTime.”
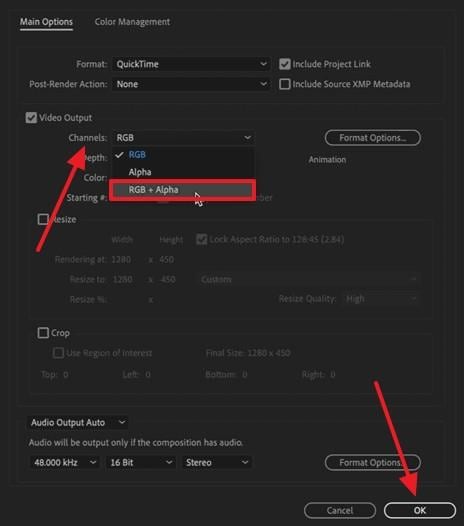
Step 4. Afterward, navigate under the “Video Output” section, and choose “RGB + Alpha” settings in the “Channels” option. When you’re done, hit the “OK” button to confirm the settings.
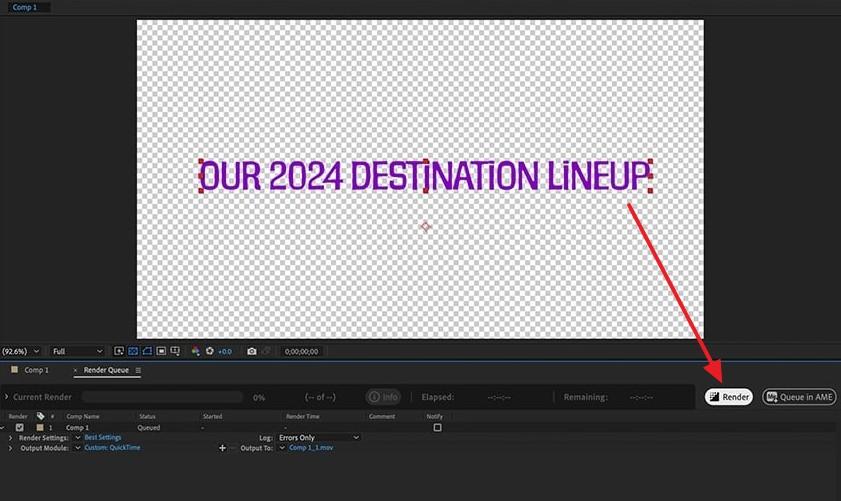
Step 5. Once the settings are adjusted, return to the "Render Queue" and click the “Render” button to begin exporting the video. Next, preview the added video in the “Timeline” zone and see how it perfectly overlays it.
You can’t miss: How to Export Premiere Pro to MP4?
Part 3. Fix Your Damaged and Unplayable After Effects Video Files in One Click
When exporting transparent videos from After Effects, especially those with alpha channels or complex layers, it’s common to run into playback issues, glitches, or codec-related corruption. Whether it's a choppy render, broken transparency, or a completely unreadable file, Repairit Video Repair helps you bring your exported videos back to life smoothly and accurately.
Supporting HD to 8K transparent videos from all major devices and formats (such as MOV with ProRes 4444, WebM with VP9), this tool preserves your alpha channels and restores visual quality without compromising motion or color integrity.
Key Features
- Precision Repair for Alpha-Channel Videos: The Professional Mode is optimized to handle videos with transparency, such as exported files from After Effects. It repairs broken alpha data, frame distortion, and codec corruption, ensuring your overlays, effects, and compositing assets stay perfectly intact.
- Batch Repair with Format Versatility: Whether you're fixing multiple transparent overlays or a whole set of animation exports, Repairit allows you to batch-repair various file types (MOV, WebM, MP4 with simulated transparency) at once, no resolution or size limit.
- Preview Transparency, Frame by Frame: Before saving, you can preview your repaired videos in real-time, including the transparent layers, ensuring each frame and mask renders exactly how you intended during export.
Now, learn how to fix corrupted video files by following these easy steps using the video repair software:
Step 1. Open Repairit’s main interface, click the “Video Repair” tab, press “Start,” and hit the “+Add” button to import the damaged video files.

Step 2. After the files are uploaded to the “Unrepaired Videos” tab, press the “Repair” button at the bottom right to start the process.

Step 3. Next, press the “Preview” button to open the review for the repaired video, which you can check frame by frame. Once satisfied with the results and quality of the video, hit “Save” to export the clip.

Fix Your Damaged and Unplayable After Effects Video Files
 Security Verified. Over 7,302,189 people have downloaded it.
Part 4. 5 Tips to Enhance Your Work in Adobe After Effects to Make It More Professional
There are various ways you can enhance the videos once you export After Effects with transparent background, given below:
1. Apply Sharpening Effects
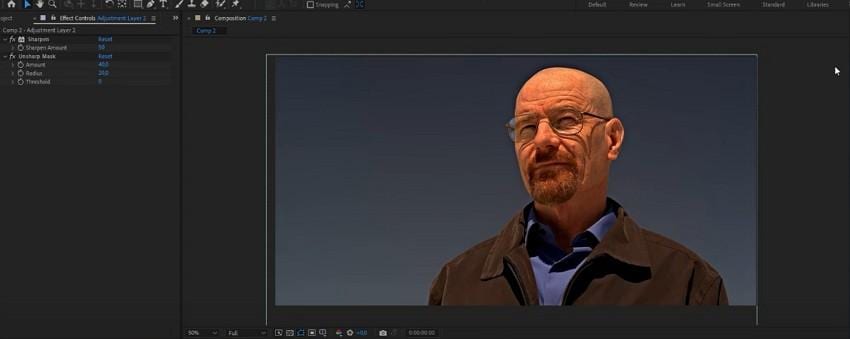
Creators can use the built-in sharpen and unblur effects of Adobe to make videos look refined. Moreover, adjusting the radius, amount, and threshold values makes the video look crisp. However, be careful not to overdo the effect, which may just result in unnecessary noise and artifacts. The sharpening may add unwanted noise or sharp edges, making the video unnatural. Hence, sharpening may give a professional touch when used sparingly.
2. Adjust Composition and Render Settings
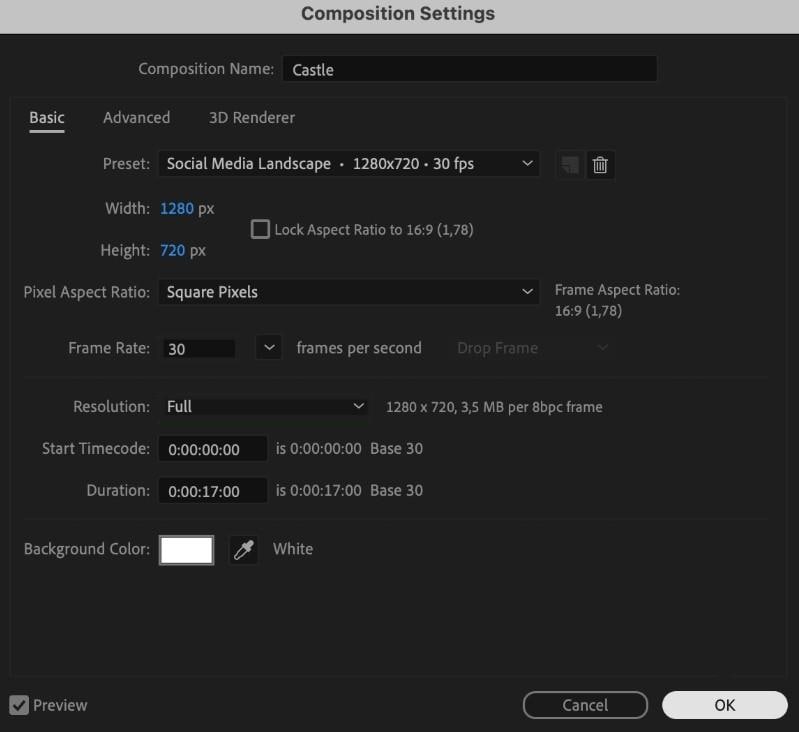
If the final result doesn't look good, change its composition resolution and frame rate. You can access the render settings and set it to the highest value. Moreover, on the composition settings, set the resolution to full and the frame rate to 30. This correction contributes to the fact that your end video appears professional and clean, particularly when seen on various devices.
3. Perform Color Correction
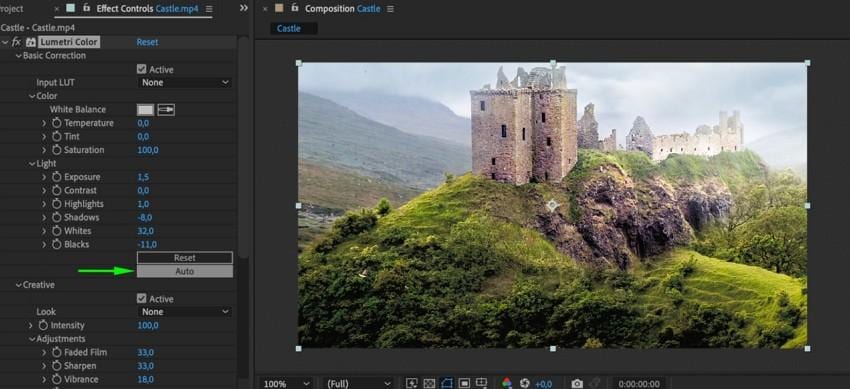
Adobe offers manual and automatic color correction options with Hue and Saturation choices that balance the brightness and contrast. The Auto Color effect analyzes the video colors after you export a transparent background in After Effects. In the end, get the best video colors with natural shadows, midtones, and highlights. Besides, proper color correction ensures your video doesn’t look washed out and displays vibrant yet realistic colors.
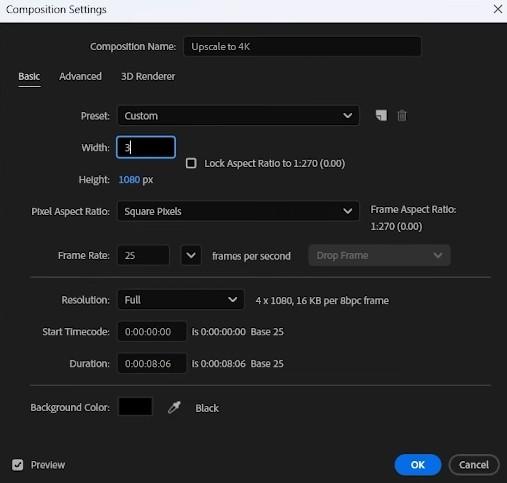
4. Upscale and Detail Preservation
If you're stuck with a small video clip, upscale it using the Detail-Preserving Upscale effect. Moreover, change the video width and height in pixels in the composition settings. These settings can preserve every frame and pixel of the video, which you can preview before exporting. This is beneficial when you want to repurpose older or smaller videos. It also avoids pixilation or blurriness and makes your final output look crisp.
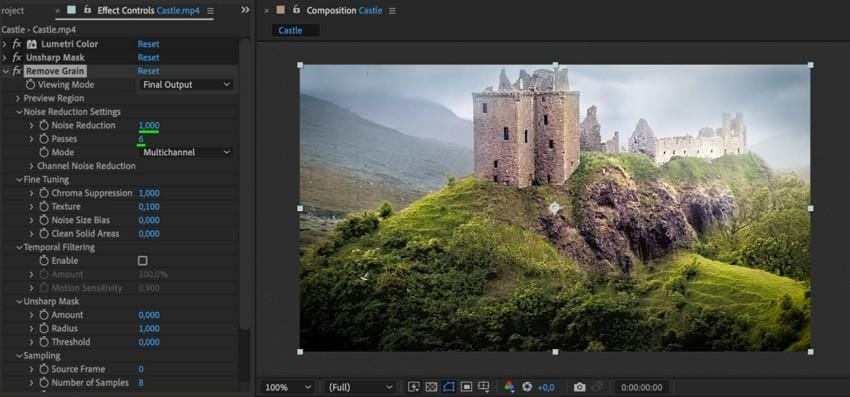
5. Noise Reduction and Footage Stabilization
The worst part of a video is the presence of unwanted noise and grain. The automatic grain removal analyzes the video clip and makes it look sharp without overdoing it. Additionally, you can change the values of the noise reduction settings, passes, and mode to have a perfect video clip. It stabilizes the shaky footage and creates fluid camera movements, with no distractions.
Conclusion
To sum up, this article highlighted the process and need of exporting transparent video from After Effects. Besides, you can follow various tips to enhance and improve the overall quality of the video with professional Adobe effects.
In the end, if these videos somehow turn out blurry or damaged, turn to Repairit, which instantly repairs damaged video files. You can import any format, and this software's advanced repair fixes it with enhanced visuals.
Frequently Asked Questions
-
Which video formats support transparency when exporting from After Effects?
When exporting transparent video from After Effects, creators should resort to formats such as MOV, WebM, and AVI. These formats enable transparency and support codecs such as ProRes 4444, VP8, and VP9, allowing you to export high-quality video in an uncompressed format. -
Will exporting transparent videos affect the file size and render time?
Yes, transparency video export leads to a bigger file size and a longer render time. This occurs because the details in the alpha channel require additional information to decode the video, thus increasing the video size. -
Why does my exported transparent video show a black background?
This can happen due to an unsupported video format or codec, or the export setting not being able to configure the alpha channel. Moreover, you can fix this issue by changing the format to a supported transparent codec and alpha channel. -
How can I reduce the file size when exporting transparent videos?
Under the export settings, the users can configure to use more efficient codecs, a low bitrate, and a resolution value to obtain a smaller video clip. Moreover, you can split the alpha channel prior to exporting or decide to merge the color video with the alpha channel in the video editing program.
