
Many editors struggle when working with 360 videos, especially those recorded using special cameras or similar devices. Although the footage looks stunning, it actually needs special tools to edit effortlessly without losing video quality or detail. That’s where the Insta360 Premiere Plugin comes in to make it easier to handle such files inside the Premiere Pro tool. This plugin lets you preview, adjust, and stitch your Insta360 videos directly without hassle.
Still, editors struggle to install or use the plugin correctly, especially when switching from other editing tools. Therefore, this article will help you learn how to install this plugin on your preferred device, along with fixing common issues that editors usually face.
Table of Contents
Part 1. What Is the Insta360 Adobe Premiere Pro Plugin?
As explored, the Insta360 Adobe Premiere Pro plugin is a tool that helps you edit Insta360 video effortlessly. It was launched in 2024 to make working with .insv 360 video files faster and more organized. Plus, this plugin removes the need for sticking and keeps video quality high during the editing. It also uses a small preview file for smoother playback to save time and make editing much more effortless.
Part 2. Key Functions of the Insta360 Premiere Pro Plugin
It offers several features that simplify your workflow to improve playback and maintain high video quality. Below, we will explore its key functions that make editing 360 videos easier and more efficient for all editors:
- In-Camera Stitching: The plugin uses low-resolution files stitched in-camera, which makes editing quicker and smoother for most types of devices. It lets creators avoid long loading times and begin editing without delays that normally come with 360-degree videos.
- Keep Original Quality: Unlike old methods, Insta360 Premiere keeps full video quality until the final export. This means your final video will look sharper and cleaner, even after heavy edits and multiple cuts in the timeline.
- Reduce Unneeded Stitching: Editors can also trim their videos, so only the clip you keep gets processed during the final stitching and exporting steps. As a result, you can save time and effort by avoiding extra work on footage that won't appear in your finished project.
- Better Playback: Apart from editing the full 8K video, the plugin uses smaller proxy files that play more effortlessly in the software. Plus, it removes common playback issues like freezing or lagging that many editors experience while working on large files.
- Edit Directly: All editing happens right inside Adobe Premiere Pro, with no need to switch between different apps or software tools. So, users can keep everything in one place, which makes editing easier and faster.
Part 3. How to Install the Insta360 Premiere Plugin on Your System?
Installing the Insta360 Premiere Pro plugin is simple if you follow the right steps based on your computer system. Hence, the following section provides effortless ways to install this advanced plugin on your preferred system:
For Windows
When you use a Windows computer, the Insta360 Premiere Pro plugin offers a smooth setup and easy editing for your videos. It supports fast file importing and maintains the original quality during the entire editing task. This plugin is made to work well on Windows to give editors a stable experience while handling extensive footage. Anyhow, you can download this plugin on your PC by following the steps below:
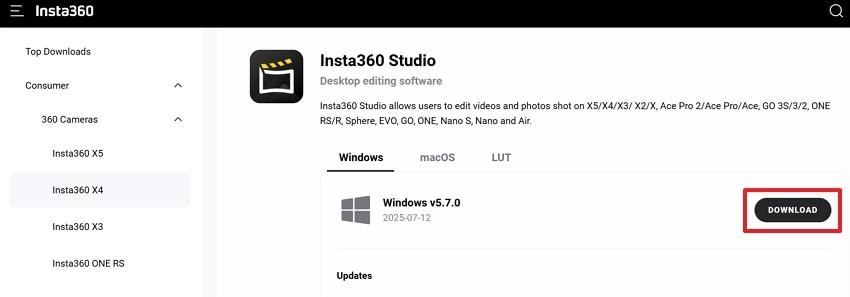
Step 1. Initially, head to the “Insta360 Studio” page and press the “Download” button under the “Windows” section.
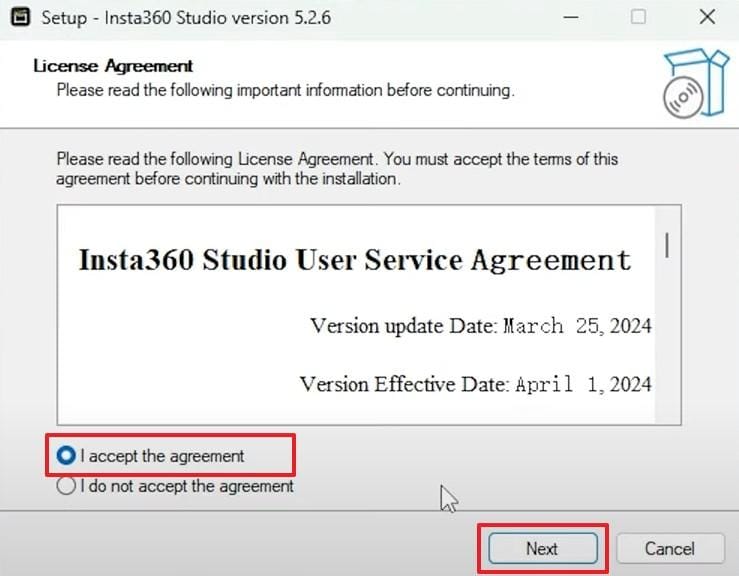
Step 2. Upon downloading, launch it to choose the “I Accept the Agreement” option and press the “Next” button.
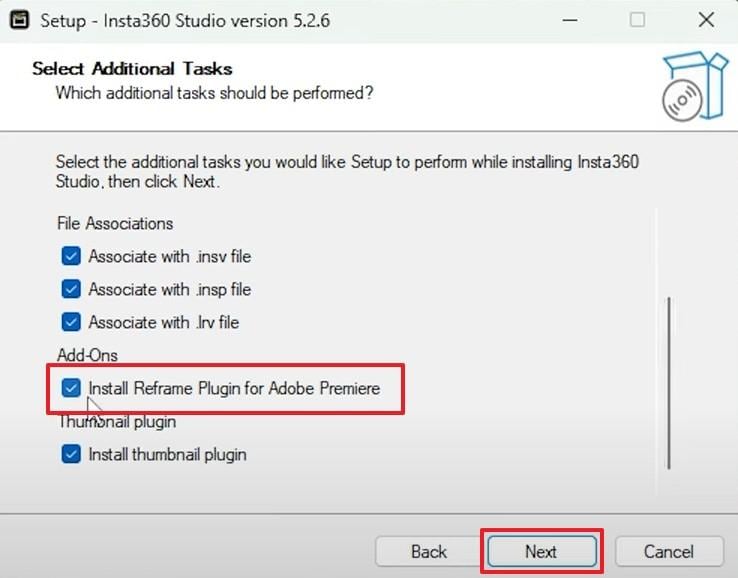
Step 3. Afterward, follow the displayed instructions to move further until you access the “Select Additional Tasks” screen. Here, click the “Install Reframe Plugin for Adobe Premiere” box and hit the “Next” button.
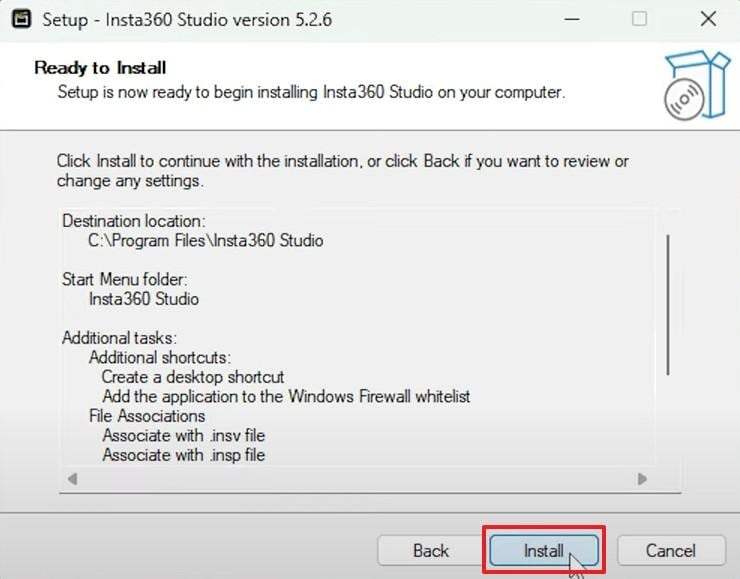
Step 4. Go ahead and click the “Install” button to successfully install the Insta360 plugin on your PC.
For Mac
Mac users can also enjoy the powerful features of the Insta360 Premiere plugin for smooth video editing. It allows direct editing of 360 footage in this software without the need for extra tools or long setups. This plugin helps reduce delays to keep your 360 videos' quality strong from start to finish. Thus, go through the detailed guide to learn how you can install and set up this plugin on your device:
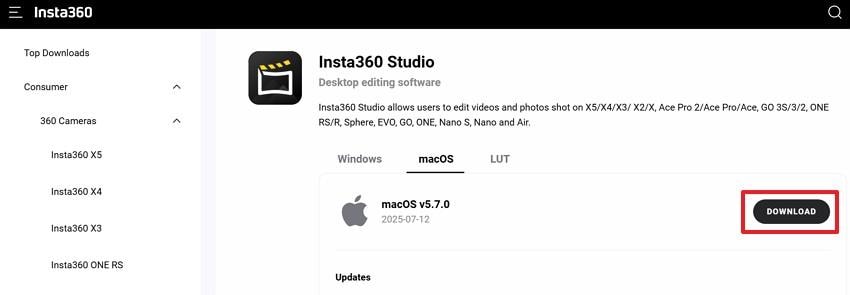
Step 1. As you access the “Insta360 Studio” website, go to the “macOS” tab and hit the “Download” button.
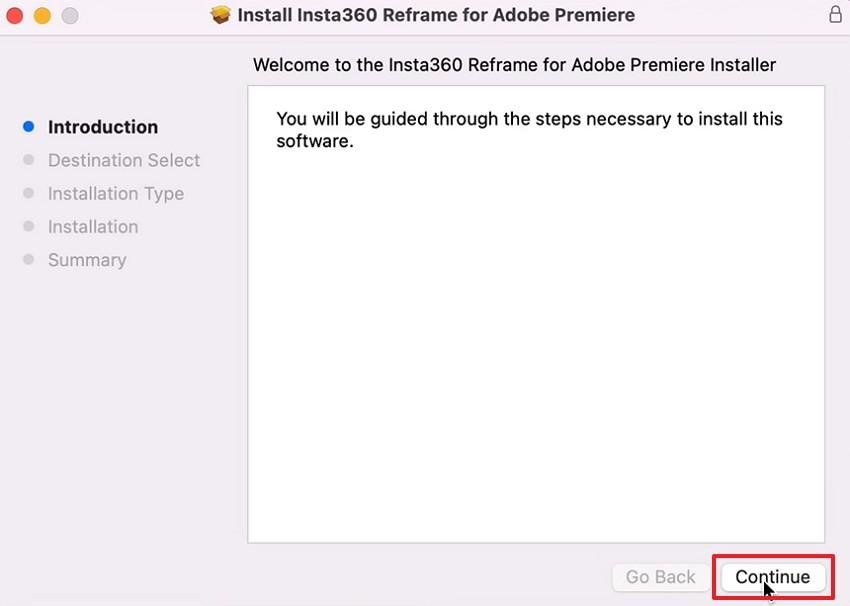
Step 2. Once you run it, press the “Continue” button and follow the displayed guidance on your screen.
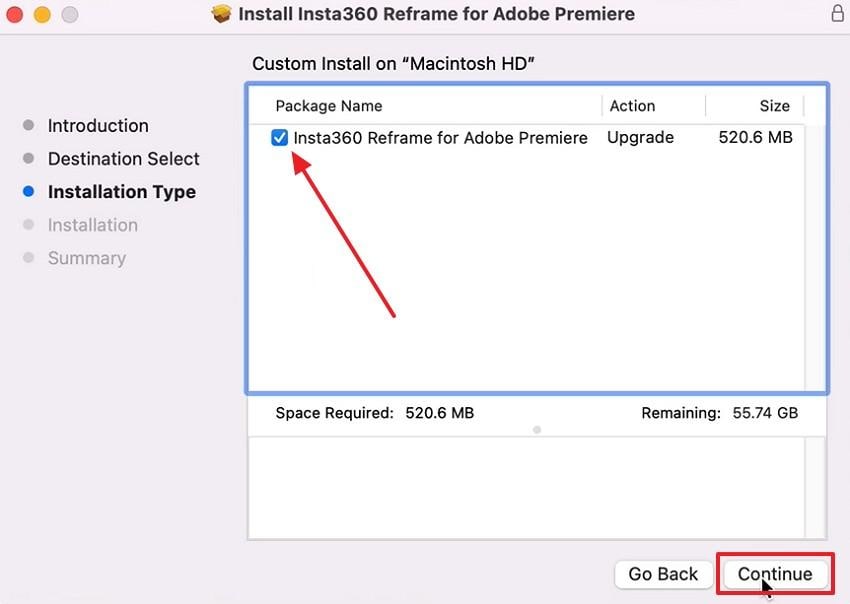
Step 3. When you access the “Installation Types” section, make sure to select the “Insta360 Reframe for Adobe Premiere” and hit the “Continue” button.
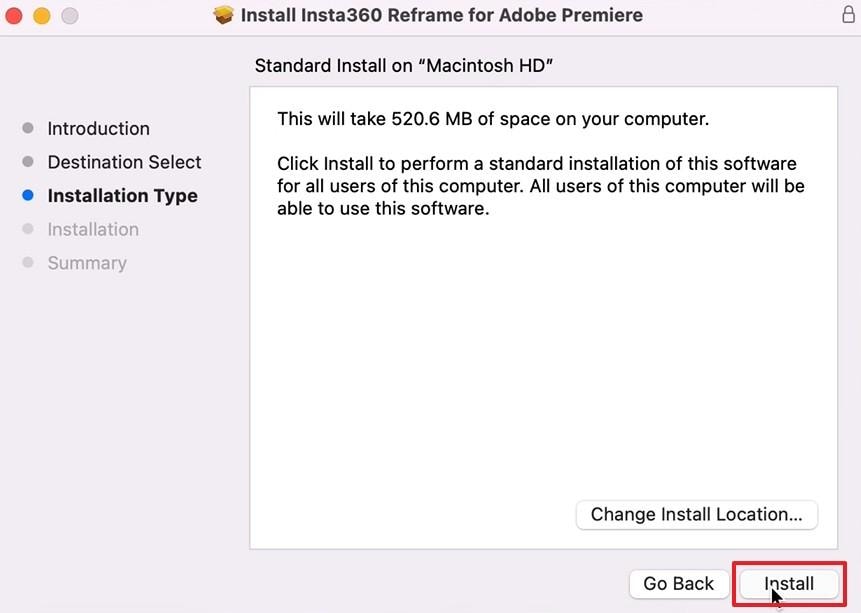
Step 4. Afterward, hit the “Install” button to start installing this plugin on your system.
You may also interest: How to Use Insta360 Videos in DaVinci Resolve Smoothly?
Part 4. How to Use Insta360 Adobe Premiere Pro Plugin: A Guide
When you install it, it becomes more convenient to edit 360 videos directly in Adobe Premiere using the Insta360 Premiere Pro plugin. This software enables you to crop, cut, or change your video records as you require without changing programs.
Moreover, it has smooth timeline playback, auto lens correction, and fast export. Hence, you can learn how to use this plugin inside this program by opting for the guide below:
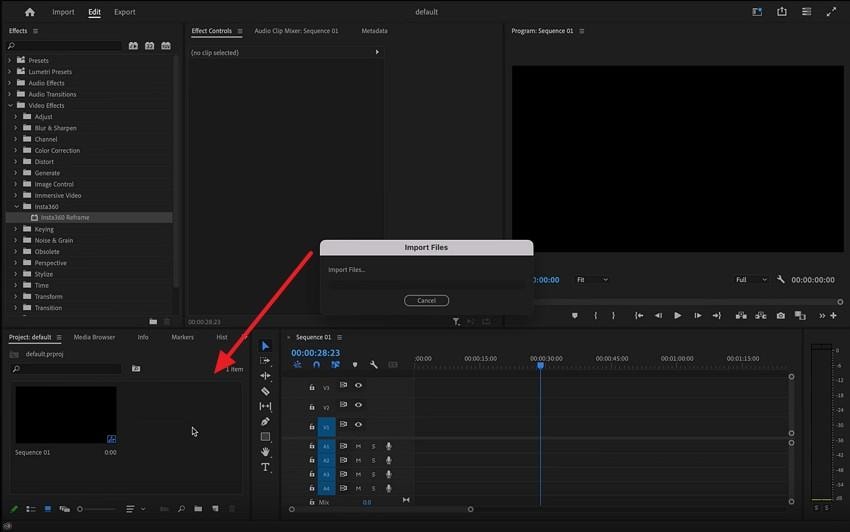
Step 1. Upon launching, you need to import the Insta360 videos into the program’s “Project” section.
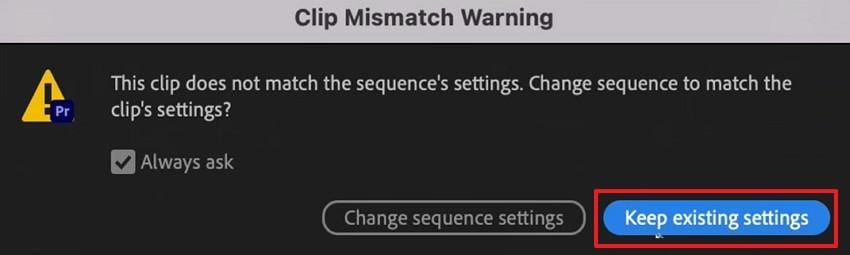
Step 2. After that, simply drag the imported file into the sequence and press the “Keep Existing Settings” button from the dialogue box.
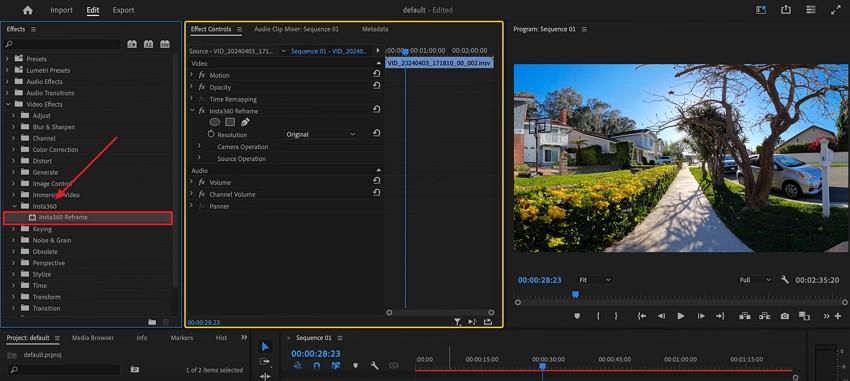
Step 3. Subsequently, click the “Insta360” section under the “Effect” tab and drag the “Insta360 Reframe” plugin into the sequence.
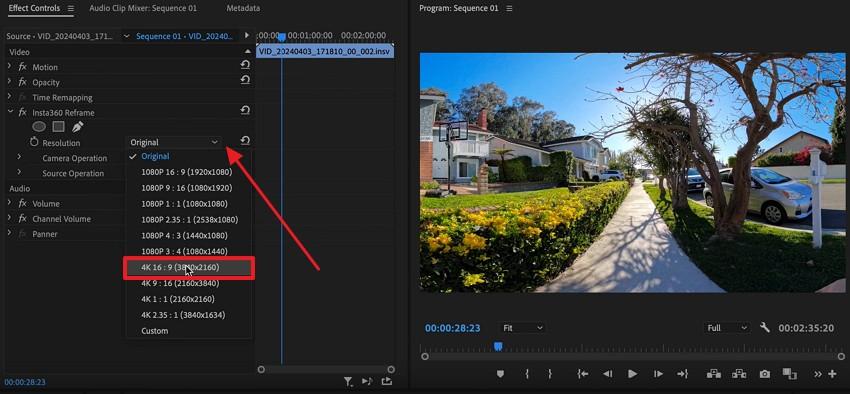
Step 4. Now, expand the “Resolution” drop-down box under the “Effects Control” section and choose “4K 16: 9 (3840x2160)” or any other option.
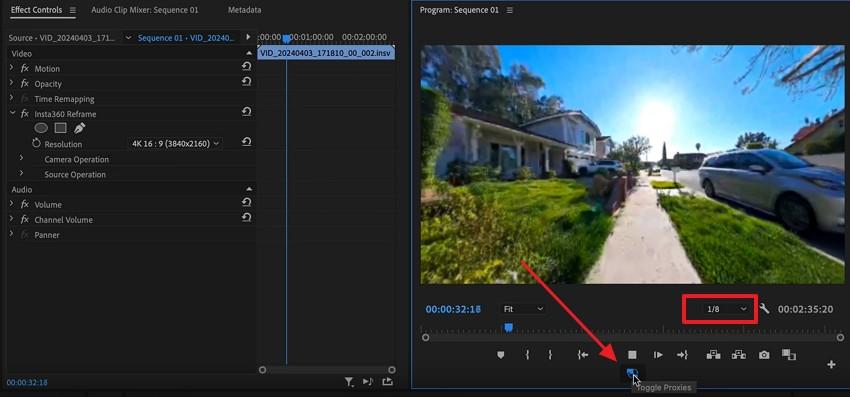
Step 5. Afterward, turn down the playback resolution speed and utilize the “Toggle Proxies" icon to edit the file in a lower quality preview.
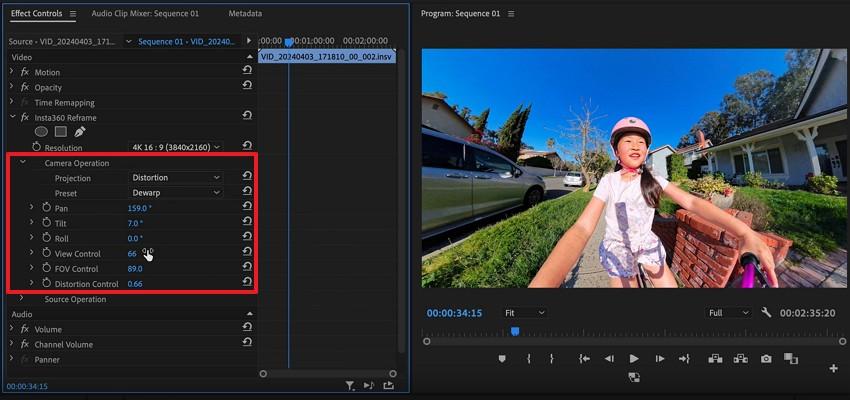
Step 6. Moving ahead, alter some more plugin features by expanding the “Camera Operation” section under “Effect Controls.” At this point, you can adjust various things, like “Pan,” “Tilt,” and “Roll,” to edit your 360 video.
Part 5. How to Deal with Corrupted or Damaged Insta360 Videos?
After discovering the Insta360 Premiere Pro plugin, editors also encounter that their video files get corrupted or damaged. This can ultimately destroy your entire project instantly, even when your video won’t open or play without sound. In such cases, you should utilize Repairit Video Repair, which offers a dedicated video repair tool to address this need. It supports over 25 video formats, including INSV and MOV, to repair them without hassle.
This advanced program repairs videos from cameras, dashcams, GoPro, and other recording devices easily. Its dedicated Quick Repair mode can fix common video issues like freezing, no sound, or pixelation in just a few clicks. Professional editors can also repair video formats like BRAW, R3D, CRM, and others used in filmmaking. Moreover, it can repair even large video files effortlessly without errors or limits on file size.
Step 1. Once you launch this software and head to the “Video Repair” tab, press the “Start” and then “+Add” button to import your damaged Insta360 videos.

Step 2. Upon importing the INSV files to the “Unrepaired Videos” section, simply hit the “Repair” button to initiate this task.

Step 3. Subsequently, click the “Save All” and “Save” buttons upon fixing all your Insta360 videos to export your files to your PC.

Deal with Corrupted or Damaged Insta360 Videos
 Security Verified. Over 7,302,189 people have downloaded it.
Part 6. Want to Uninstall the Insta360 Plugin for Premiere Pro? Here is How
If you no longer need the Insta360 Premiere plugin, removing it from your system is simple and takes just minutes. Therefore, this part will guide you through the steps to fully uninstall the plugin and clear space on your desired system:
For Windows
The Insta360 Adobe Premiere Pro plugin can be uninstalled by Windows users directly in the settings app. The plugin is installed as an independent application, and therefore, it will be listed in your installed applications list.
Notably, this process removes the files of the plugin in Premiere Pro without damaging your saved projects and footage. Thus, go through the instructions to understand how to uninstall this plugin from your Windows PC:
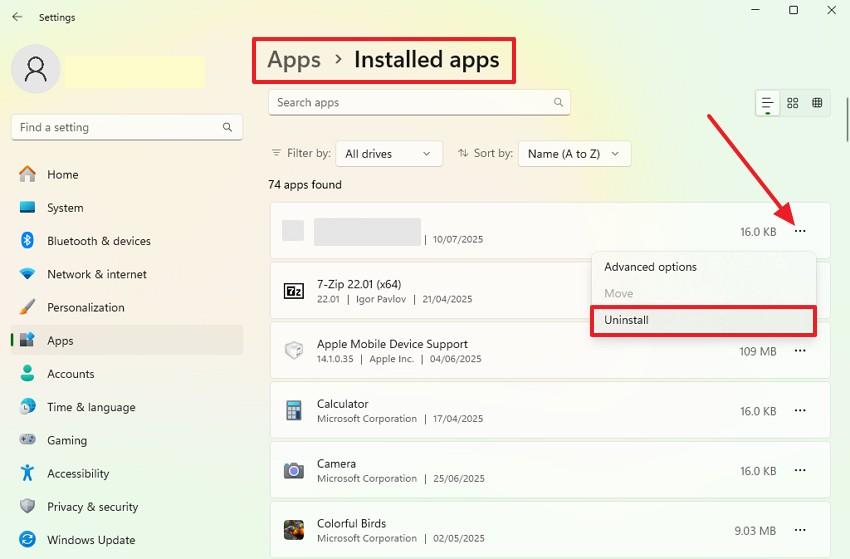
Instruction. When you launch the “Settings” app on your system, navigate to the “Apps” tab and choose the “Installed Apps” section. Here, click the “Three Dots” icon that appears on the Insta360 Studio and press the “Uninstall” option.
For Mac
When you want to remove this plugin from your macOS, locate Adobe’s plugins folder to access and delete it. This method fully clears plugin files without damaging your main Adobe setup. It ensures that future plugin installations work properly by clearing out old scripts, logs, and runtime conflicts. Anyhow, take guidance to know how you can uninstall the Insta360 Adobe Premiere Pro plugin on your macOS:
Instruction. To initiate, launch “Finder” and press the “Command + Shift + G” keys at once to access the “Go to the Folder” box. Afterward, input the "/Library/Application Support/Adobe/Common/Plug-ins/7.0/MediaCore” to delete the “insv” files.

Part 7. Insta360 Adobe Premiere Pro Plugin Not Working? 5 Fixes
Apart from the above, many editors face the issue that their Insta360 plugin for Premiere Pro is not working properly. So, discover the top 5 ways to solve common issues and get back to editing quickly:
1. Reinstall the Plugin
The first fix you should try before applying any other methods is to reinstall the Insta360 Premiere Pro plugin. You have already discovered how to install and uninstall this program on your desired system. Moreover, it helps in case Premiere Pro doesn’t detect the plugin or shows errors during launch due to faulty installations. Thus, a reinstall resets the plugin environment and allows effortless editing with Insta360 footage.
2. Reset App Preferences in Premiere Pro
This method directly targets errors that may block the Insta360 Premiere plugin from loading or functioning properly. Besides, it clears faulty settings and corrupted caches without deleting your actual video projects or plugins. Furthermore, you can even restore all plugin-related controls and panels to make them more stable. Anyhow, adhere to the given steps to find out how you can reset app preferences in this editing software:
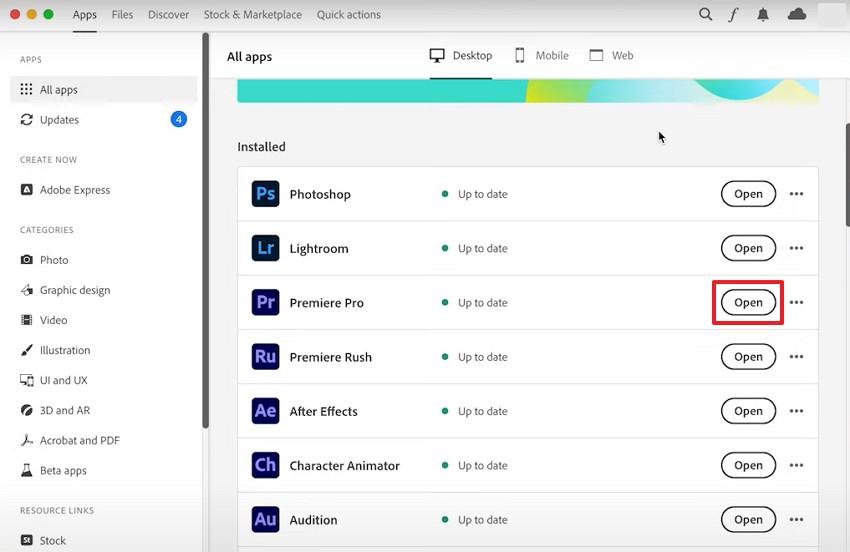
Step 1. Initially, you need to launch “Premiere Pro” by holding the “Option” key on Mac or the “Alt” key on Windows.
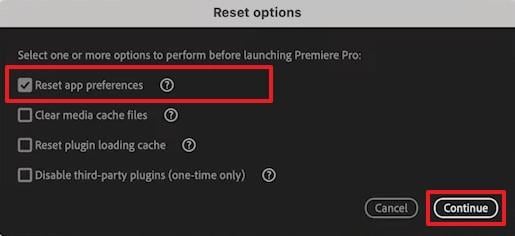
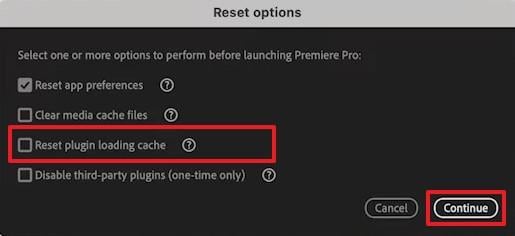
Step 2. When you access the “Reset Options” dialogue box, enable the “Reset App Preferences” feature and hit the “Continue” button.
3. Clear Media Cache File
Clearing the media cache can fix preview and playback issues related to the Insta360 Premiere Pro plugin. It removes temporary files that may be corrupted, which causes slowdowns or crashes during editing. In addition, this method refreshes how Premiere Pro reads your Insta360 files to improve speed and enhance the overall experience. Thus, go through the guide to learn how to clear media cache files to resolve the plugin issue:
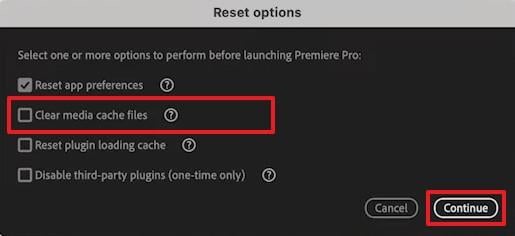
Instruction. As you reach the “Reset Options” pop-up, check the “Clear Media Cache Files” box and press the “Continue” button.
4. Reset Plugin Loading Cache
When the Insta360 Premiere plugin doesn’t open correctly, you can clear its loading cache to refresh it with the tool. This method removes hidden plugin data that may be blocking smooth operation after updates or system settings changes. Notably, it helps fix missing panels and loading failures caused by cached plugin settings from earlier versions. Hence, let’s explore how you can perform this action and fix the plugin not working problem:
Instruction. You need to tick the “Reset Plugin Loading Cache” box in the “Reset Options” dialogue and press the “Continue” button to apply changes.
5. Update Adobe Premiere Pro
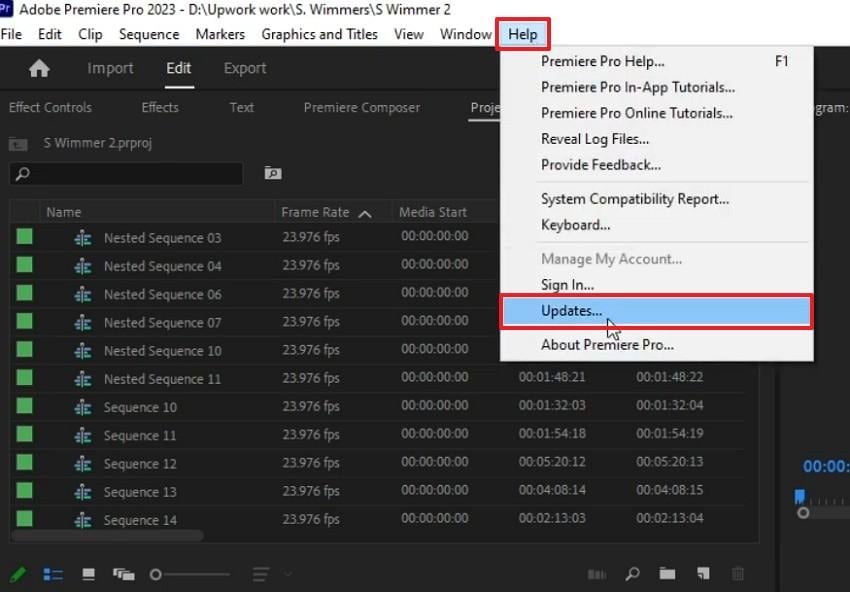
Apart from the above, using an outdated version of the tool can also cause the Insta360 plugin for Premiere Pro to crash or freeze. At this point, you should update your editing software to ensure better compatibility with plugins. As we know, each new update fixes past bugs and improves how the plugin connects with your system. Thus, update your editing software by adhering to the given steps:
Instruction. Once you run the tool, head to the “Help” tab to click the “Updates…” and follow the on-screen guide to update it.
Conclusion
In summary, the Insta360 Premiere plugin enables fast and effortless editing of 360 video files directly within the software. When set up and used correctly, it is possible to cut, reframe, and export HD videos without changing tools and losing quality.
Moreover, if your Insta360 videos get damaged or unplayable, you will require a trusted repair option. That’s where Repairit helps you quickly restore broken videos to keep your project and edits safe.
Frequently Asked Questions
-
Q1. Can I use the Insta360 Premiere plugin with older Adobe Premiere versions?
This advanced plugin is compatible with the versions of Premiere Pro 2018 and 2019, but it will work best with the new and updated software versions. Older versions may not be compatible with the plugin, and this results in crashing or a lack of features in editing. When you are working with an older version, you must upgrade Premiere Pro, and after that, you have to install the plugin. -
Q2. Why does the Insta360 Premiere plugin not show up after installation?
This problem normally arises because of the permission issues or when the plugin was not chosen during the installation process. Here, ensure that you have chosen the option of the Reframe Plugin for Adobe Premiere in the process of setting it up. In case it fails to appear, you can reinstall it in order to fix this issue. -
Q3. Can I repair blurry and pixelated Insta360 video before importing it to Premiere Pro?
In such cases, you need to repair your video files by using tools like Repairit. This advanced software enables you to fix videos in 25+ formats, including MOV, MP4, and AVI. Furthermore, you can repair multiple Insta360 videos simultaneously and preview the fixed file before exporting.
