
The frustration of editing a video only to face constant lag can slow down any creative process. You sit down to make progress on a project, but instead, you're stuck watching choppy previews and delayed frames. This issue is common for editors, especially when using powerful editing software like Adobe Premiere Pro. Plus, it doesn't just happen with large video files or slow computers.
Even high-end machines can struggle with playback if the software settings aren’t right. Luckily, several ways exist to solve this dilemma and make playback smooth again. Therefore, this guide explores the common reasons behind the laggy Premiere playback issue and walks you through quick solutions. We will also share a helpful tip for fixing laggy videos recorded by professional cameras.
In this article
Part 1. Why Is My Premiere Pro Playback Choppy?
Before fixing the problem, all the editors need to understand what's causing it. That's why this section discovers the most common reasons why your Premiere Pro playback is choppy, even on a fast computer:
| Reasons | Description |
| Playback Resolution | When this specific resolution is too high, your computer needs more power to display every frame. Thus, this can cause lag, especially with large or HD quality video files. |
| Large File Sizes | Some videos with large file sizes or high bitrates can also take longer to load and play. In this situation, you basically put extra pressure on your system’s memory and processing, which causes problems. |
| Unrendered Effects | If you add some specific filters or transitions without rendering them, playback may slow down. Here, Premiere tries to show these changes in real-time, which takes more power and can cause lag. |
| Hardware Limitations | Older computers or those with low memory and weak graphics cards can also struggle to keep up with the tool. Without enough RAM or GPU power, smooth editing becomes difficult, and you face chopping or lagging. |
| Media Cache Management | This editing software basically uses a cache to store preview files of your project. When the cache is full or corrupted, it can also slow down playback, and lag occurs. |
Part 2. Solutions to Fix Playback in Premiere Pro is Choppy
Upon discovering the common reason behind this issue, let’s explore how to fix it. Below, you will find the top 6 solutions to reduce lag, whether you are editing a full project or using loop playback in Premiere:
Fix 1. Lower Playback Resolution
The quick and easiest way to fix lag is by lowering the playback resolution in the program. This feature lets you view your video in lower quality without changing the original file. If playback in Premiere Pro is choppy, switching to 1/2 or 1/4 resolution can make things smoother by reducing the pressure on your system. Thus, adhere to the guide below to learn how to perform this process:
Instructions: To inaugurate, access your project in this editing program and click the “Playback Resolution” drop-down. After expanding it, you need to opt for either “1/2” or “1/4” to lower it according to your preference.

Fix 2. Enable the GPU Acceleration Feature
In addition, turning on GPU Acceleration helps the tool use your graphics card to handle video tasks faster. This feature helps boost performance, especially during previews and transitions. Plus, it allows your system to work more efficiently by sharing the workload between the processor and the graphics card. Thus, go through the steps below to enable this feature if playback in Premiere Pro is choppy:
Step 1. Start by heading to the “File” menu and choosing the “Project Settings" option from the drop-down. After that, select the "General" option to move to the next step.
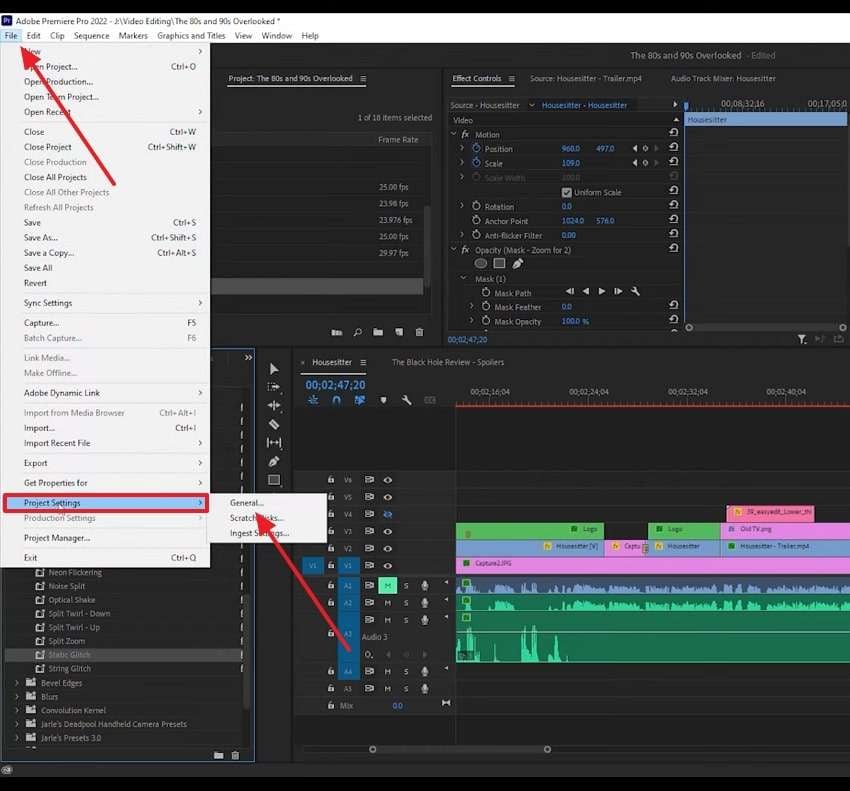
Step 2. Following that, expand the “Renderer” drop-down under the “Video Rendering and Playback" section. Afterward, choose the "Mercury Playback Engine GPU Acceleration (CUDA)" option and hit the "OK” button.

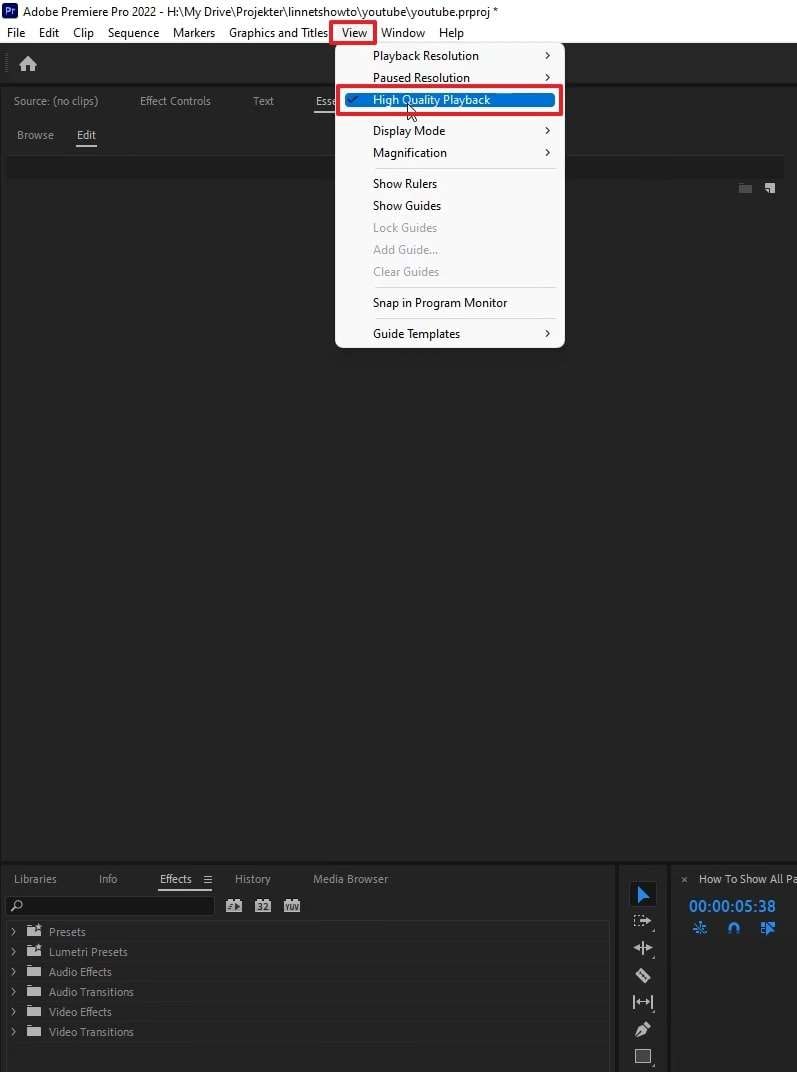
Fix 3. Turn Off High-Quality Playback
Another solution to resolve this problem is to disable the quality playbacks in the editing tool. It shows clearer previews, but it can slow down your editing process. Turning it off reduces the strain on your system and helps videos play more smoothly. This is especially helpful when using Premiere Pro loop playback during editing checks. Hence, let's dive below to disable the quality playback on your tool effortlessly:
Instruction. Initiate the process by clicking the “View” tab and deselecting the “High Quality Playback” feature from the drop-down menu.
Fix 4. Use the Proxy Videos Feature
Proxy videos are basically low-resolution copies of your original files, which are helpful when your computer struggles with large or HD clips. When your Premiere playback feels slow or laggy, using proxies can greatly improve performance. It even lets you edit smoothly without overloading your system, especially with 4K or heavy video formats. Thus, go through the guide below to learn how you can create proxy videos:
Step 1. You need to select the clips and then right-click on them to opt for the “Proxy” option. When you see new choices, choose the “Create Proxies…” option to move further.
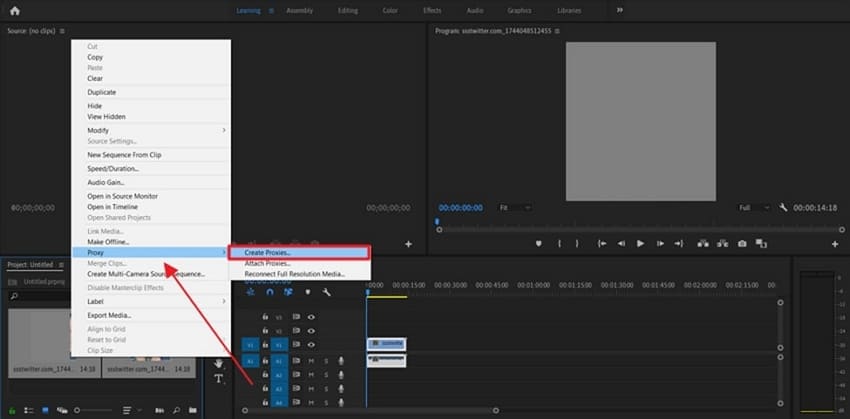
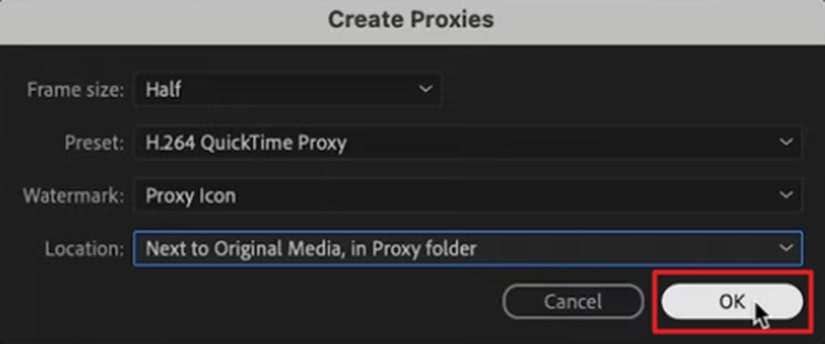
Step 2. Upon accessing the small dialog box, select your preferred location, size, or preset and hit the “OK” button.
Fix 5. Disable the FX Feature
Sometimes, the FX feature can slow things down, especially on older or slower systems. This feature basically controls visual effects like color correction, blurs, and filters during playback. Alongside that, this setting is useful when you want to focus on timing or editing without delay. Hence, adhere to the following steps to understand how to turn off this feature to avoid the Premiere Pro playback choppy issue:
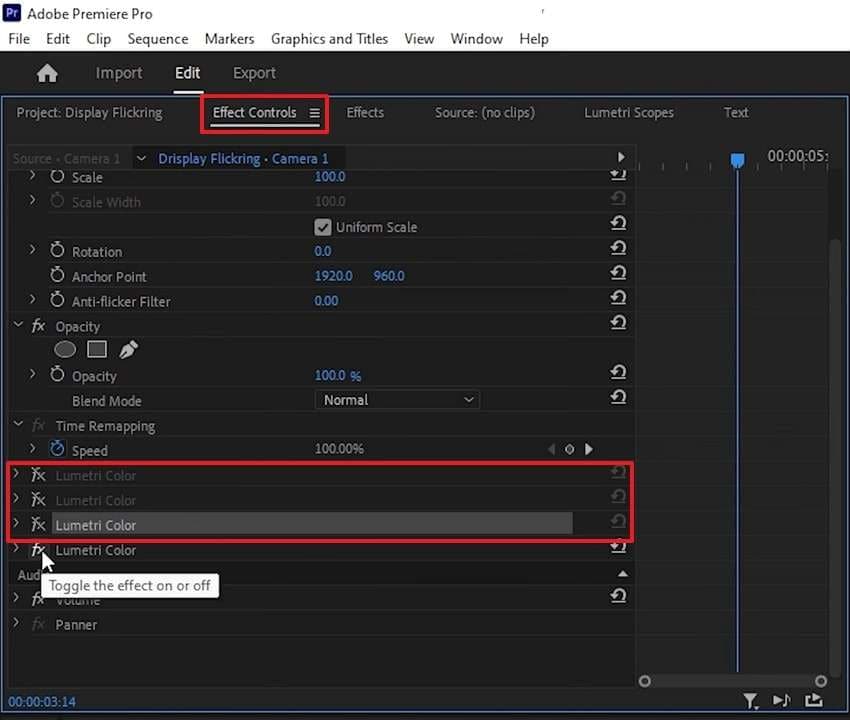
Instructions: To inaugurate, select the specific clip in the timeline section to remove the FX feature. Next, to turn it off, you need to click the "FX” options under the “Effects Control" tab.
Fix 6. Optimize Rendering for Performance
Lastly, tweaking the rendering settings also helps your computer process video faster during editing. You can adjust these settings in Premiere Pro to focus more on speed than quality while previewing. This is very helpful when using loop playback in Premiere, as it reduces lag during repeated viewing. Thus, follow the given guide below to optimize the rendering performance in this editing tool effortlessly:
Step 1. Head to the “Edit” menu and hover the cursor on the “Preferences" option from the drop-down. Afterward, opt for the "Memory” option to move to the next step.
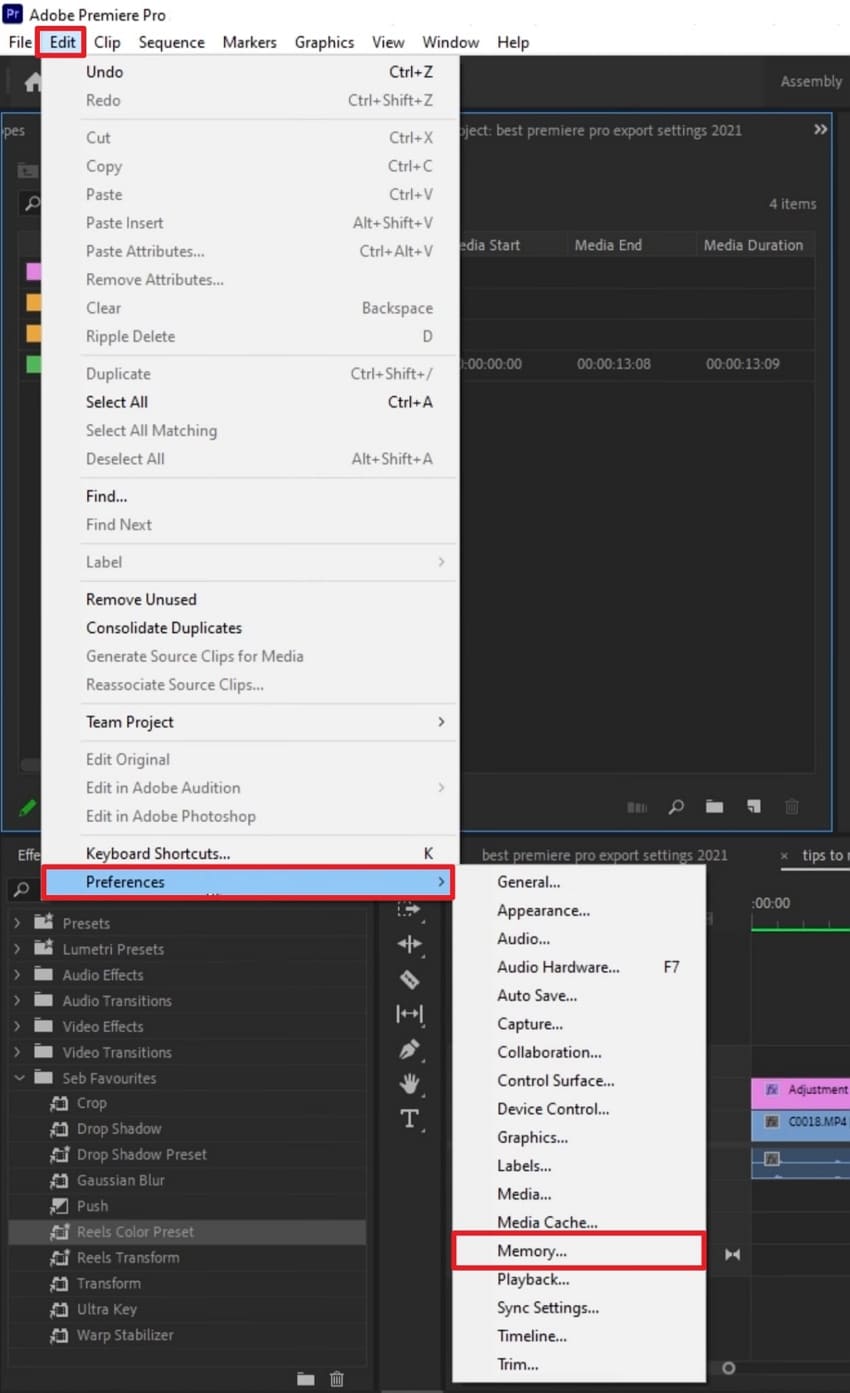
Step 2. Moving forward, click the “Optimize Rendering For” drop-down and choose the “Performance” option to finish the task.

Pro Tip. How to Fix Choppy or Laggy Videos Recorded by Professional Cameras
Apart from fixing the premiere playback issue, many users face another issue where their recorded videos suddenly get choppy. From system issues to malware attacks, a lot of reasons can lead to this problem. It is especially common with RAW or HDR footage captured on heavy gear like GoPro or DJI. In this situation, Repairit stands out as the best option for fixing corrupted videos captured through any source.
This tool also supports over 20 video formats, including MOV, MP4, M2TS, and even RAW. It can repair files corrupted during shooting, editing, or transfer, without sacrificing quality. Featuring both Quick Repair and Advanced Repair modes, it uses intelligent sample polling algorithms and HDR/LOG optimization to handle even severe damage. For GoPro users, its exclusive gyroscope data repair ensures smooth playback in tools like GyroFlow.
Key Features

-
Repairs Professional Formats: It supports RAW and HDR formats used by professional cameras, ensuring smooth editing workflow compatibility.
-
AI Video Enhancement: This dedicated AI tool uses AI technology to improve video clarity, reduce noise, and enhance overall visual quality.
-
Supports 8K and HD Videos: Repairit handles ultra-high-definition footage, ensuring smooth repair for modern high-resolution video files.
Detailed Guide to Fix Choppy or Laggy Videos Recorded by Professional Cameras
Upon learning Repairit’s dedicated features, it’s time to fix your choppy or laggy videos. Hence, follow the comprehensive guide below to understand how to use this tool to cater to this need:
Step 1. Run Repairit to Fix Choppy and Laggy Videos

Step 2. Start Fixing Your Choppy and Laggy Videos

Step 3. Export the Repaired Laggy or Choppy Video

Fix Choppy or Laggy Videos Recorded by Professional Cameras Now
 Security Verified. Over 7,302,189 people have downloaded it.
Conclusion
To conclude, fixing Premiere playback issues doesn't have to be hard. With the right settings and small changes, your editing can run smoother and faster. This guide has explored several fixes that you can opt for to resolve this dilemma.
Alongside that, many users have an issue with their recorded videos still being laggy or choppy. That's where Repairit is the best option to fix broken footage without losing quality.
FAQ
-
Q1. Can too many background apps affect Premiere Pro playback?
Yes, if multiple apps run in the background, they basically use your computer’s memory and processor power, which can affect playback. To avoid playback problems, close any unused programs while editing. This helps Premiere Pro use more system power, making the editing smoother and avoiding issues like choppy previews or delayed responses. -
Q2. How does timeline clutter affect playback speed in Premiere Pro?
Too many layers or effects on your timeline can overload the system. Thus, this can cause the editing tool to lag when previewing changes. Alongside that, simplifying the timeline or collapsing tracks can sometimes reduce the load in the Premiere Pro loop playback issue. Plus, it improves playback speed during your editing sessions. -
Q3. How can I fix a choppy video file recorded by my action camera?
A few action cameras, like GoPro or DJI, sometimes create files that become choppy due to motion or memory errors. In such a case, Repairit is the best option, as it supports various formats such as RAW and HDR. Besides, this AI-powered tool can fix your videos while maintaining their original quality.
