When it comes to graphics card manufacturers, Nvidia has to be the most reliable option. While the brand is known to manufacture some of the best graphics cards out there, you can encounter numerous issues with its products at a time.
Now, there could be several hardware or software-related issues behind these Nvidia Graphics Card errors. Therefore, in this post, I will help you fix Nvidia Graphics Card problems of all kinds in every possible way.
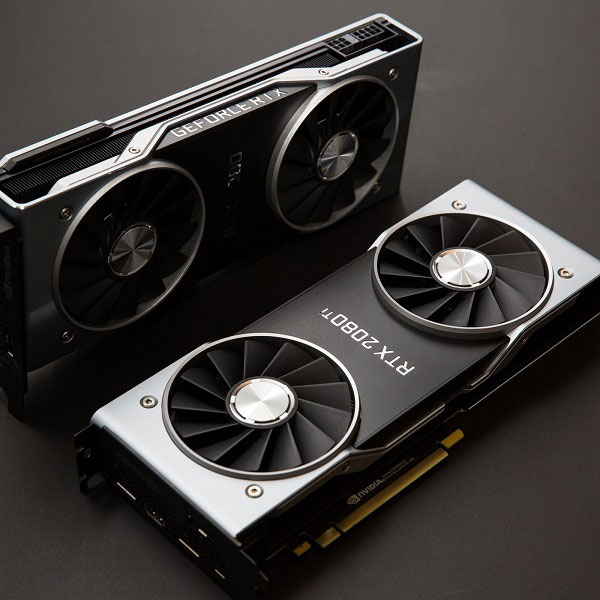
Part 1: How to Tell if your Nvidia Graphics Card has an Issue?
Before you take any drastic measure, keep an eye on the following symptoms that are mostly related to a faulty Nvidia graphics card.
- System Crash: Your computer might stop working all of a sudden, particularly when a graphic-intensive application is loaded.
- Overheating: While working on any heavy application, your computer would make a prominent sound (of the fan) and might overheat.
- Blue/Black Screen of Death: At times, your system might restart and instead of booting in a standard way, it would display a blue or black screen.
- Screen Glitches: If there is an issue with your Nvidia Graphics Card, then you can encounter glitches or stutters on the display while working on your system.
If there is an issue with your Nvidia Graphics Card, then you can encounter glitches or stutters on the display while working on your system.
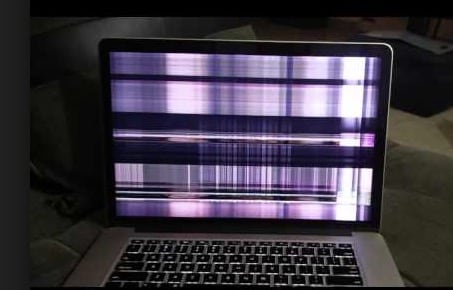
Part 2: Reasons Behind Nvidia Graphics Card Not Being Detected during Startup
Apart from that, there are times when the Nvidia Graphics Card isn’t detected by the system after the startup. This Nvidia Graphics Card problem can happen due to the following reason:
- Lose Connections: Chances are that your Nvidia Graphics Card might not be connected properly to the rest of the system.
- Booting Error: There could be a change in the booting sequence on your system or any other BIOS settings can cause this problem.
- Card-related Issue: Besides that, your Nvidia card might not be compatible anymore or its drivers could be corrupted.
- Other Reasons: There could be other reasons for this Nvidia card issue like corrupt firmware, display error, or a case of deadlock.
Part 3: How to Fix Nvidia Graphics Card Problems in Different Ways?
Now when you know various reasons for causing these issues, let’s learn how to fix Nvidia graphics card problems by following these suggestions.
Check These Methods
Method 1: Verify All the Card and Display Connections
As I have listed above, most of the Nvidia Graphics Card issues are caused by faulty connections. Therefore, you can first disassemble your system and make sure that there are no loose connections.
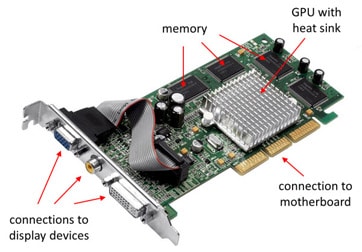
You can look for the exact specifications of your system’s motherboard and graphics card to know how they should be connected. Apart from their connection, you can also check all the hardware components are working properly.
Method 2: Check that the Graphics Card is Not Damaged
Besides all the vital connections, you also need to check if the graphics card is physically damaged or not. To fix Nvidia Graphics Card problems, you can also remove it from your system and connect it to any other PC instead. This will help you diagnose if the problem is with the graphics card or your system.
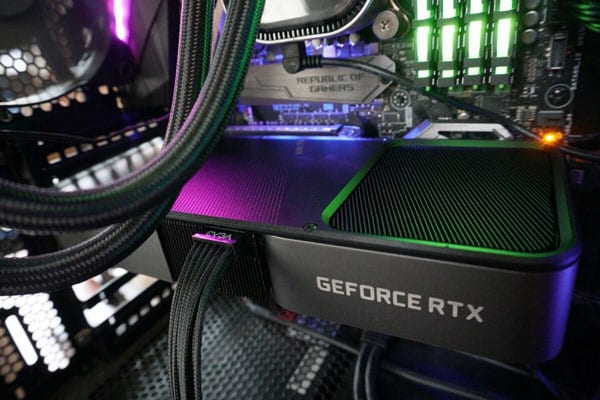
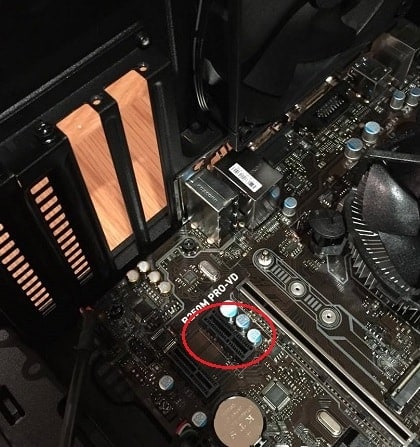
Method 3: Make Sure that the Graphics Card Slot is Working
On your system, there are specific slots that are dedicated to primary and secondary graphics cards. As surprisingly as it might sound, at times these problems can happen when the card is connected to the wrong slot.
Therefore, to fix Nvidia Graphics Card problems, you can also ensure that the graphics card is connected to a proper slot. It is mostly located near the motherboard, but its exact location can vary from one system to another.
Method 4: Check the BIOS Settings of your System
BIOS, which stands for Basic Input/Output System, is a vital component that stores information about the booting program and startup processes in your system. If you have recently changed the BIOS settings on your system, then it can cause problems with its startup and graphics card.
To fix Nvidia Graphics Card problems, you can just restart your system in the usual way. Now, as your system would restart, you can keep pressing the BIOS key, which could be DEL, ESC, F2, F10, F12, or any other designated key.
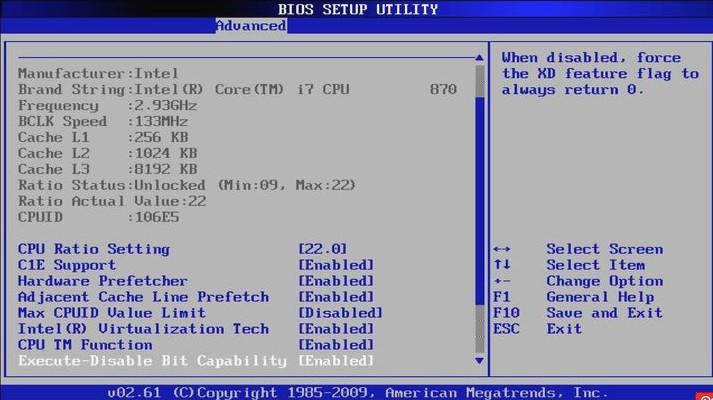
As the BIOS settings panel would be launched, you can go to its Advanced settings to make sure the graphics card has been configured properly.
Method 5: Restore the BIOS Settings to their Default Value
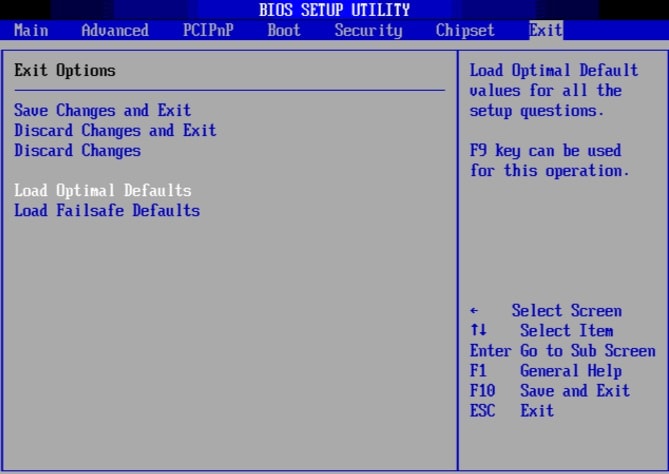
An unexpected change in your system’s BIOS settings can also cause problems with its display or the graphics card. Therefore, if you have recently made some changes in its BIOS settings, then you can restore them to their default value.
To fix that, you can just restart your system, and keep pressing its BIOS key that would boot it in the BIOS mode. Afterward, you can use the designated keys to go to the Exit option and choose to restore the BIOS settings to their default value.
Method 6: Reinstall or Update the Graphics Drivers
When was the last time you updated the drivers of your Nvidia Graphics Card? If it has been a while, then there could be some incompatibility issues with your card and the firmware.
To fix Nvidia Graphics Card problems caused due to this, you can just go to the Device Manager tool from the Start menu of your system. Now, go to the Display Adapters feature and right-click the installed Nvidia Graphics card.
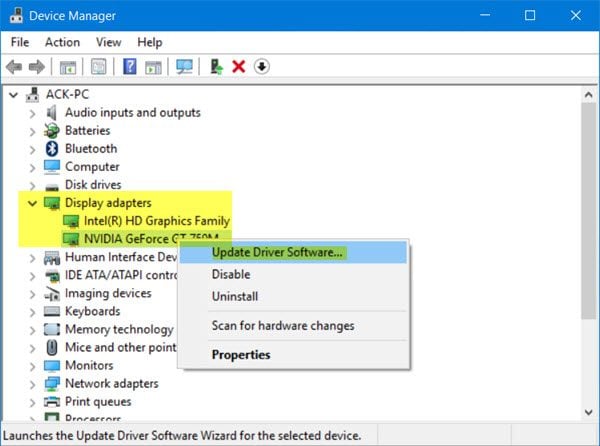
From the context menu, you can just click on the “Update” button and follow a click-through process to upgrade the installed Nvidia drivers. Besides that, you can also uninstall the drivers from here and can later reinstall them by visiting the official website of Nvidia.
Method 7: Set your Graphics Card to Default for Various Apps
In case you have installed multiple graphics cards on your system, then you would have to manually select which graphics card would be the default option.
If you want to fix Nvidia Graphics card problems due to this, then just head to your System’s Settings > Display and click on the “Graphics Settings” button.
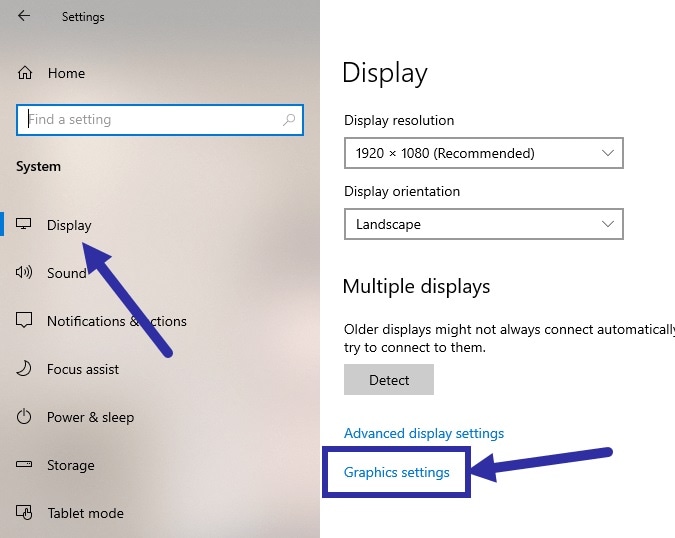
From here, you can manually select which graphics card should your system pick while playing videos, running games, or performing any other display-oriented task.
Method 8: Use Wondershare Repairit to Fix Corrupt Pictures
If you are getting glitches or distortions while viewing a picture, then the issue could be with the image and not the graphics card. In this case, you can consider using Wondershare Repairit that can fix all kinds of corrupt and damaged pictures.
The DIY desktop application runs on leading Windows and Mac versions and offers two repairing modes – Quick and Advanced. It can fix every major issue with your photos like pixelated images, color imbalance, the picture not loading, and so much more by following these steps:
Step 1: Launch Repairit and Load Corrupt Photos
Firstly, you can launch Wondershare Repairit, go to the Photo Repair features from "More Types Repair", and click on the “Add” button to browse and load your corrupt photos.
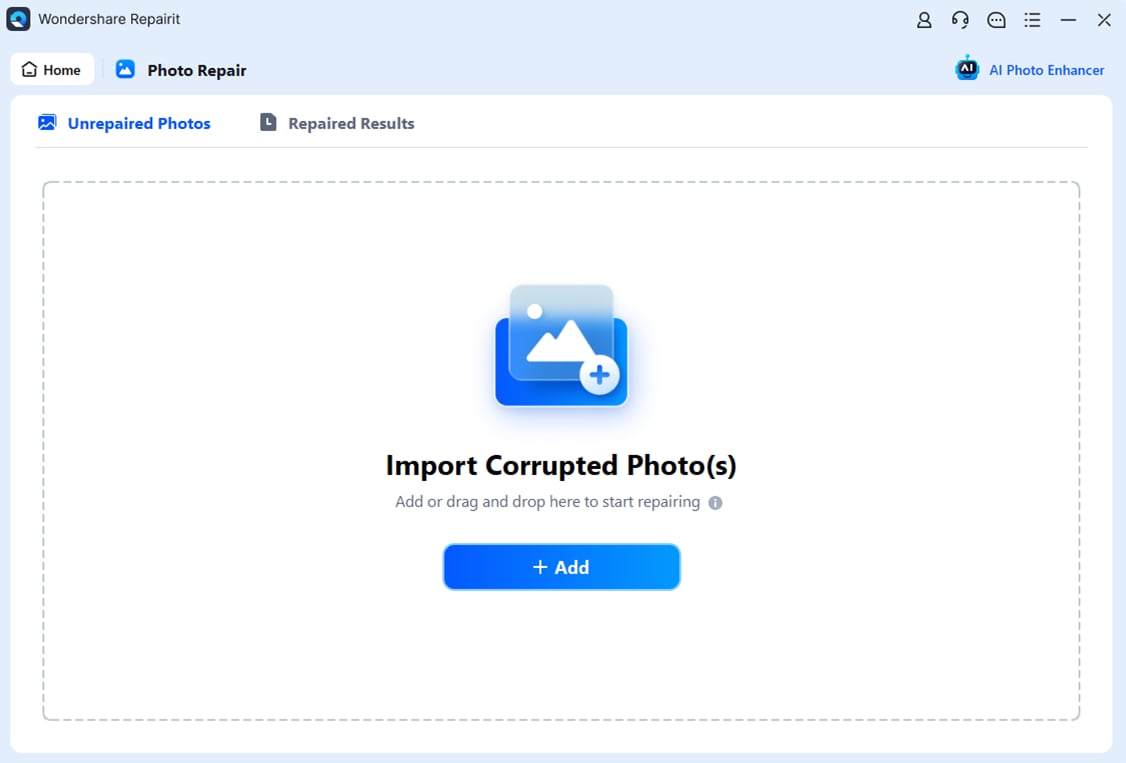
After the pictures are loaded, you can view their details, and start the repairing process.
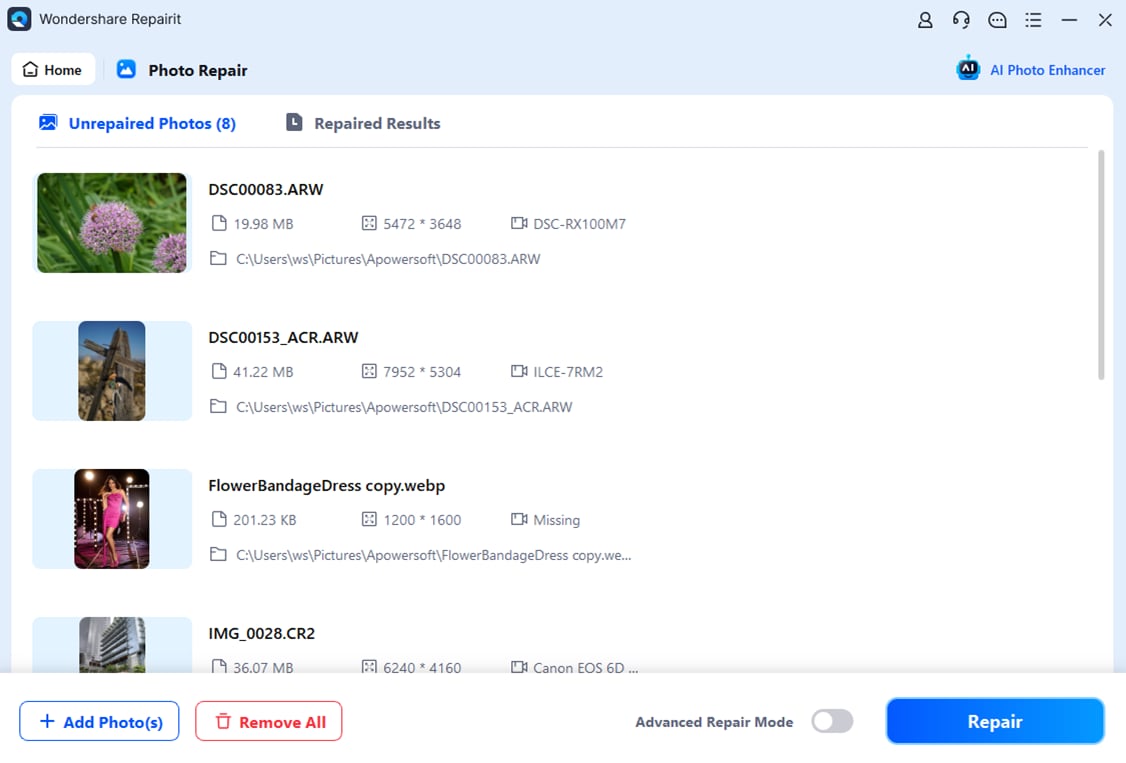
Step 2: Repair and Preview your Photos on Repairit
At first, the application will automatically perform a Quick Repair Scan and will display the results once it is done.
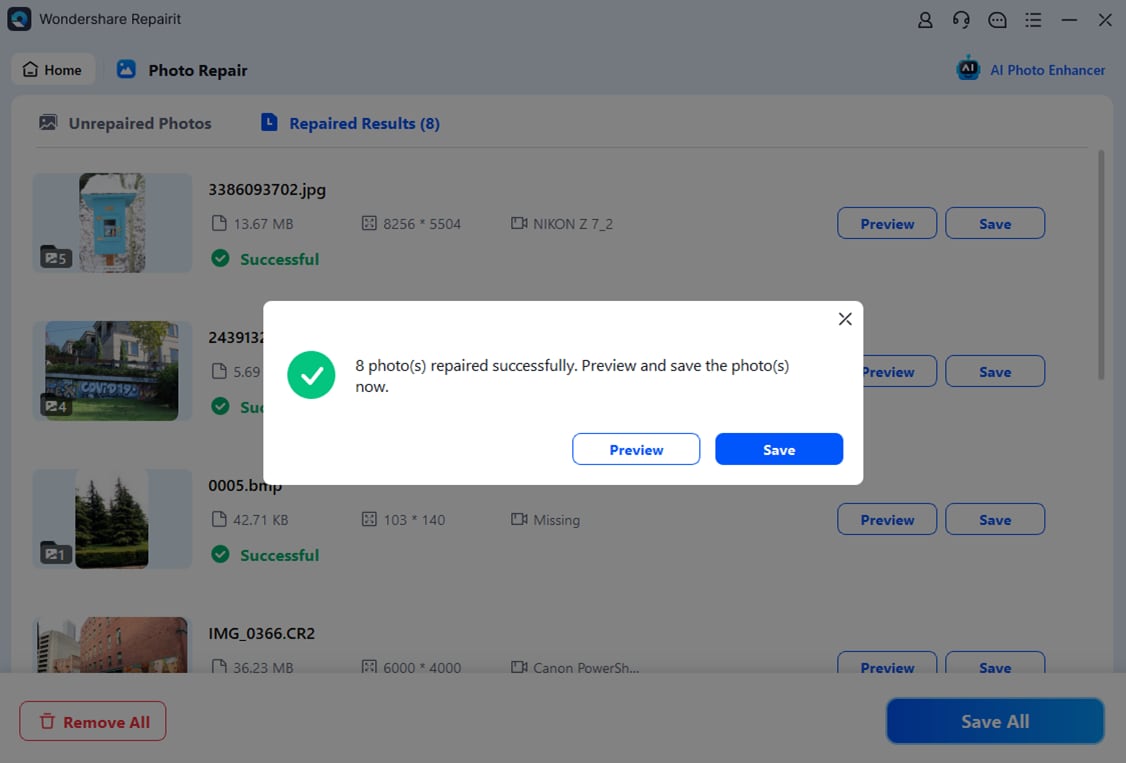
You can just click on the image’s thumbnail or the “Preview” button to check the results on a bigger screen.
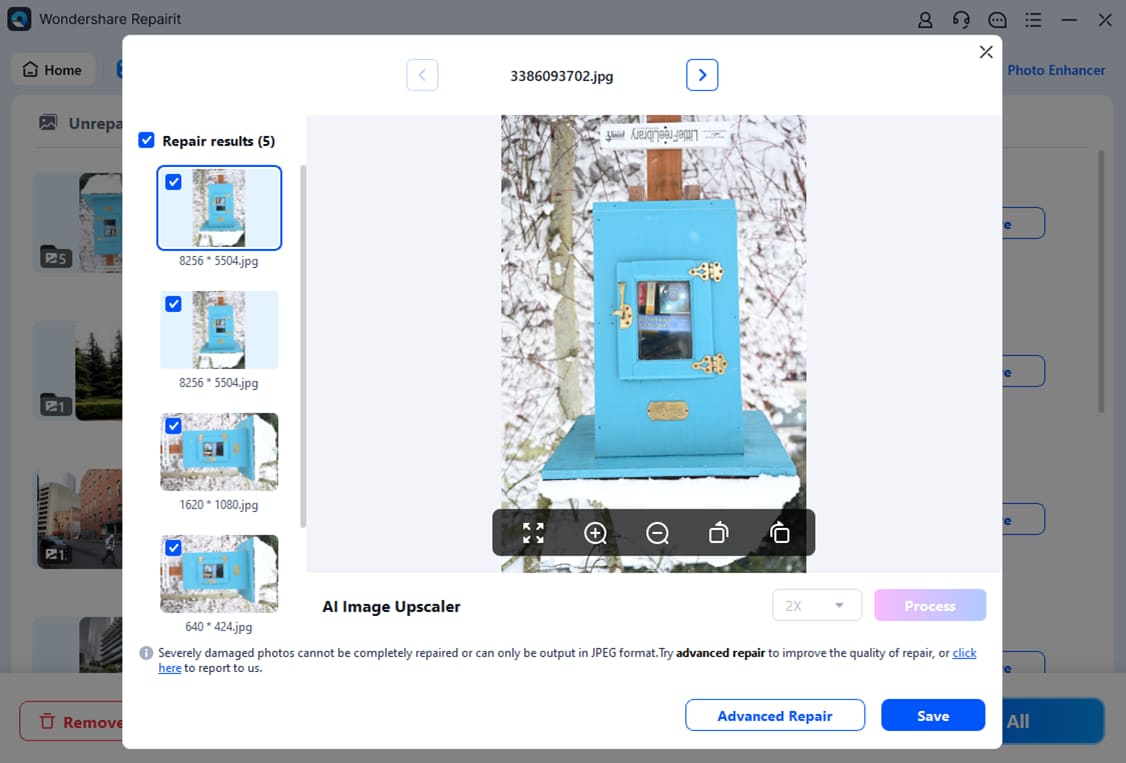
If there is a more severe issue with your photos, then the application will let you know. In this case, you can consider performing an Advanced Repair Scan instead.
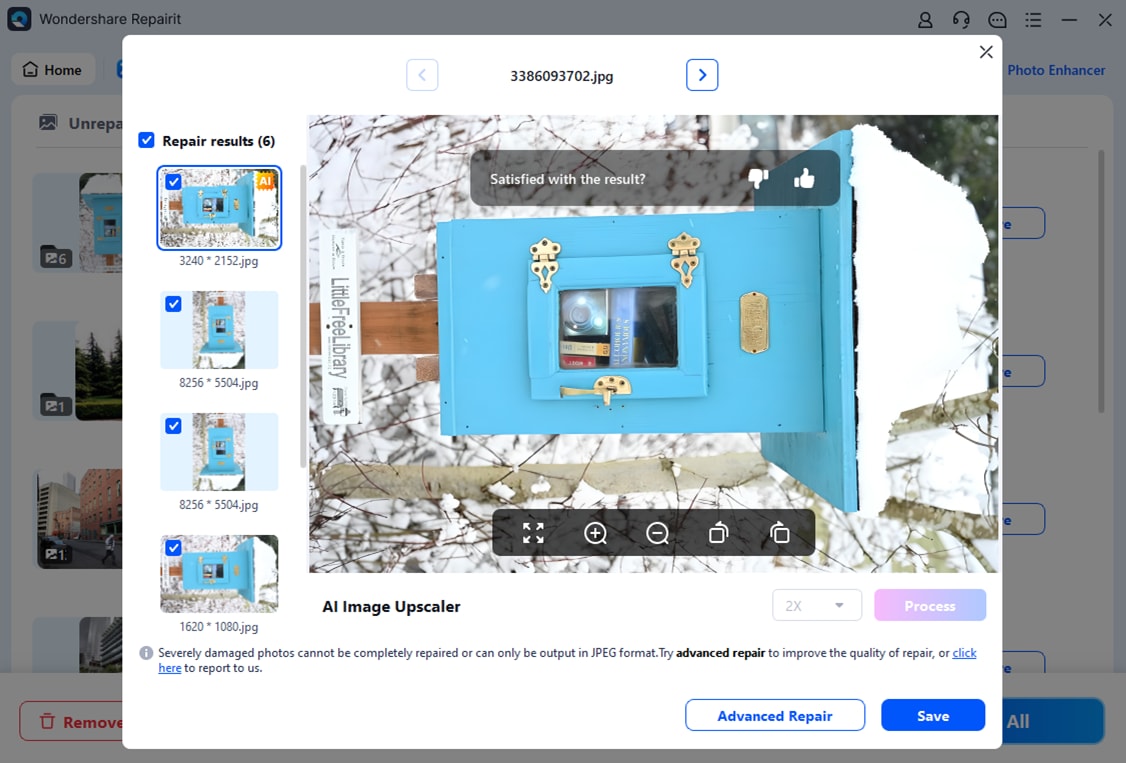
You can just select the “Advanced Repair” feature from the bottom panel and load a sample image (a standard photo of the same format and taken on the same device as the corrupt one).

While the Advanced Repair Scan will take more time, its results would be better, and you will be notified by the application once it is over.
Step 3: Export your Repaired Photos
In the end, you can just click on the “Save” or “Save All” button to export your photos to any location of your choice from Repairit.
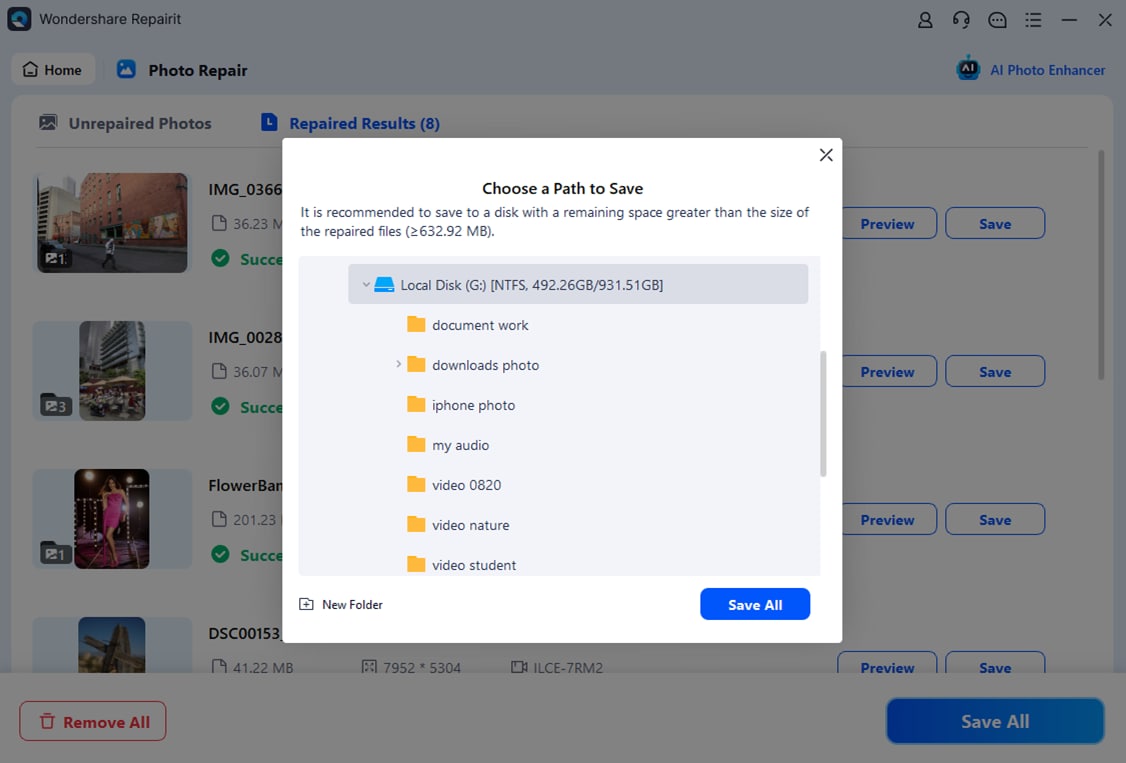
By following this simple approach, you can repair multiple corrupt photos at the same time with Repairit.
This video can help you fix your graphic card problems with a step-by-step guide.
Method 9: Use Command Prompt to Enable your Graphics Card
Lastly, if you are still encountering issues with your Nvidia Graphics card, then you need to make sure it is enabled. One of the best ways to do that is by launching the Command Prompt as an administrator and entering the following command.
bcdedit /set pciexpress forcedisable
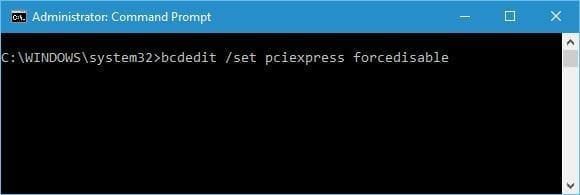
This will make sure that all the connected drivers are turned on and would fix Nvidia Graphics Card problems as well.
Part 4: How to Prevent Nvidia Graphics Card Problems?
Furthermore, if you want to avoid the occurrence of various Nvidia Graphics Card problems in the future, then consider following these recommendations:
- Update its Drivers: Make sure that all the installed graphics card drivers from Nvidia stay up to date on your system.
- Kill Background Apps: If you are loading too many applications or games in the background, then you can simply close them from running (to avoid overload on the graphics card).
- Disable Hardware Acceleration: On your browsers (like Chrome or Firefox), you can find a Hardware Acceleration feature that can add more load to the GPU. To avoid that, you can just visit its Hardware Acceleration settings and disable this option.
- Protect it from Physical Damage: You can keep the Nvidia graphics card protected so that it won’t suffer from any wear and tear. For instance, you should clean your system to avoid the accumulation of dirt and make sure that the card is connected to the right slot.
Further Reading:
Here are the useful articles to help you.
1. How to Fix Graphic Card HDMI Not Working Issue.
2. The Most Common Digital Camera Errors.
Final Verdict
There you go! After reading this guide, you can see that the Nvidia Graphics Card can encounter so many unwanted issues. To make things easier for you, I have included 9 different ways to fix Nvidia Graphics Card problems in this guide.
Apart from updating its drivers and checking all physical connections, you can also make sure that your photos are not damaged. In case if your pictures are corrupted instead, then a tool like Wondershare Repairit can be used to fix them.

 ChatGPT
 Perplexity
 Google AI Mode
 Grok
Grok
