

Are you currently facing any issues with the photo library on Mac and can't access your pictures or album? This situation can be quite frustrating, but fortunately, several ways exist to repair the photo library and get things back to normal. Whether it's slow performance or missing photos, you can resolve any issues without needing technical knowledge.
Hence, in this article, we’ll walk you through some reliable repair iPhoto library fixes on the MacBook. From innovative software to considering built-in features, we'll cover every solution in detail with a stepwise guide.
In this article
Part 1. Why is the Photo Library Damaged or Corrupted on Your MacBook?
Before you rebuild the photo library on Mac, do you know that issues can affect the photo library? If not, here we have mentioned 6 main reasons which will let you know the cause behind its malfunctioning.
- Software Updates or System Errors: Sometimes, when the macOS updates, it can cause unexpected glitches and crashes. Hence, this results in missing and damaged files within the library that can't be accessed.
- External Drive Issues: Besides that, if the photo library is saved to the external drive, issues with the drive, like hardware failure or incorrect ejection, can also lead to corruption. Unlike internal drives, this usually happens because external drives can be slower and vulnerable to damage.
- Corrupted or Damaged Images: While transferring the images or during system crashes, certain images are damaged and make them unreadable. One such damage can affect the whole photo library, ultimately making the image inaccessible.
- Interrupted Syncing or Importing: If you have synced your image library with iCloud or importing images, the file becomes corrupted if the process is interrupted. This can usually happen because of poor internet connection or unexpected shutdowns that prevent the images from being saved.
- File Permission Problems: Incorrect permission can also hinder the Photos app's ability to save the new image data to the library. This happens when you update the library system or move between the various user's accounts.
Part 2. Top 5 Solutions to Repair Photo Library on MacBook
Since you know the root causes behind the photo library damage, it's time to explore various solutions to repair the photo library. This section covers 5 simple yet effective fixes to easily follow to access your images in real time.
Solution 1. Use the Photos Repair Library Tool
First, try using the Mac built-in Photos Repair Library tool since it's a simple and quick way to fix the photo library issues. As it's built-in, it requires zero installation or setup and can automatically repair the corrupted or slow performance of the photo library. Once you consider using this tool to repair the iPhoto library by following the mentioned steps, you will have zero data loss.
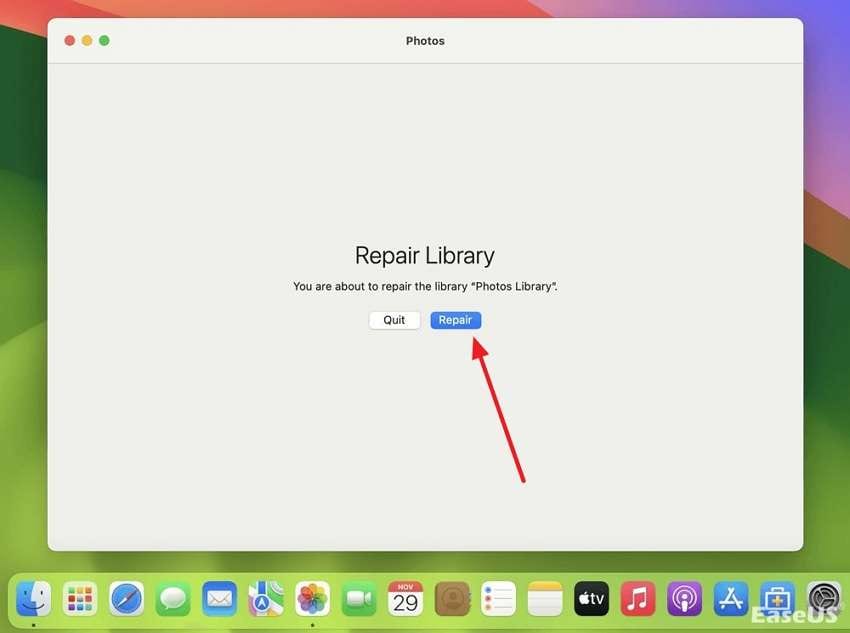
Step 1. To begin with, close the Photos app on the MacBook if it's opened and relaunch the “Photos” app while holding the Command and Option keys. This will open a library repair window for you where you have to press the “Repair” button to start fixing the issues.
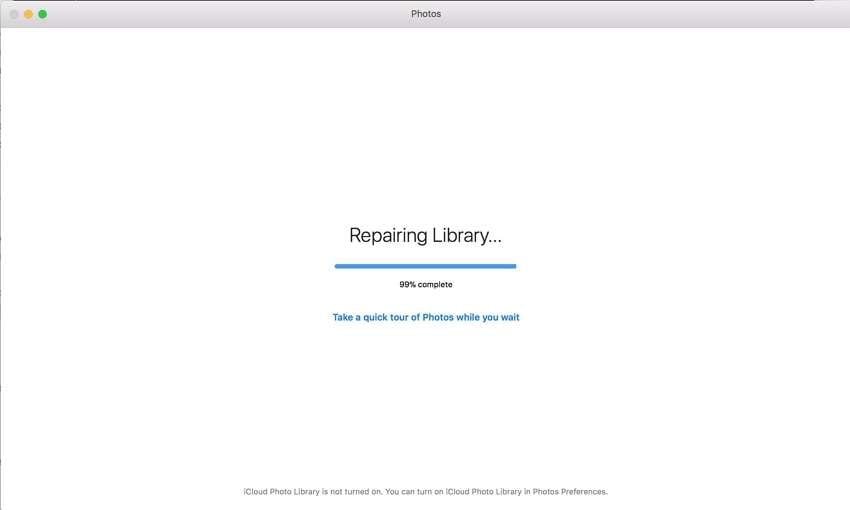
Step 2. Upon tapping the repair option, the tool will begin repairing the images through which you can easily access the images.
Solution 2. Update macOS Firmware
Other than repairing the photo library, try updating the macOS firmware to resolve the issue, as doing so will improve the system's stability and security. Not just that, it also ensures that the Photos app runs smoothly by resolving possible bugs and glitches. Hence, here is how you can update your MacBook firmware to enhance the performance of your device:
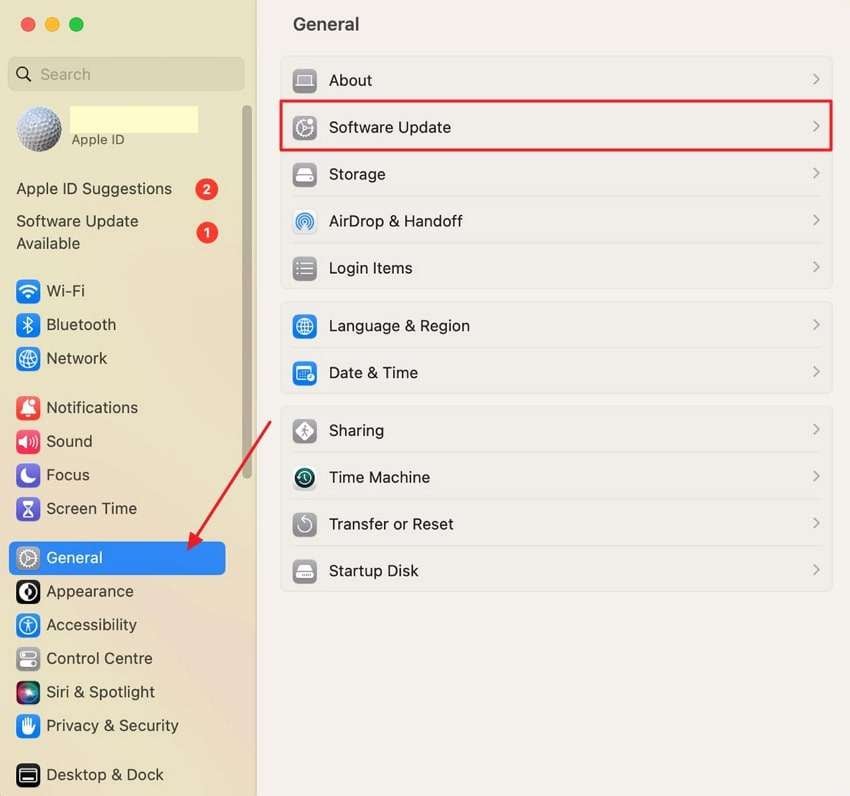
Step 1. Start by accessing the system settings option from the Apple tab and press the “Software Update” option within the “General” settings.
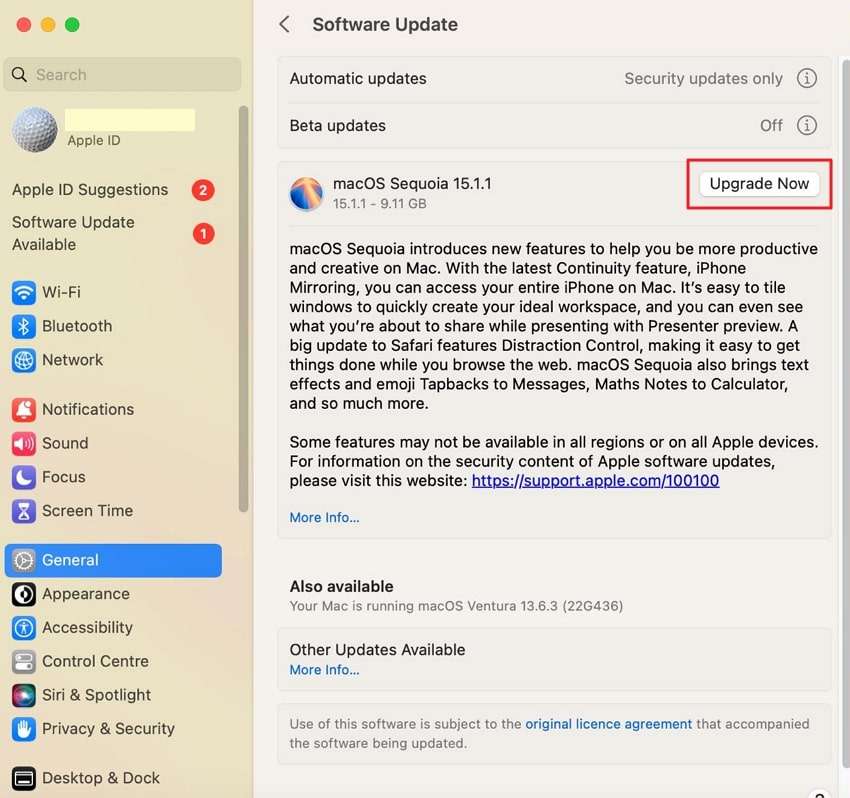
Step 2. After that, a new screen will appear, and you will have to choose the “Upgrade Now” option from the right side of the screen.
Step 3. Once it's done, it will ask permission to start the updating process, which you can initiate by tapping the “Agree” option from the popup. When you press the button, the system will update after a while, and you can easily locate the desired image on your Mac.
Solution 3. Fix Corrupted/Damaged Images in One-Click
As mentioned, damned or corrupted images can also cause issues in the Photos library which is why it's better to use the finest tool to fix it. In this case, Repairit offers you the versatility to resolve images of all formats without any size limitations. The best part about this platform is its branch processing facility, which allows you to repair images in bulk.

-
Repair damaged photos with all levels of corruption, such as grainy photos, dark photos, pixelated photos, faded photos, etc.
-
Repair images of diverse formats, such as JPG, JPEG, PNG, CR3, CR2, NEF, NRW, etc.
-
Repair critically damaged or corrupted photos available on SD cards, phones, cameras, USB flash drives, and more.
-
Repairit has a quick and advanced repair mode. You can use either depending on the level of corruption the photos has undergone.
-
The "AI Image Upscaler" feature can enlarge the repaired photos to 2X, 4X, and 8X.
-
Intelligently restore old/scratched photos and colorize black and white photos with various AI effects.
-
No limit to the number and size of the repairable photos compared with the online version of Repairit.
-
Support Windows 11/10/8/7/Vista, Windows Server 2003/2008/2012/2016/2019/2022, and macOS 10.12~macOS 13.
Once you restore the images, you can further enhance the quality by using its AI assistant. Additionally, users can easily store the images on any device since it supports Mac and Windows, memory sticks, SD cards, USB flash drives, and cell phones. Besides repairing the images, one can also extract the thumbnails from the images with detailed precision.
Key Features of Repairit Photo Repair
- Regain the Lost Photo Content: Using innovative AI technology, Repairit can easily restore the face, objects, or other elements in the image.
- Rediscover Crystal Clarity: If you have incomplete image data, this tool can also regain and restore the true essence of the portraits.
- Open and Access Photos Instantly: While using this image repair tool, you can easily open and gain access to unopened images.
Step-by-Step Guide to Repair Damaged Images to Repair Photo Library with Repairit
Now that you know about this innovative tool in detail, here is how to fix damaged or corrupted images. Upon reviewing the details, you can easily resolve the issue and regain access to your precious memories.
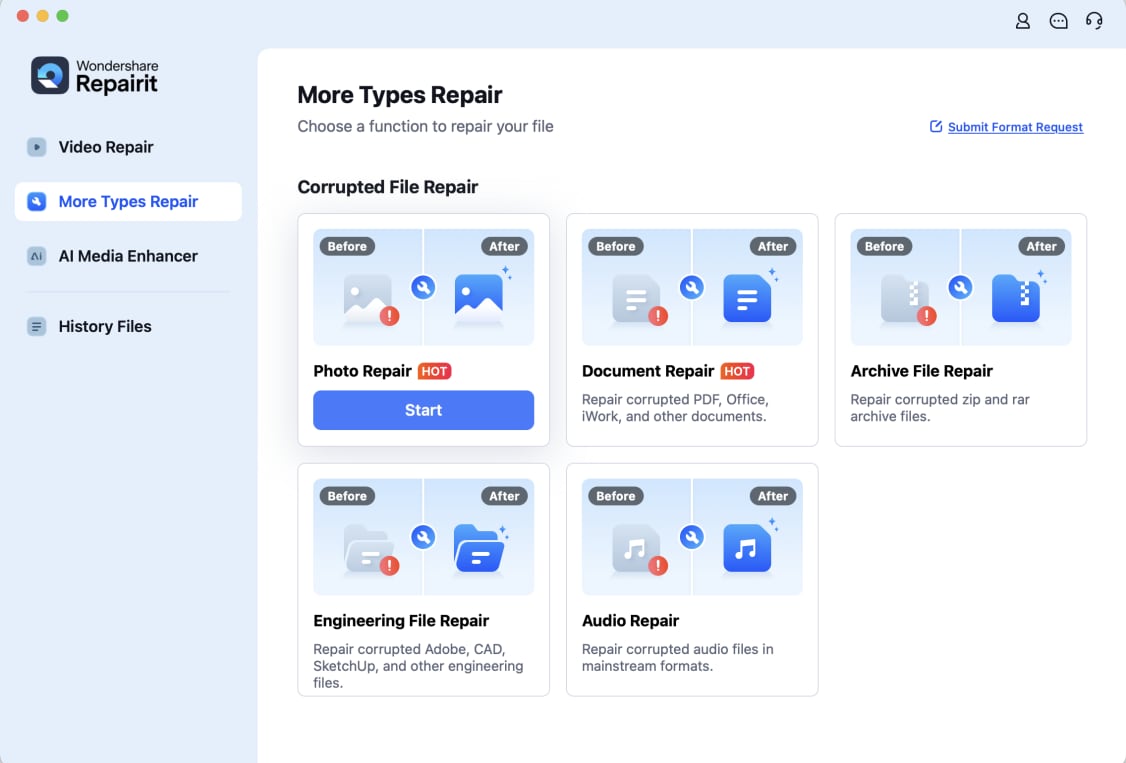
Step 1. Install Repairit and Locate the Tool
Choose the “Start” option to proceed further with the process of repairing images.
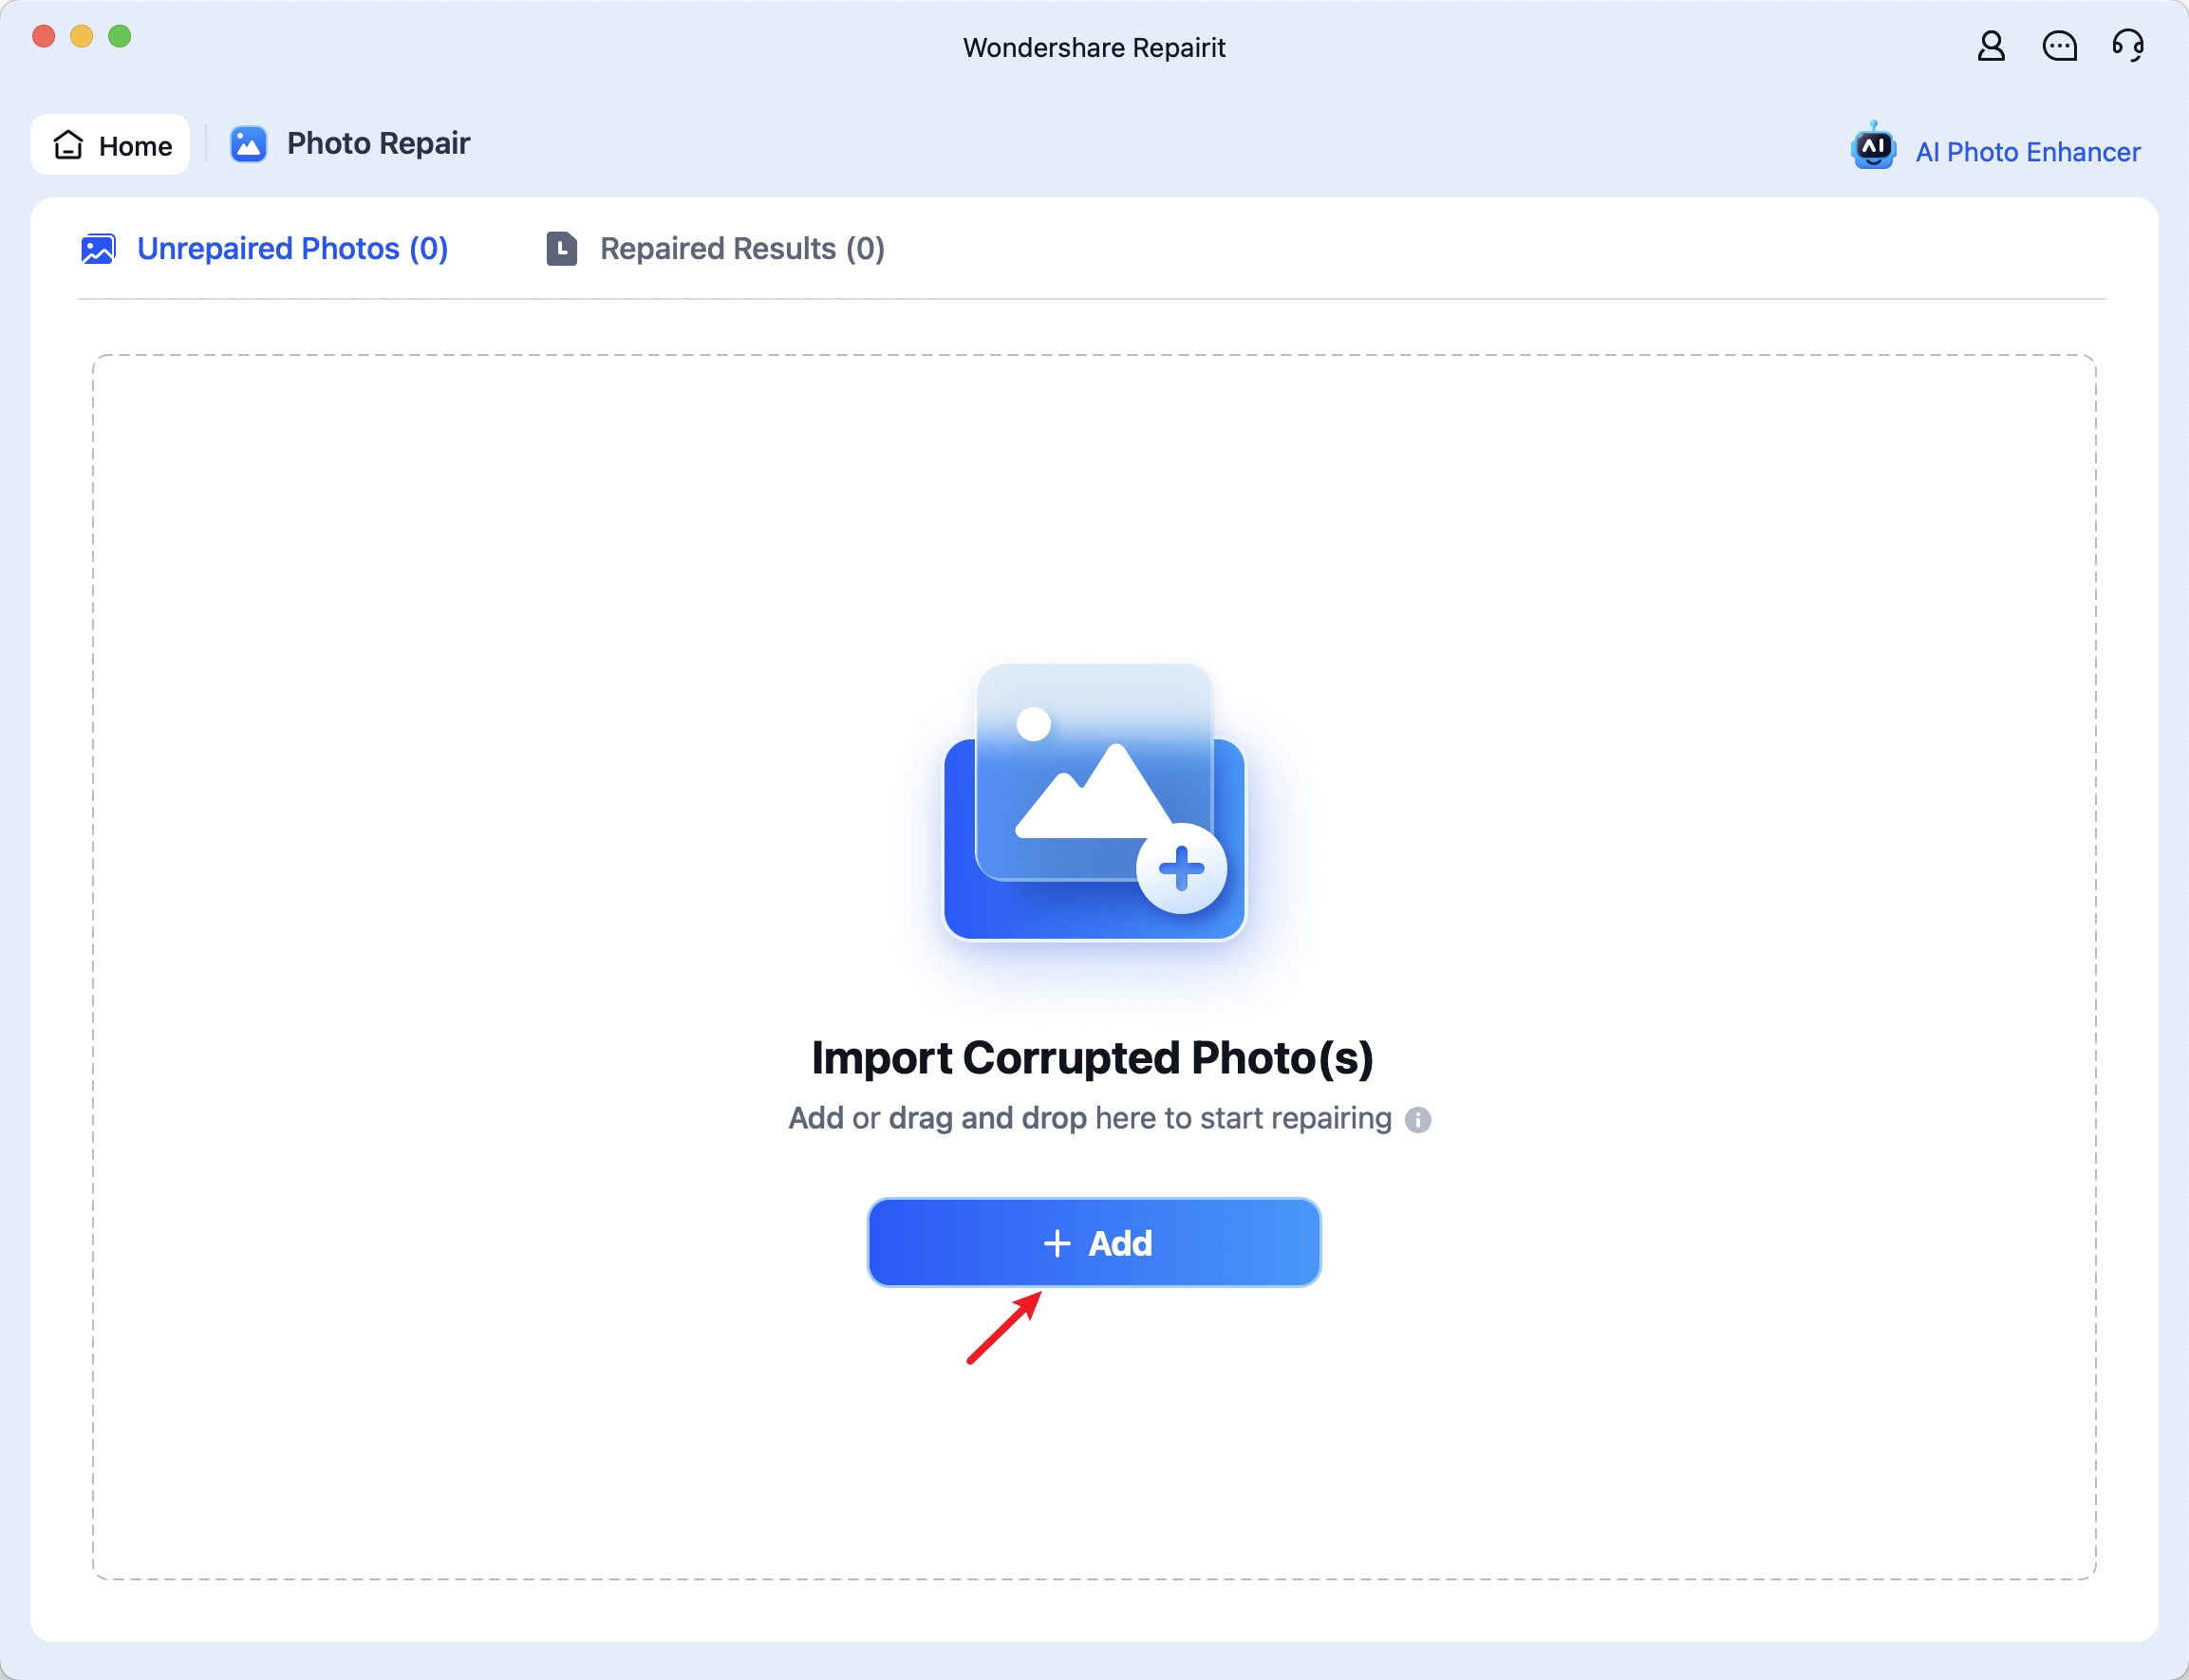
Step 2. Import the Corrupted Image on the Tool
On the new screen, choose the “+Add” option and import all the corrupted images from your MacBook.
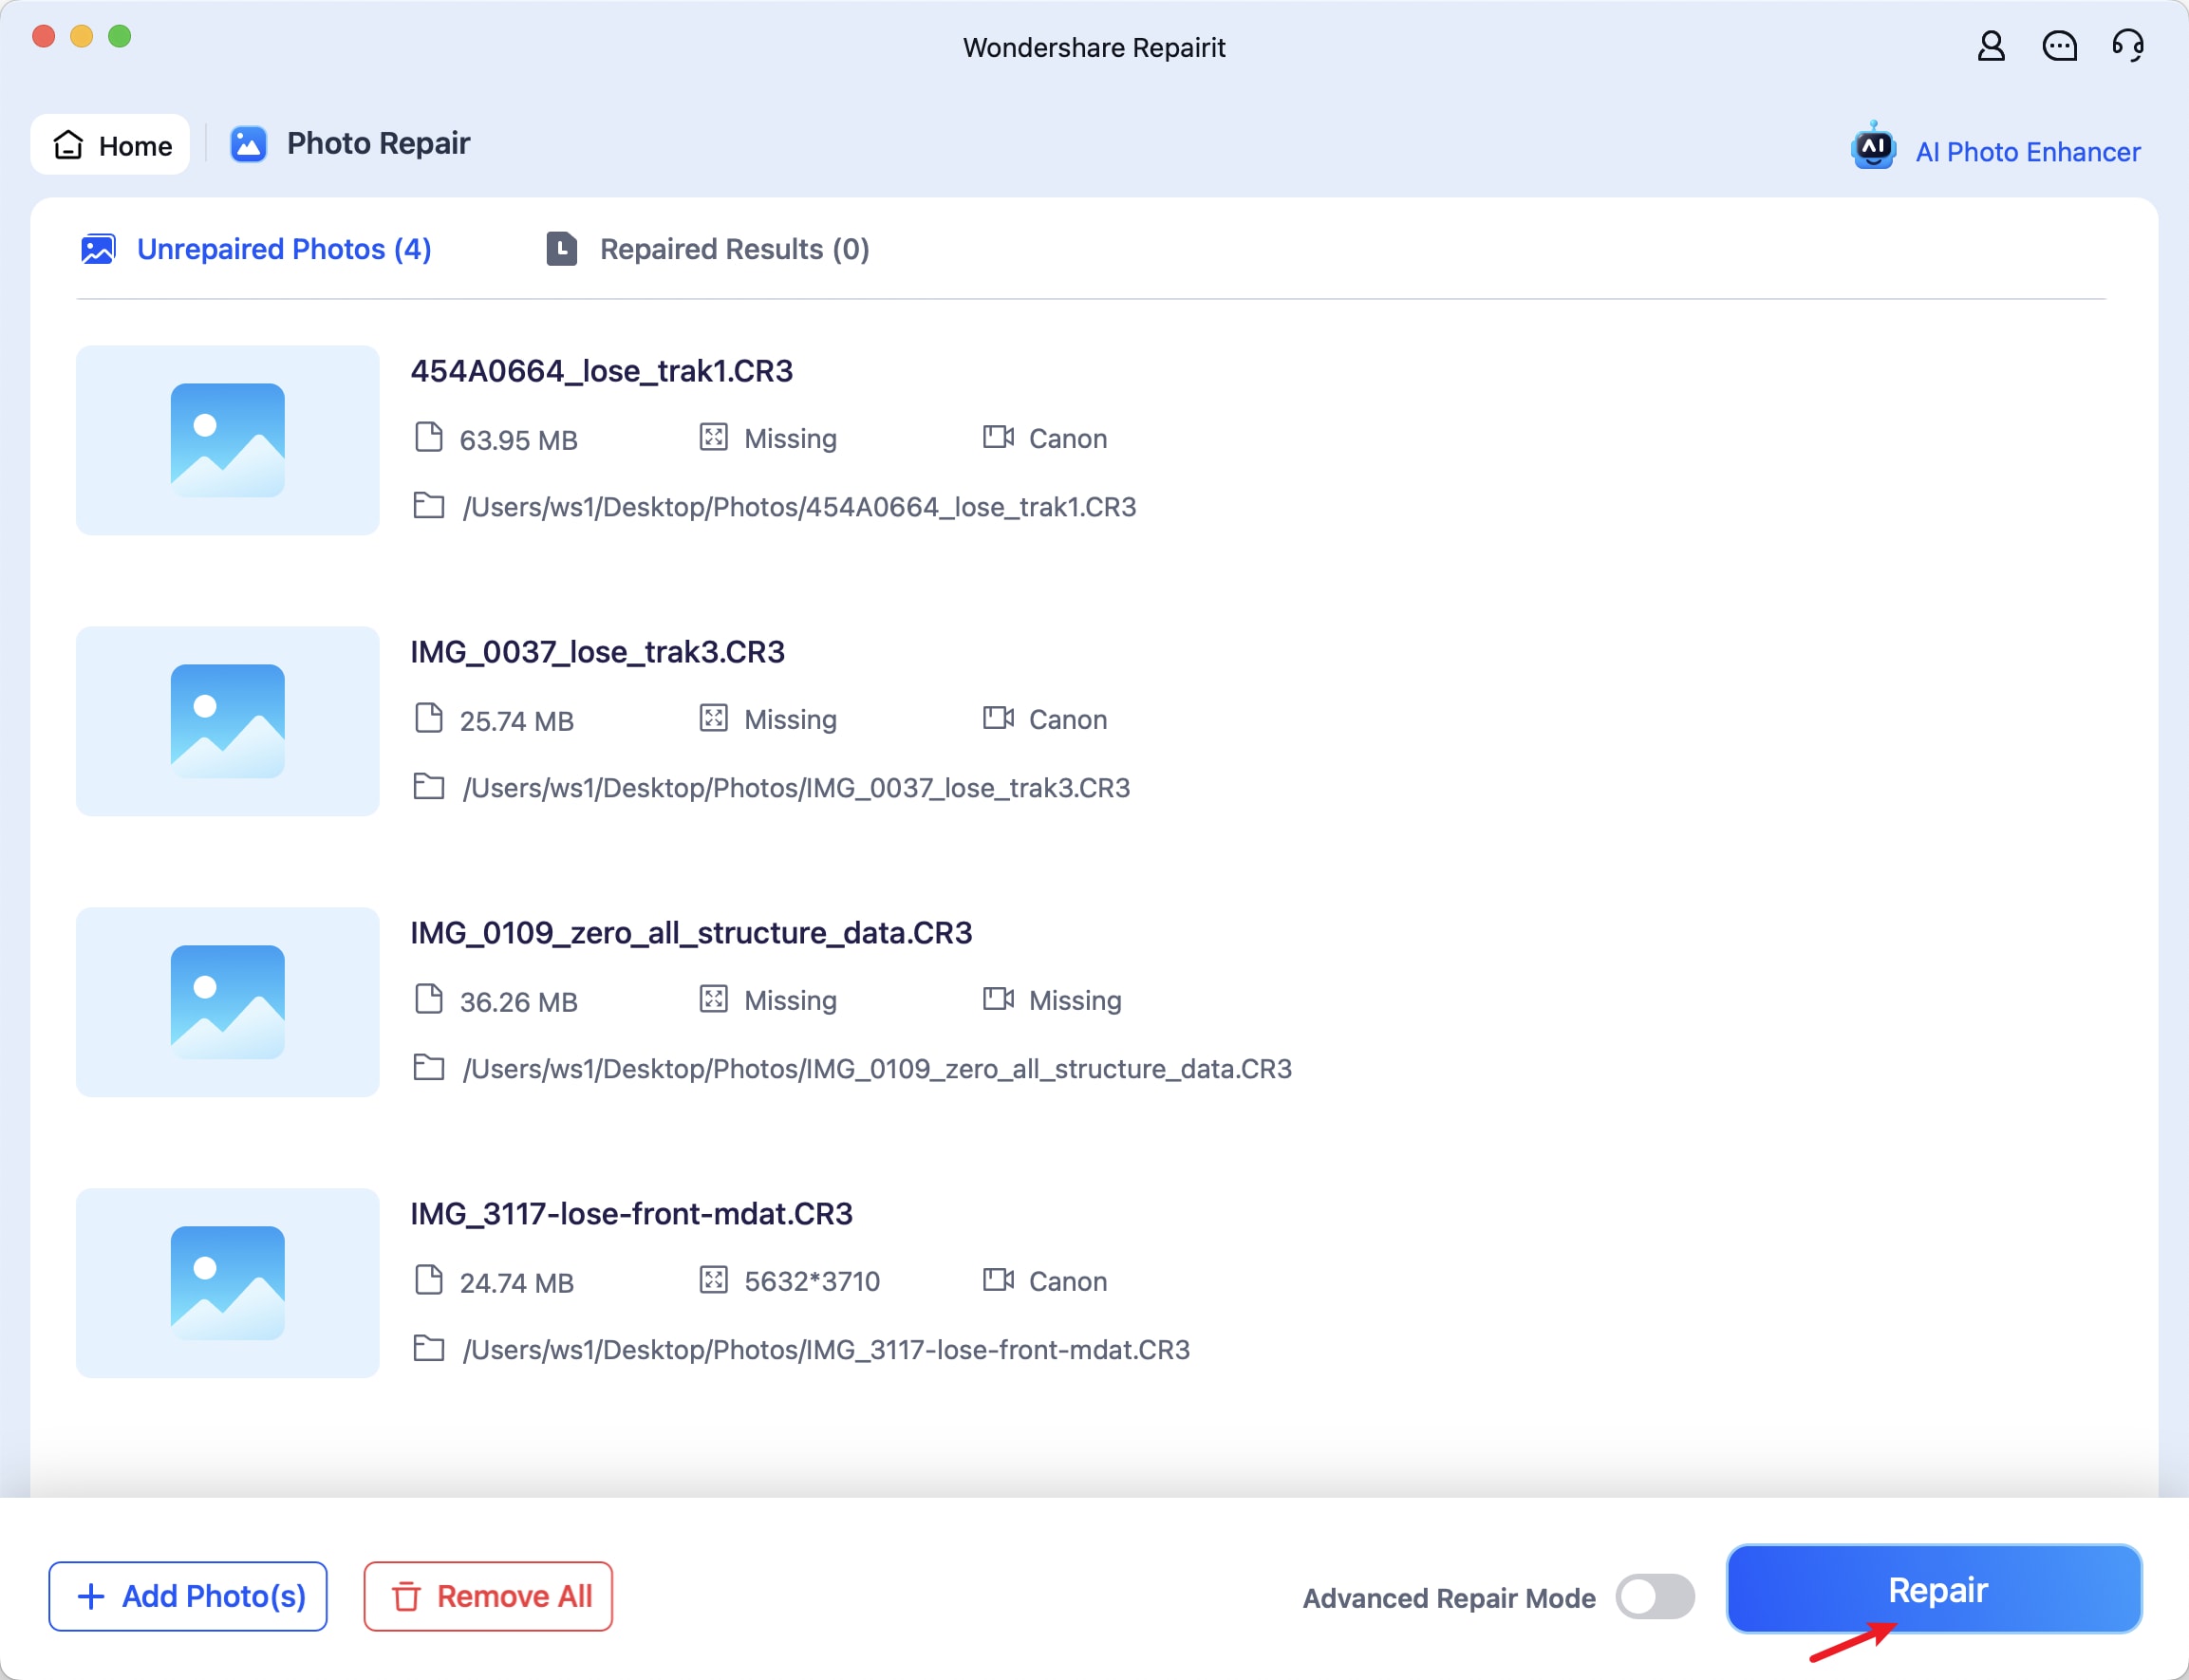
Step 3. Start the Repairing Process to Fix the Issue
Moving forward, tap the “Repair” button from the bottom-right of the screen. Then, the app will start repairing your damaged or corrupted file, which you can easily access on your device by hitting the “Save” option from the popup.
Solution 4. Rebuild Library on Older MacBooks
If you are using Mac versions prior to macOS Mojave 10.14, you can rebuild the iPhoto library to regain image access. Doing so will fix corrupted or missing image files while ensuring they are viewable and approachable.
Furthermore, this solution will also boost the overall speed and efficiency of the Photos app. Thus, here is how you can rebuild it to repair the iPhoto library in a few taps:
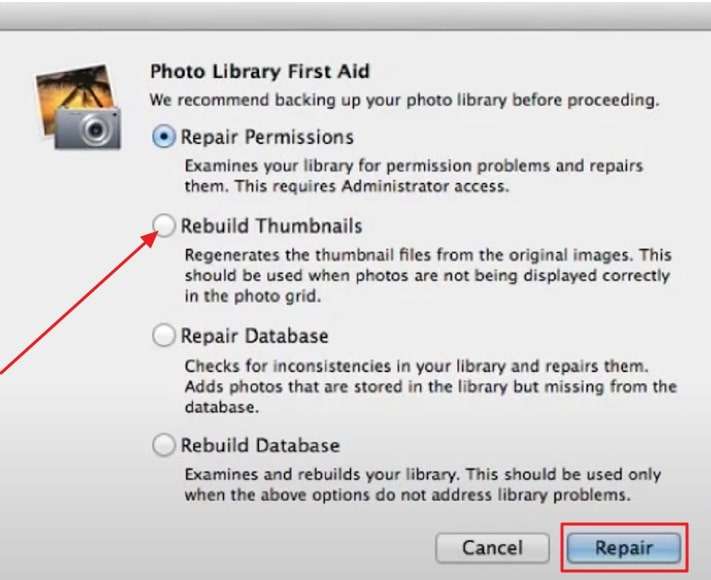
Instructions: To rebuild the iPhoto library, locate the iPhoto on your device and hold the Command and Option keys. This will navigate you to a new window where you have to choose the option to access your preferences. Since you seek to rebuild, choose the “Rebuild Thumbnails” and tap the “Repair” button to start the process.
Solution 5. Run First Aid to Fix Damaged Drives
As a MacBook user, you can also use the Disk Utility app, as it can fix disk errors that could affect the Photos app functionality. Moreover, this approach enhances the stability of the device, making the photo library accessible. Thus, below is detailed stepwise guidance on how to repair a photo library while taking leverage of this quick and reliable solution:
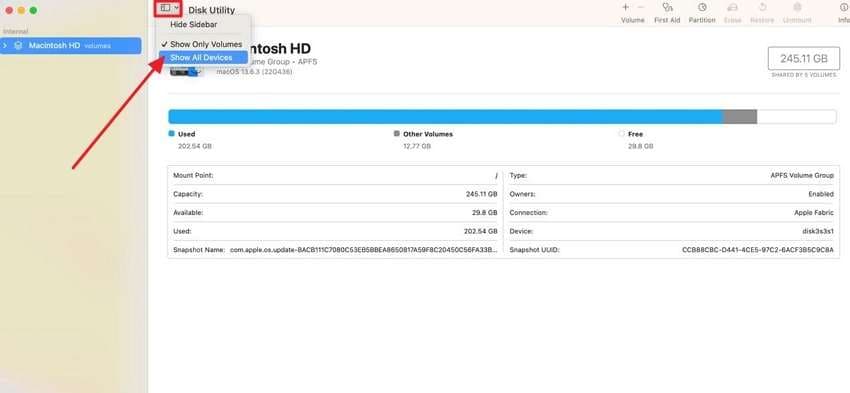
Step 1. Locate the Disk Utility app on your Mac and tap the “View” icon from the top bar to choose the “Show All Devices” option.
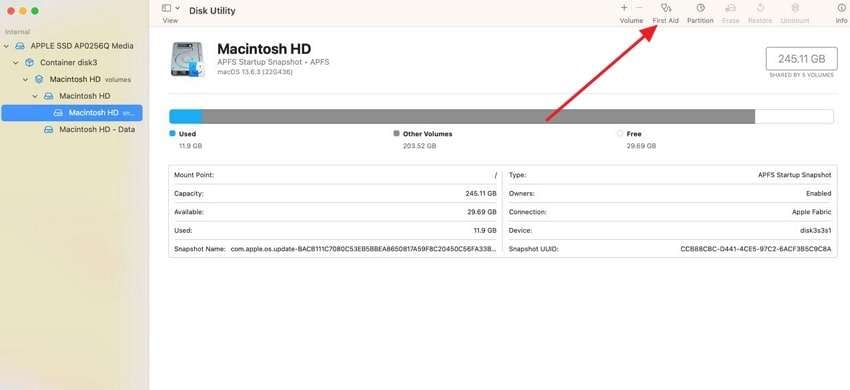
Step 2. Then, on the new window, choose the desired disk and pick the “First Aid” option from the right side of the screen.
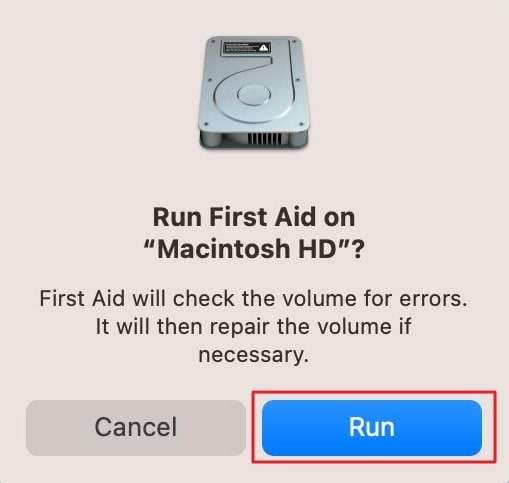
Step 3. This will then ask you the permission to run the process that you can begin by hitting the “Run” button. As the process completes, you will be able to view and access the images on your device easily.
Repair Photo Library Now
 Security Verified. Over 7,302,189 people have downloaded it.
Conclusion
Summing up, learning how to repair or rebuild a photo library on a Mac is essential if you are facing issues with your Photos app. Therefore, in this guide, we have explored 5 top-notch and effective solutions in detail with stepwise guidance. According to experts, all these methods are considered the finest to regain access to corrupted or damaged images.
However, for better precision and accuracy, we recommend using Repairit, as this tool can restore corrupted images without losing any data. Additionally, you can repair images in bulk, reducing manual effort and time.
FAQ
-
Q1. How can I repair my photos on a MacBook?
You can repair your corrupted or damaged photos by using the Wondershare Repairit toolbox. Using this tool, you can import images in bulk and restore their quality in just no time. Besides that, using Disk Utility or rebuilding the library can also fix common issues like corruption and performance slowdowns. -
Q2. What does rebuilding the photo library do?
Rebuilding the photo library helps organize and fix corrupted files, which improves its performance. It's especially helpful for older MacBooks with large libraries. -
Q3. Is it safe to repair my photo library using Disk Utility?
Yes, Disk Utility is safe to use to repair the Photo library on the MacBook since it is a simple and effective method. Apart from that, it checks for disk errors and fixes them, ensuring your photo library is accessible and performs better.
