
 TL;DR:
⚡ Quick Fix: Fix GPU Not Detected in Device Manager
Enable the GPU: Boot Windows in Safe Mode, open Device Manager, check Display Adapters, and enable the graphics card if it was disabled.
Update or Reinstall Drivers: Use NVIDIA, AMD, or Intel driver software to update the graphics driver, or uninstall and reinstall the GPU driver for a clean setup.
Check BIOS Settings: Reset BIOS settings to default, update BIOS or UEFI from the motherboard manufacturer, and confirm the system supports your graphics card.
Repair Related Video Issues: If videos still show playback errors after the GPU is detected, use Repairit video repair tool to fix corrupted video files and save them to a new location.
Ask AI for a summary
 ChatGPT
 Perplexity
 Gemini
 Claude
 Grok
Grok
Imagine you are all set to play your favorite WAV audio file at a special event, and suddenly it stops playing or creates a distorted sound.
Sounds embarrassing? Indeed, it is!! Don’t worry! In this guide, we have compiled some effective methods to repair distorted audio and quickly fix corrupted WAV files with minimal effort. Moreover, the guide also entails the possible reasons that lead to this trouble so that you can avoid it in the future.
In this article

Part 1: What is WAV File?
Before jumping into the solutions, let's first understand this file type a bit more. A WAV file, also known as Waveform Audio File, refers to a standard format primarily found on Windows computers.

These files are uncompressed and larger than the major audio formats. Owing to the large size, WAV isn't always used as the preferred format. However, they support compression, and users can compress the files to reduce their size. This popular audio extension was released by Microsoft in 1991.
Part 2: Solutions to Fix Corrupted Audio Files
Wondering how you fix the distorted sound? Here are some practical solutions to fix the corrupted WAV audio file. Without any further delay, let's get into it.
Solution 1: Using Professional Audio Repair Software
The easiest method to fix the distorted WAV file is to use professional audio repair software. While the market is loaded with tons of options, you must turn to the Wondershare Repairit to deal with the trouble. This third-party application is a go-to solution to repair your files and assures you of offering the best results.
Wondershare Repairit can fix the distorted WAV file in just three steps, so you can enjoy the audio again.

Wondershare Repairit - Audio Repair
 Security Verified. Over 7,302,189 people have downloaded it.
-
Repair damaged audios with all levels of corruption, such as audio not working, clipping audio, humming audio, rumbling audio, sibilant audio, out-of-sync audio, etc.
-
Repair audios of diverse formats, including MP3, M4A, FLAC, AAC, WAV, etc.
-
Repair damaged or corrupted audios from multiple devices: portable voice recorder, recording software, shooting apparatus, SD cards, phones, hard drives, USB flash drives, etc.
-
Support Windows 11/10/8/7/Vista, Windows Server 2003/2008/2012/2016/2019/2022, and macOS 10.10~macOS 13.
Follow the step-by-step guide here to use Wondershare Repairit and repair distorted audio within little or no time.
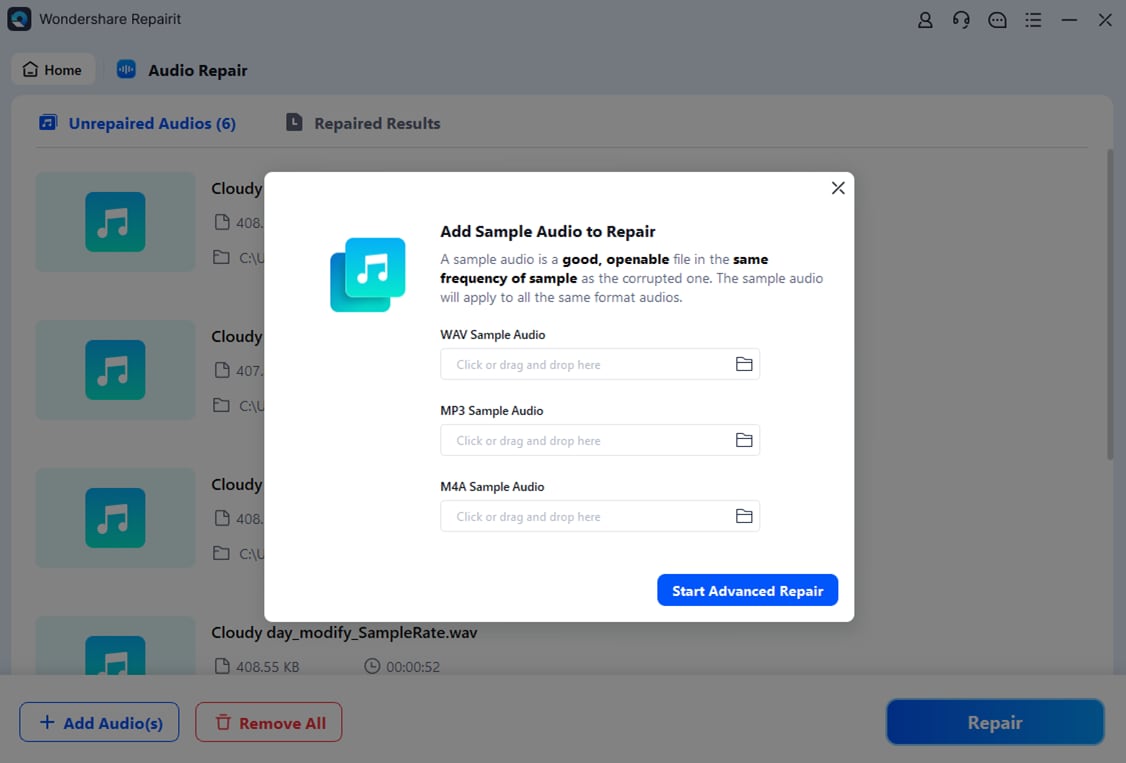
Step 1: Add the corrupted WAV file
- First of all, download and install the Wondershare Repairit on your device and go to the audio repair option.
- Now, add the corrupted and sample audio files, which should be created in the same format and belong to the same source.
- The interface will let you know once the files are added.

Step 2: Start the repair process.
- The next step is to begin the repair process. Click on the repair button available on the display screen to start repairing the files.
- It will take a few minutes to complete, and the progress will appear on the screen.
- Once the repair is completed, a prompt message will be generated indicating the process completion.
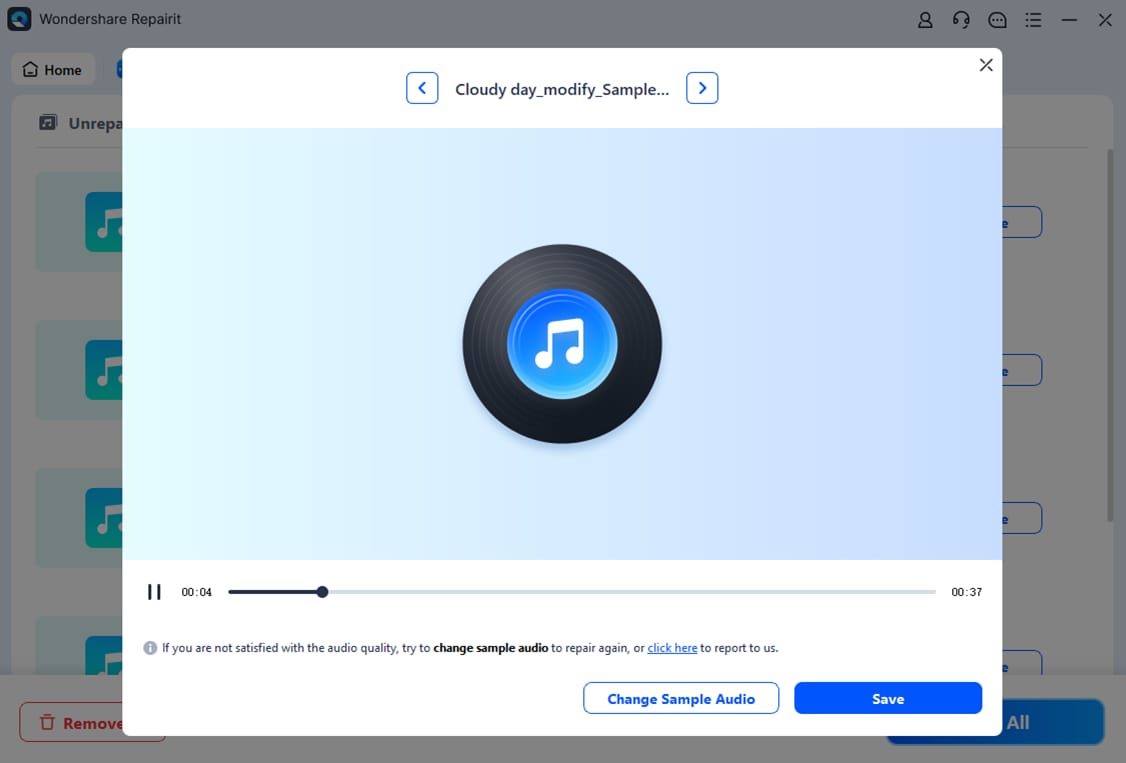
Step 3: Preview and Save
- As soon as the audio files are repaired, you will find the preview option in front of all files. Click on it to preview the repaired files.
- If you are satisfied with the results, tap on the Save button and export the file to a designated folder.
This video can help you fix your wav files with a step-by-step guide.
Solution 2: Fix this Issue By VLC Player
The second-best method to repair distorted audio is to use the VLC player. This tool comes with a simple interface and is available for free. Furthermore, VLC is a lightweight tool that won't take up much space in your system. Hence, you can easily install the tool without thinking about the space.
The best thing about using the VLC player is that the tool features a built-in WAV file repair option that automatically fixes the distorted WAV file. All you have to do is set up the tool and let the repair begin. Here's how you can do it!!
- First of all, download the VLC player and follow the on-screen prompts to install the software.
- Launch the tool and click on the Media option. Go to the Convert/ Save tab to proceed further.

- Tap on the File tab on the Open Media window and click on the Browse option to choose your save path.
- At last, hit the Start button and let the VLC player repair the corrupted WAV file. Once the process is completed, try playing the file and check if the problem resolves.
Solution 3: Export the WAV File
Still thinking that Can you undistort audio? Look no further and try adding and exporting the file again as a WAV format using an audio editor. However, remember that the solution works if only the metadata and headers of the file are damaged and the file is still safe. It is a simple fix that you should give a try before downloading the file again from the original source.
Follow the steps and export the WAV file easily.
- Download Audacity and follow the on-screen prompts to install the same.
- Now, launch the application and drag & drop the distorted audio file.
- Before proceeding next, try playing the audio to check whether the solution is a right fit or not. If the audio plays, it means that the file is not damaged yet and can be fixed. However, if your audio doesn’t play, it means that the method can't help the file now.
- If the file plays, it starts loading the wavelength. Once it loads, navigate to the File and click on the Export button.

- Choose the WAV format and save the file as a new file. Try playing the new file and check if the problem is fixed.
Solution 4: Use Adobe Audition
Don't have enough time for a manual fix? Turn to the Adobe Audition tool and repair distorted audio automatically. This tool helps you fix the corrupted audio files, remove audio effects, noise, and more. Carry out the steps below and repair the WAV audio file within a few clicks.
- To begin the process, choose the distorted WAV file and open it in Adobe Audition.
- Now, go to the Effects menu and click on the Diagnostics option to identify and repair the audio file issues.
- Once you click on it, wait for a while, as it may take a few minutes to complete the process.
- As soon as the repair is completed, play the audio and check if it resolves the problem.

How to Convert AIFF File to WAV Easily [Mac & Windows]
A Complete Guide To Convert MP3 to High-Quality WAV Audio File
Top 6 YouTube to WAV Converters to Use in 2025
Part 3: Reasons Why WAV Files Get Corrupted
So, now that you are fully aware of the solution to repair distorted audio files, it's time to unwrap some of the possible reasons that usually trigger the trouble. Keep into account these causes and make sure to avoid them as much as possible to prevent the error from occurring in the future.
-
Inappropriate file transfer
The primary reason why a WAV file gets corrupted or damaged is its inappropriate movement. The file may get easily damaged when moving it from one source to another. Hence, ensure that your system is fully charged when transferring WAV files, so the process doesn't get interrupted.
-
Third-party Tools
Yet another common reason leading to the distorted audio file is third-party tools, including music and media players. Even editors can also distort a WAVE audio file, so you should be very careful while using them.
-
Malware Infection
Virus attack or malware infection is also one of the possible reasons leading to the trouble. Hence, always install a premium-quality anti-virus to protect your files from getting corrupted or damaged.
-
Forceful Editing
When you change the file extension forcefully, it leads to the damage or distortion of an audio file. Therefore, make changes to the file format only if possible; otherwise, you'll end up losing the same.
-
Change in meta content
Any modification in the file's metadata or header can also cause the distortion; hence should be avoided.
-
Inappropriate source
Sometimes, the audio file gets damaged when you obtain it from an illegal or inappropriate source. Thus, it is recommended to fetch the file from official or reliable sources only.
-
Damage to the storage unit
WAV files can also get affected if the storage unit or hard drive where you have kept the file is damaged. Hence, make sure to create multiple copies of the file so you can retrieve it without any hassle.
Conclusion
That concludes with how to fix distorted sound and how to fix a WAV audio file. We hope you have enjoyed reading the article and found it worthwhile. Nothing is more frustrating than a damaged or distorted audio file; therefore, we have compiled some effective methods to get rid of the trouble. You can easily pick any of the above solutions to repair the file quickly.
However, if you are looking for a solution that delivers guaranteed success, then think no more and turn to Wondershare Repairit to fix the trouble within three simple clicks.