
“I copied an image with a transparent background into a PowerPoint slide, expecting the slide's background color to fill in the transparency. However, the transparent areas remained as a checkerboard pattern. I couldn't find a solution in the context or main menu options, but I believe there must be a way to fix this since it's a common need.”
One Reddit user shared their frustration after inserting a transparent image in PowerPoint, only to find the background didn't merge as expected. This problem is common with PowerPoint users. The good news is: removing the background from a picture in PowerPoint is easier than you might think.
In this article, you’ll learn step-by-step on how to remove background from picture in PowerPoint and discover why it’s useful.
In this article
Part 1: Why You Should Remove Background from Picture in PowerPoint?
PowerPoint can be used to remove backgrounds from images which results in a more polished appearance for your presentations. Let's take a look at why individuals should consider doing this:
- Focus on the Main Subject: Without the background, it would be easier for you to focus on the central theme or matter being discussed in the picture. This will make sure that all eyes are on the critical part of the photo and you communicate more effectively.
- Blend Images Seamlessly: If you have multiple images on a slide, removing their backgrounds can help them blend together more smoothly. This can give your presentation a more polished look.
- Custom Backgrounds: You can put the image on any background of your choice if you do not have the original background. This allows you to be more creative and versatile in the design of your slides.
- Professional Appearance: Clean, background-free images give your slides a more professional look, which can be particularly important for business presentations or academic projects.
- Consistency: It becomes simpler to ensure uniformity when controlling the backgrounds of your images in order to maintain consistent style across all your slides. This evenness in the distribution has the power of making the message stronger and more unified.
Part 2: Step-by-step Guide on How to Remove a Picture Background in PowerPoint
Learning to remove a background from an image in PowerPoint helps you use your presentations in a better way and clearly express your thoughts. Check out this step-by-step guide on how you can do this like a pro:
Method 1: Using "Set Transparent Color" (For Solid Backgrounds)
Here are the steps on how to remove background from image in PowerPoint with solid backgrounds:
Step 1: Click on the picture you inserted to a slide and select Format. Go to the Color dropdown menu.
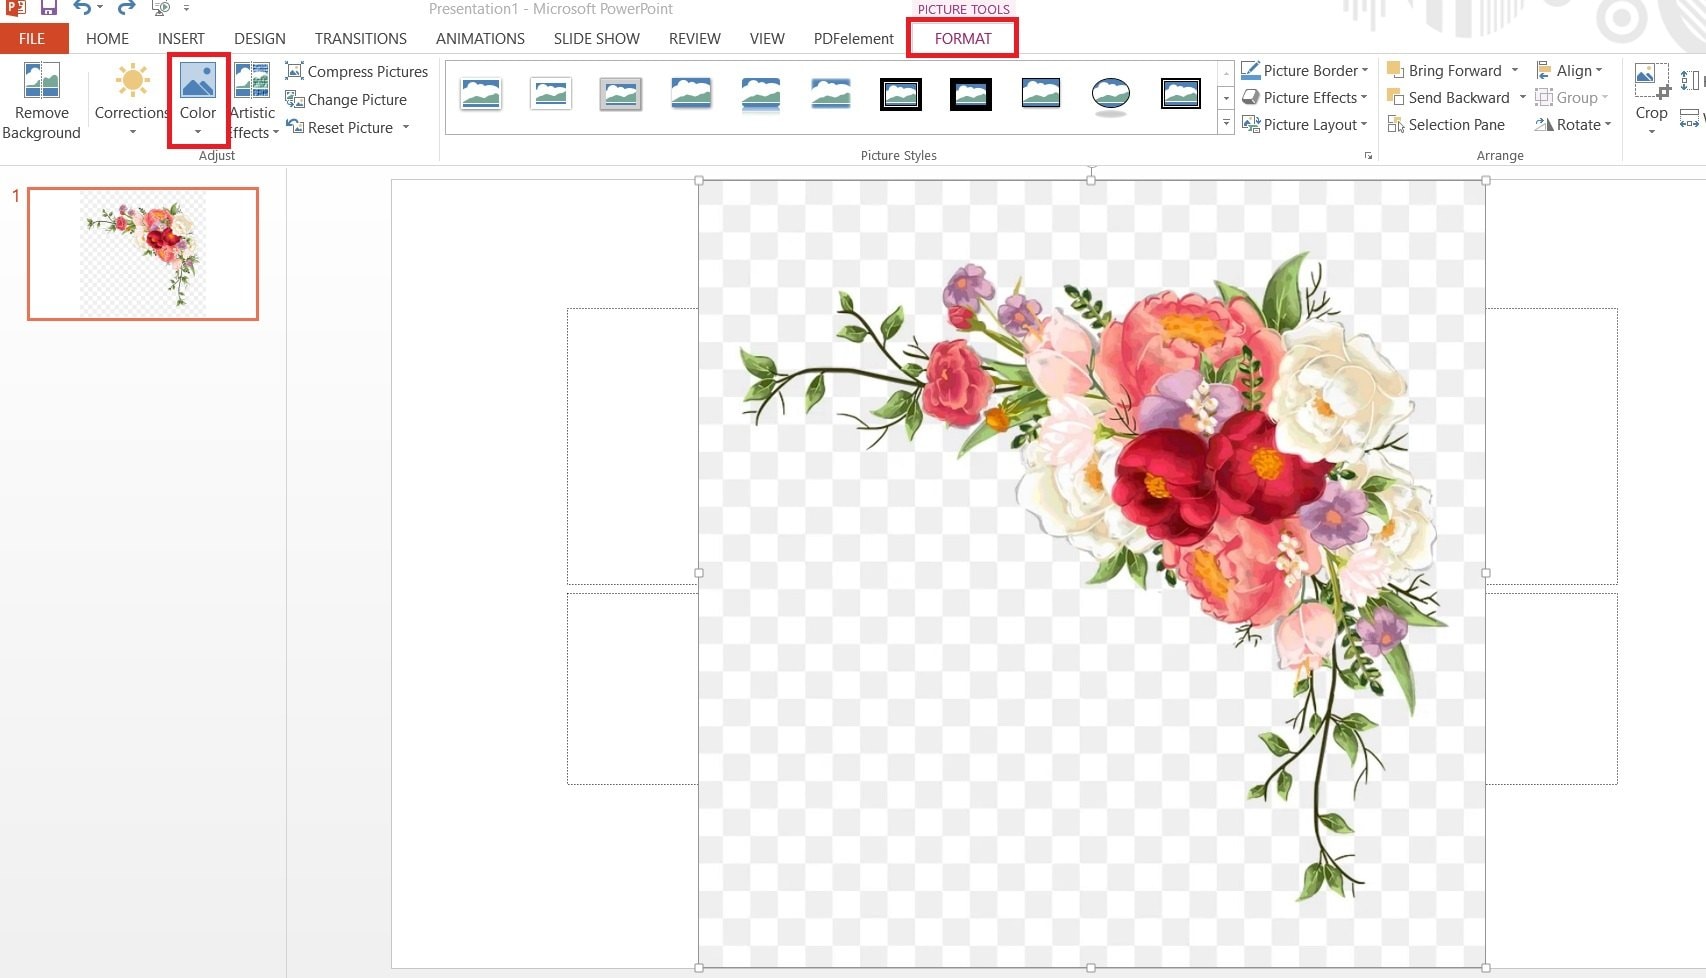
Step 2: Click on the Set Transparent Color option.
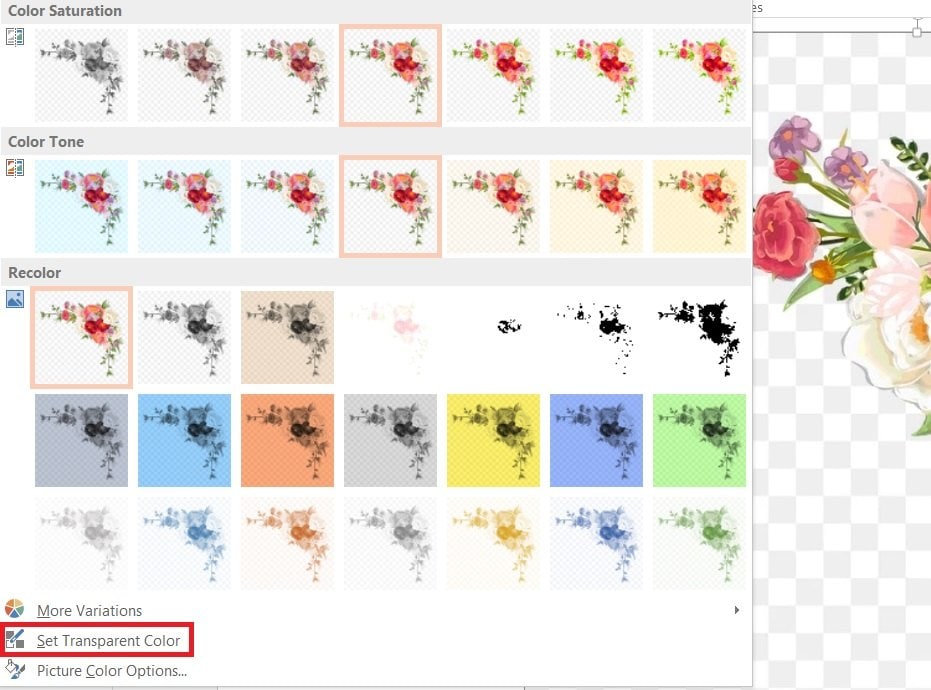
Step 3: Your cursor will turn into a small eyedropper tool. Now, click on the solid background color you want to remove in the picture.
Method 2: Utilize the "Remove Background" Feature (For More Complex Backgrounds)
This is another method on how to remove background of a picture in PowerPoint with more complex backgrounds:
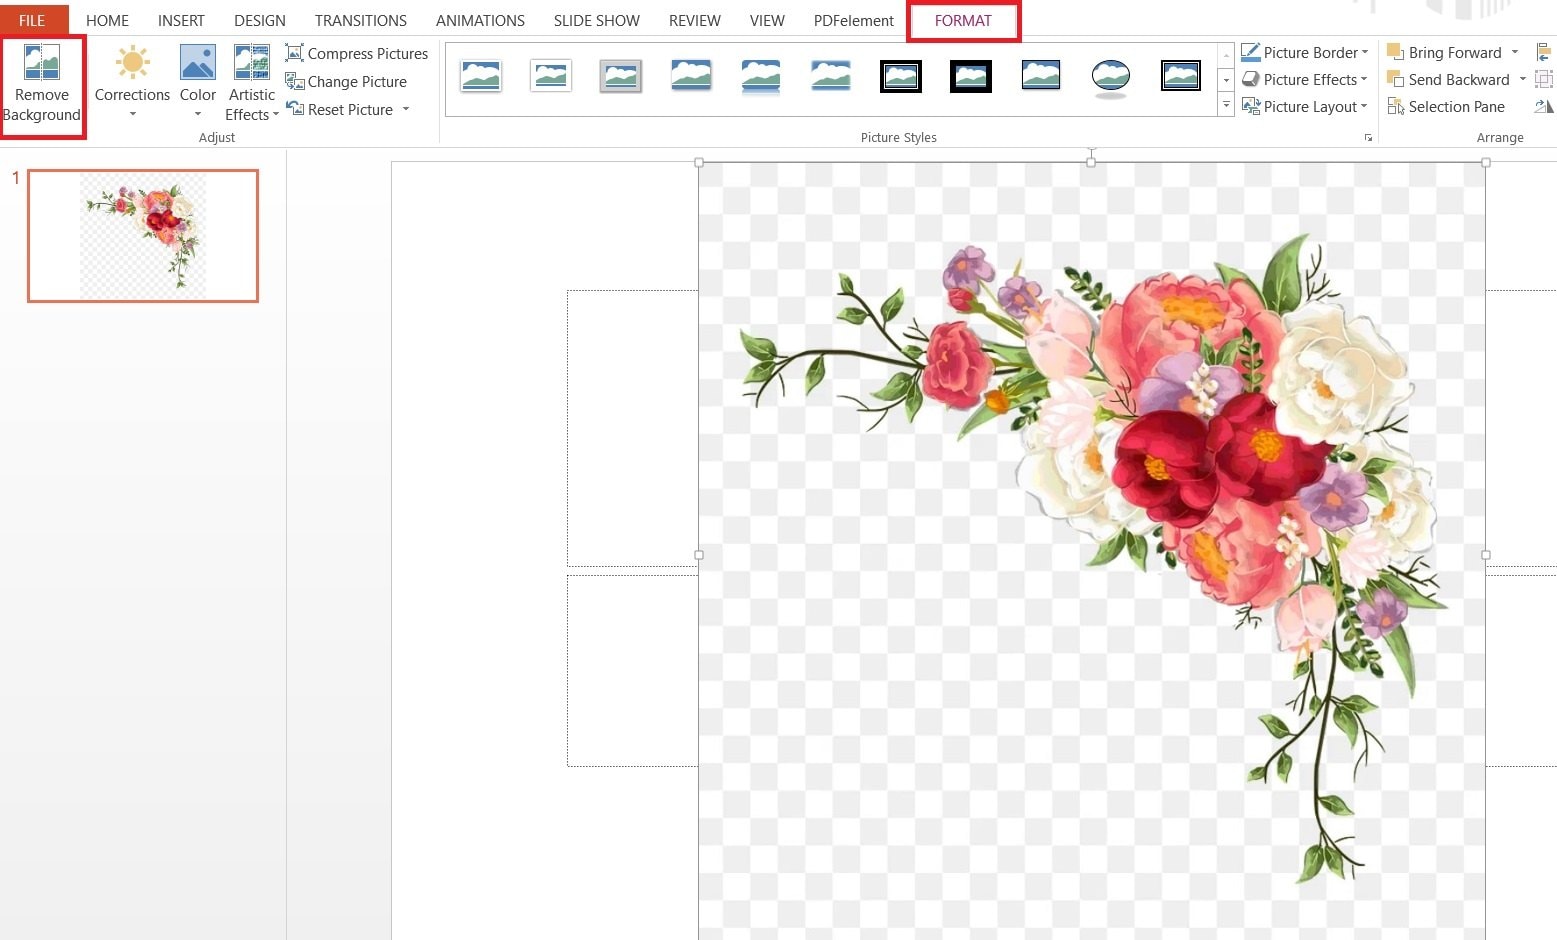
Step 1: Similar to Method 1, click the image, then access Format tab.
Step 2: Instead of Color, choose the Remove Background tool. PowerPoint will automatically analyze the image and try to identify the background area. It will be highlighted in purple or magenta.
Step 3: If the automatic selection isn't perfect, use this option: Mark Areas to Keep. Use the free-form drawing tool to paint over areas you want to retain.
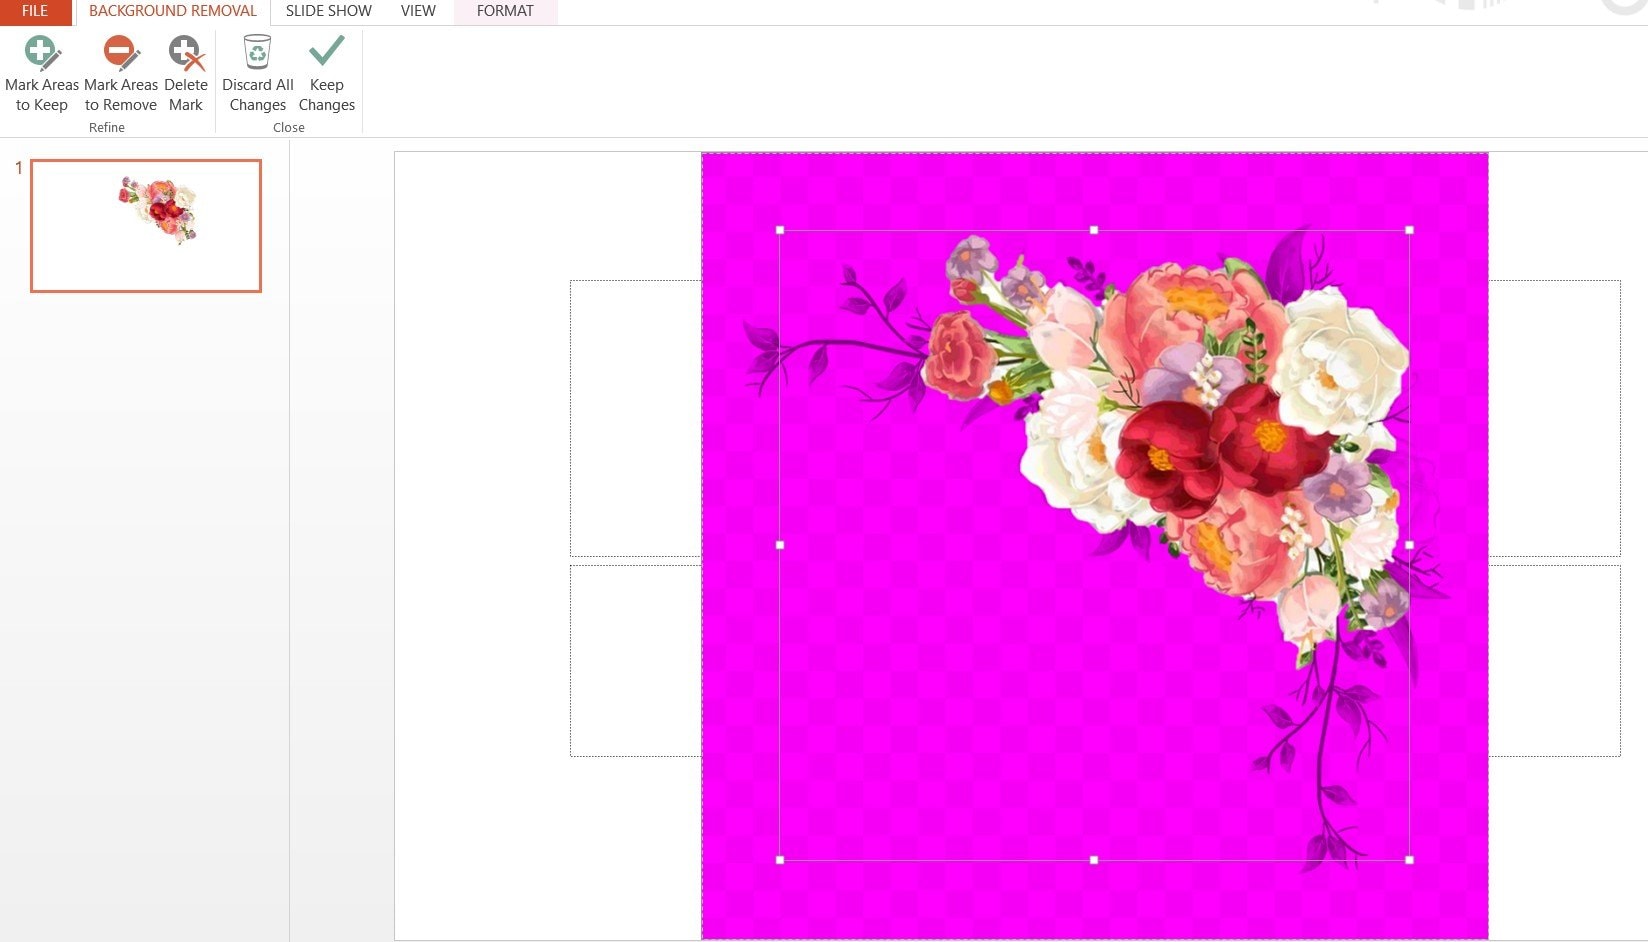
Step 4: Mark Areas to Remove option works in reverse. Click on it and paint over areas you want to remove.
Step 5: Once you're satisfied with the selection, click Keep Changes to finalize the background removal.
Part 3: Use a Reliable Background Remover: Repairit Photo Eraser
Sometimes, removing the background of image in PowerPoint can be time-consuming, especially if it is complicated. That's where a reliable tool like Repairit Photo Eraser comes in handy. This tool makes it easy to remove backgrounds from images before you insert them into your PowerPoint slides.
- User-Friendly: Repairit Photo Eraser is user-friendly even if you lack certain expertise or ability.
- Excellent Results: The tool guarantees your photographs seem professional and clean by exact background removal. When you have to know how to eliminate a background from a PowerPoint picture, this is quite helpful.
- Fast Processing: Repairit Photo Eraser saves time by working fast to get your images ready for your PowerPoint presentations.
- Customizable: The tool allows you to control the background removal procedure so obtaining the desired exact appearance. This adaptability lets you produce graphics that complement your presentation layout exactly.
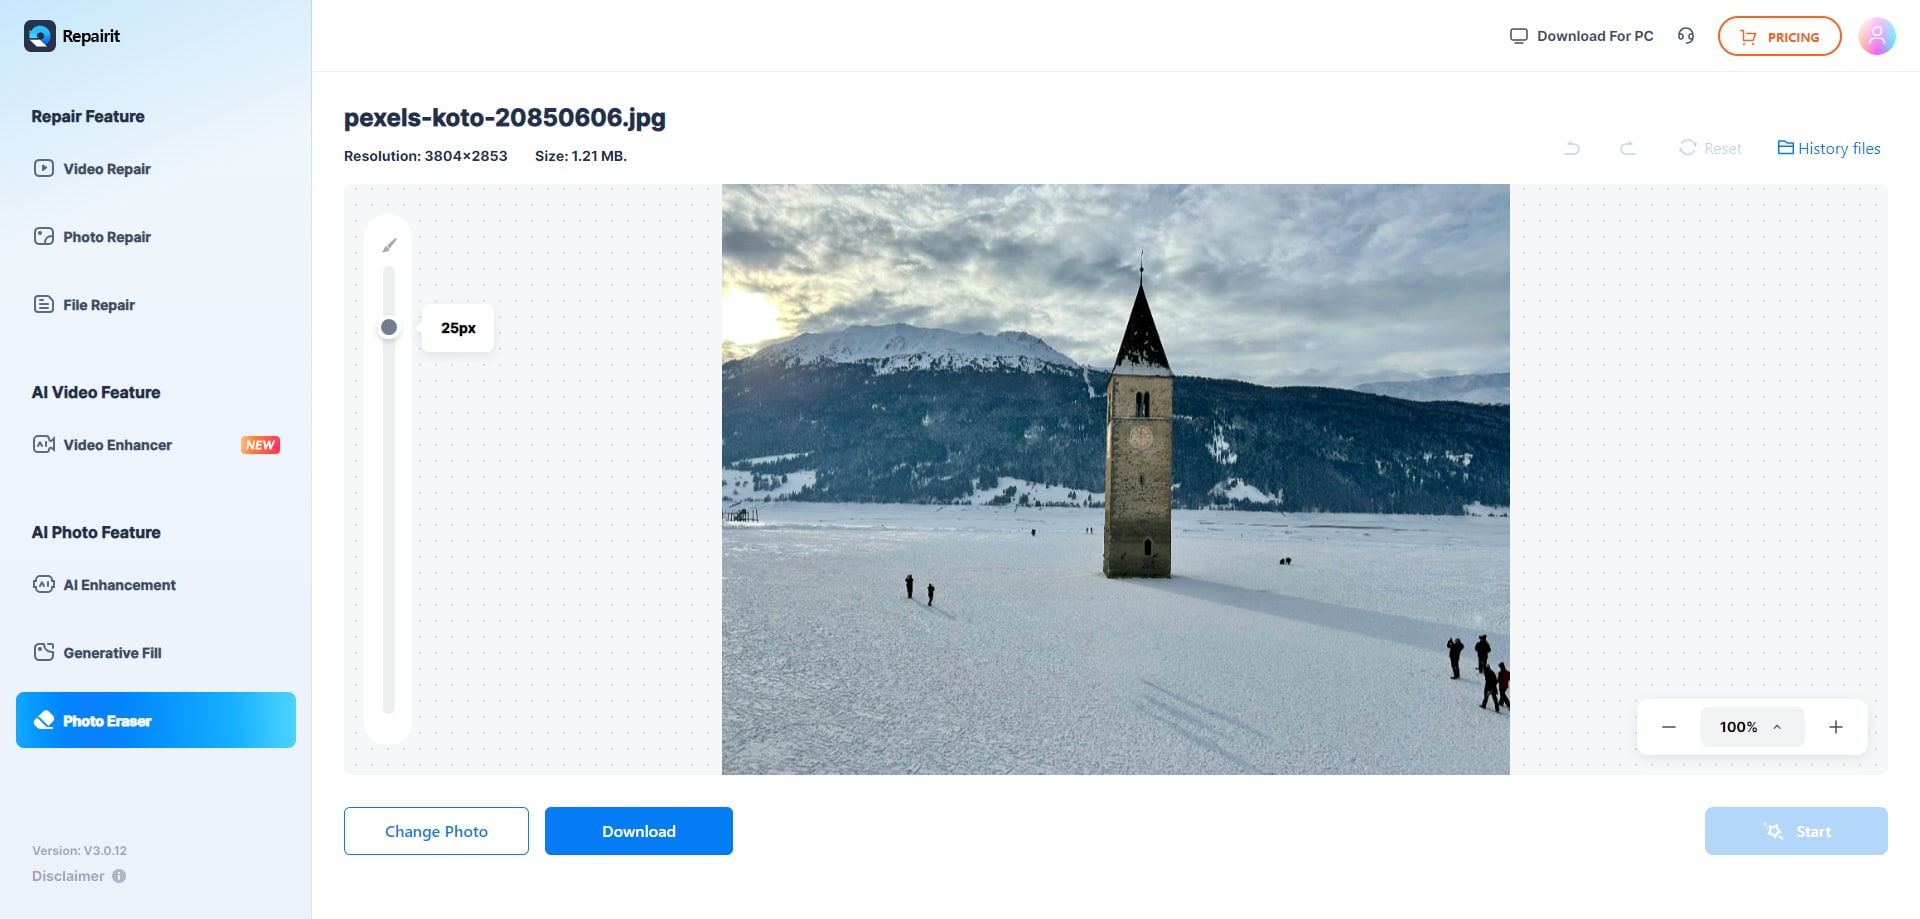
Step 1. Go to Repairit Photo Eraser website. Click Add Photo to upload the image.

Step 2. Once you've uploaded the photo, use the brush tool (adjustable up to 160px) to highlight the areas or objects you want to remove. For finer details, you can zoom in up to 500%. After that, click the Start button to start the erasing process.
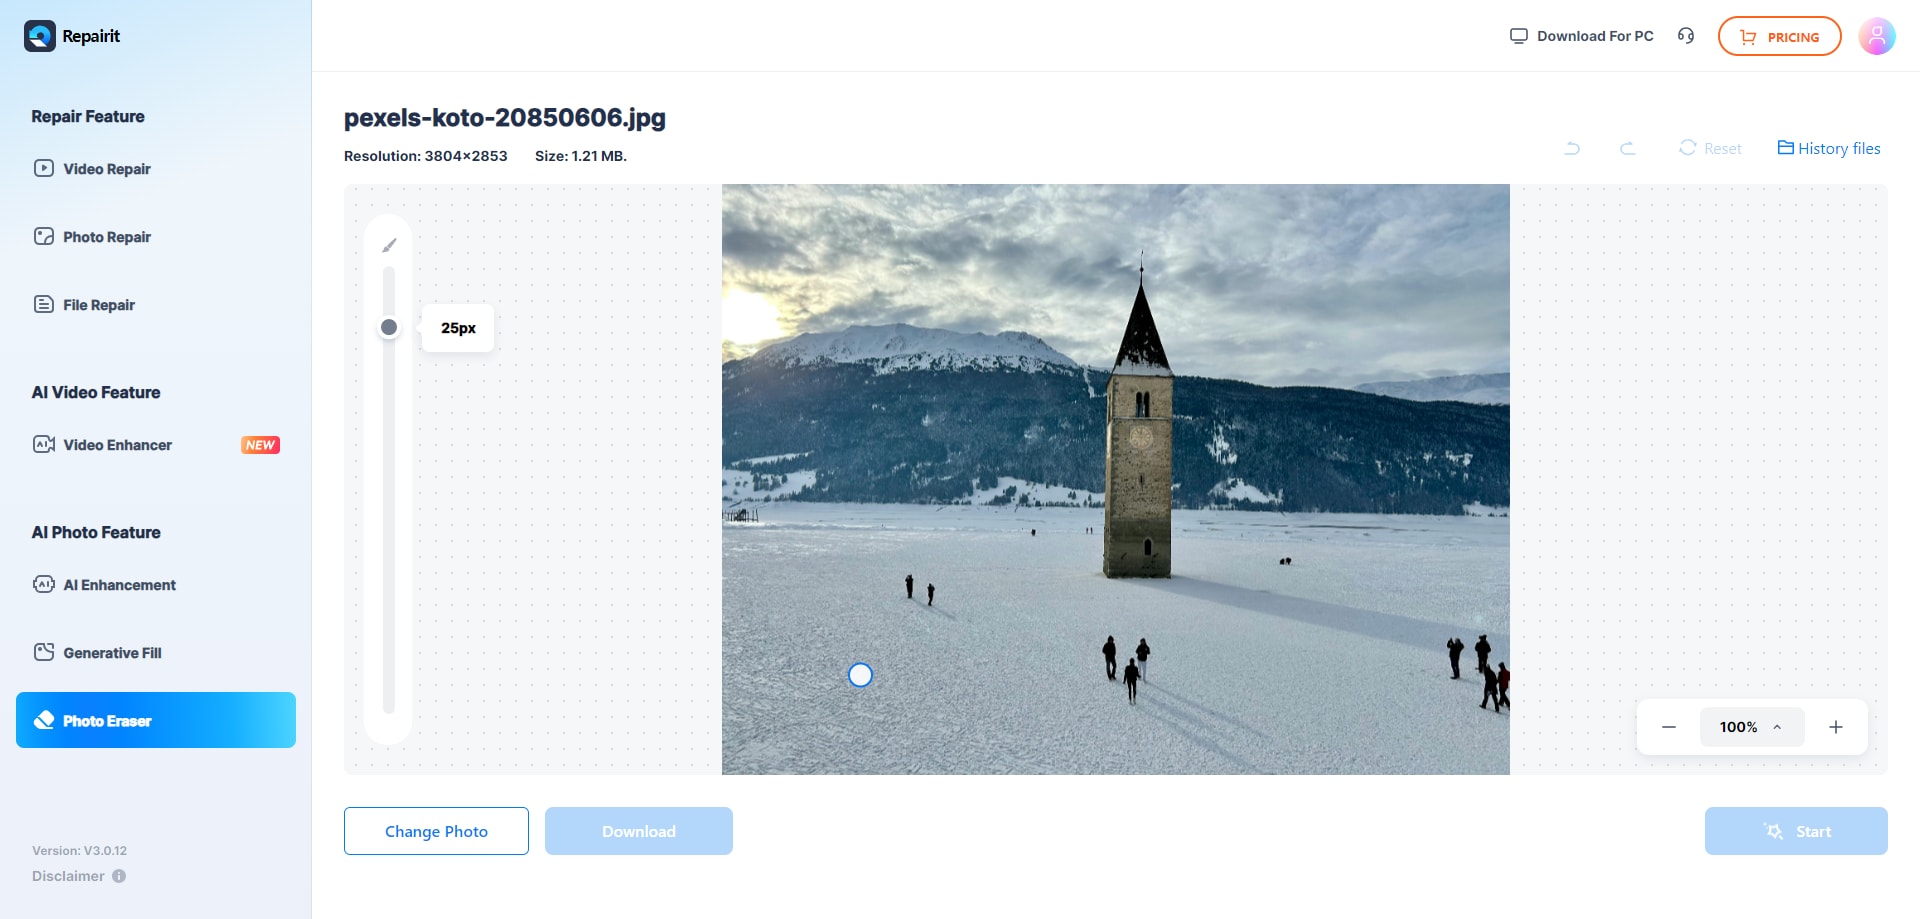
Step 3. Once done, you can Download your image on your device.
Conclusion
Now, you discovered the process of how to remove background from picture in PowerPoint. It is really simple, right? This guide helps you improve the look and feel of your presentations. Following the steps provided can make your task hassle-free. For more complex images, tools like Repairit Photo Eraser can offer precise and high-quality results. Whether you're working on a business presentation or a school project, these tips will help you achieve a clean, professional appearance.
FAQ
-
Does PowerPoint support removing backgrounds from all image formats?
PowerPoint supports removing backgrounds from common image formats like JPEG, PNG, and BMP. However, the effectiveness of background removal can vary based on the image's complexity and quality. Images with clear contrast between the subject and background work best. Additionally, if an image has a lot of similar colors in the background and foreground, it may be harder for PowerPoint to separate them accurately. -
Are there any limitations to using PowerPoint’s background removal tool?
While PowerPoint’s background removal tool is useful, it may struggle with images that have complex or similar-colored backgrounds. For more precise background removal, you might consider using specialized tools like Repairit Photo Eraser. These tools offer advanced features that can handle more detailed work. PowerPoint's tool also might not always be perfect for intricate details, so manual adjustments are often needed. Moreover, very high-resolution images may slow down the process. -
Is it possible to remove backgrounds from multiple images simultaneously in PowerPoint?
No, PowerPoint does not support batch background removal. You will need to remove the background from each image individually.
