Photographers often face issues when capturing photographs in dark environments. A common problem in such dark conditions is getting red eyes on the photos due to excessive flashlights. It happens when the camera flash reflects off the retina of your eyes and creates an unnatural red glow.
Fortunately, Photoshop's powerful editing tools, combined with simple techniques, can easily fix red-eye quickly. This guide provides everything you need to know about correcting red eyes in Photoshop. By following this detailed guide, you’ll be able to restore your photos to their natural look with ease.
In this article
Part 1. What Causes the Red Eye in Photographs?
Usually, the speed of light is faster than the closing speed of a person's retina. As a result, the light bounces back from the eyes and is captured in the camera lens. Before we move on to remove red eye in Photoshop, let's look at a few common reasons for clarifying concepts.
- Low Light Conditions: As said above, dim lighting causes pupils to dilate, which causes the red retina to appear more prominent when a flash is used.
- Direct Flash Angle: In older cameras, the flashlight usually fits directly above the lens. Consequently, it often aligns with the subject's eyes and causes a red-eye problem when a shot is taken.
- Wide Open Pupils: Pupils dilate when they are in low light conditions to accommodate more light in the eyes. When a flash is fired in such a condition, it reflects more light back into the camera and causes the red effect.
- Lack of Pre-Flash: In modern cameras, there is a mechanism of pre-flashing to allow pupils to close. Since this is absent in older equipment, the issue of red eye becomes common.
- Proximity to the Subject: Reflection becomes clearer when the flashlight is closer to the person's face. In such cases, red eyes appear more prominently and in darker shades.
Part 2. How to Remove Red Eye in Photoshop Using the Red Eye Tool?
Being an advanced editing tool for all kinds of photography, Photoshop offers comprehensive solutions to solve red-eye issues. Among its many capabilities, the editing suite has a dedicated "Red Eye Tool" to instantly eliminate this effect from photos. This tool is especially effective because it offers customizable settings, allowing users to adjust pupil size and darkness for the most realistic correction.
The good thing about this tool is that it doesn’t require any technical editing knowledge. Even a beginner with no editing background can access this feature and remove red Photoshop. To restore your photos by removing the red-eye effect, follow these steps:
Step 1. After launching this advanced photo editing tool on your PC, click the “Open” button. After that, select the photo with the red-eye effect and import it into the tool.

Step 2. Once the image loads in Photoshop, right-click the “Patch Tool” from the left toolbar. From the options that pop up, select the “Red Eye Tool” to access its functionality.
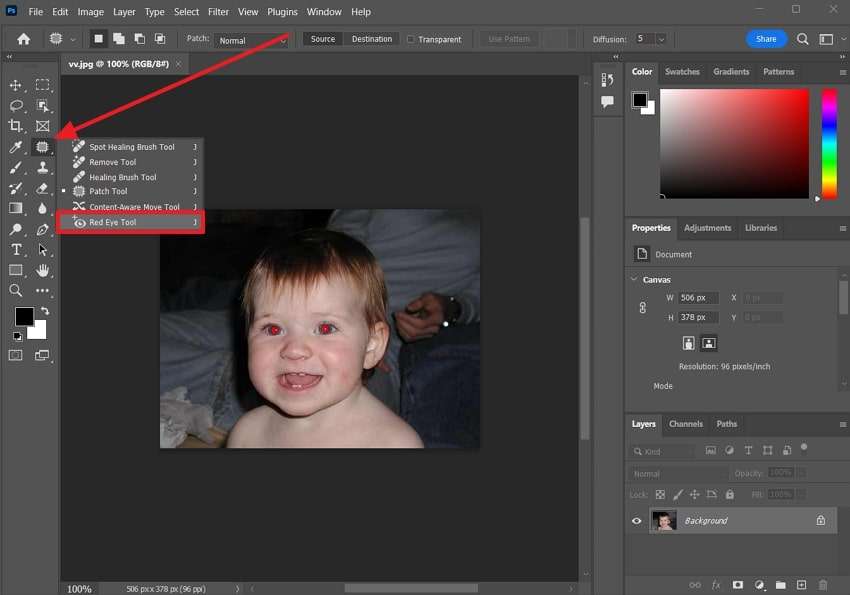
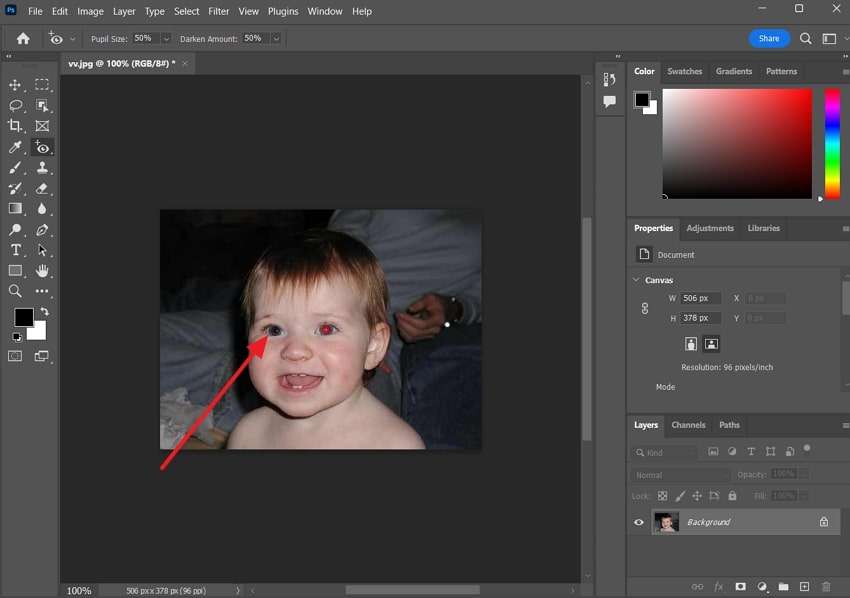
Step 3. Finally, take your cursor over the red-eye effect on the photo and click on it. The tool will instantly remove the effect from the eye. In the final step, repeat the same process with the other eye and save edited the photo on your device.
Bonus Tip. How to Fix Damaged or Corrupted Photographs of Any Level in One-Click?
While correcting red eye in Photoshop is a straightforward process, the tool usually requires high-end specs to function properly. Apart from that, the tool often crashes, which results in the corruption of important media files. To solve this problem, users can use Repairit for its extensive file-repairing features. It uses advanced AI to detect corrupted parts of an image and fix them accordingly.
In this way, you can access even those media files that are not opening on your device. This feature is especially helpful in repairing your childhood photos stored in older storage devices. Since the tool supports over 15 picture formats, you can safely use it for all kinds of new and old photos. Despite repairing, you can also use it to refine the quality of the images and improve their clarity.
Key Features of Repairit Photo Repair

-
Batch Restoration: To streamline workflow and manage multiple files at a time, the tool allows batch restoration of photos.
-
Repair images of diverse formats, such as JPG, JPEG, PNG, CR3, CR2, NEF, NRW, etc.
-
Accessibility: In addition to Windows storage devices, you can also use it to repair media files in USBs, SD cards, and digital cameras.
-
Repairit has a quick and advanced repairing mode. You can use either depending on the level of corruption the photos has undergone.
-
Thumbnail Extraction: For content creators, the tool allows the extraction of catchy moments to be used as thumbnails.
-
Availability across Devices: Users can not only use it as software but can also access it online on all operating systems.
-
No limit to the number and size of the repairable photos compared with the online version of Repairit.
-
Support Windows 11/10/8/7/Vista, Windows Server 2003/2008/2012/2016/2019/2022, and macOS 10.12~macOS 13.
Simplified Step-by-Step Guide to Use Repairit for Ease Image Repairing
Since we are confident of the tool’s capability as an alternative to correcting red eye in Photoshop, let’s see how to use it effectively. You can see how to repair damaged images and media files in Repairit by following these steps:
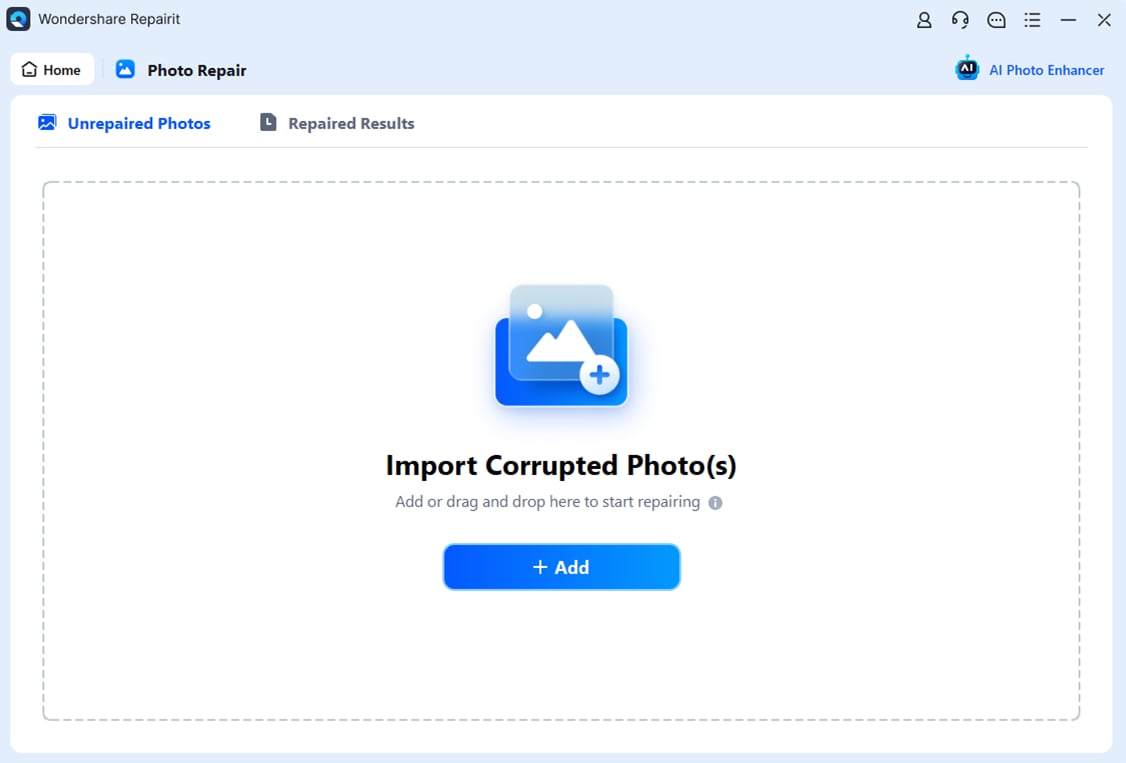
Step 1. Navigate to the Photo Repair Feature

Step 2. Import the Corrupted Media Files in Repairit
Click the “+Add” button to access various folders on your storage device. Finally, select the file that needs repairing and import it to the tool.
Step 3. Repair the Corrupted/Damaged Photos
Finally, tap the “Repair” button from the bottom and repair corrupted photos.

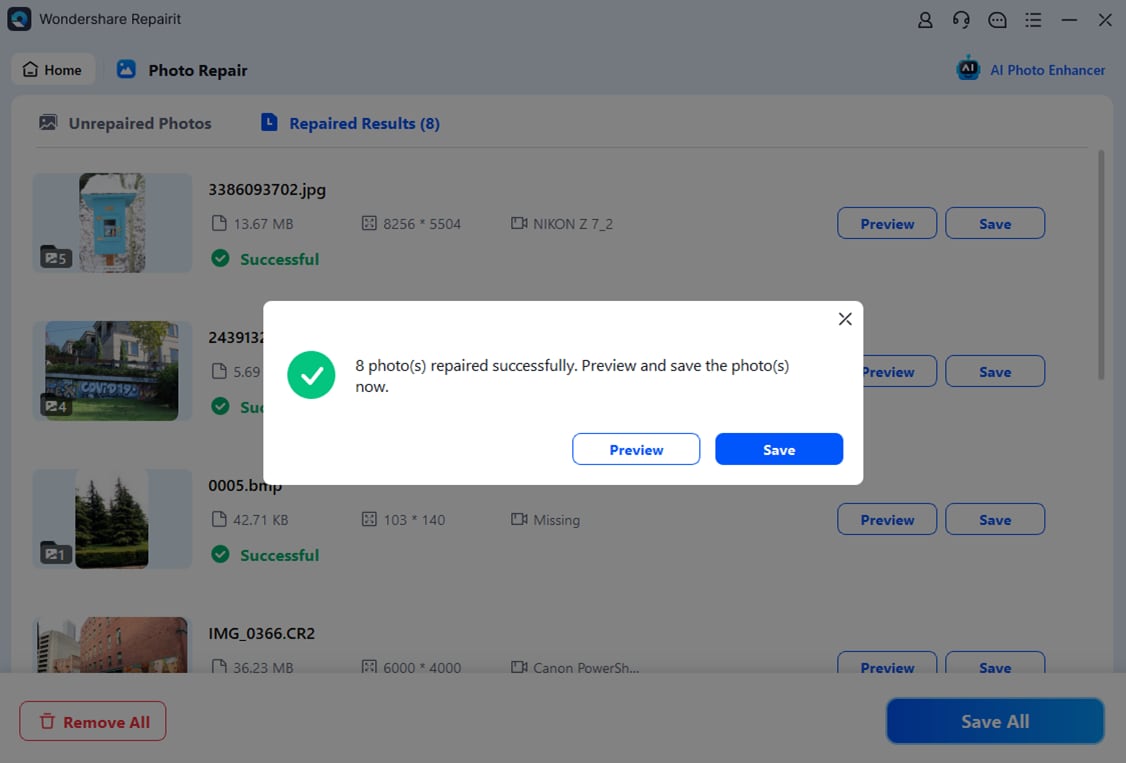
Step 4. Save the Enhanced Photos on PC
Click the “Save” button from the small pop-up and preserve the corrected photo on your device.
Repair Corrupted Photo Files

Conclusion
In short, users can easily remove red eyes in Photoshop by using various tools. While the "Red Eye Tool" in the editing suite is a direct and more suitable method, its other features also allow comprehensive removal. Similarly, when using Photoshop, you can lose access to your media files due to sudden crashes.
To ensure your data is accessible in such cases, tools like Repairit provide advanced photo repair options. Besides, it uses the power of AI to detect corrupted areas in pictures and correct them automatically.
FAQ
-
Q1. Can I remove red eye without Photoshop?
Many tools like Picsart and Fotor provide excellent red-eye removal features to users. It is a straightforward tool when it comes to operations and even provides free-of-cost services. -
Q2. Is there any other way to remove red eye in Photoshop except the Red Eye Tool?
You can easily fix red-eye in Photoshop by using its different features. To do so, open the image in the software and right-click on the "Eyedropper" tool. From the options that appear, select the "Color Sampler Tool." Now, locate the area near the eyes where you can see natural color and click on it. Finally, select the "Color Replacement Tool" and use it to paint the red part on the eyes. -
Q3. Are online tools effective for professional red-eye removal?
Online tools provide excellent editing features to remove red eye without burdening the hardware. However, there is no competition with Photoshop when it comes to advanced editing for professional results. -
Q4. How can I prevent red eye while taking photos?
Users can ensure their pictures come out without red eye by enabling pre-flash in their cameras. For professional shoots, appropriate lighting is recommended to avoid unnecessary reflections.


 ChatGPT
 Perplexity
 Google AI Mode
 Grok
Grok

