
 TL;DR:
⚡ Quick Fix: Fix Windows 10 Thumbnails Not Working
Windows 10 thumbnail preview issues are usually caused by disabled settings, a corrupted cache, or damaged files. Restore your image previews instantly with these 3 fixes:
● Uncheck Icon-Only Mode: Open File Explorer, click View > Options > View tab. Uncheck "Always show icons, never thumbnails" and click Apply.● Clear the Thumbnail Cache: Right-click your system C: drive, select Properties, and click Disk Cleanup. Check the Thumbnails box and click OK to force Windows to rebuild the preview database.
● Repair Corrupted Images via AI: If specific JPEG, PNG, or RAW files refuse to show previews due to broken headers, use Wondershare Repairit Photo Repair to automatically extract and rebuild hidden image thumbnails.
Ask AI for a summary
 ChatGPT
 Perplexity
 Gemini
 Claude
 Grok
Grok
User Query: “After upgrading to Windows 10, only half of my JPEGs show thumbnails. However, when using Windows Picture Viewer, all images are visible. How can I fix this problem?”
Facing Windows 10 thumbnail preview issue? This article offers practical solutions. It’ll guide you through quickly when your Windows 10 photo thumbnail preview’s not working. The page has all the answers you need, from adjusting folder properties to resetting thumbnail caches. Let’s address these concerns and restore seamless image browsing when Windows image preview not working. Read on to learn more.
In this article
-
- Method 1: Check If Thumbnail Preview Is Enabled
- Method 2: Restore File Explorer Options to Default
- Method 3: Use a Dedicated Repair Tool To Preview Images on Windows
- Method 4: Clear Thumbnails Cache
- Method 5: Change the Visual Effect Settings of Windows 10
- Method 6: Use the Command Prompt to Delete Thumbnail Cache
- Method 7: Run SFC Scan
- Method 8: Run the DISM Tool
- Method 9: Scan Your System for Spyware

Part 1. Why You’re Unable To Preview Some Thumbnails in Windows 10?
If your Windows photo preview is not working, various issues might be at play:
- Disabled thumbnails. System optimizations may disable thumbnail generation at times.
- Wrong File Explorer option settings. Incorrect File Explorer settings can disrupt the smooth rendering of thumbnails. It often leads to photo preview issues.
- Glitches with File Explorer. Technical glitches within the File Explorer itself might hinder the proper display of thumbnails. When it happens, it sometimes causes thumbnail preview problems.
- Broken or corrupt system files. Issues with essential system files can result in the malfunction of thumbnail previews. This often requires attention and restoration.
- Issues with the folder. Specific problems, such as permission issues, can impact the generation and display of thumbnails.
- OneDrive full. A full OneDrive can limit the storage available for thumbnail generation. It affects your ability to preview images.

In the next sections, let’s explore comprehensive solutions for fixing common Windows 10 thumbnail preview issues.
Part 2. Top Solutions To Fix Windows Image Preview Not Working
Are you facing issues with Windows image previews? You’re in the right place. Here are several guides to resolve thumbnail preview problems on Windows 10.
Method 1: Check If Thumbnail Preview Is Enabled
Checking the Thumbnail preview setting is the most basic way to troubleshoot your image previews. Follow the steps:
Step 1: Launch Windows Explorer on your system. Go to the top of the screen and click on the View tab. From there, select Options.

Step 2: Within the Folder Options > View tab. Ensure that the Always show icons, never thumbnails option in the Advanced Settings section is unchecked. If it’s selected, uncheck the option, then click OK. The action enables thumbnail preview.

Method 2: Restore File Explorer Options to Default
You can restore File Explorer options to their default settings to resolve photo thumbnails not displaying. Follow these steps:
Step 1: Open File Explorer Options by searching for it in the search bar.
Step 2: Open the View tab, then click the Restore Defaults button. Afterward, click Apply and then OK.
Method 3: Use a Dedicated Repair Tool To Preview Images on Windows
If previous methods fail, consider using Wondershare Repairit as the photo repair tool for your Desktop. The tool specializes in repairing corrupted image files without breaking a sweat. Here are its key features:

Wondershare Repairit - Photo Repair
 Security Verified. Over 7,302,189 people have downloaded it.
-
Repair damaged photos with all levels of corruption, such as grainy photos, dark photos, pixelated photos, faded photos, etc.
-
Repair images of diverse formats, such as JPG, JPEG, PNG, CR3, CR2, NEF, NRW, etc.
-
Repair critically damaged or corrupted photos available on SD cards, phones, cameras, USB flash drives, and more.
-
Repairit has a quick and advanced repair mode. You can use either depending on the level of corruption the photos have undergone.
-
The "AI Image Upscaler" feature can enlarge the repaired photos to 2X, 4X, and 8X.
-
Intelligently restore old / scratched photos and colorize black and white photos with various AI effects.
-
No limit to the number and size of the repairable photos compared with the online version of Repairit.
-
Support Windows 11/10/8/7/Vista, Windows Server 2003/2008/2012/2016/2019/2022, and macOS 10.12~macOS 14.
How To Fix Corrupted Photos Using Wondershare Repairit[a]
Initiate the photo repair process when photo previews are malfunctioning. Here is the detailed step-by-step guide:
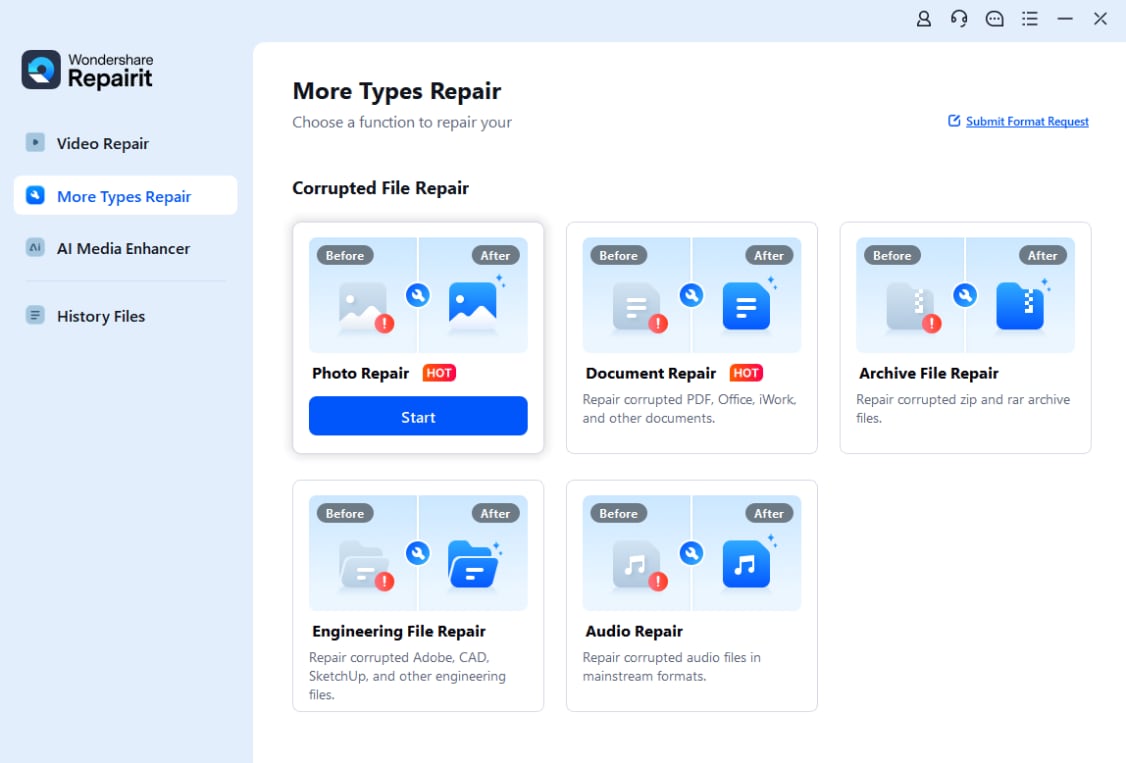
Step 1: Download and install Wondershare Repairit on your Windows PC. Open the application and go to the More Types Repair section in the sidebar. Click File Repair.
Step 2: Click the Add button to open a browser window. From there, go to the directory where your corrupted photos are stored. Upload them onto the app.

Step 3: The window will display your photos or other corrupted files. Click Repair to start the process. Once completed, Repairit will notify you of the result.

Step 4: Review the repair results by clicking Preview. Open the preview window by clicking the image thumbnail. Check file details like name, size, and location. Delete mistaken uploads using the trash icon or remove all with the Remove All button. Add more files with the Add Photo(s) option to continue.

Step 5: To export individual photos, click the Save button next to Preview. Use the Save All button for bulk export. Choose a destination on your computer, and the application will save the selected files.
Method 4: Clear Thumbnails Cache
Thumbnails rely on a cache. If it’s corrupted, picture thumbnails won’t display in Windows 10. Reset the thumbnail cache by:
Step 1: Right-click on . drive in File Explorer and select Properties. Click Disk Cleanup.

Step 2: Check the Thumbnails option in the pop-up window and click OK.
Method 5: Change the Visual Effect Settings of Windows 10
Verify and adjust Windows visual effects settings to display picture thumbnails using the steps below:
Step 1: Type View advanced system settings in the search bar and choose it. Next, go to System Properties > Advanced tab. Under the Performance section, click Settings. In the Performance Options box, select the Visual Effects tab.

Step 2: In the Custom section, choose Save taskbar thumbnail previews and Show thumbnails instead of icons. Click OK to save the changes. Check the folders to ensure photo thumbnails are now visible.
Method 6: Use the Command Prompt to Delete Thumbnail Cache
Alternatively, use Command Prompt to delete the thumbnail cache on Windows 10 with these steps:
Step 1: In the search box, type Command Prompt. Right-click and select Run as administrator. In the Command Prompt, enter the following three commands, pressing Enter after each:
- taskkill /f /im explorer.exe
- del /f /s /q /a %LocalAppData%\Microsoft\Windows\Explorer\thumbcache_.db
- start explorer.exe
Step 2: Press Enter and close the Command Prompt window. JPEG, PNG, TIFF, and other image files’ thumbnail previews should now be visible in Windows 10.

Related Reading:
7 Best Solutions to Videos Not Playing in Windows 10/11
Windows 10 Explorer Keeps Crashing? 10 Workable Fixes!
Method 7: Run SFC Scan
The System File Checker (SFC) scan can rectify system file issues, causing picture thumbnails to not appear in Windows 10. Use the SFC scan by following these steps:
Step 1: In the search box, type Command Prompt. Right-click and select Run as administrator.
Step 2: In the Command Prompt, type “sfc /scannow” and press Enter. Wait for the scan to finish. Once completed, check whether the issue has been resolved.
Method 8: Run the DISM Tool
If the issue persists even after the SFC scan, use the DISM Tool. DISM can repair and update system files to address Windows problems. Follow these steps:
Step 1: In the search box, type Command Prompt. Right-click and choose Run as administrator. In the Command Prompt, enter the following two commands, pressing Enter after each:
- DISM.exe /Online /Cleanup-image /Scanhealth
- DISM.exe /Online /Cleanup-image /Restorehealth
Step 2: Type Exit and press Enter. Allow a few minutes to complete the process, and refrain from interrupting it.
Method 9: Scan Your System for Spyware
Perform a thorough system scan for spyware using a reliable antivirus or anti-malware tool. Spyware can interfere with system functions, potentially affecting thumbnail previews.
Part 3. Why Photo Previews Are Important
Photo previews, represented by thumbnails, play a crucial role in optimizing your computing experience for several reasons:

- Space Saver
Thumbnails act as space-efficient representations of larger images. It offers you a visual overview without consuming excessive disk space. It’s beneficial when dealing with extensive photo collections and conserving storage resources for other essential data.
- User-friendly
Photo previews enhance the user interface, making navigation more intuitive. You can quickly identify and locate specific images. It streamlines the browsing process and reduces the time spent searching for files.
- Interactive
Thumbnails transform file management into an interactive experience. It allows you to engage with the content visually. The visual interaction simplifies the identification of images and promotes an enjoyable visual environment.
Part 4. How To Prevent Thumbnail Previews Not Working on Windows 10
Preventing issues with thumbnail previews on Windows 10 involves implementing proactive measures. It will bring a smooth and efficient experience.

- Ensure Photo Viewer Compatibility
Check that your chosen photo viewer is compatible with Windows 10. Compatibility issues can lead to thumbnail preview malfunctions. That’s why you should choose software that integrates with your operating system.
- Make Backups
Regularly back up your image files. Having backups ensures you can restore your photo library without losing essential thumbnails.
- Insert/Eject Storage Media Responsibly
Always use the proper procedures when working with external storage devices, like USB drives or memory cards. Abruptly removing storage media can disrupt file structures, affecting thumbnail previews.
- Let the Computer Finish Tasks
When downloading or uploading images, allow your computer to complete these tasks before moving away. Interrupting these processes may lead to incomplete or missing thumbnail previews.
- Ensure Consistent Power Supply
Maintain a consistent power supply for your computer. Abrupt power interruptions can result in system instability, potentially causing issues with thumbnail generation. Invest in a reliable UPS (Uninterruptible Power Supply) if power fluctuations are common in your area.
- Don’t Alter the Original Files
Avoid making direct alterations to original image files whenever possible. Instead, use copies or duplicates for edits.
Related Reading:
How to Fix Windows 11 Thumbnails Not Showing Issues?
6 Methods to Fix the "Images Not Showing" Problem on Any Website
Repair JPEG/JPG with 5 Photo Repair Software
Conclusion
Fixing Windows 10 image preview not working issues involves learning these easy and quick methods. If these standard troubleshooting steps prove insufficient, consider using Wondershare Repairit. It’s a comprehensive tool for repairing corrupted images and restore thumbnails.
Using a professional solution offers an effective resolution to persistent thumbnails not showing on Windows 10.
FAQ
-
1. How do I show images as thumbnails?
To display images as thumbnails, ensure your File Explorer settings are configured. Go to the View tab and select Icons. Next, check the Medium icons or Large icons option to view image thumbnails. -
2. Is a thumbnail a PNG or JPG?
Thumbnails are not limited to a specific image format. They can be generated for various formats, including PNG, JPG, etc. The format depends on the original image file. -
3. Is Windows Photo Viewer still supported?
Windows Photo Viewer is still supported in Windows 10. However, newer systems often use the Photos app as the default image viewer. If you wish to, Windows Photo Viewer is still accessible for users who prefer it. Always check for the latest updates to stay informed about software changes.
