There are many possible ways to repair Windows 10 Explorer if it keeps crashing. But there's no one-size-fits-all solution. What works for someone may not work for you. In other words, the solution to your "Windows 10 Explorer keeps crashing" issue depends on the cause.
So, before we jump into these possible fixes, we should start by looking at the various potential causes of the error.
In this article
-
- Possible Fix 1. Change Display Settings
- Possible Fix 2. Close Anti-Virus and Other Background Running Apps
- Possible Fix 3. Clear the Cache, then Create a New Path
- Possible Fix 4. Change File Explorer Options
- Possible Fix 5. Check Account Permission
- Possible Fix 6. Run Your Files through Repairit File Repair

- Possible Fix 7. Disable Thumbnails
- Possible Fix 8. Run CHKDSK
- Possible Fix 9. Update Your Windows
- Possible Fix 10. Update or Reinstall Graphics Card Driver
Part 1. Why Does Windows 10 Explorer Keeps Crashing?
Windows 10 File Explorer may crash from time to time due to the following reasons:
- A software glitch
- Incorrect display settings
- A conflict between the Explorer and a third-party antivirus software
- A corrupt or damaged cached file
- Problematic File Explorer configuration option
- Outdated graphics card drivers
- Outdated Windows
- Damaged or corrupted files
Part 2. 10 Ways to Fix the Windows 10 Explorer Keeps Crashing Issue?
When File Explorer repeatedly crashes, the first thing you want to do is to restart it. To do that, press the CTRL, SHIFT and ESC keys simultaneously (CTRL+SHIFT+ESC) to open the Task Manager. Within the Task Manager, choose the Processes, then find and select Windows Explorer. Now click the Restart button at the bottom right corner.

That will restart File Explorer, which ought to be the end of the problem. You can also resolve the issue by restarting your computer.
But if the problem persists, one of the following methods should fix it:
Possible Fix 1. Change Display Settings
Change the display settings and see if it fixes the "Explorer Exe keeps crashing Windows 10" issue. Here's how:
Step 1: Right-click any area on the desktop and click Display Settings.

Step 2: Change the "Display resolution" to the recommended 100%. However, you can choose other options except 175%.

Possible Fix 2. Close Anti-Virus and Other Background Running Apps
To close anti-virus and other background running apps:
Step 1: Press CTRL + SHIFT + ESC simultaneously. This will launch the Task Manager.
Step 2: In the Task Manager, click Processes.
Step 3: You'll see many columns within the Processes tab. Look at the description column and locate the process related to the "AVG anti-virus."

Step 4: Choose the anti-virus process from the list. Then click the End Task button at the lower right corner.

Step 5: Click Yes if prompted to confirm your action.
Possible Fix 3. Clear the Cache, then Create a New Path
The Windows 10 File Explorer stores a history of recent files and folders. Some of these can sometimes become corrupted, causing issues such as crashing. Clearing this history may help. Fellow these steps:
Step 1: Right-click File Explorer in the toolbar, then choose "Unpin from taskbar."

Step 2: Hit the Windows + S buttons and type File Explorer Options. Click Open.

Step 3: In the General tab, hit the Clear button next to "Clear File Explorer history."

Step 4: Exit the tab, right-click a space on your desktop and tap New, then choose Shortcut.

Step 5: Type C:\Windows\explorer.exe inside the dialog box, then click Next.

Step 6: Rename the file to "File Explorer" and click Finish.

Possible Fix 4. Change File Explorer Options
The File Explorer has different configuration options, which can affect its performance. Modifying these settings may help prevent crashes:
Step 1: Hit the Windows + S keys. Type "File Explorer," then choose Open.

Step 2: Click View and then select Options.

Step 3: Head over to the General tab. Here, set the "Open File Explorer to:" option to "This PC" instead of "Quick access."

Step 4: Under Privacy, uncheck the two options for showing files in Quick Access. After that, click Apply, then OK.

Possible Fix 5. Check Account Permission
Does Windows 10 Windows Explorer keep crashing whenever you try to access a specific folder? If yes, you need to check if you have full permission to access this folder.
Follow these steps:
Step 1: Launch File Explorer, then right-click the problematic folder. Choose Properties.

Step 2: Head over to the Security tab, then select Advanced.

Step 3: Click "Change" next to Owner. Input the object name (administrator) inside the box under the "Enter the object name to select."

Step 4: You can click Check Names to ensure that the name is correct. Click OK to exit the tab and then click OK to save the changes.
Step 5: In User Properties, choose Security, then click Edit to change permissions.
Step 6: In the Permission for Administrators section, check "Allow for Full Control." Click OK to save the changes.

Possible Fix 6. Run Your Files through Repairit File Repair
Corrupted files in the systems may also cause File Explorer to misbehave. The corruption may be a result of virus infections, some hardware failures, or unexpected power outages. These factors can lead to Windows' inability to read files correctly, leading to the constant crashing of File Explorer.
And if you've tried all the above methods unsuccessfully, your files are likely corrupt. Repairit File Repair can restore these files in a few clicks and, hopefully, fix the crashing problem.

-
Repair damaged files with all levels of corruption, including blank files, files not opening, unrecognizable format, unreadable content, files layout changed, etc.
-
Support to repair all formats of PDF, Word, Excel, PowerPoint, Zip, and Adobe files.
-
Perfectly repair corrupted files with a very high success rate, without modifying the original file.
-
No limit to the number and size of the repairable files.
-
Support Windows 11/10/8/7/Vista, Windows Server 2003/2008/2012/2016/2019/2022, and macOS 10.12~macOS 14.
To repair your files:
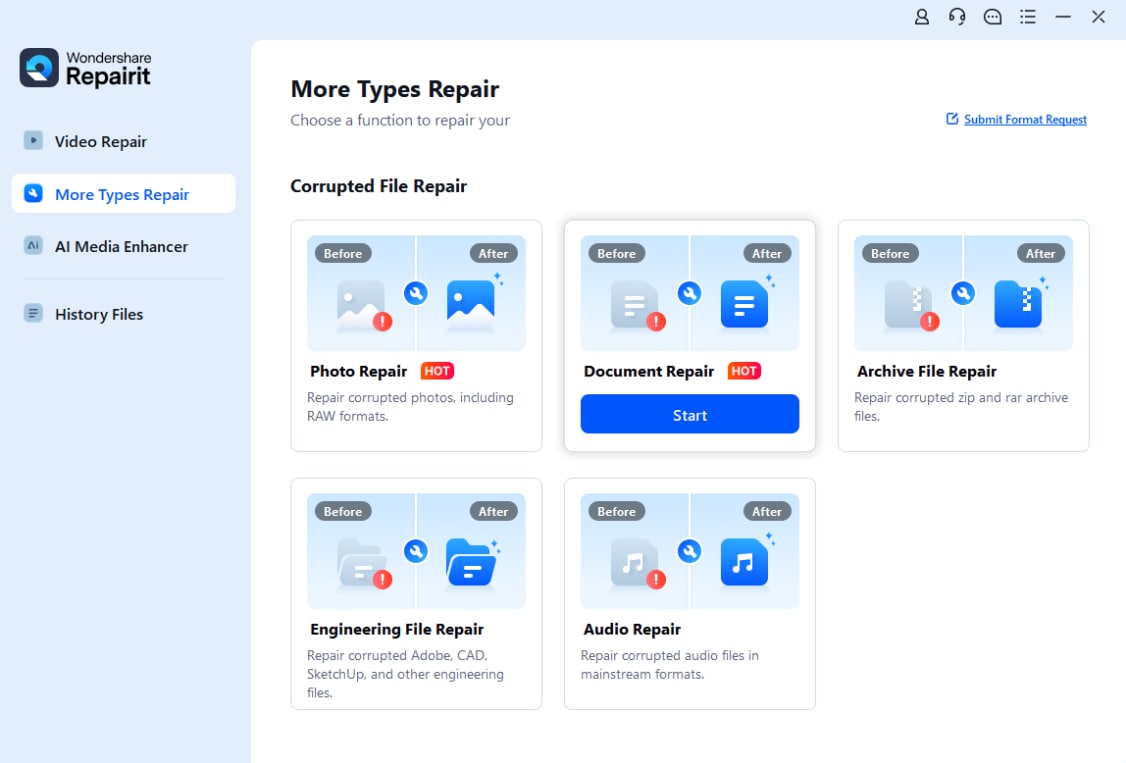
Step 1: In the More Types Repair mode, click the +Add button to upload your corrupted files.

Step 2: Hit the Repair button to kick start the repair process.

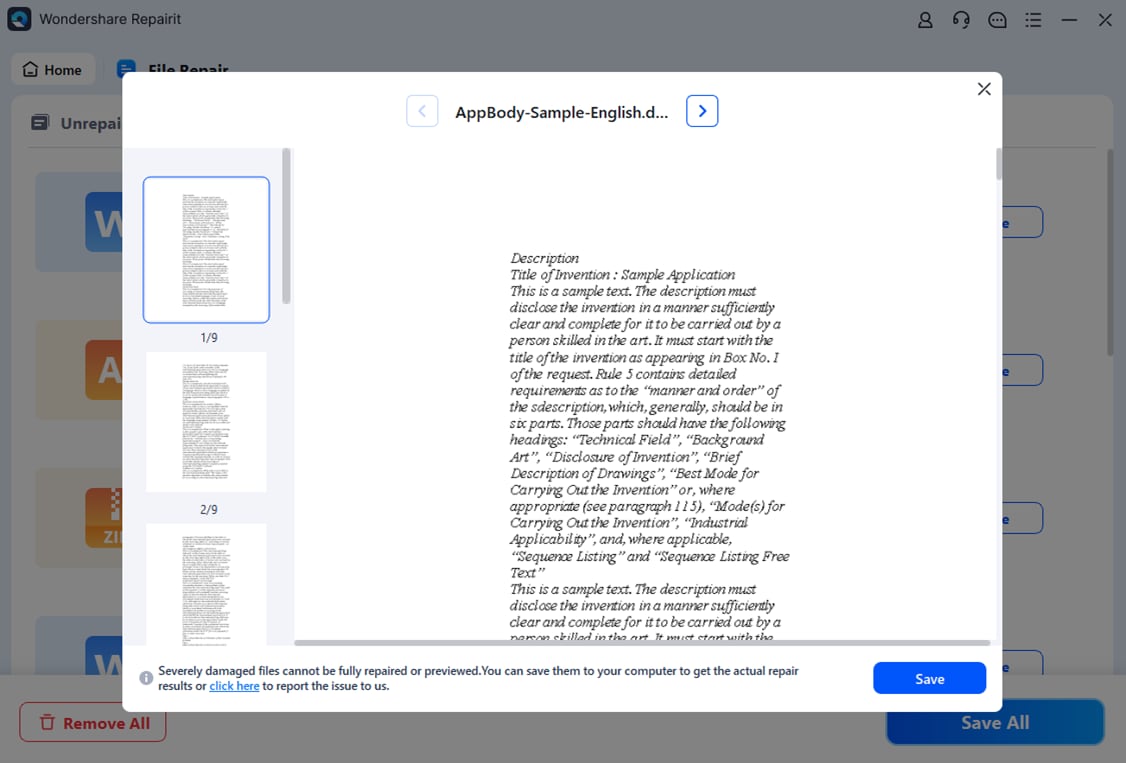
Step 3: Preview the repaired files and save them to a desired location.

Try Repairit to fix corrupted files on Windows 10

Related articles:
How to Fix the Explorer.exe Has Stopped Working Error
Possible Fix 7. Disable Thumbnails
Thumbnails can cause the "Windows Explorer keeps crashing Windows 10" issues. That's especially true when a folder has several images. Therefore, disabling thumbnails can solve the problem.
Here's how to disable thumbnails in Windows 10:
Step 1: Type "control panel" in the Search bar to launch the Windows Control Panel.
Step 2: Set View By: to Large icons, then click File Explorer Options.
Step 3: Navigate to the View tab. Here, check "Always show icons, never thumbnails." Click Apply, then OK to save changes.

Possible Fix 8. Run CHKDSK
Disk errors are notorious for causing instability in Windows. This instability can, sometimes, lead to problems like the "File Explorer Windows 10 crashing."
Here's what you need to do:
Step 1: Hit the Windows + X buttons, then choose Windows Powershell (Admin).

Step 2: Type chkdsk/f and hit Enter.
Step 3: Follow the screen prompts and schedule a check on the next reboot. Type Y and hit Enter.
Possible Fix 9. Update Your Windows
Another easy solution is updating Windows. Keeping the operating system up to date may not only fix the "Windows 10 Windows Explorer crashing" but may also resolve many other issues.
Follow the following steps to find out if your Windows needs to be updated:
Step 1: Hit the Windows + I buttons to open Settings.
Step 2: In the Settings tab, select Update & Security.
Step 3: Select Windows Update, then click "Check for updates" on the right panel.

Step 4: If any updates are available, Windows will begin to download them automatically. Once the process is complete, restart your computer, then check if the issue is gone.
Possible Fix 10. Update or Reinstall Graphics Card Driver
Update your graphics card driver to fix the File Explorer crashing problem in Windows 10. Follow these steps:
Step 1: Press Windows + X to open Device Manager.
Step 2: Expand the Display Adapters category. Right-click your graphics card, then select Uninstall device.

Step 3: Check the "Delete the driver software for this device," then check Uninstall.
Step 4: Restart your PC, and it will automatically reinstall your graphics card.
The constant crashing of File Explorer should now be resolved.
Conclusion
You now know the measures to take if you encounter the "Windows 10 Explorer keeps crashing" issue. Begin with the quick fixes, then proceed to the more detailed methods discussed in the guide.
FAQ
-
How do I restart Windows 10 File Explorer?
To restart Windows 10 File Explorer, open the Task Manager and locate the Explorer on the task list under Processes. Right-click the File Explorer task, then select Restart. -
What is the quickest way to resolve Windows 10 File Explorer issues?
Restarting your computer is the quickest way to resolve Windows 10 File Explorer issues. Restarting the PC can also fix many other random bugs that could be hampering your system's proper functioning. -
Why Is File Explorer in Windows 10 not responding?
The Windows 10 File Explorer may remain unresponsive for a myriad of reasons. One of the most common reasons is interference from recently installed applications. Sometimes, apps can change various system settings, causing File Explorer to lock and/or slow down the computer's performance.


 ChatGPT
 Perplexity
 Google AI Mode
 Grok
Grok

