“New features and UI of Windows 11 seems super cool. I heard that Windows 11 is available for upgrade for free from Windows 10. However, I don’t know how to update to Windows 11. I have searched on the internet for Windows 11 guide, but none of them has been helpful so far!” -- User on the internet.
Microsoft Windows 11 comes with an all-new user interface and tons of new features. The most exciting feature of Windows 11 is its new UI which is much better than any Windows version before.
If you are looking to upgrade to Windows 11 from your existing Windows 10/8.1/7, this is the right article for you. Also, if you feel confused like the user above, then there is no need to be. Our ultimate one-in-all guide will enlist all Windows 11 requirements and how you can upgrade to it.
In this article
Part 1. Windows 11 Update Requirements
Windows 11 comes with some pre-defined system requirements that are needed to run Windows 11 smoothly on your PC.
Let’s see each requirement one by one:
Processor: Windows 11 comes with tons of new features. To run those features, Windows 11 require at least 1 gigahertz (GHz) or a faster processor. You need at least two or more cores and a 64-bit compatible processor.
RAM: W4 gigabytes (GB) or greater RAM is at least required to support Windows 11.
ROM/Storage: Windows 11 takes almost 64 GB of free space on your system. Make sure you have enough space before you begin with Windows 11 installation.
System Firmware: Your system must have secure boot enabled for Windows 11 to install and run.
Graphics Card:Windows 11 is compatible with DirectX 12 or higher. Also, it needs WDDM 2.0 driver.
TPM 2.0 Support:Microsoft has made Trusted Platform Module (TPM) mandatory for Windows 11 operation.
Monitor Color Channel: Windows 11 comes with the most enriched user interface and user experience. To enjoy the full of it, you need at least 8 bits per color channel screen. An HD 720pixels display is ideal for Windows 11 usage.
Internet Availability: You need a viable internet connection while installing Windows 11. The internet helps Windows 11 to download and install all the necessary updates.
Microsoft Account: Last but not least, you need Microsoft Account to complete the setup installation of Windows 11.
The requirements mentioned above are necessary to download and install Windows 11 on your computer. If you want to check your system eligibility for Windows 11, just hold on and read the next part of the article.
Part 2. How to Update Windows 11 from Windows 10/7/8.1?
If you are an existing Windows 10/7/8.1 user, then the good news is that you can upgrade to Windows 11 easily. But before you go for the upgrade, you need to check if your system supports Windows 11 or not.
PC Health Check Application
W4 gigabytes (GB) or greater RAM is at least required to support Windows 11.
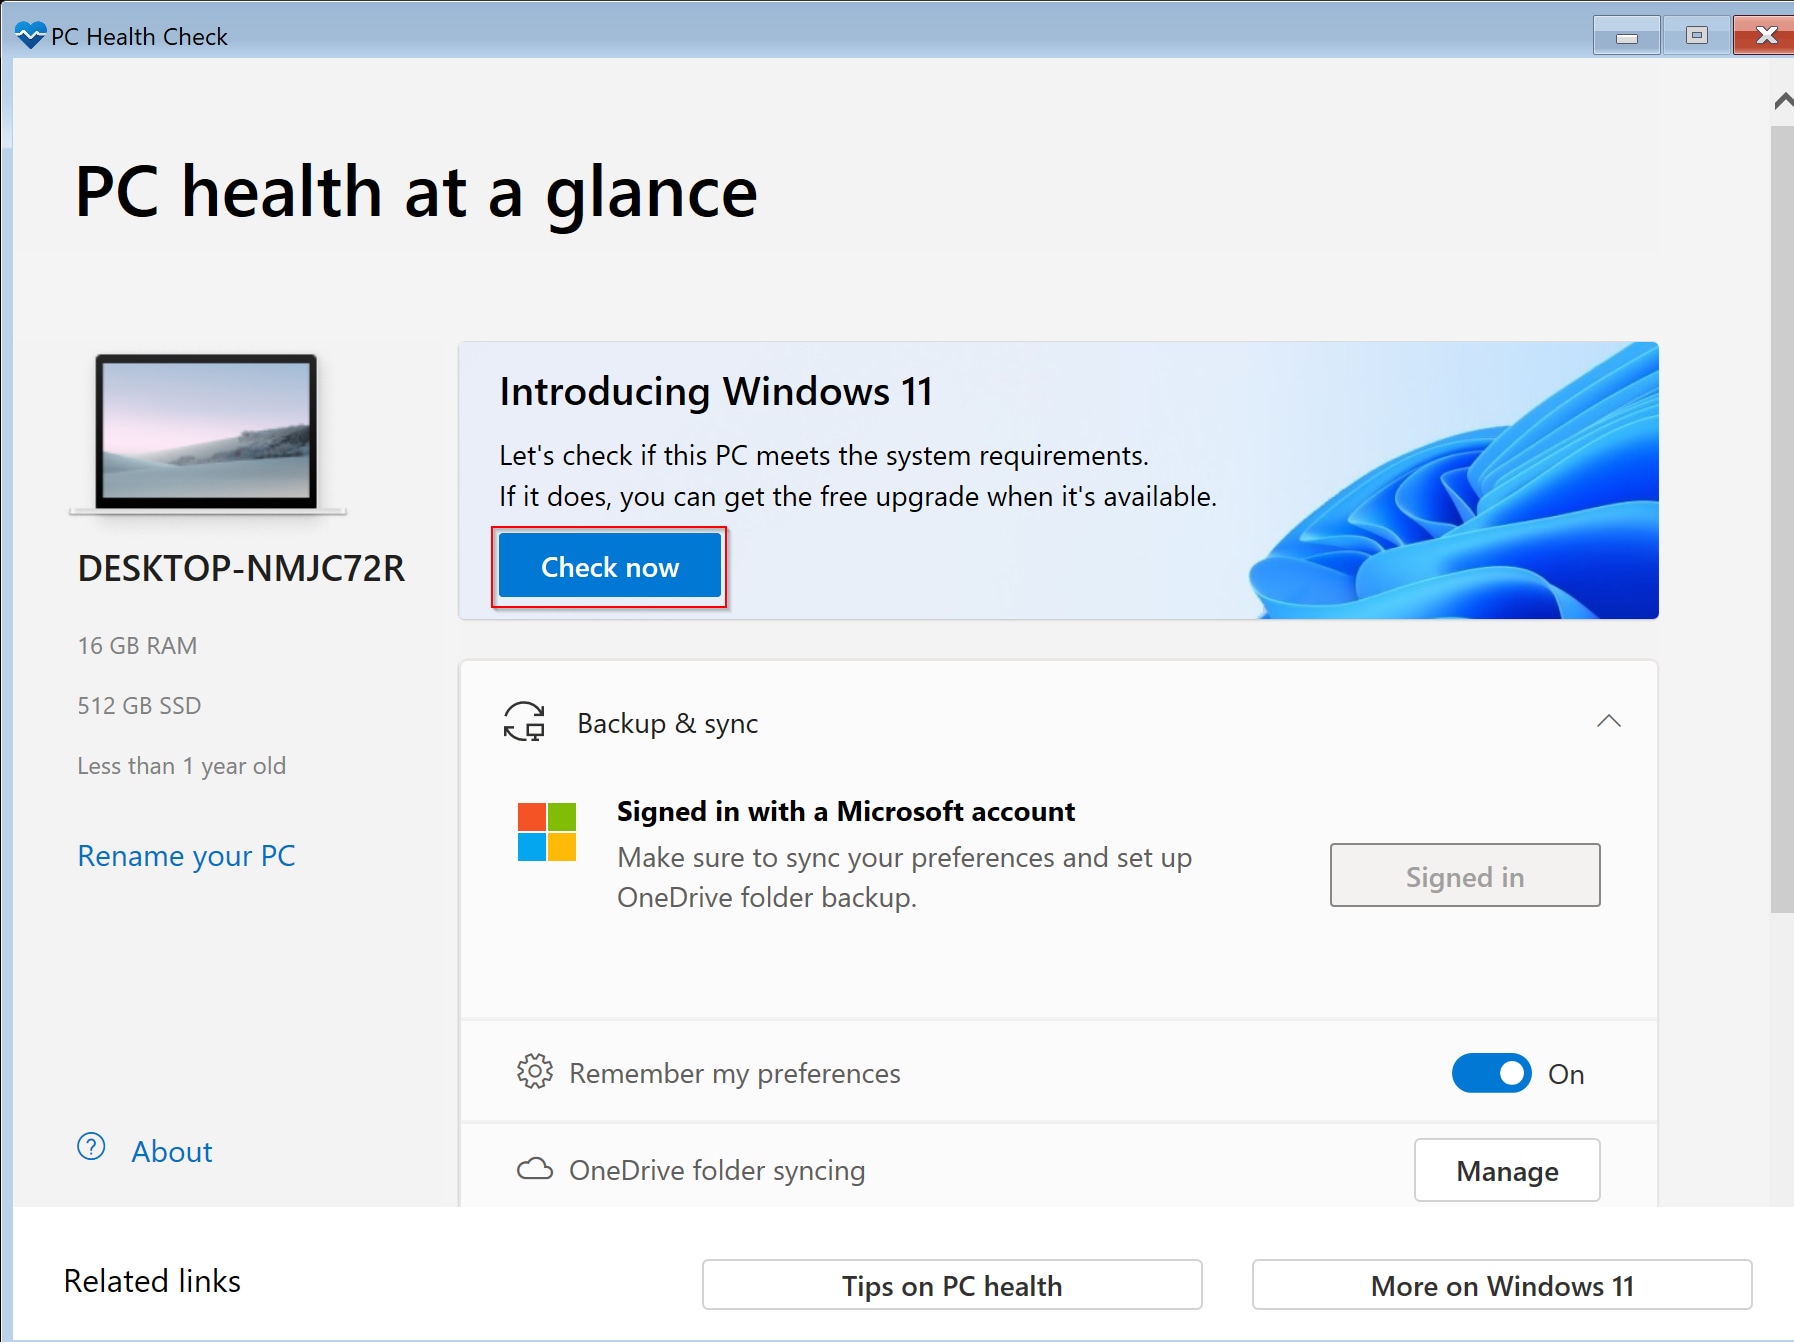
The first part of our article enlists the detailed Windows 11 requirements. But, if you are unsure about your PC eligibility for Windows 11, then the PC health app can help. Microsoft has released its PC Health check app, which can be downloaded from the Windows store.
If you have automatic updates turned on, this app will be installed by default. The primary purpose of this application is to help people see if they meet the minimum requirements to update to Windows 11 or not.
Launch your PC Health check app and click on Check now button from its main interface screen. The app will automatically check your system against all minimum Windows 11 requirements. At the end of its run, you will see a result indicating if you meet the requirements for Windows 11 or not.
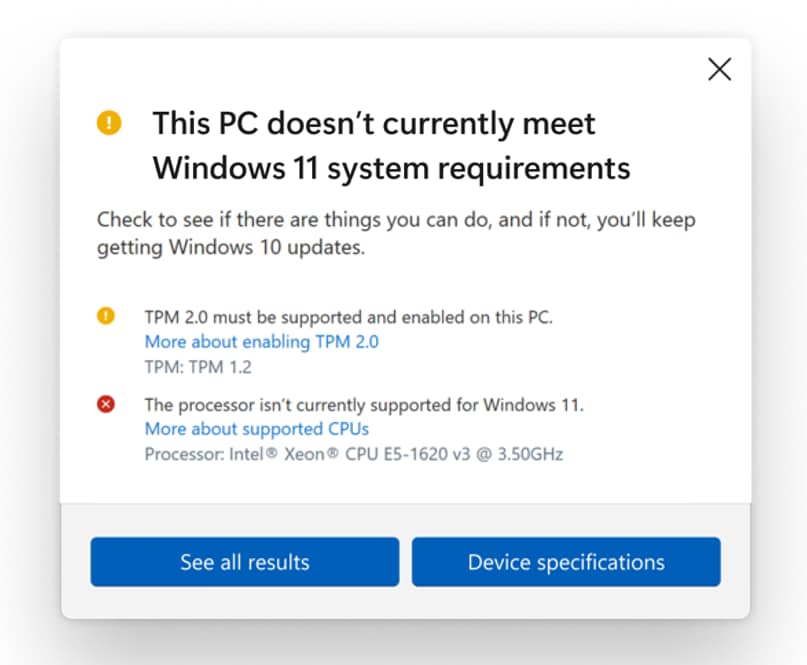
Once you have checked your system against requirements, you are all set to upgrade to Windows 11. Below are the upgrade options available for Windows 11.
Internet Availability:
You need a viable internet connection while installing Windows 11. The internet helps Windows 11 to download and install all the necessary updates.
1. Upgrade to Windows 11 from Windows 7
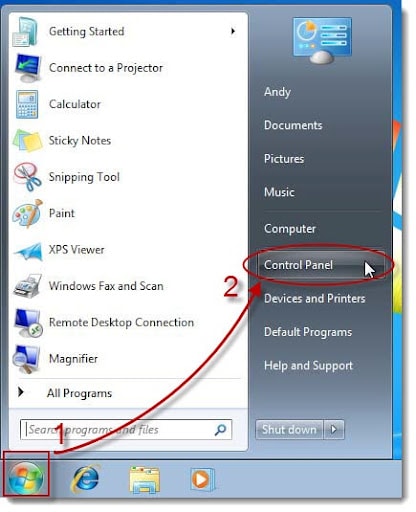
Step 1: Click on the Start button and then open Control Panel from there.
Step 2: From Control Panel, click on the Windows Update button. Clicking on that will take you to a new Windows Update page.
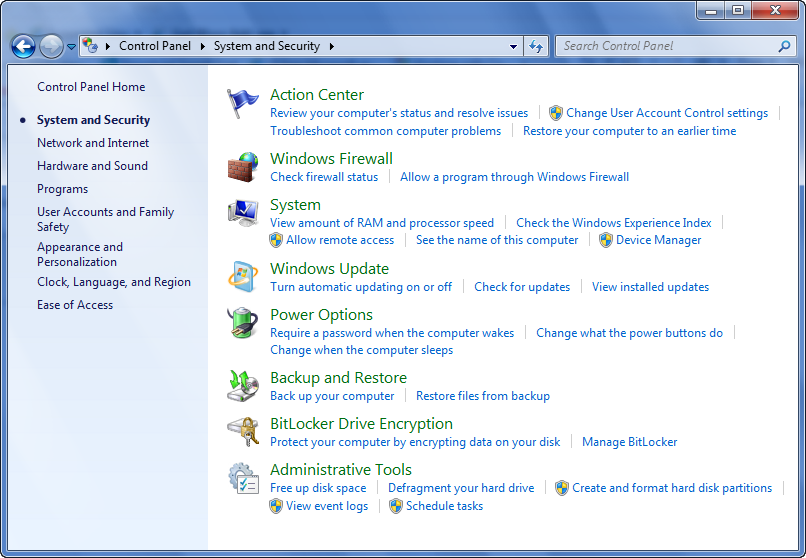
Step 3: On the Windows Update page, select the “Check for Updates” button. Once you have clicked on it, your computer will start to look for recent updates.
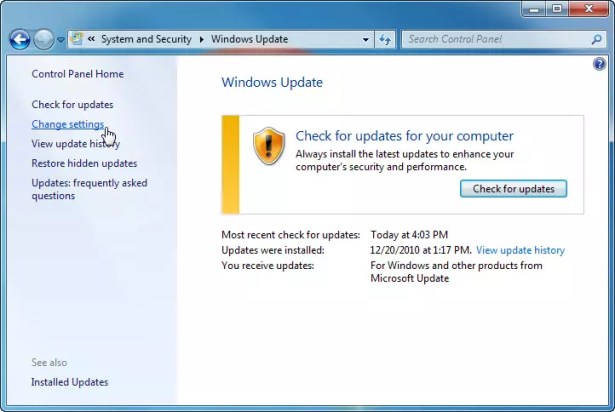
Step 4: Once the searching is complete, you can click on the Install updates button, and all the new updates, including Windows 11, will be installed on your system.
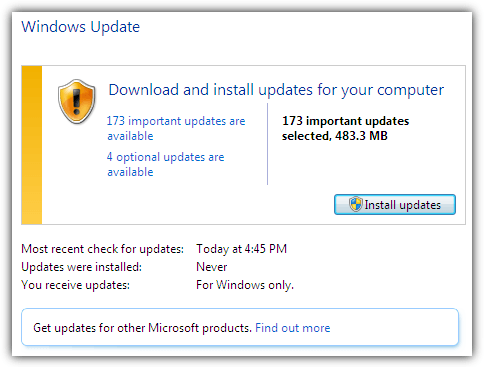
Note:
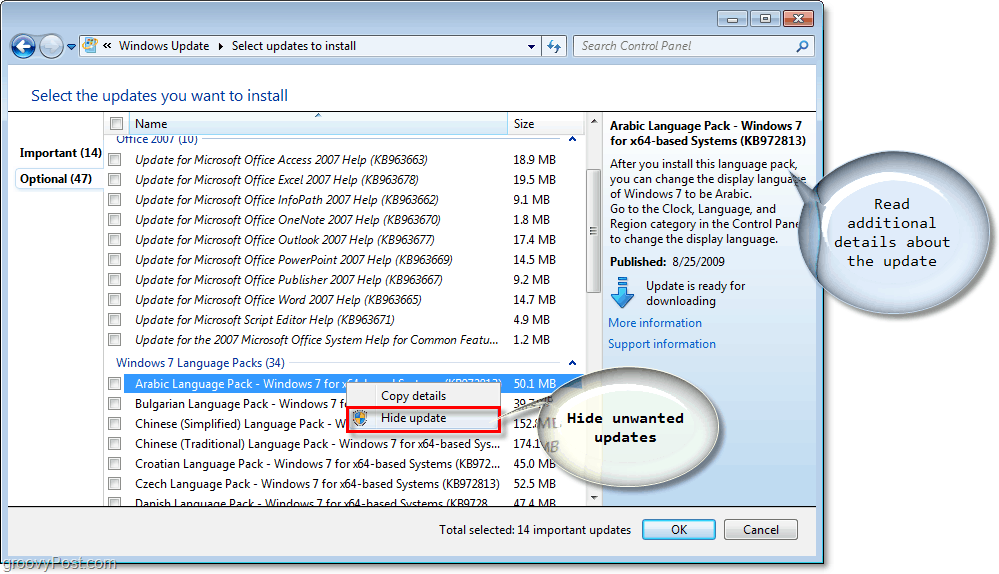
You can also see the optional updates and essential updates section. You can view them to see the exact updates that are available to you.
Here you can see the list of things that are available for update. If you just wish to upgrade to Windows 11, select Windows 11 update from the list and install that one only.
2. Upgrade to Windows 11 from Windows 8/8.1
You can not directly upgrade to Windows 11 from Windows 8/8.1. First, you must upgrade your Windows 8/8.1 to Windows 10 and then ultimately upgrade to Windows 11.
Step 1: Go to Microsoft’s website and download Windows 10 tool.
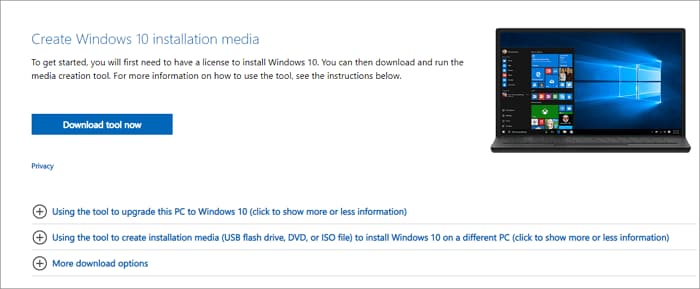
Step 2: Open the tool once it is downloaded.
A window will appear which will ask your permission regarding changes to your computer. Please select Yes from it.
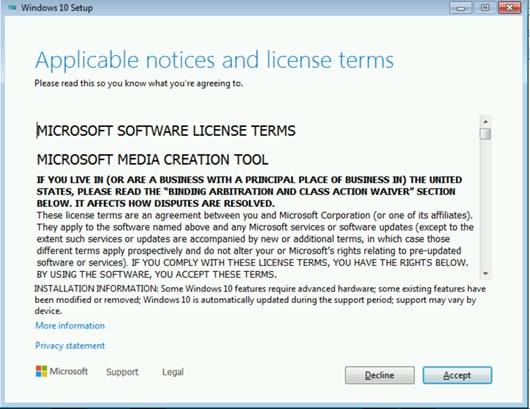
Step 3: Windows 10 setup will begin. Just accept the terms and click on Accept button.
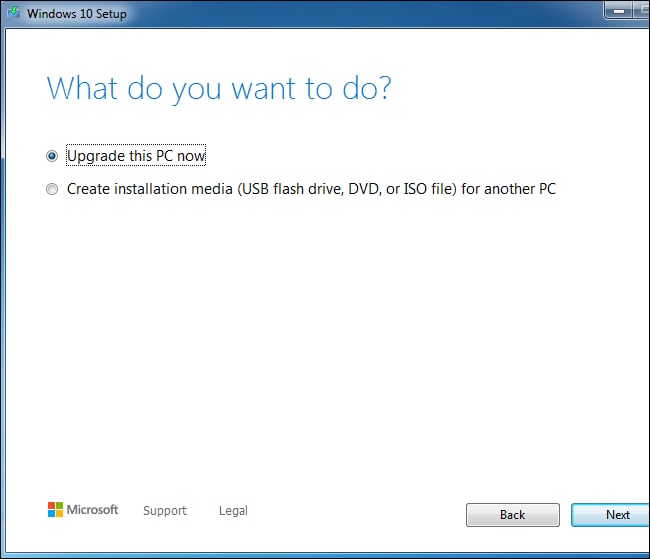
Step 4: From the next Windows, choose the Upgrade this PC now option. Once chosen, click on the Next button.
Step 5: Once you have your system updated to Windows 10, you need to check Windows updates to update it to Windows 11.
Step 6: In the search bar, type Windows Update Setting and open them.
Step 7: A new window will open. Select Windows Update from there.
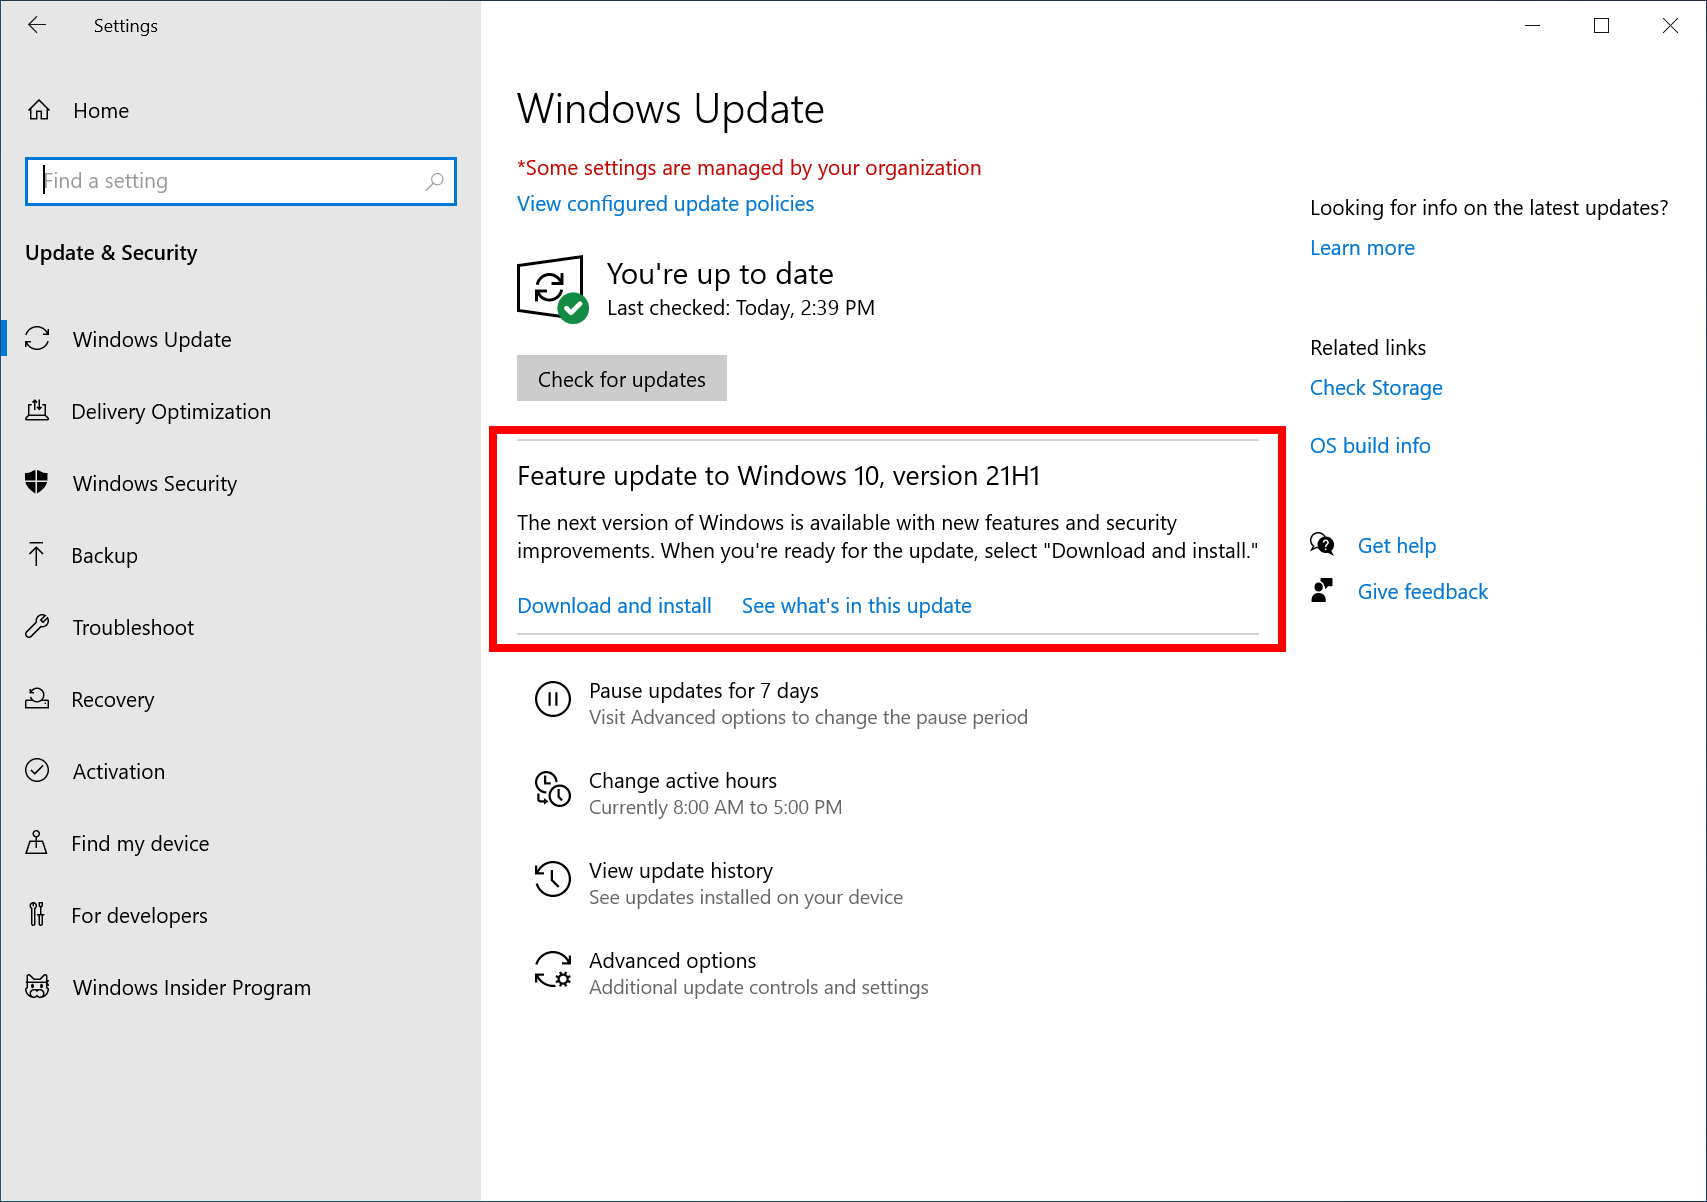
Step 8: Your PC will check for new updates and will take a while. Once checked, it will download Windows 11 update file and store it in your downloads folder.
Step 9: Go to your downloads folder and double-click on the Windows 11 update file.
Step 10: Proceed with the installation steps and then enter your Windows product key and select OK.
Once the setup is complete, your system will restart and boot up with a new Windows 11.
3. Upgrade to Windows 11 from Windows 10
It is straightforward for Windows 10 users to upgrade to Windows 11. They can do it just like a regular feature update. Follow the below steps:
Step 1: Type Windows Update Setting in the search bar and open it.
Step 2: Select the Windows Update option in the new Window.

Step 3: It will take some time for your PC to check for new updates. It will download the Windows 11 update file and save it to your downloads folder.
Step 4: From your downloads folder and double click on the Windows 11 update file.
Step 5: Proceed with the installation steps and then enter your Windows product key and select OK.
Upon completing the update setup, your system will restart and boot up with a new Windows 11.
Conclusion
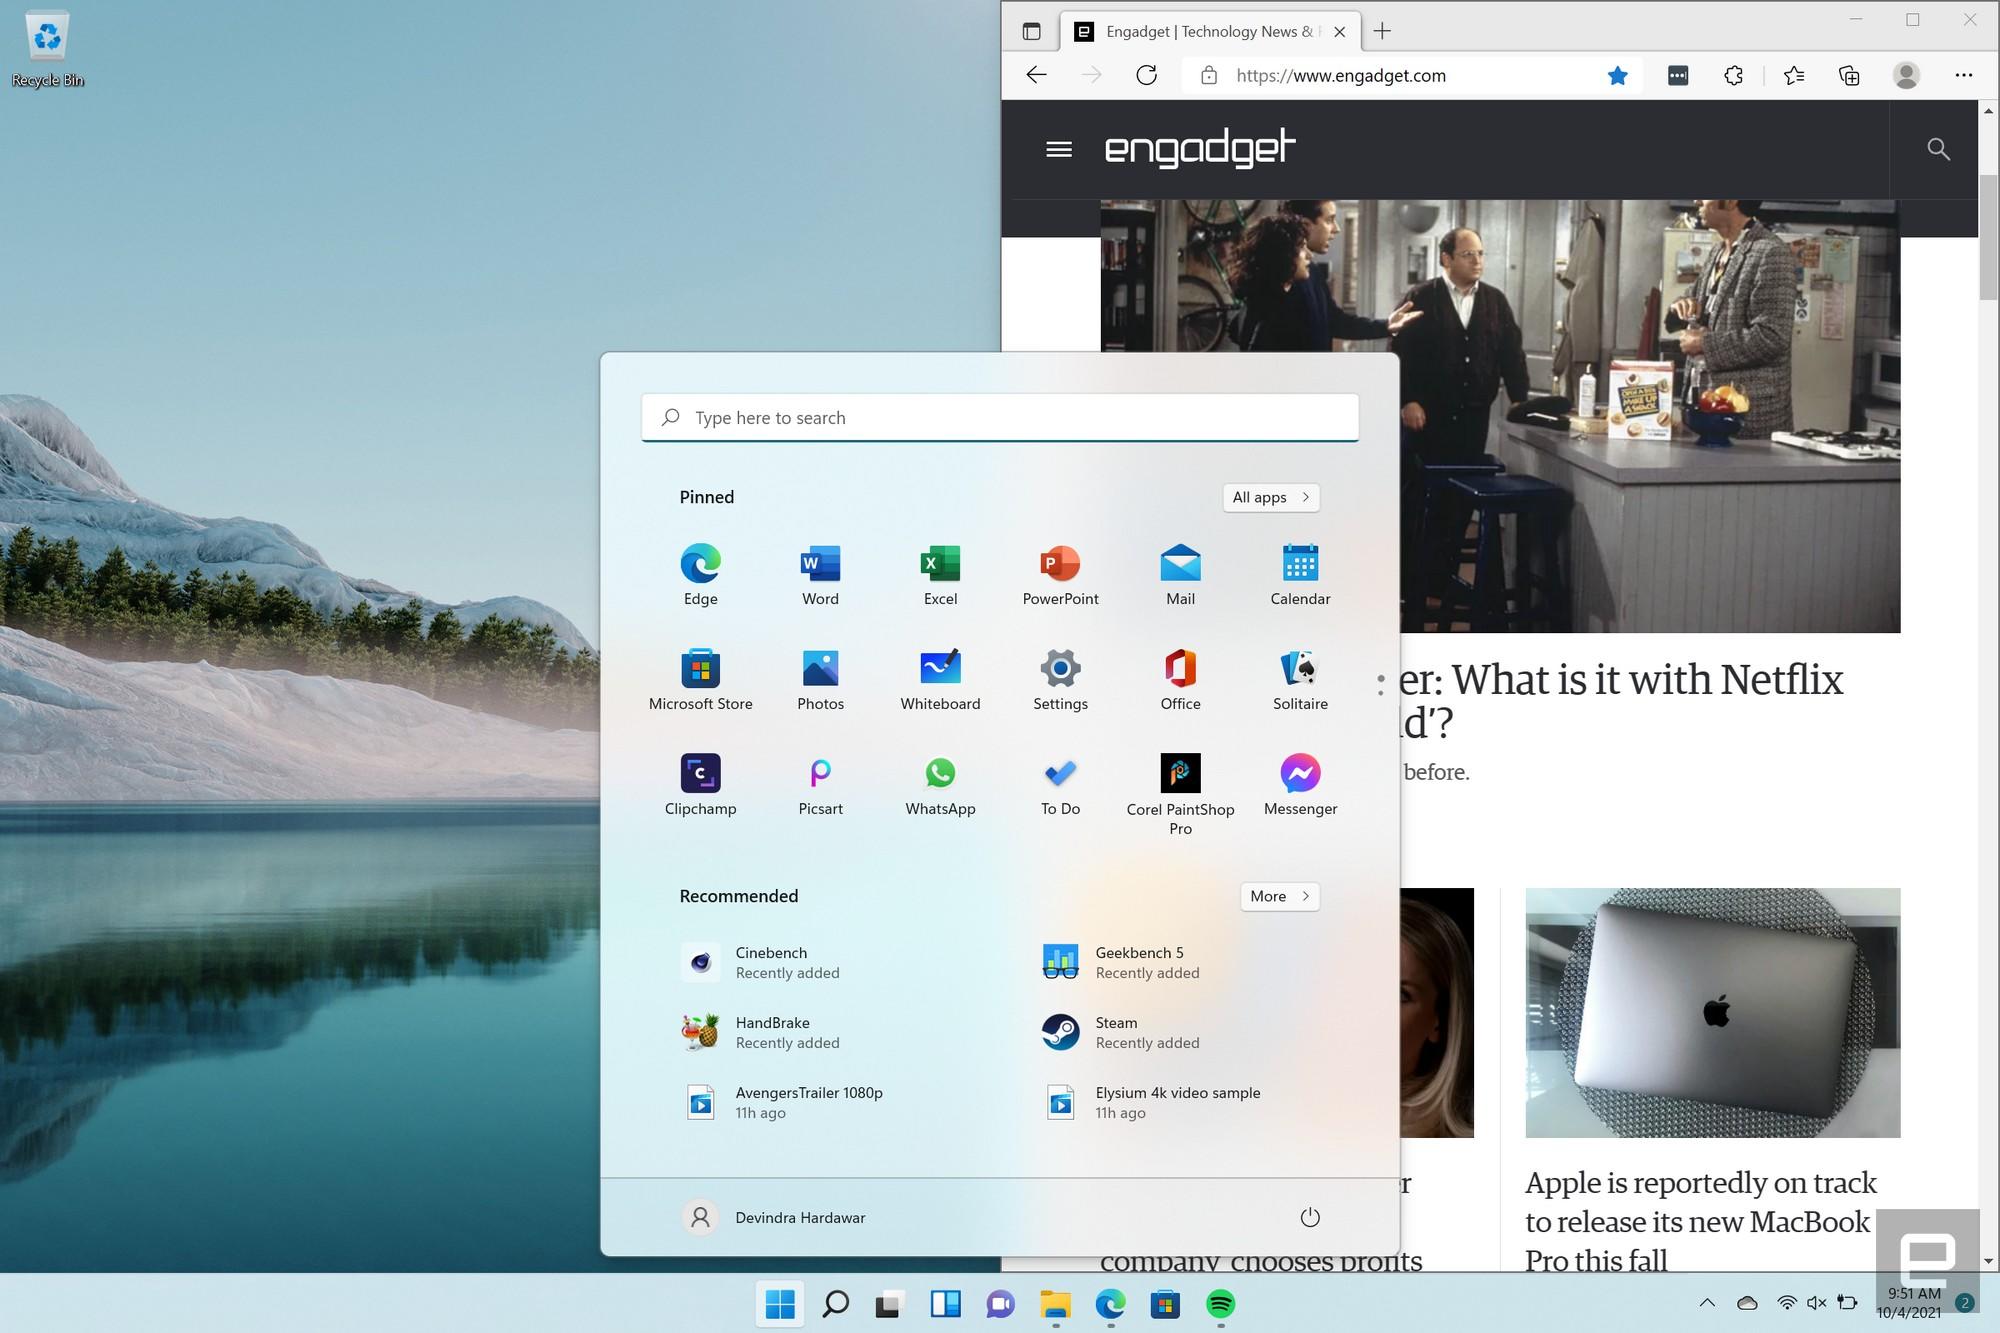
Windows 11 is the most significant update from Microsoft of their operating system in recent years. The primary focus of Microsoft was to revamp the whole user interface to enrich the user experience.
Along with the focus on user experience, Windows 11 focuses on boosting work productivity. Microsoft has even made MS-Teams as the built-in application in their new Windows 11.
Since its release on October 5, 2021, Windows 11 has taken colossal popularity. Users are looking to upgrade to Windows 11. Therefore, we provided an ultimate guide that covers all the minimum requirements needed to install Windows 11. Also, our guide includes how you can check if your system is eligible for Windows 11 update.
By following the rest of the article, you will be able to upgrade your Windows 7/8/10 PC to Windows 11 successfully.
If some of your essential photos or videos got corrupted due to Windows 11 upgrade, you could use Wondershare Repairit software. It is highly recommended and repair your photos and videos in simple steps.
Wondershare Repairit is an effective and safe file repair software. This third-party software can quickly get back corrupted, formatted files on Windows Computer, irrespective of the file type and format.

 ChatGPT
 Perplexity
 Google AI Mode
 Grok
Grok
