
Smooth audio is essential for an immersive experience when streaming media content. Yet, issues with audio can disrupt enjoyment and lead users to troubleshoot for solutions. One common scenario that many users encounter involves unexpected sound problems. Kodi is a popular open-source media player that offers an effortless entertainment experience.
However, some users have encountered the frustrating issue of no sound output. This guide will walk you through the common causes of the Kodi no sound issue and provide clear solutions. We will provide step-by-step guides to ensure a return to uninterrupted streaming with quality sound.
In this article
Part 1. What are the Different Reasons and Cases Behind the Kodi No Sound Problem?
Before attempting any fixes, it is important to understand why this issue is occurring in the first place. There are several potential reasons and cases that may lead to audio issues on Kodi. Understanding these causes can help pinpoint the problem more effectively. Summarized below are the common reasons and cases for Kodi no audio issues:
1. Corrupted Videos
Sometimes, the media file itself may be the problem due to being damaged or corrupted. If you try to play a corrupted video file, you may face no sound and many other issues.
2. Incorrect Audio Settings
Kodi has a range of configurations that must be properly configured for optimal sound output. Incorrect settings, such as the wrong audio output device, sample rate, or digital audio format, can result in no sound.
3. Incompatible Audio Drivers
Corrupted or outdated system drivers on your device can interfere with Kodi’s audio output. Keeping your drivers updated helps maintain compatibility and prevents sound issues.
4. Outdated Software
Running an old version of Kodi can lead to compatibility issues, including sound problems. It usually happens due to the accumulation of bugs and glitches within the program.
5. Third-Party Add-ons
Some extensions can interfere with Kodi’s core functionality, including sound. It might be worth disabling if you recently installed or updated an add-on.
Part 2: What is the Purpose of a GoPro THM Files?
When you encounter such issues, a systematic approach to troubleshooting can quickly help restore audio. The following are 4 effective methods to resolve the Kodi no-volume error, covering adjustments to both settings and hardware. These solutions target common issues, from device compatibility to software configuration to restoring audio without hassle.
Way 1. Use the Latest Version of Kodi
Since outdated software can be a major cause of the error, you should start by upgrading to the newest available iteration. Doing this will improve functionality and enhance compatibility with new audio and video formats. Running an outdated version can lead to compatibility issues due to software bugs. Follow these steps to upgrade the software to resolve no audio Kodi issue:
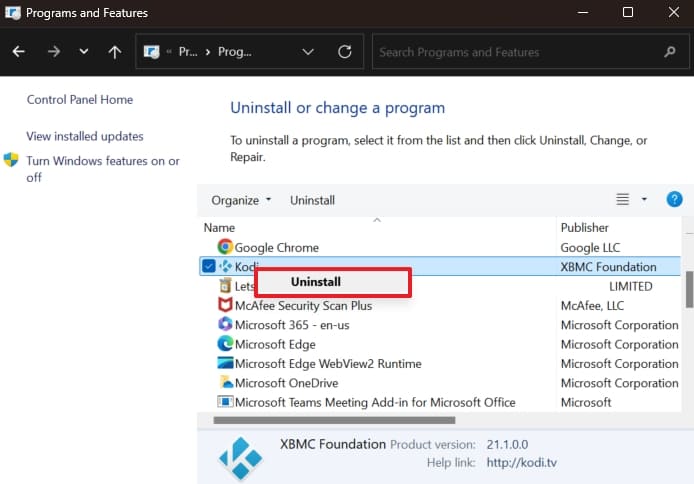
Step 1. Approach the “Control Panel” on your Windows computer and opt for “Uninstall a program” from “Programs.” On the subsequent screen, find Kodi in the list of installed programs and select “Uninstall” after right-clicking it.
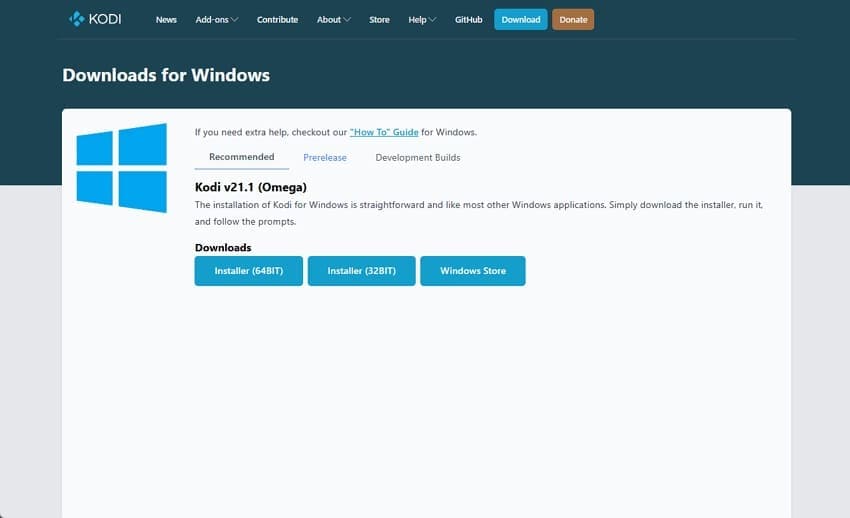
Step 2. Once the software has been removed from your system, visit the official Kodi website to get the new version from “Download.” Afterward, install the software and launch it to play videos to see if the sound is back.
Way 2. Properly Configure the Audio Settings
Kodi has various configurable sound options; too many changes can sometimes create issues. Adjusting these settings can often resolve the no-sound problem quickly, letting you stream in peace. Doing so can also resolve mismatches in different audio devices being used with this tool. The following instructions can help you fix the no audio on Kodi problem:
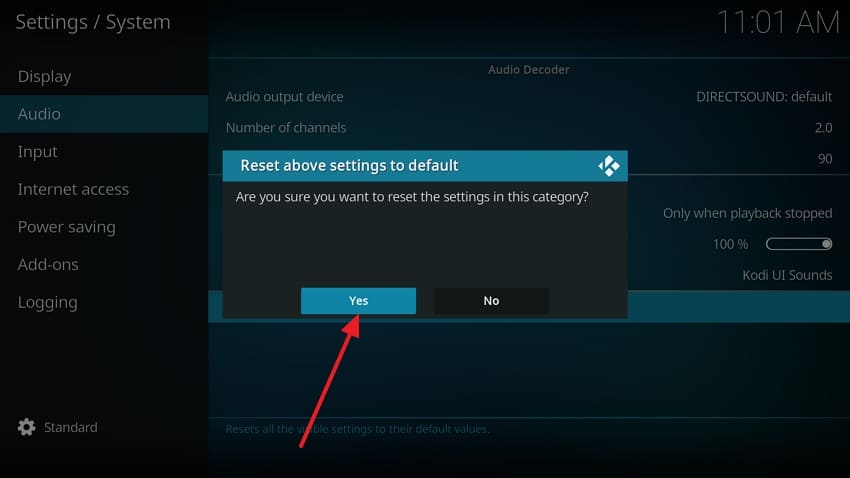
Step 1. Launch the software and click the “Gear” icon from the left side panel to access app settings. Now, click “System” from the available option and move to the “Audio” tab on the next window.
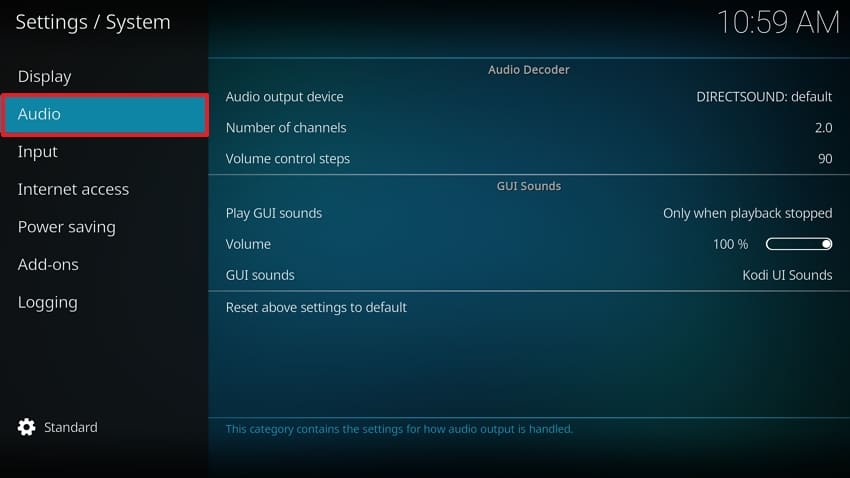
Step 2. Here, tap “Basic” from the bottom left corner a few times until it gets replaced by the “Expert” option. Finally, hit “Reset above settings to default” and confirm your choice via “Yes” to restore the audio configurations to their default.
Way 3. Update the Kodi Add-ons
Many users rely on third-party extensions to access additional content, which can sometimes create problems. This happens when they conflict with the main application or become outdated. Regularly updating your add-ons ensures you benefit from the latest features and compatibility improvements. The steps needed to fix no sound from Kodi via this upgrading of extensions are the following:
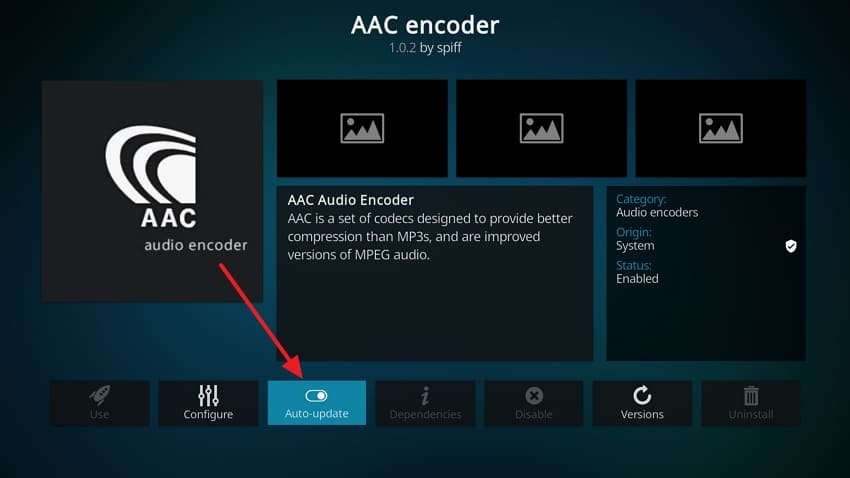
Step 1. Once the media player is running, hit the “Gear” icon from the left side to choose “Add-ons” on the following screen. Here, find the extension that is creating issues for you and right-click it to select “Information.”

Step 2. Now, opt for the “Update” or “Auto-update” option from the bottom toolbar and wait for the software to check and update it. When the process is complete, re-launch the program to check if the add-on works.
Way 4. Update the Audio Drives of Your System
The drivers installed on your PC are essential for the working of your system in all areas. Outdated or corrupt audio drivers can significantly impact the performance of Kodi, leading to sound issues. They act as the communication bridge between your operating system and audio hardware. Ensuring that these drivers are up to date using this guide is essential for fixing Kodi no sound issue:
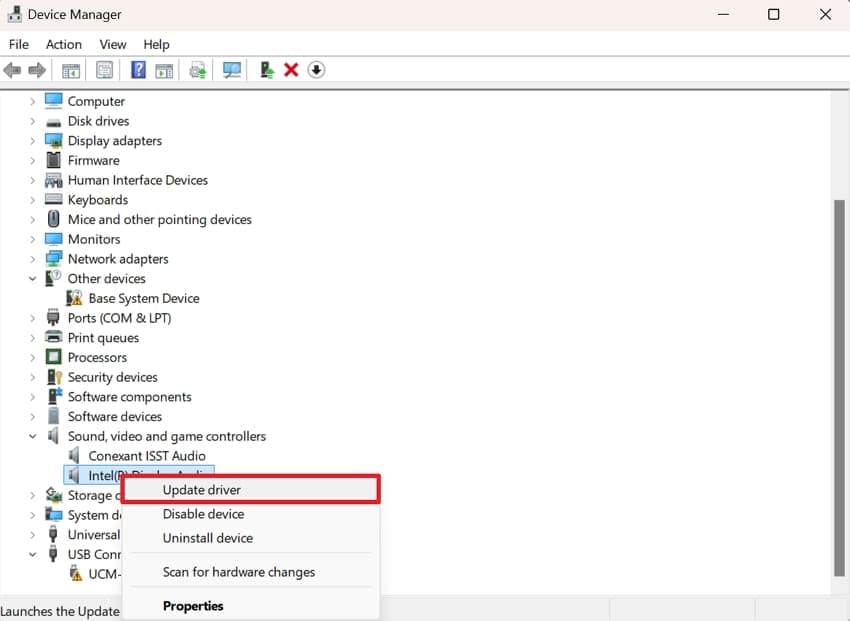
Instructions. On your PC, go to Device Manager and expand the “Sound, video, and game controllers” section. Right-click the targeted drive to choose “Update Driver” and upgrade it using the “Search automatically for drivers” option.
Part 3. Repair Corrupted Videos Files with the AI-powered Video Repair Tool - Repairit
In addition to addressing software and configuration issues, damaged clips can also be a significant cause. When video files are corrupted or incomplete, they can disrupt playback and lead to missing sound or choppy audio. Utilizing a specialized video repair tool can be invaluable to effectively resolve these issues. One such solution is Wondershare Repairit, an advanced AI-powered software designed to fix a wide range of video corruption scenarios.
This innovative video repair toolbox harnesses advanced algorithms to analyze and repair damaged video files, restoring them to a playable state. There is no compromising on quality or file integrity when you use this program. Its repair feature allows users to restore the video and the associated audio tracks, ensuring that you can enjoy your media without interruptions.
Advantages of Using Repairit
- Using the advanced gyroscope data repair algorithms, it can repair videos with over 98% accuracy.
- Its advanced video repair feature lets you import a sample clip shot using the same device to repair a severely damaged video file.
- This advanced program can rescue corrupted video files in over 20 formats, such as MP4, M2TS, MKV, etc.
Quick Guide to Repair Corrupted Video Files with the AI-powered Video Repair Tool
With Repairit, you can quickly recover your videos and eliminate any sound issues caused by file corruption. The following simplified steps can fix Kodi no audio issue, making it accessible for all users:
Step 1. Once you open Repairit, select the "Video Repair" option from the left sidebar. Following that, click on "+Add" to import the damaged video clips you want to repair.

Step 2. Afterward, click “Repair” from the lower right corner to begin the video repair process and wait for it to finish.

Step 3. You can “Preview” each file to confirm that it meets your expectations before saving it to your device. If any video file remains unrepaired, utilize the “Advanced Repair” option by uploading a sample to fix it. Then, click “Save” or “Save All” to store the corrected clips individually or all at once.

Fix Your Corrupted Video Files Now
 Security Verified. Over 7,302,189 people have downloaded it.
Conclusion
To reiterate, experiencing the Kodi no-sound problem can disturb your ability to watch your favorite content. However, understanding the various potential causes and applying the right solutions can help fix the issue effectively. Additionally, being aware of the possibility of damaged video files is crucial.
For those dealing with corrupted videos, Repairit offers a powerful solution. This AI-powered video repair tool can efficiently restore damaged videos while maintaining their original quality. By leveraging Repairit, you can ensure that your video files are in top condition to enhance your overall Kodi experience.
FAQ
-
What types of video corruption can Wondershare Repairit fix?
You can resolve damaged clips via this advanced software in a wide range of scenarios. To name a few, it includes files with playback errors, glitches, missing audio, and incomplete downloads. -
How can I prevent audio issues in Kodi in the future?
Regularly update the software and its add-ons to ensure your audio drivers are current. Also, avoid using corrupted video files, as further use can lead to more damage. Additionally, periodically check and adjust your audio settings as needed to clear all doubts. -
Will I lose quality when repairing my video files with Wondershare Repairit?
This software uses state-of-the-art technology and several functions that ensure that your clips remain intact. Your video quality will stay the same during the repair process, allowing you to enjoy your content without degradation.
