For many people, working with MXF files in DaVinci Resolve can seem like a task meant only for experts. But that's not true. With a few basics and enough practice, anyone can edit their creative work just like a pro.
This guide offers the fundamentals of MXF DaVinci Resolve. Learn how to import, edit, and export your files from the software. It also provides valuable tips for navigating common hitches that you might encounter along the way.
In this article
Part 1. MXF Davinci Resolve: How to Get Started?
DaVinci Resolve supports both audio and video MXF files and handles different MXF codecs, such as XDCAM, ProRes, and DNxHD. You can use the software to edit, color grade, and add various visual effects to your files.
Importing and editing MXF footage in DaVinci Resolve is straightforward. However, there are certain things you need to do for a smooth experience. First, make sure that you meet the recommended system specifications. Second, set up the DaVinci to handle your MXF files effectively. Let's briefly discuss each below.
System Specifications for Handling MXF Files
The following are the critical system requirements needed to handle MXF files:
- The operating system should be Windows 10+, CentOS Linux, or macOS 11+.
- CPU 32 GB for standard videos and 64 GB for 4/6K editing.
- At least 1 TB of NVMe SSD storage for media files.
- 500 GB or more SSD for OS/cache
- CPU should be Core i9 or AMD Ryzen 9 (at least 8 cores and 16 threads)
- GPU is AMD Radeon RX 6800/6900 XT (with at least 8 GB VRAM) or NVIDIA RTX 4090/3080/3070/3060
How Do You Configure DaVinci Resolve for MXF Files?
Suppose you meet the above system requirements. In that case, the next step is implementing various key settings for DaVinci MXF. These include:
- Project settings: Configure the timeline resolution and frame rate. Then, match these changes with your MXF files.
- Proxy mode: Turn on the Proxy mode if dealing with 4K or higher resolution files.
- Optimized media: Activate Optimized Media for lower-bitrate file versions to enhance editing.
- Exporting: The Deliver page helps you export your project to MXF format. The file will also be exported with the correct codec and settings.
Part 2. How to Import MXF into DaVinci Resolve?
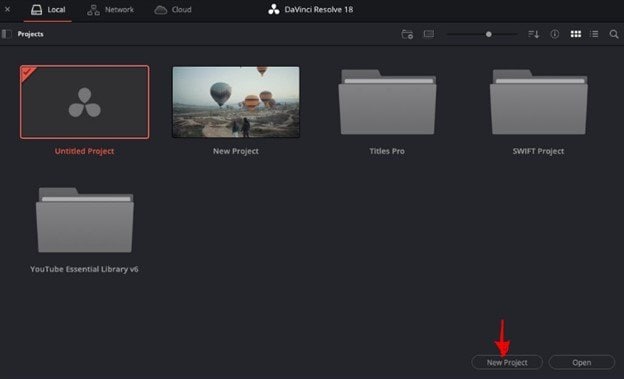
As mentioned, importing MXF files into DaVinci Resolve is easy and can be done in three ways. But first, you must create a project. Upon opening the Resolve for the first time, you’ll be greeted by the Project Manager. Your projects are saved in one database instead of a standalone project file. So, from here:
Step 1: Click New Project.
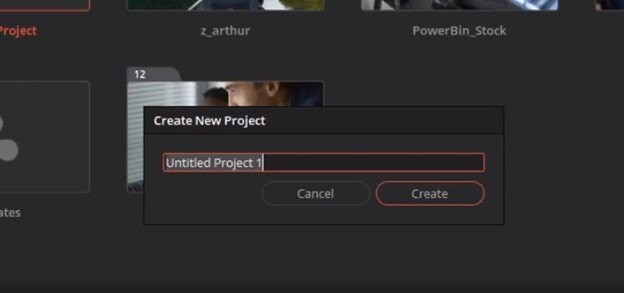
Step 2: Name your project.
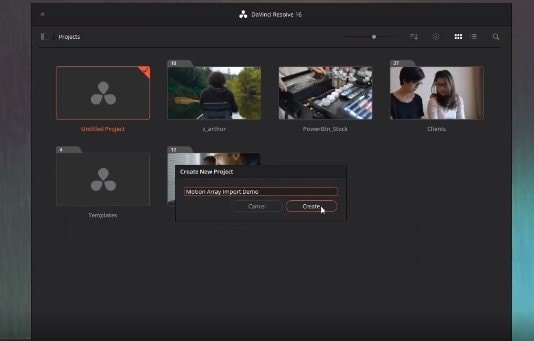
Step 3: Hit the Create button to open the project.
Next, you can import your MXF files using one of the options below.
Option One: Import Files into the Cut Page
To import files into the Cut page:
Step 1: To upload one or multiple files, click the Import Media button.
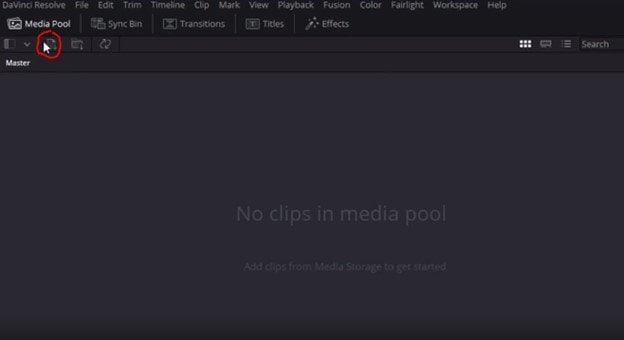
Step 2: You can also click Import Folder.
Option Two: Import Files into the Edit Page
You can import your files on the Edit page instead of the Cut page. The timeline is the same on both pages.
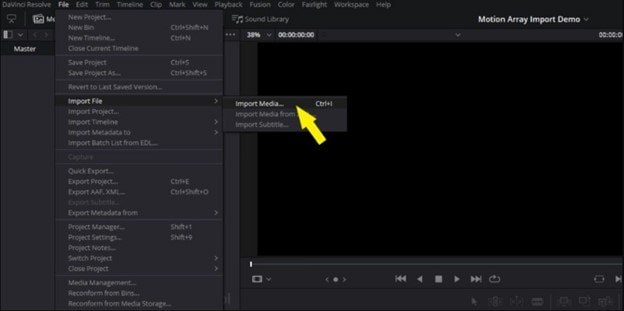
Step 1: Click the menu bar, then select File > Import > Import Media.
Step 2: Go to the folder where your files are, choose the ones you want, then click Import.
Option Three: Import via the Media Page
The Media page in DaVinci Resolve is dedicated to viewing files. You can watch the clips before importing them; that way, choose the ones you want to import. To import your MXF files into the Media page:
Step 1: Go to the Media page on the ribbon navigator.
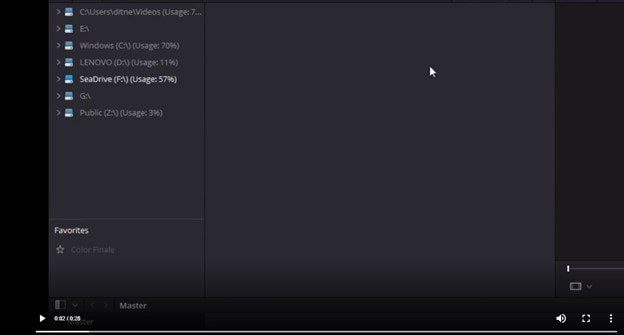
Step 2: Navigate to the location of your files using the directory tree at the top left of the screen.
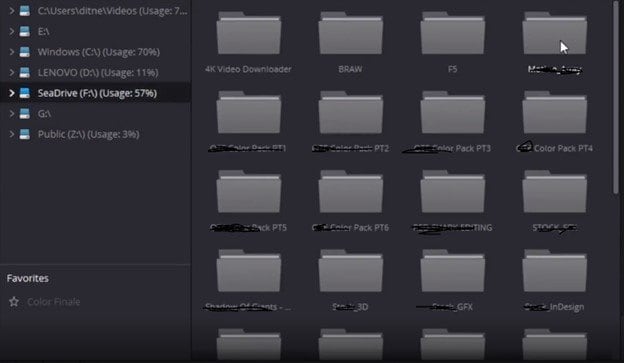
Step 3: Click on a file to preview.
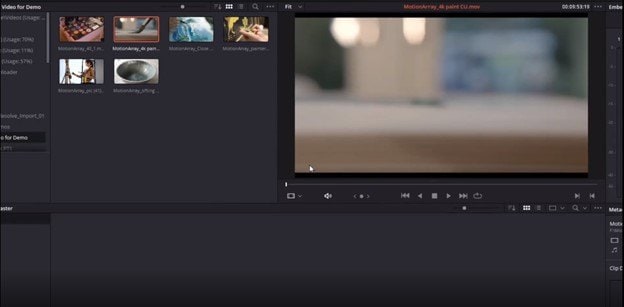
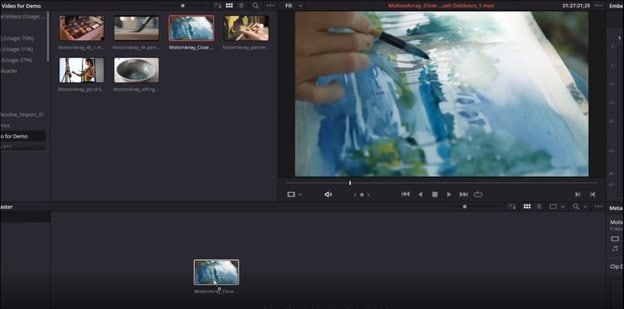
Step 4: Drag and drop the file into the Media Pool to import them into the project.
You can’t miss: How to Import and Edit Premiere MXF Files in Adobe Pro.
Part 3. Fix Common MXF Files Importing Problems
When importing DaVinci Resolve MXF, you can encounter several issues. One of the most common problems is corrupted files. If a file was damaged during a transfer, it may fail to import. Fortunately, you can fix this issue by trying the following:
- Open the file in VLC Media Player or equivalent software to confirm the file’s integrity.
- Or, re-transfer the file from the source to ensure it’s not damaged.
If these two tips don’t work, your best bet is Repairit Video Repair. It's a powerful, AI-powered file repair tool that effortlessly fixes corrupted files. Corruption level and file size don't matter—Repairit will repair your files in one click! One of the things that makes this tool unique is the fact that it supports most video formats, including MXF.
Repairit is also very user-friendly. You don’t need advanced skills; anyone can use it. Its sophisticated AI algorithms guarantee the highest file repair quality. And the best part is that the software works on Windows and Mac.
Follow these simple steps to repair your corrupted MXF files on Windows or Mac using Repairit:
Step 1: Download and Install Repairit File Repair on your device.
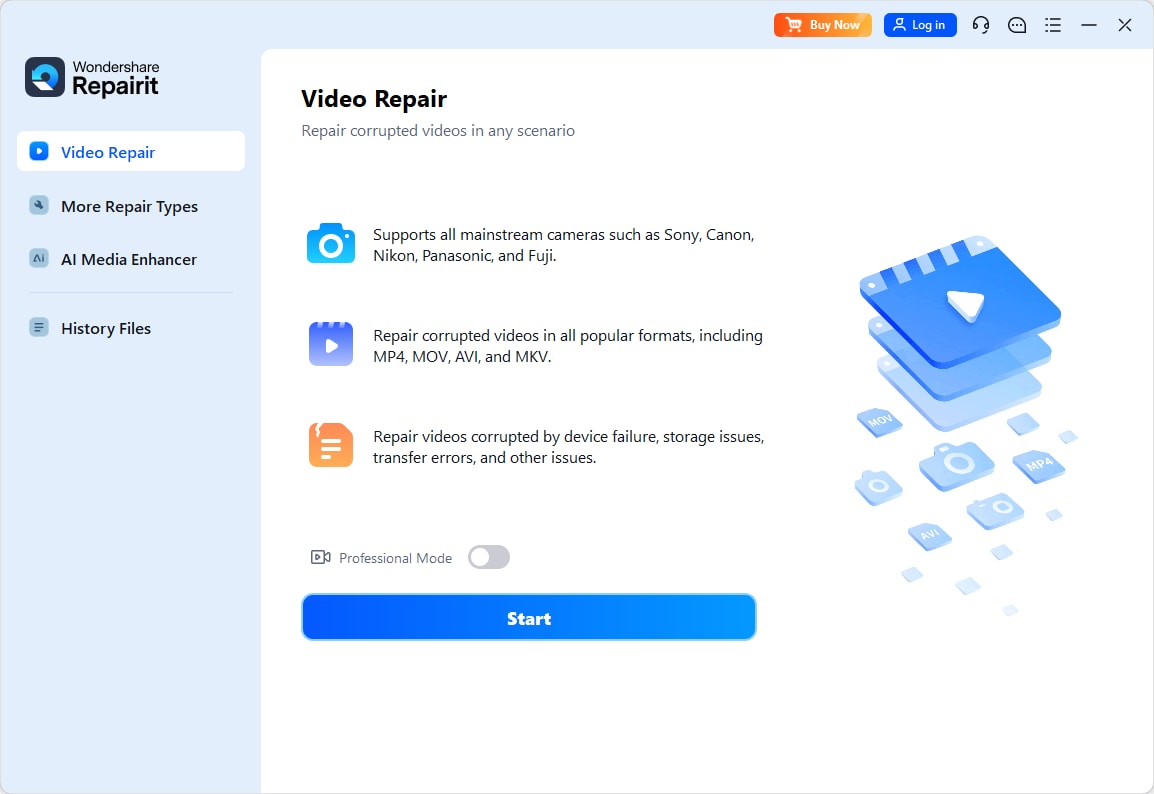
Step 2: Click the “Add” button in the Video Repair mode to add your corrupted videos.
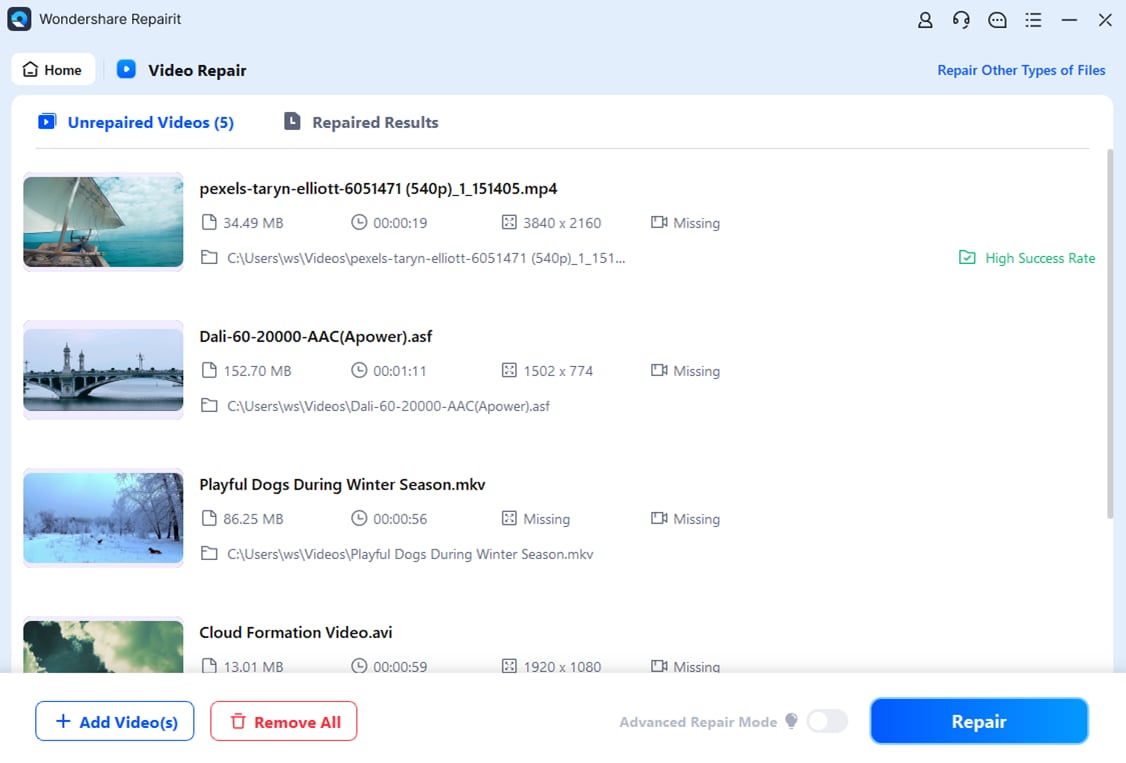
Step 3: After adding the videos, click Repair to start the repair process.
Once the video is repaired, the software will prompt you to preview or save the fixed video.
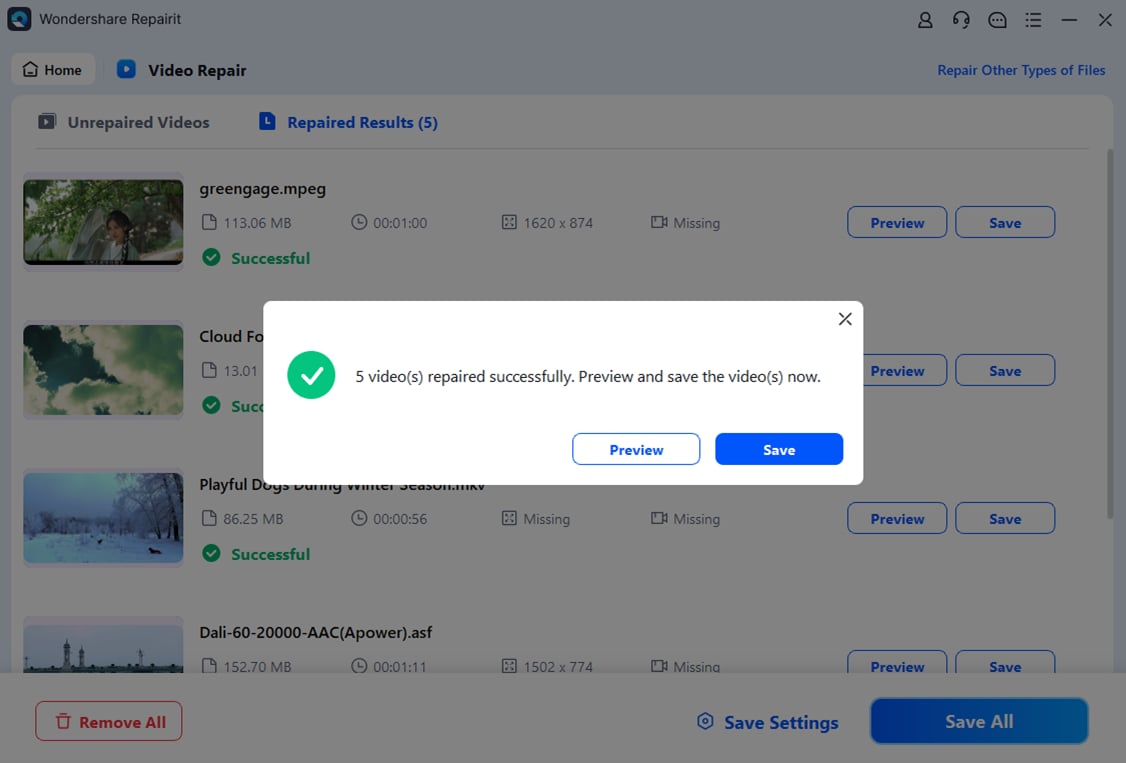
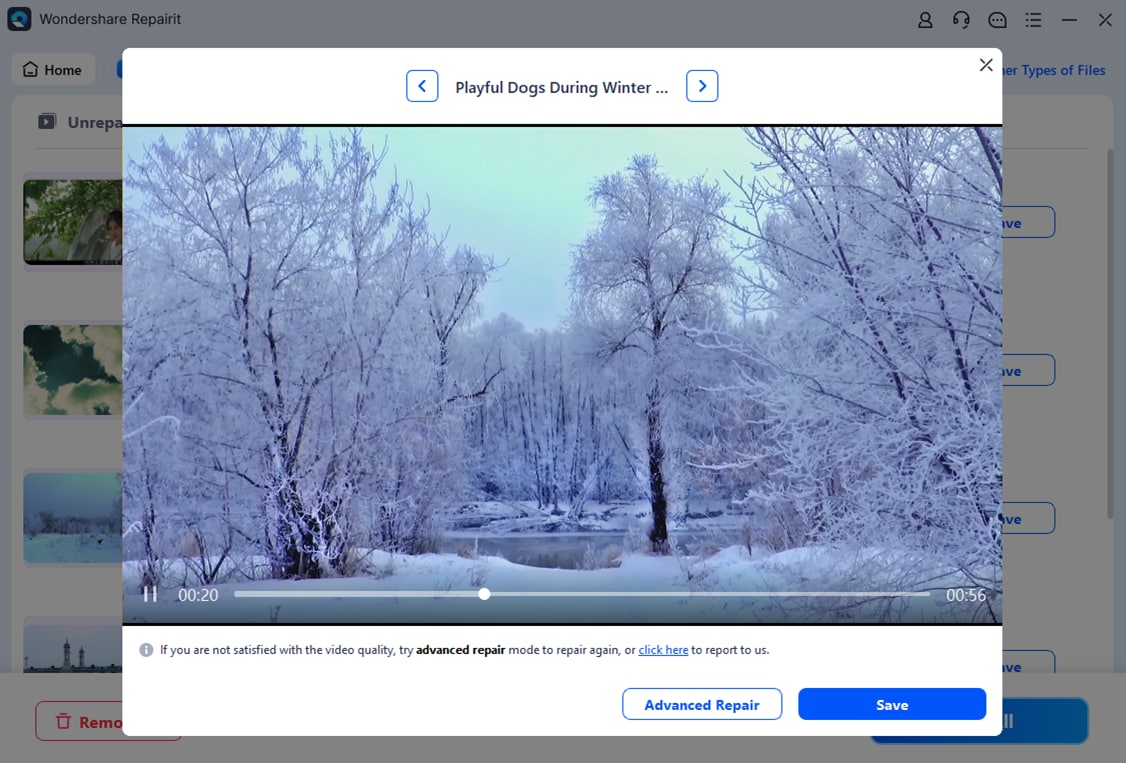
Step 4: Click Preview to preview your repaired video.
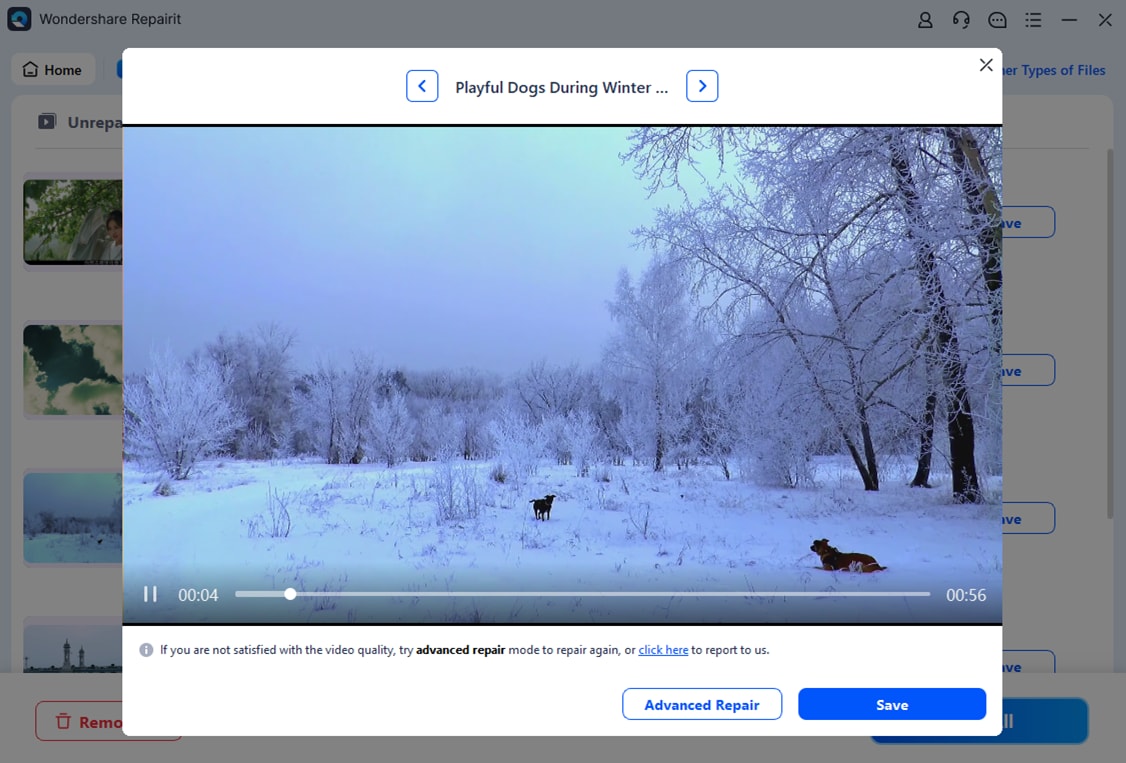
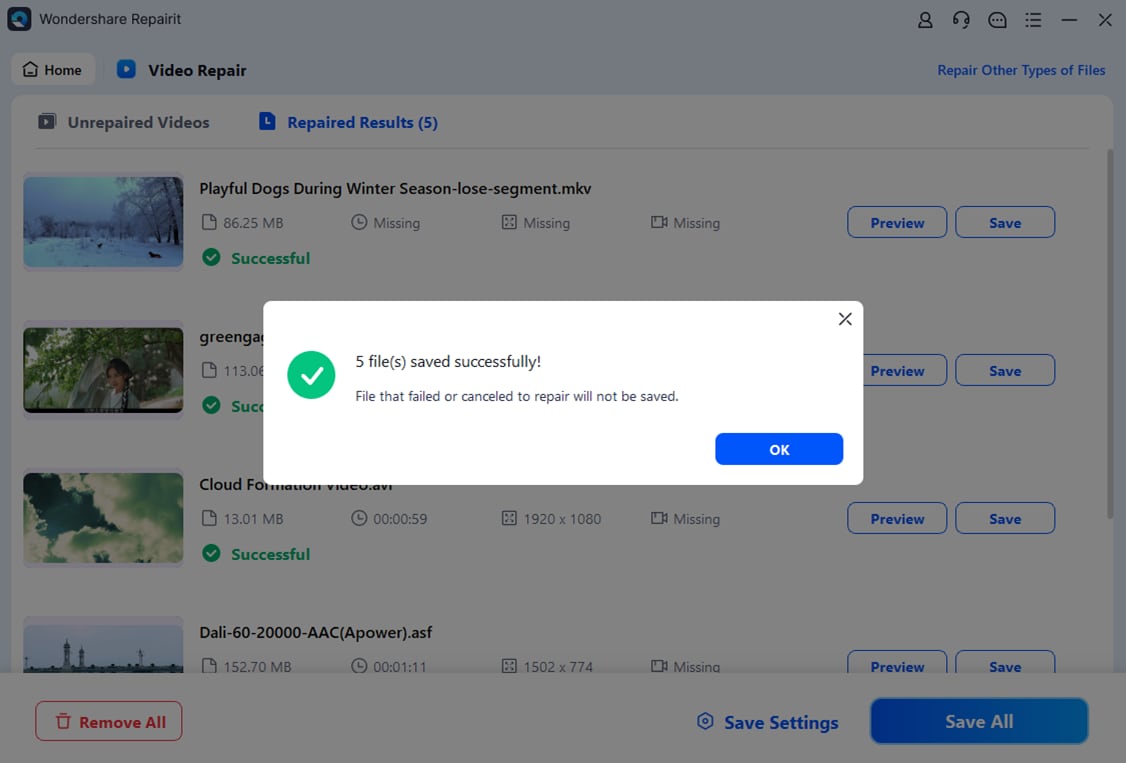
If the video meets your expectations, click Save to save it in your ideal path - other than where it was lost. Then, click OK to complete the process.
Fix Common MXF Files Importing Problems

Part 4. How to Edit MXF in Davinci Resolve?
After successfully importing your MXF file into DaVinci Resolve, your next task is to edit on the Edit page. Here are the basics of the editing process:
Navigate the Timeline with MXF Files
You can follow several easy tips to smoothen your experience with DaVinci Resolve MXF files. For example, you can select a clip by placing the playhead over it and pressing Shift V.
You can even move a clip earlier by pressing Ctrl+Shift+Comma on Windows. On Mac, press Command+Shift+Comma. Hold Command+Shift on Mac or Ctrl+Shift on Windows to snap to an edit point. Next, drag until your clip snaps to the edit point.
Apply Effects and Correlations
To apply effects and correlations, click the Effects tab in the upper left corner of the Edit page. That will display various video transitions, titles, audio effects, and other visual enhancements. Explore the effects and learn how to use them on your files.

Optimize Audio for MXF in Resolve
Make sure that the audio project settings are set correctly. Go to File > Project Settings > Audio Settings. Under Master Settings, check the Time Resolution and ensure the sample rate matches the audio.
You can also open the Fairlight tab and set the Audio Tracks to the correct configuration. Remember to also set the input and output configuration for optimal audio track monitoring and routing.
Sync Audio with Video Like a Pro
DaVinci Resolve offers three options to sync audio with video:
- Syncing by clap/slate: This method suits footage with a visible clapboard or slate.
- Syncing by a waveform is ideal if no timecode is available, but your audio is recorded clearly together with the video.
- Syncing by timecode is best applicable for professional setups or situations where the camera and audio recorder are running on the same timecode clock.
Choose the option that best works for you, depending on your situation, for optimal results.
How to Color Grade Your MXF Footage?
You can color grade your MXF in DaVinci Resolve in three simple steps using the Color page:
- Click the Color option.
- Adjust the color to your preferences on the Color page.
- Apply the grade to individual clips or your entire timeline.

Part 5. Exporting MXF Files from Davinci Resolve
Exporting your MXF footage from DaVinci is also easy. You can do this in a minute using the following steps:
- Navigate to the Deliver page and set the Format to MXF OP1A.
- Configure the settings. In the Audio settings, you can check Render one track per channel or uncheck Render as discrete audio tracks.
- Set the filename and destination location.
- Select your resolution and frame rate.
- Restrict the bitrate, then add it to the render queue.

- Click on Render All.

Remember to choose the correct codec. You can do that on the Deliver page. Select MXF under Format, then select the codec from the Video Codec dropdown. You should also check the frame rate and resolution settings under the Video section to ensure they match your needs.
Adjust all the necessary settings, including bitrate and aspect ratio. Then, test the MXF file in the intended delivery system before finalizing the export process.
Conclusion
Importing and editing your MXF files in DaVinci Resolve is easy. This guide has provided the basics; you’re now ready to start. If your file fails to import due to damage or corruption, don’t worry. Repairit covers you. Install Repairit on your Mac or PC and fix all kinds of video corruption in a few clicks!
FAQ
Which Is Better: MXF or MP4?
The better option between MXF and MP4 depends on format types. MXF is the most stable professional format. MP4, on the other hand, is popular as a consumer format. Your phone may be unable to play an MXF file, but it'll almost certainly play an MP4.Can VLC Play an MXF File?
Yes! You can use the VLC media player to play MXF files. VLC is compatible with most operating systems, including Windows and Mac. The best part is that you don't need to install extra codecs.Which Other Media Player Tools Supports MXF?
Other software that supports MXF files include Wondershare UniConverter and Adobe Premiere on Windows. You can also use the same software tools to play your MXF on Mac.


 ChatGPT
 Perplexity
 Google AI Mode
 Grok
Grok

