

"Help! I shot some photos at my sister's wedding, and they came out blurry and in low-resolution. Please, is there a way to fix these in Photoshop?"
Have you ever found yourself in this situation when you are desperately looking for ways to rescue some important photos that just didn't turn out quite as focused and clear as you had wished? In fact, if that's the case, you're not alone.
Now, the good news is that with the right set of tools and techniques, sometimes you'll be able to greatly improve them.
In this all-inclusive tutorial, we will cover various methods of how to increase resolution of photo in Photoshop. We'll also mention some other online options and share some basic tips regarding the preservation of image quality.
In this article
Part 1: How to Increase Resolution of Photo in Photoshop
Photoshop is a powerful tool that offers several methods to increase the resolution of your photos. Here are some of the most simple techniques that you can try:
Method 1: Increase Resolution Of Photo In Photoshop With Image Size Adjustment
The most straightforward way to increase resolution of photo in Photoshop is by using the Image Size feature. Here's how:
Step 1: Open your image in Photoshop. Go to Image > Image Size.
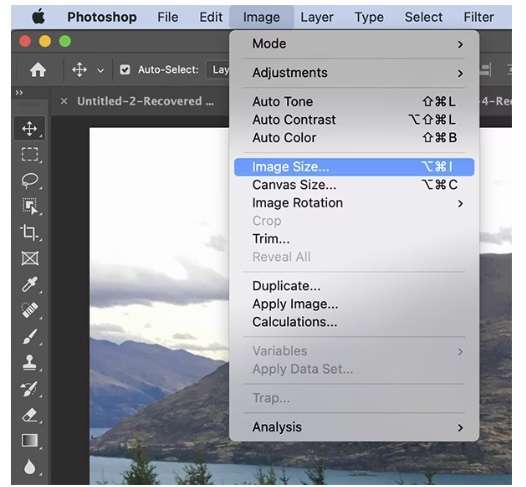
Step 2: In the dialog box, make sure “Resample” is checked. Choose “Automatic” from the dropdown menu (if available). Increase the width and height of the resolution as needed. Click “OK” to apply the changes.

This method works well for minor increases in resolution, but be cautious with drastic changes as they may result in loss of quality.
Method 2: How To Enhance A Photo In Photoshop With Content-Aware Scaling
Content-Aware Scaling is a smart feature that can help increase resolution while preserving important image elements:
Step 1: Open your image and duplicate the background layer. Go to Edit > Content-Aware Scale.
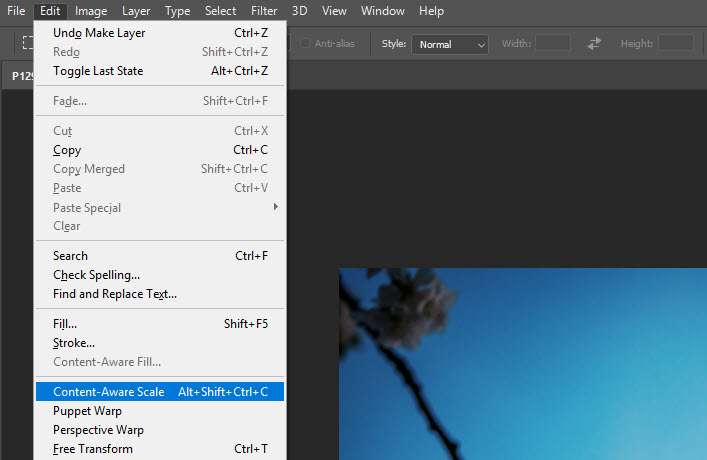
Step 2: Drag the handles to increase the image size. Press Enter to apply the changes.
This technique is particularly useful when you need to increase the resolution of photos with specific subjects or focal points.
Method 3: How To Increase Resolution Of Photo In Photoshop Using The Super Resolution Feature
For newer versions of Photoshop (2021 and later), the Super Resolution feature provides an AI-powered way to enhance photo in Photoshop:
Step 1: Open your image in Camera Raw. Right-click on the image and select “Enhance”.
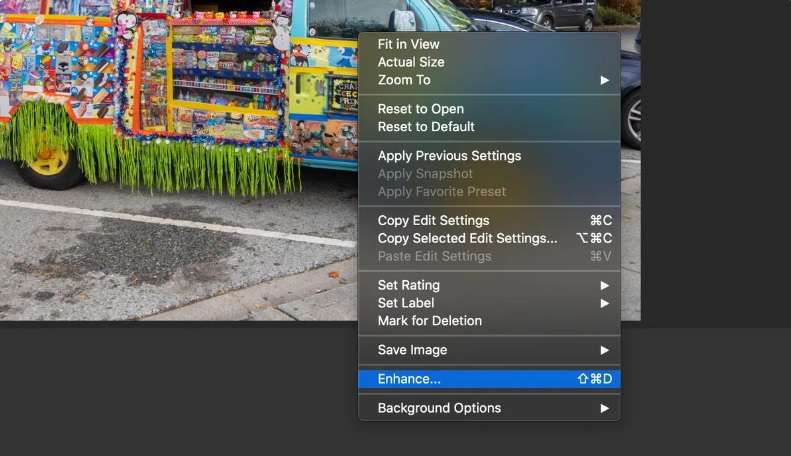
Step 2: In the Enhance preview dialog, check “Super Resolution”. Click “Enhance” to apply.
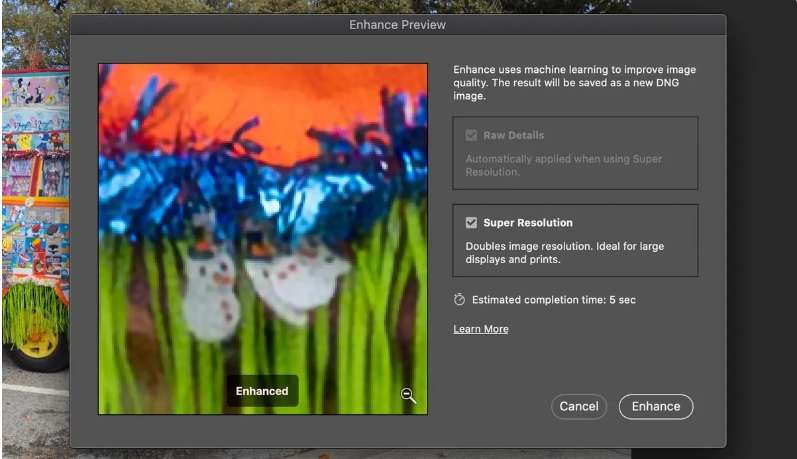
This method can significantly increase resolution while maintaining image quality.
Method 4: Upsampling with Preserve Details
Another effective way to increase resolution of photo in Photoshop is through upsampling:
Step 1: Go to Image > Image Size. Check “Resample” and select “Preserve Details (enlargement)” from the dropdown.
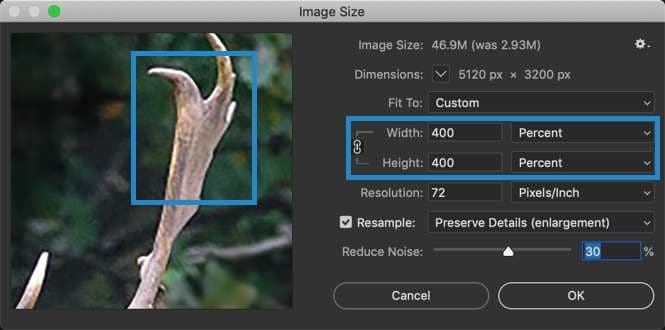
Step 2: Increase the width and height values. Adjust the “Reduce Noise” slider if needed. Click “OK” to apply.
This method often produces better results than standard resampling, especially for significant increases in resolution.
Part 2: How to Fix Blurry Photos in Photoshop
Now that we've covered how to increase resolution, let's explore techniques to fix blurry photos in Photoshop:
Method 1: How To Fix Blurry Photos In Photoshop With Shake Reduction Filter
The Shake Reduction filter is excellent for correcting motion blur:
Step 1: In Photoshop, navigate to Filter > Sharpen > Shake Reduction. Photoshop will automatically analyze and attempt to correct the blur.
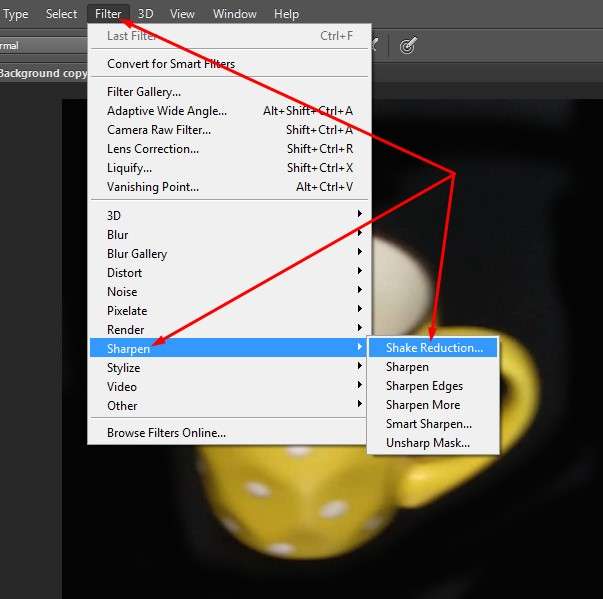
Step 2: Fine-tune the settings in the Blur Estimation and Advanced sections if needed. Click “OK” to apply.
This filter can work wonders on photos affected by camera shake or slight motion blur.
Method 2: Use the Smart Sharpen Filter
The Smart Sharpen filter is a versatile tool to enhance photo in Photoshop:
Step 1: Go to Filter > Sharpen > Smart Sharpen. Adjust the Amount, Radius, and Reduce Noise sliders.

Step 2: Experiment with different settings in the “Remove” dropdown for optimal results. Click “OK” to apply.
This filter allows for precise control over sharpening and can significantly improve image clarity.
Method 3: How To Fix Blurry Photos In Photoshop With High Pass Filter
The High Pass filter is a more advanced technique to fix blurry photos in Photoshop:
Step 1: Duplicate your image layer. Go to Filter > Other > High Pass.
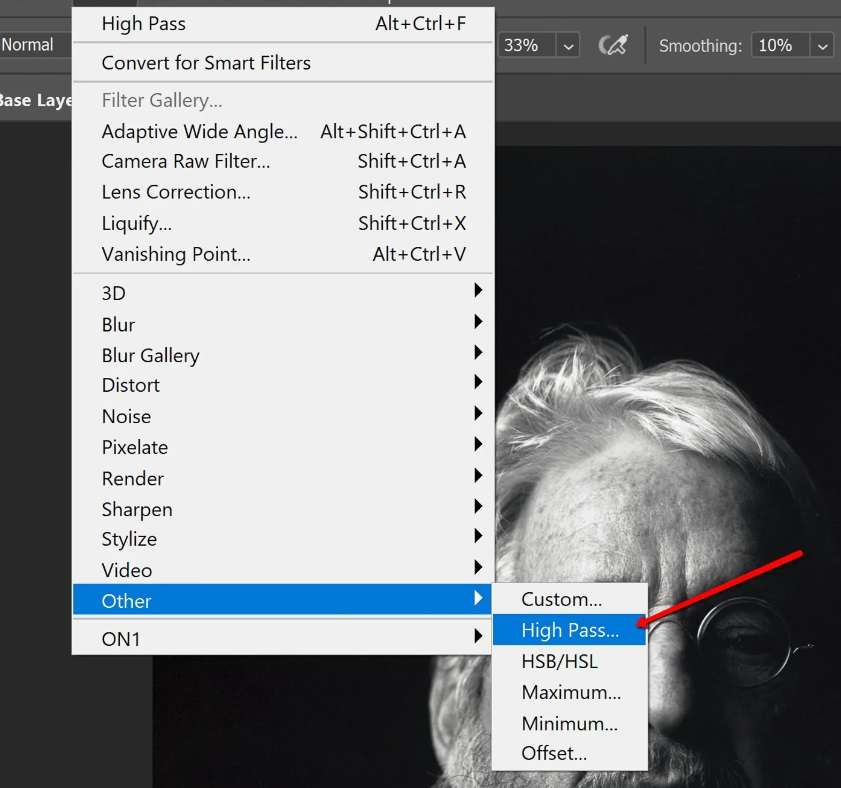
Step 2: Move the Radius slider, usually setting it between 2 to 5 pixels works well. Then, change the layer's blend mode to either “Overlay” or “Soft Light”. If necessary, adjust the layer's opacity.
This method enhances edge contrast, making images appear sharper without introducing artifacts.
By combining these techniques to increase resolution of photo in Photoshop and fix blurry photos in Photoshop, you can significantly improve the quality of your images. Remember that the key to success is often in subtle adjustments and combining multiple methods for the best results.
Part 3: Enhance Images: A Step-by-step Guide
While Photoshop is a powerful tool to enhance photo in Photoshop, sometimes you might need a quicker, more accessible solution. This is where tools like Repairit AI Photo Enhancer come in handy.
Let's explore why users might choose Repairit in this scenario and how to use it.
Why Choose Repairit AI Photo Enhancer:
- User-Friendly Interface: Repairit offers a straightforward, intuitive interface that doesn't require extensive knowledge of photo editing. This makes it an excellent choice for beginners or those who find Photoshop overwhelming.
- AI-Powered Enhancement: Repairit uses advanced AI algorithms to automatically enhance photos, often producing impressive results with minimal user input. This can save time compared to manual adjustments in Photoshop.
- Batch Processing: If you need to enhance multiple photos at once, Repairit's batch processing feature can be a significant time-saver compared to working on individual images in Photoshop.
- No Software Installation: As an online tool, Repairit doesn't require any software installation or updates, ensuring you always have access to the latest features without any maintenance on your part.
Steps to Use Repairit Photo Enhancer Online:
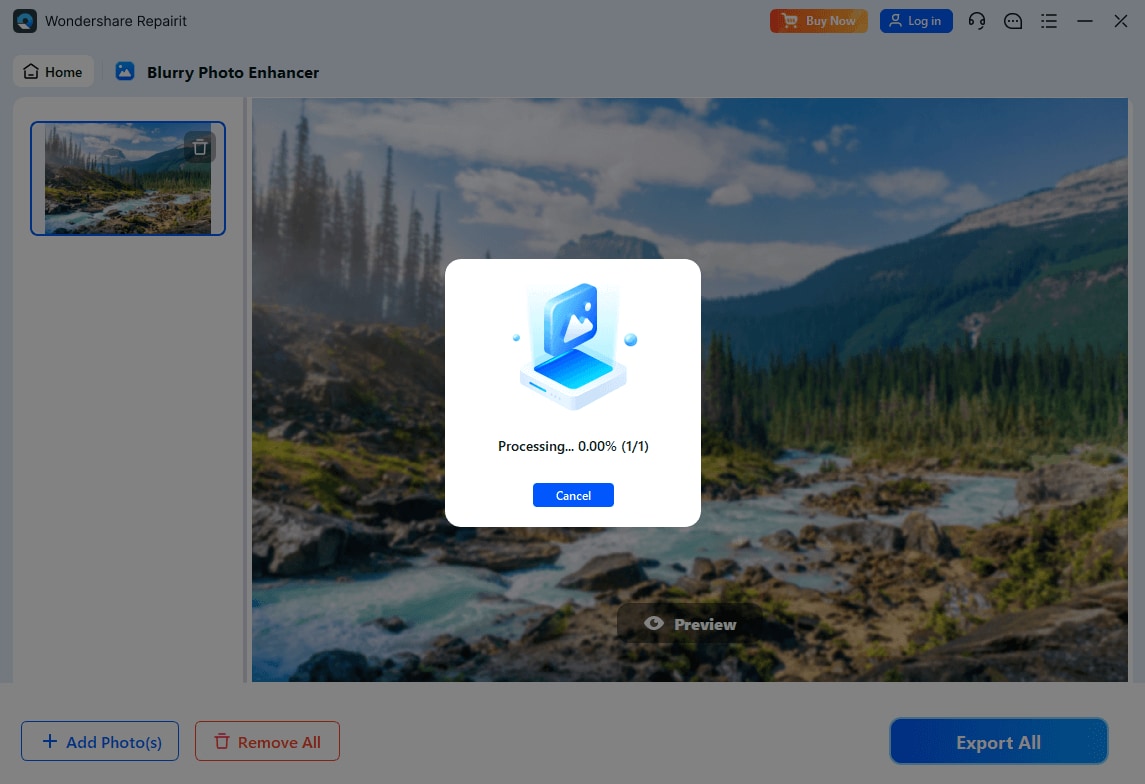
Step 1: Hit "AI Photo Enhancer" and then click on the "+Add" button to upload the photo that you want to enhance.

Step 2: Wait for the AI to analyze and enhance your photo automatically. After making all the adjustments, you can choose an ideal enhancing model from the three AI models: General Model, Portrait Enhancer, and Old Photo Restoration, then hit the “Start” button.
Step 3: Review the enhanced version and use the slider to compare it with the original. If satisfied, click “Save All” to save the enhanced image to your device.

While Repairit can be an excellent tool to quickly enhance photo quality, it's important to note that for professional work or when you need precise control over the enhancement process, learning how to increase resolution of photo in Photoshop and how to fix blurry photos in Photoshop is still valuable.
Increase the Resolution of Your Photo Now
 Security Verified. Over 7,302,189 people have downloaded it.
Part 4: Tips and Best Practices for Saving Images for Various Uses
After you've learned how to enhance photo in Photoshop or used an online tool like Repairit, it's crucial to save your images correctly for their intended use. Here are six essential tips:
- Choose the Right File Format: Use JPEG for photographs and complex images with many colors. Opt for PNG for images with transparency or fewer colors. Consider TIFF for high-quality prints or when you need to preserve layers.
- Understand Resolution Requirements: For web use, 72 PPI (pixels per inch) is usually sufficient. For print, aim for 300 PPI or higher to ensure crisp results. When you increase resolution of photo in Photoshop, consider the final output to avoid unnecessary file size bloat.
- Use Color Profiles Consistently: For the web, use the sRGB color profile. For print, use CMYK or consult with your printer for their preferred profile. Embed the color profile when saving to ensure consistent colors across devices.
- Compress Wisely: For JPEG, balance between file size and quality. A setting of 8-10 in Photoshop's "Save for Web" often provides a good balance. Use "Save for Web" in Photoshop to preview how different compression levels affect your image.
- Back-Up Your Original Files: Always keep your original, unedited files. Save edited versions as separate files to preserve the ability to make future changes. Consider using cloud storage for additional security.
By following these tips, you'll ensure that your enhanced photos maintain their quality and are optimized for their intended use, whether that's web, print, or archival purposes.
Conclusion
Mastering the techniques on how to increase resolution of a photo in Photoshop and how to fix a blurry photo in Photoshop will hugely improve your photos. The bottom line is to experiment with techniques, know what your image requires, and always keep the final use in mind. And with practice and attention to detail, you will turn even the most problematic photos into stunning high-resolution images.
FAQ
-
Can I increase the resolution of a photo without losing quality?
While it's challenging to significantly increase resolution without some loss of quality, using advanced techniques in Photoshop like Super Resolution or third-party AI-powered tools can help minimize quality loss. -
What's the best method to fix extremely blurry photos?
For extremely blurry photos, a combination of techniques often works best. Try using the Shake Reduction filter followed by careful application of Smart Sharpen or Unsharp Mask in Photoshop. -
Is it better to enhance photos in Photoshop or use online tools?
It depends on your needs. Photoshop offers more control and advanced features, making it ideal for professional work. Online tools like Repairit are more accessible and user-friendly, perfect for quick enhancements or beginners.
