Transferring documents is a practical way to generate backups, which lets you access data when needed. For this purpose, PST files are a preferred format to store copies of your data, whether it's mail or calendar events, without affecting the data integrity.
Therefore, numerous considerable approaches exist to export a PST file from Office 365, depending on your needs and technical skills. In this article, we'll explore those approaches, including Outlook App, eDiscovery, or any third-party alternative. Upon navigating, you will comprehensively understand how to export PST from Office 365 and repair such files if they turn corrupted.
In this article
Part 1. Why Is It Important to Export PST Files from Office 365?
Before we explore how to export PST from O365, do you know what reasons led you to move PST data? If not, this section uncovers various reasons, exploring the importance of transferring PST documents from Office 365.
- Backup and Data Protection: First off, exporting PST files offers users a layer of backup for their emails, contacts, or calendar details.
- Easier Data Access: Other than that, if you have PST files, you can open and view them without requiring an internet connection. The best part is that they are compatible with multiple software, making offline data access easier than ever.
- Streamlining Email Management: For some reason, if your Office 365 mailbox is crowded with a lot of mail, exporting old emails in PST is the best solution. Through this, you will be able to organize your mailbox to easily find recent and important emails.
- Smooth Data Migration: If you want to move data to other platforms, having a PST makes this process seamless. Since this format is compatible with numerous email platforms, you can easily move email data without any data loss.

-
Repair damaged PST & OST Files in Outlook in all Email corruption scenarios, such as hard disk crashes & bad sectors, virus attacks & tojan horse, outlook corruption & malfunctions, improper shutdown procedure, etc.
-
Restore Outlook Emails deleted for a long time and extract the Email messages, folders, calendars, etc. within seconds.
-
Repair corrupted Emails and restore deleted Emails with a 100% success rate.
-
Repair Emails in bathes without size limits and support to preview all of them before saving.
-
Compatible with Windows 7/8/8.1/10/11, Windows Server 2012/2016/2019, and MacOS X 10.11~ MacOS 12 (Monterey).
Part 2. Methods to Export PST from Office 365
Now that you know what benefits you will get if you export emails to Office 365, let's discuss some solutions.
Method 1: Export PST from Office 365 Using eDiscovery from Microsoft 365 Admin Portal
Starting with eDiscovery, this process is also known as Electronic Discovery, which is used to find, review, and collect digital information like emails. In many organizations, using this tool makes it simple to search large amounts of data and locate certain details. Hence, follow the guidelines mentioned below to export PST from Office 365:
Step 1. Log in to the Microsoft 365 Admin portal and tap the “Hamburger” icon from the top left corner to locate the "Security & Compliance" portal. After that, head to the "Permissions" tab and hit the "Roles" option under the Microsoft Purview section.

Step 2. Upon tapping, a new screen will appear, and you must pick the "eDiscovery Manager" option from the list. From a newly displayed dialog box, scroll down and use the "Edit" option beside the eDiscovery Administrator.

Step 3. Moving on, pick the "Choose an eDiscovery Administrator" tab and click the "Add" option from a pop-up menu.

Step 4. Once done adding the administrator, hit the "Add" button again and then the "Done" option.

Step 5. Now, save the administrator details and navigate to export PST from the O365 by creating an eDiscovery case. For that, choose the "Standard" option from the drop-down menu of the eDiscovery tab. Pick the "Create a Case" option and insert the name and description in the new pop-up menu to start creating a case. Later, pick the "Save" option to continue with the process of generating eDiscovery cases.

Step 6. Since the case is created, click on it and choose the “Searches” tab to pick the “New Search” option.

Step 7. This will direct you to a new screen and generate a new search by adding a name and description. When you are done adding the details, hit the "Next" button to continue.

Step 8. Heading to locations, toggle the "Exchange Mailboxes" option and select the "Choose Users, Groups or Teams" option. From the newly appeared pop-up menu, choose the characters to get the mailbox list and tap the "Done" option. Now, on the location screen, tap the "Next" option to continue adding conditions for the eDiscovery case.

Step 9. There, review the search conditions and choose the "Next" option again. If you desire to export all the mailbox data, it is recommended not to insert any conditions or keywords to make all files accessible.

Step 10. Once verified, check the search and create section and hit the “Submit” button to wrap up the process.

Step 11. Return to the Searches tab, locate the newly created PST file, and tap on it. After tapping, you will navigate to a pop-up menu where you can see details of the PST file. There, click the "Actions" button and choose the "Export Results" option to start the process of exporting emails to Office 365.

Step 12. Check for the output and export exchange options from the new pop-up menu and press the "Export" button again.

Step 13. After a while, the PST file will be exported, which you can access by choosing the "Exports" tab of the eDiscovery tab. From there, click the file and wait until the export process is complete. Once done, hit the "Download Results" option to export the data and then scroll down to copy the export key by choosing the "Copy to Clipboard" option.

Step 14. Later, a dialog box named eDiscovery PST Export Tool will appear where you have to paste the export key under the "Paste the Export Key…" section. From here, choose the location to store the downloaded file and press the "Start" button to export the PST files from Office 365.

Method 2: Export PST File from Office 365 via Third-Party Software
Users can also consider alternate options like SysTools Office 365 Export Software to transfer PST files. The fascinating aspect of this tool is that it features an intuitive interface, making file exporting easier for all types of users. Using this, users can export files in multiple formats for better accessibility. So, review the stepwise guide given to learn seamless ways to export PST files from Office 365:
Step 1. To begin with, launch SysTools Office 365 Export Software on your device and choose the “Office 365” option from the main screen. Then, pick the "Outlook" option from the destination section to continue exporting.

Step 2. Upon tapping the Outlook option, tick the required mailbox items from the workload section and tap the “Next” button.

Step 3. On the new screen, enter the Office 365 admin credentials and click the “Validate” option to ensure the permissions. Once done, pick the “Next” button and move ahead to choose the file destination.

Step 4. Moving to the destination tab, manage the permissions there, and review the file properties. Later, tap the "Next" button to continue on the user's tab.

Step 5. Following that, access the fetch users’ option to add certain admin credentials, such as who can access the file. Then, tap the "Start Export" button at the top right corner and move the mail data into PST files.

Method 3: Export PST File from Office 365 with Outlook App
Users without any technical knowledge can try to export a PST file from Office 365 from Outlook if the previous methods seem difficult to them. When you want to fetch old emails, here is how you can export PST files from Outlook:
Step 1. Begin by tapping the "Files" tab from Outlook and entering the "Open & Export" section. From here, you need to find and choose the "Import/ Export" option to proceed.

Step 2. This will direct you to a pop-up menu, letting you pick the "Export to a File" option. Once done, hit the "Next" button to proceed further with the data-moving process.

Step 3. Moving forward, select "Outlook Data File (.pst)" on the following screen and click the "Next" button again.

Step 4. Then, uncheck the “Include Subfolders” option and press the “Next” button to set the destination place of the exported file.

Step 5. Afterward, tap "Browse" from the top right corner and choose the folder where you want to save the file. Now, check "Replace Duplicates with Items Exported" and hit the "Finish" button.

Part 3. How to Repair Corrupted or Damaged PST Files in Single-Click?
While exporting PST from Office 365, files can get damaged or corrupted, affecting the user's ability to access it in the future. Therefore, to resolve these issues, Repairit for Email offers you a seamless solution by repairing damaged email files with its innovative algorithms. Using such a technology, the AI can analyze and fix the damage, letting users access functional files.
In addition, users can add the PST or OST files in batches to take off the manual effort of repairing the data. Furthermore, whether it's a PC or Mac, this tool offers you the ease of repairing mail without any compatibility issues.
Key Features
- Other than repairing, this tool can also restore deleted Outlook email messages, folders, and calendars to make data accessible.
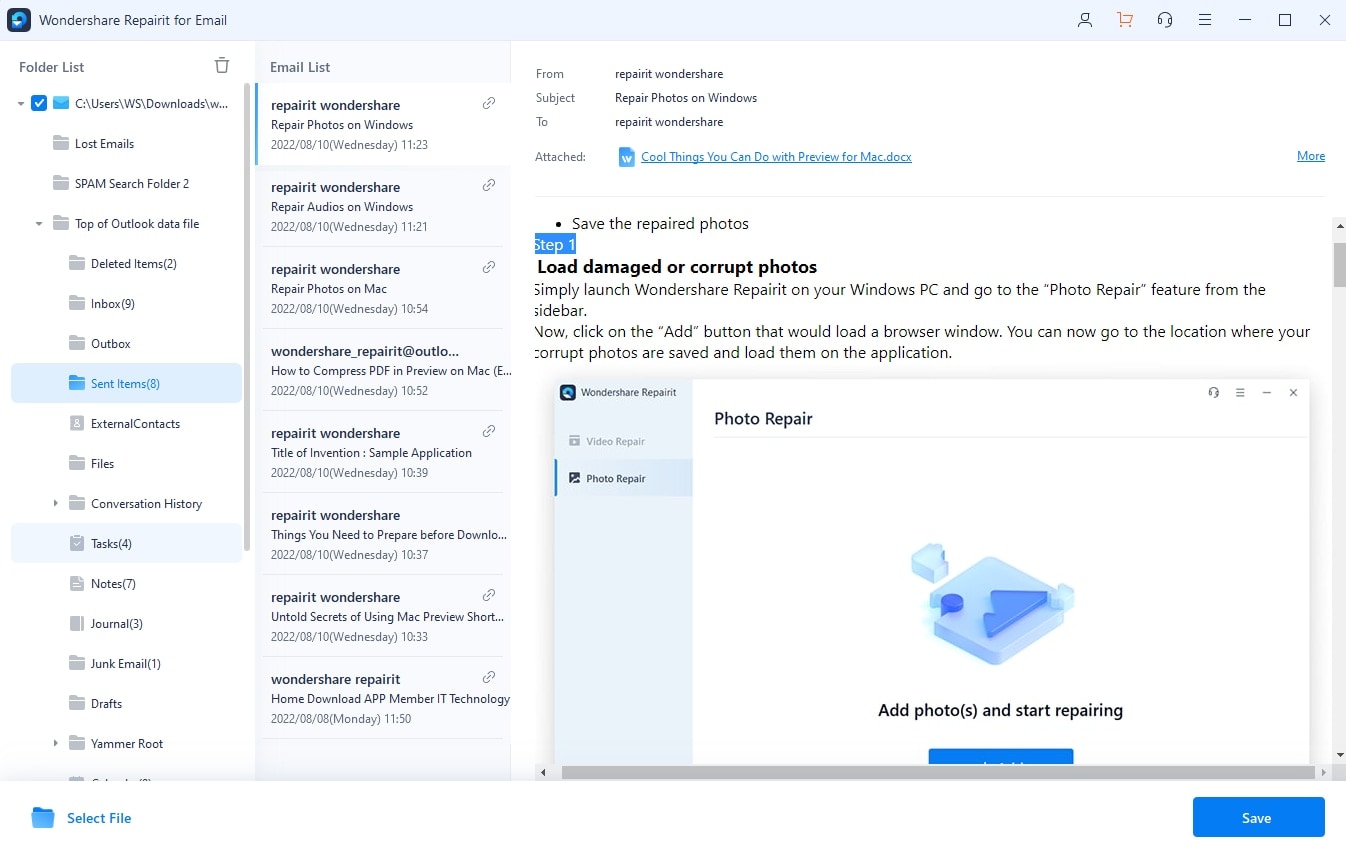
- When you export a PST file from Office 365 and fix the corrupted data with Repairit, you can preview the final outcomes before saving.
- While fixing PST or OST files, this tool ensures a virus-free solution, eliminating the risk of malware infections.
Simplified Guide on How to Repair Corrupted or Damaged Emails with Repairit for Email
Since you know most of the features of this tool, here is how you can repair corrupted or damaged email files in just a few steps:
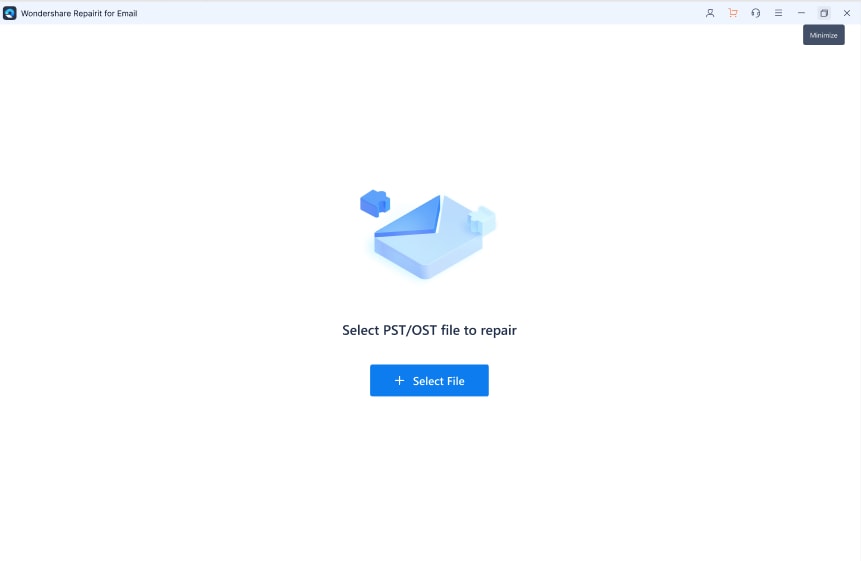
Step 1. Launch Repairit for Email and hit the "+Select File" option to import the damaged OST or PST file.

Step 2. You can also go for the "Add File" option to fetch the file directly from the device. Once the corrupted OST/PST file is there, click the "Repair" button to proceed.

Step 3. Once you are satisfied with the results, hit the "Save" button and end the PST/OST file repairing process.

Conclusion
Summing up, if you want to export emails to Office 365, the process is straightforward, particularly when the right technique and approach are followed. Thus, this article covered various reliable approaches, letting you move data that can be accessed anytime. However, when your exported email files get damaged, it is recommended that you utilize Repairit for Email to fix the issues in real-time.
FAQ
-
Q1. What is the easiest method to export PST files from Office 365?
One of the straightforward ways to export PST from O365 is by using the Outlook app, which allows you to move mailbox data directly. Using this method, you can also insert a password to the file to prevent unauthorized access. -
Q2. Can I export PST files from Office 365 without admin access?
Exporting PST files from Microsoft Office 365 requires admin permission if you use the Security & Compliance Center. However, if you don't have admin access, try using the Outlook app to easily move data in PST form. -
Q3. Is exporting PST files from Office 365 secure?
Yes, transferring PST files from Office 365 is straightforward if one uses built-in Microsoft 365 tools. Also, reliable third-party alternates can make this process seamless, letting you access PST file data anytime.


 ChatGPT
 Perplexity
 Google AI Mode
 Grok
Grok

