

Are you trying to view photos on an SD card, but your computer doesn't recognize it? Or maybe your SD card is not showing photos at all? Losing access to your SD card photos can feel devastating, especially if they contain vacation memories, wedding shots, or important work files.
Quick Answer: How to View Photos on an SD Card
If you want to view photos on an SD card quickly, follow these steps:
- Insert the SD card into your computer's built-in slot or use an external SD card reader.
- Open File Explorer (Windows) or Finder (Mac).
- Locate your SD card under This PC (Windows) or in the Finder sidebar under Locations (Mac).
- Open the DCIM folder (or the folder where your photos are stored) to access your pictures.
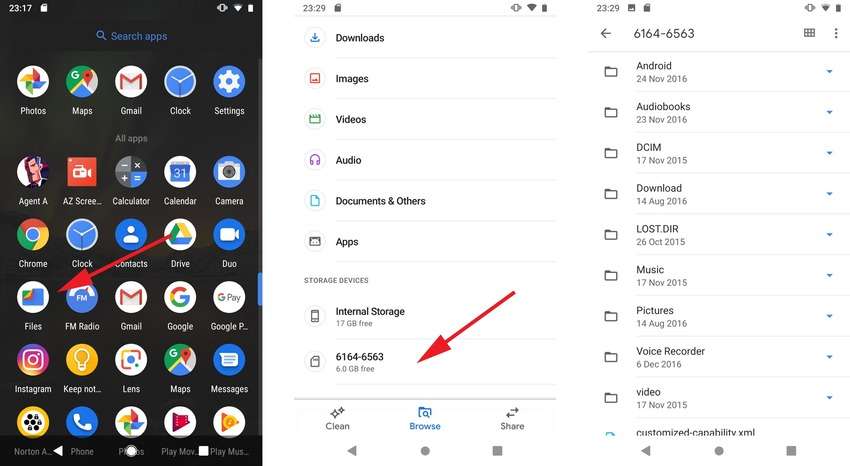
- To access an SD card on Android or iPhone/iPad, connect it using a compatible card reader and open the Files app to browse the storage.
If your SD card is not showing photos, not recognized, or files won't open, refer to the troubleshooting section below for detailed solutions.
In this article
How to View Photos on SD Cards
Before exploring the most frustrating SD card problems, fixes, and precautions to avoid them, let's see how to view pictures in SD card storage.
Using External SD Card Readers
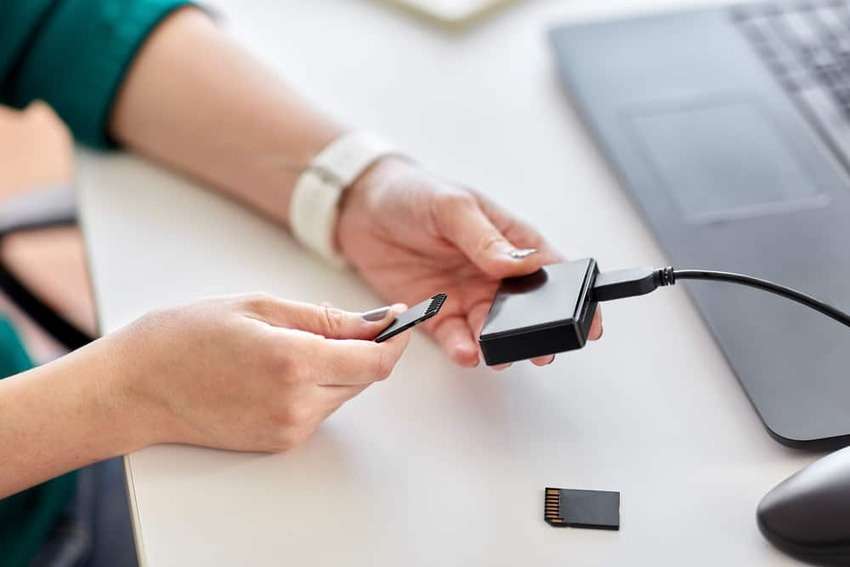
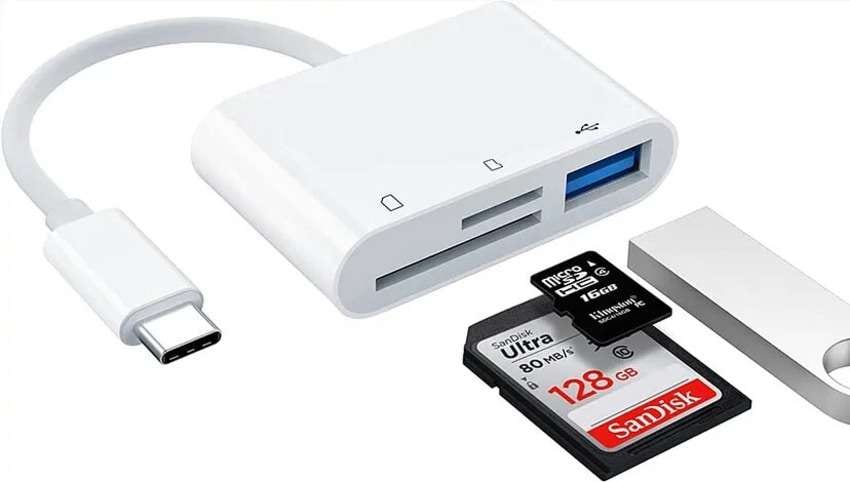
External SD card readers are excellent gadgets for viewing and transferring SD card data to another device. They're ideal if your computer doesn't have a built-in card reader.
Here's how to view photos on an SD card on a laptop or desktop computer using an external SD card reader for Windows or macOS.
Windows
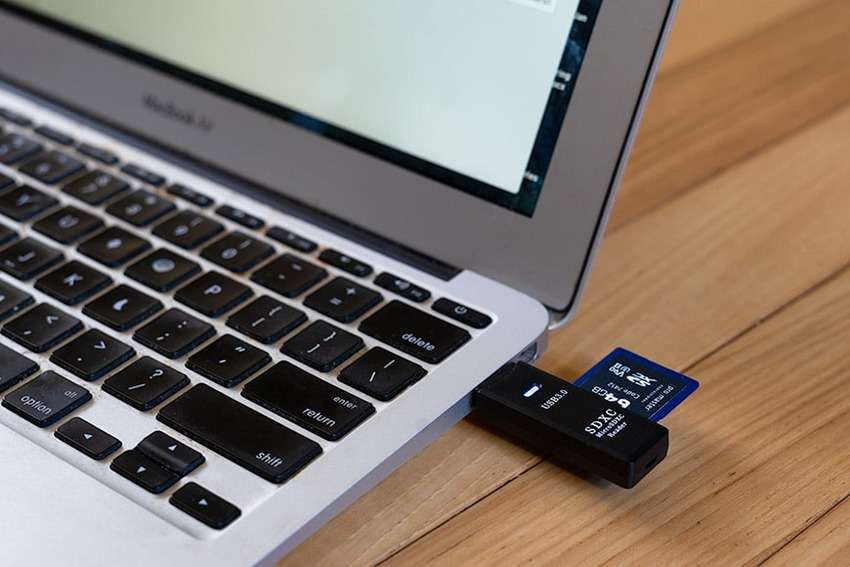
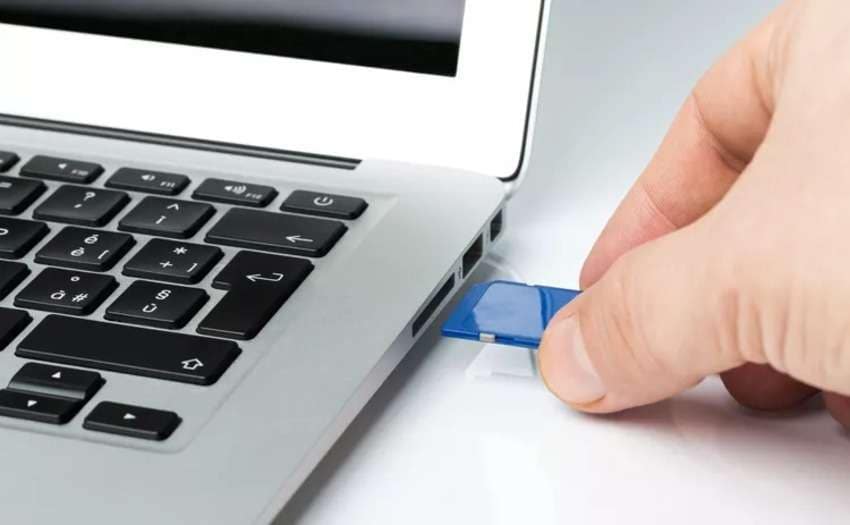
Step 1: Insert your SD card into an external reader and connect it to your computer through a USB port.
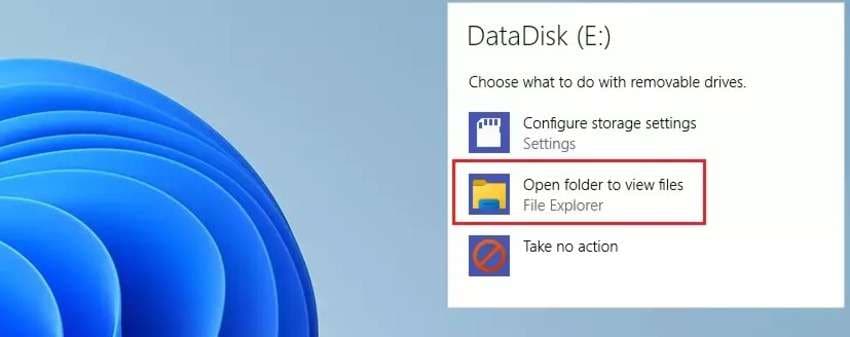
Step 2: If your Windows AutoPlay is on, click Open folder to view files.

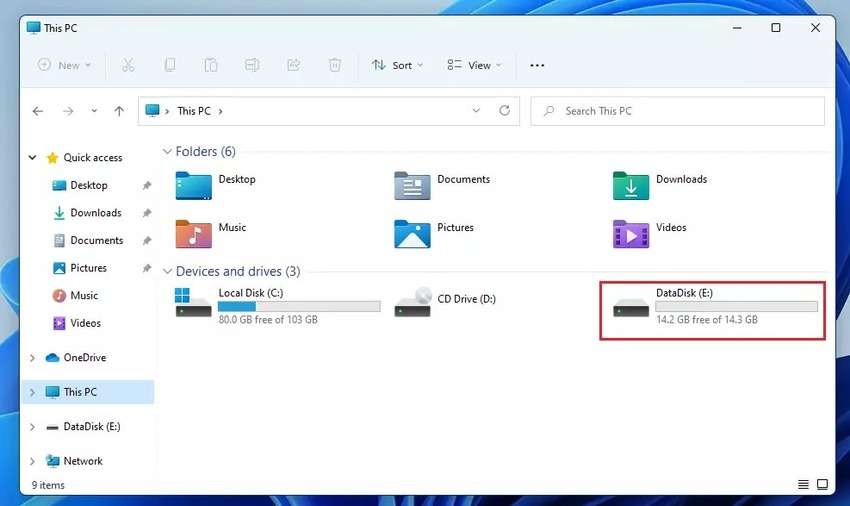
If AutoPlay is off, open File Explorer, go to This PC, find your SD card under Devices and Drives, and open it to view the stored photos.

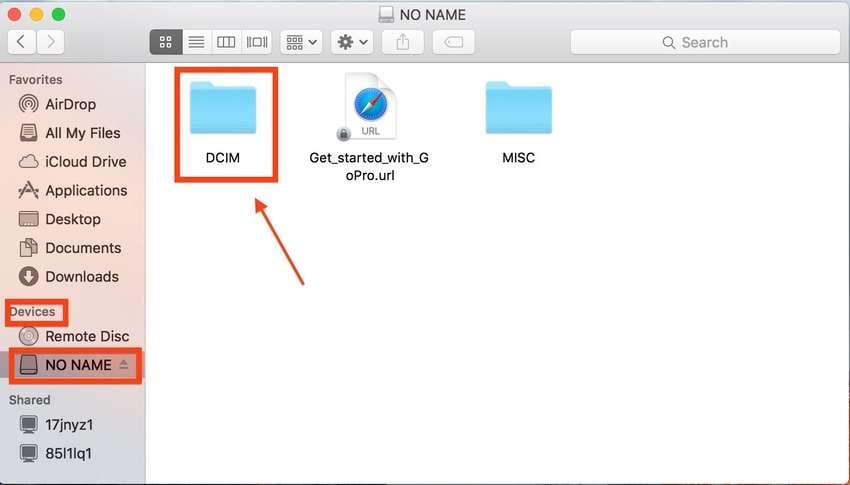
Mac
Step 1: Insert your SD card into an external reader and connect it to your Mac through a USB port.
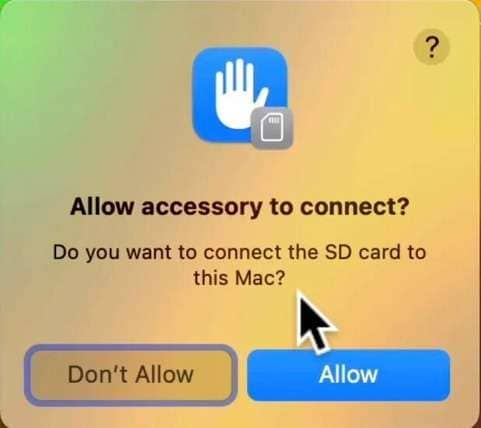
Step 2: If you have macOS Ventura 13.3 or newer, your Mac will ask you to approve the SD card. Click Allow.

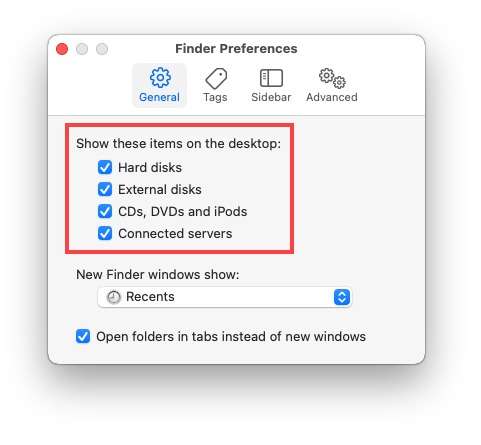
Step 3: Go to Finder > Preferences.
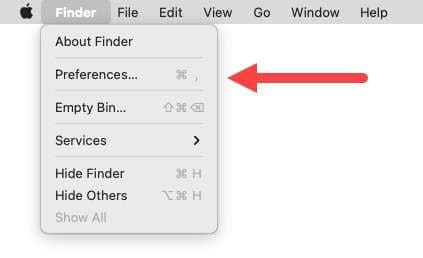
Step 4: Tick all the checkboxes in the General tab to ensure you see the SD card on the desktop.
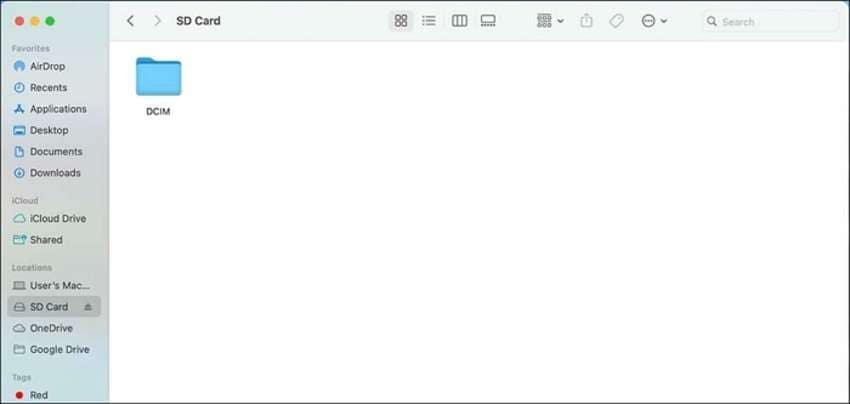
Step 5: Launch Finder and open your SD.
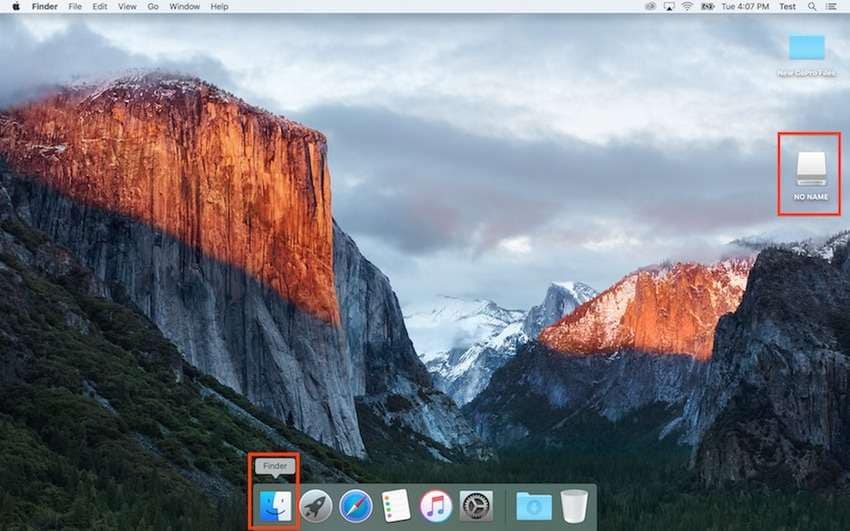
Step 6: Find your photos in the DCIM folder.
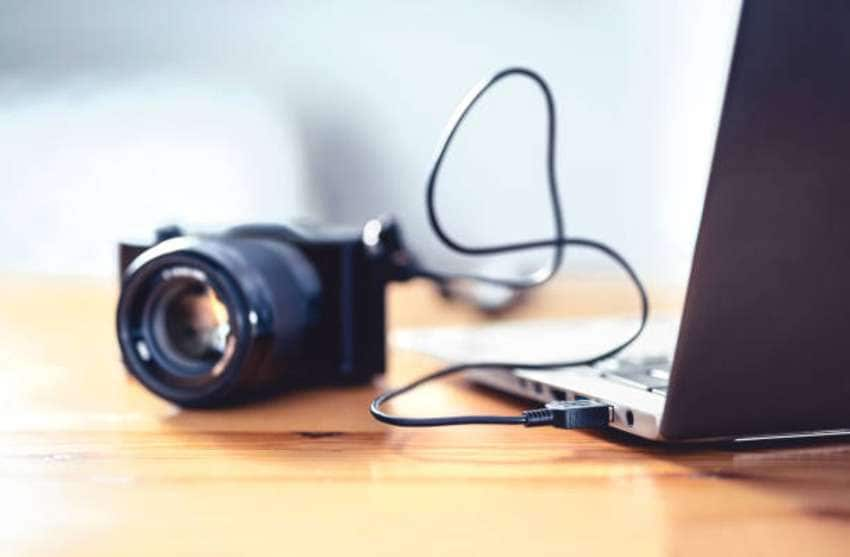
View Photos Directly on Cameras
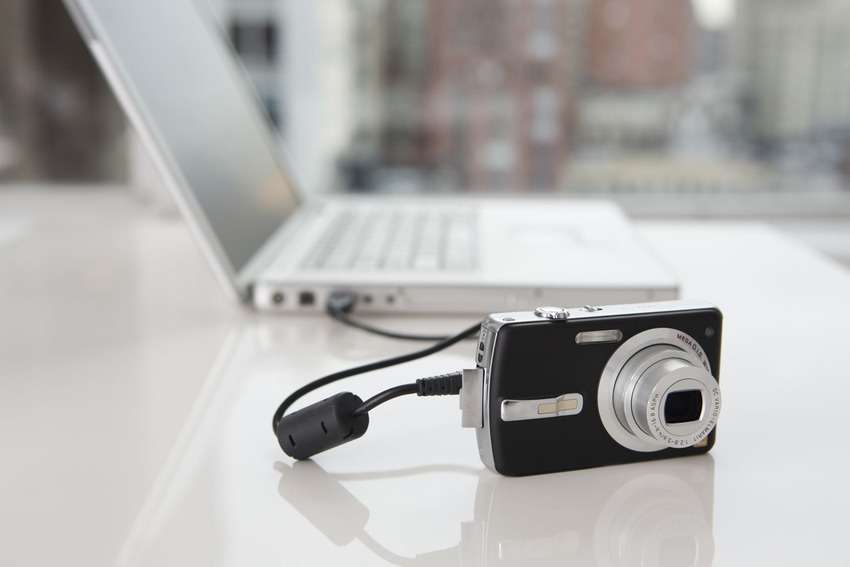
You don't have to remove your SD card from a camera to view the photos on a computer. You can use a USB cable to browse them directly from the camera. That's perfect if you don't have an external reader.
Here's how to view pictures from an SD card on a computer directly from your camera.
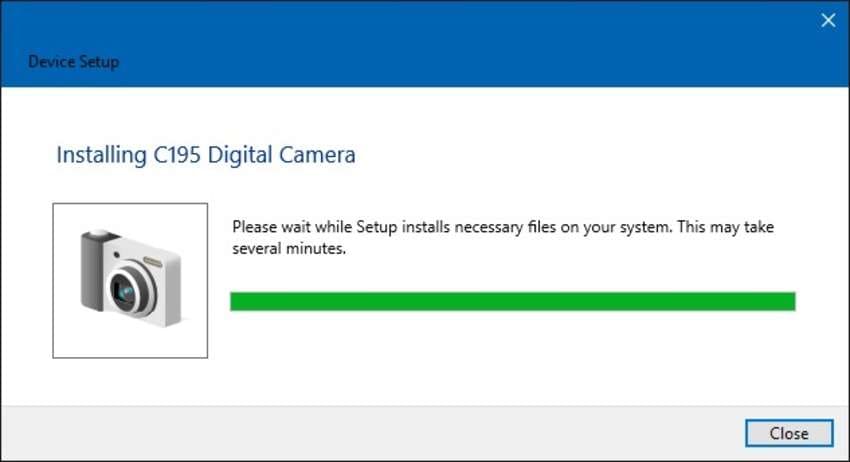
Windows
Step 1: Turn on your camera and connect it to your computer with a USB cable.
Step 2: You'll see a device setup screen if connecting your camera to your PC for the first time. Let Windows initialize the device and install the necessary drivers.
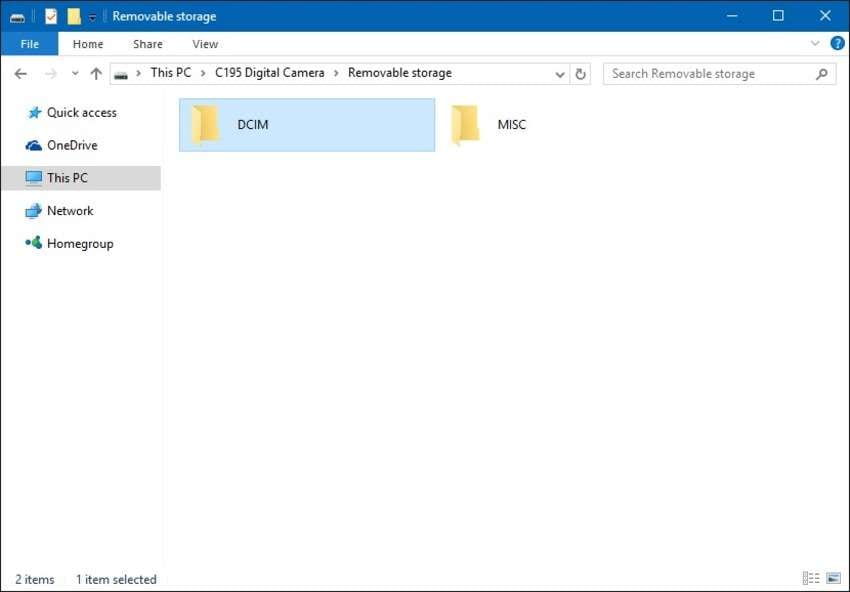
Step 3: Access your camera storage in File Explorer > This PC and open Removable storage.

Step 4: Find your SD card photos in the DCIM folder.
macOS
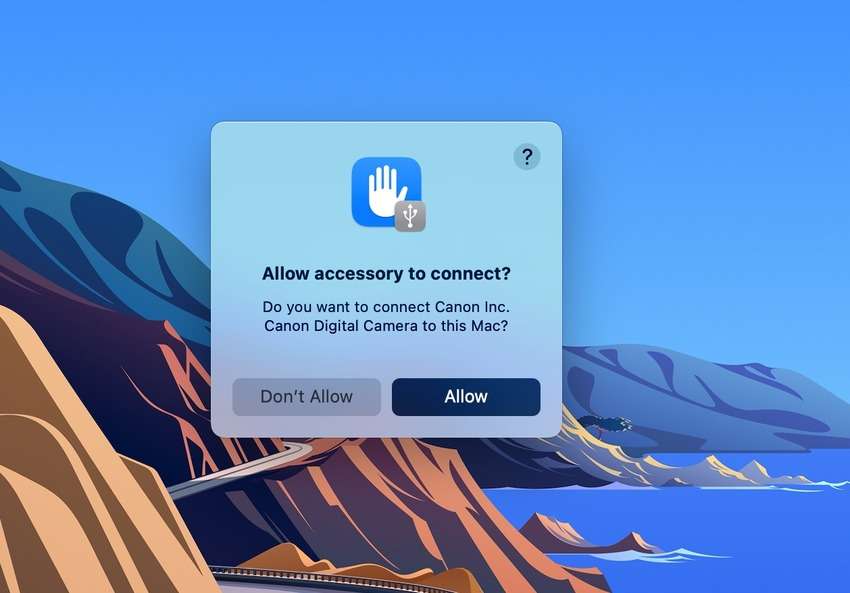
Step 1: Turn on your camera and connect it to your Mac with a USB cable.
Step 2: If your Mac runs on macOS Ventura 13.3 or newer, you'll see a dialog box for connecting accessories. Click Allow.
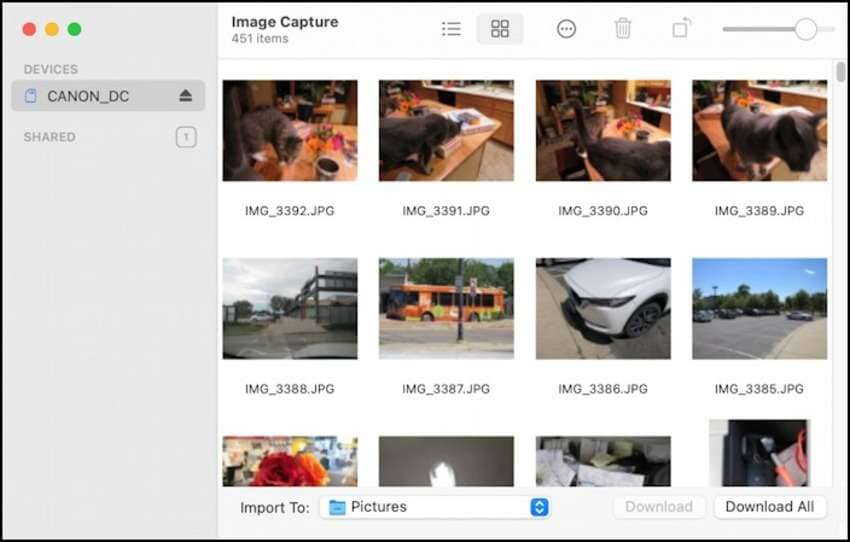
Step 3: Open Image Capture, select your camera in the left sidebar under Devices, and view your SD card pictures. You can also use the Photos app.
Using Built-in Card Readers on Computers
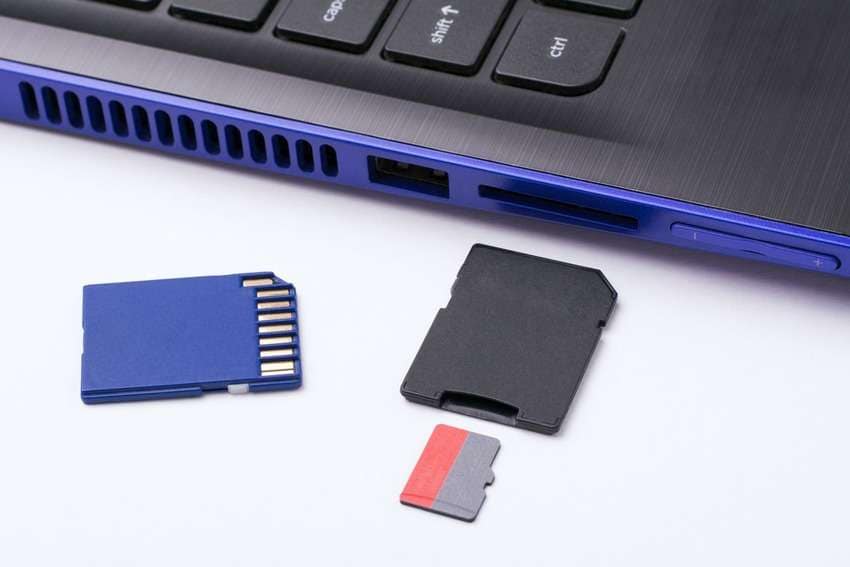
Most new computers have built-in card readers, eliminating the need for their external counterparts. Some (typically older devices) also have a memory card adapter necessary for microSD cards.
Here's how to view pictures from an SD card on a computer using a built-in card reader.
Windows
Step 1: Insert your SD card into your computer's built-in memory slot. Unlock the write-protection switch beforehand if you wish to transfer photos. Otherwise, you can only view them.
Step 2: If you've enabled the Windows AutoPlay feature, click Open folder to view files.
If the AutoPlay is off, access your SD card in File Explorer > This PC. It's under Devices and Drives.
macOS
Step 1: Insert your SD card into your Mac's built-in memory slot, ensuring you unlock the write-protection switch if you wish to transfer photos.
Step 2: If you use macOS Ventura 13.3 or later, click Allow to let your Mac connect to the SD card.
Step 3: Access your SD card on the desktop and find your photos in the DCIM folder. If you don't see it on the desktop, go to Finder > Preferences and select everything in the General tab.
Viewing SD Card Photos on Mobile Devices
Now that you know how to view pictures from an SD card on a laptop or desktop computer, it's time to dive into mobile devices.
Unlike iOS devices, their Android rivals have expandable storage. However, they only support microSD cards, requiring an external reader for SD cards.
Here's how to view pictures in SD card storage on Android and iOS phones and tablets.
Android
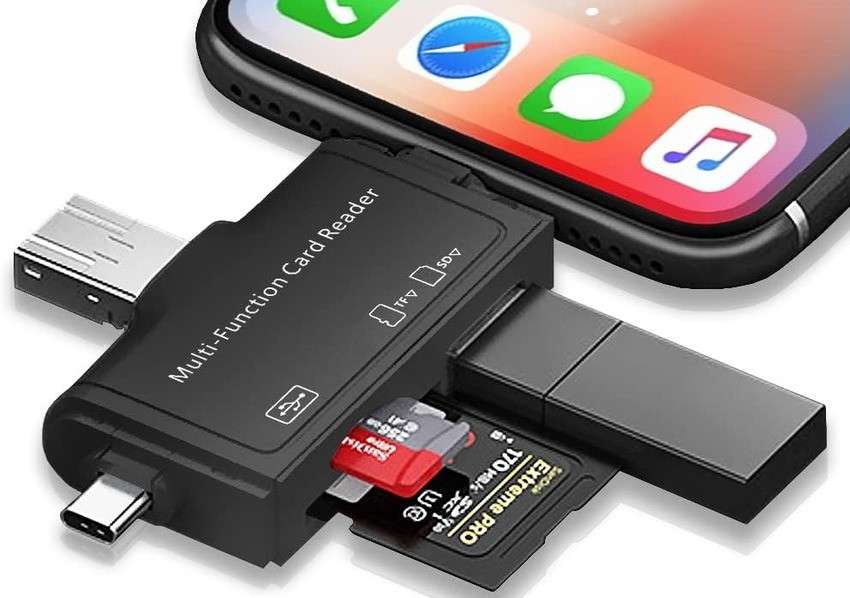
Step 1: Insert your SD card into an external reader with a compatible USB connector and plug it into your Android device's USB port.
Step 2: View your photos in Settings > Storage > SD Card.
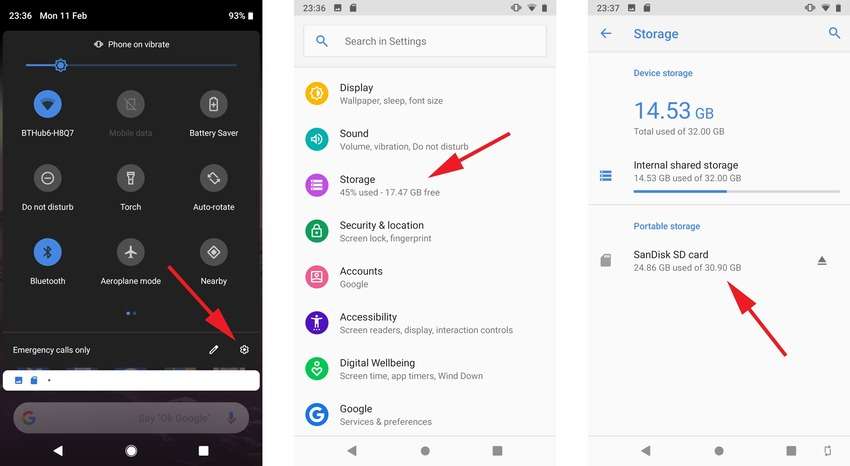
You can also access the SD card under Storage Devices in the Files app.
iOS
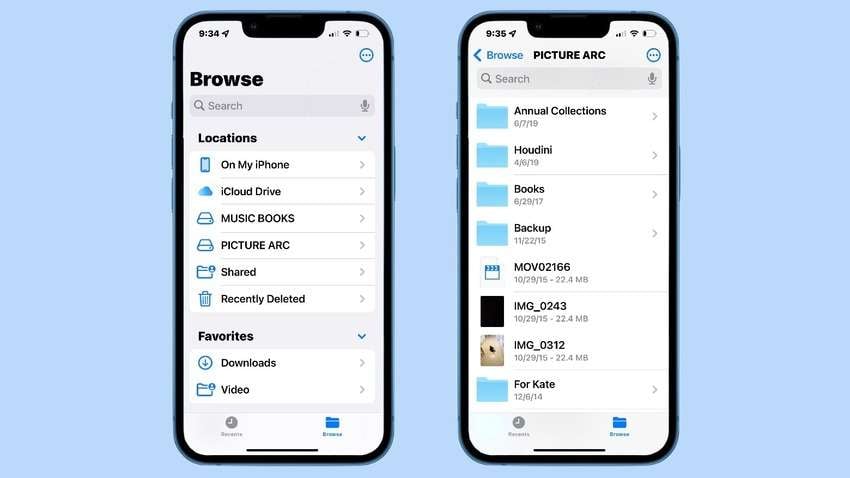
Step 1: Insert your SD card into an iOS-compatible card reader and connect it to your iPhone, iPad, or iPod Touch via a lightning or USB-C connector.
Step 2: Go to Files > Browse to access your SD card.
How to Troubleshoot and Fix Common SD Card Issues
What if your computer doesn't recognize your SD card? What if the photos refuse to open? What if some files are missing or your digital camera suddenly displays an error message? And If you format your SD card without backup, you may permanently lose your photos.
Quick Fix: If your SD card photos are corrupted or won't open, you can directly fix them using professional photo repair software like Wondershare Repairit Photo Repair — no technical skills required.
You'll probably check the connection to ensure a USB cable isn't loose or the card reader works correctly. You'll try another USB port, computer, mobile device, and card reader to see if anything changes. You'll also likely restart your PC, Mac, or mobile.
What if the problem persists? File system incompatibility or data corruption (e.g., due to malware) might be at play. Here's how to fix the issues and salvage your photos.
SD Card Compatibility Errors
Formatting your SD card is the only way to make its file system compatible with your device. That causes data loss, but it isn't permanent if you perform a Quick Format.
However, you'll still need data recovery software to restore lost files. We recommend Wondershare Recoverit, which has a 98% success rate and supports 1,000 file formats and 2,000+ storage media, including SD cards. It's compatible with Windows and macOS.
Here's how to format your SD card to eliminate incompatibility issues.
Windows
Step 1: Connect your SD card to your computer.
Step 2: Launch File Explorer, right-click your SD card storage, and select Format.
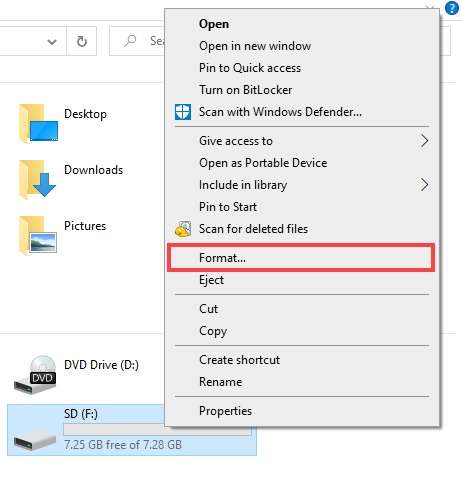
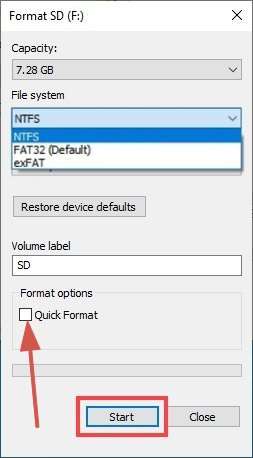
Step 3: Set the file system: FAT32 if the SD card has a maximum storage of 32 GB (and you'll use it on Android) or exFAT if it exceeds 64 GB. Tick the Quick Format checkbox and hit Start.
macOS
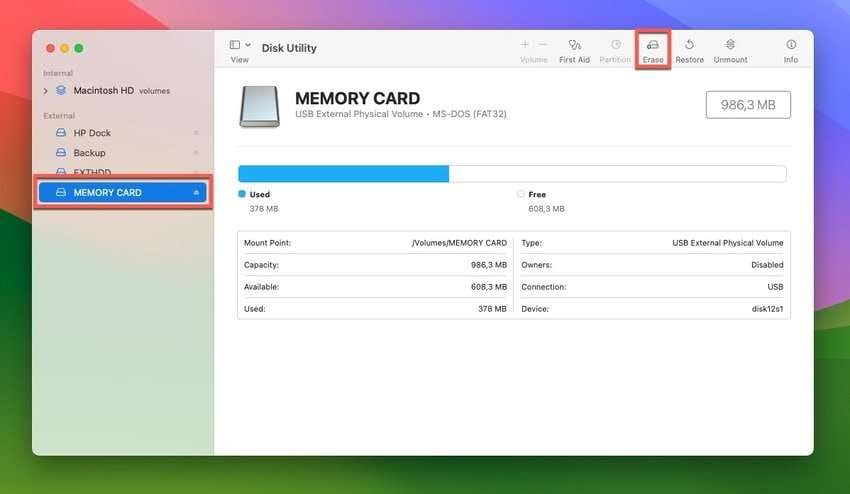
Step 1: Connect your SD card to your Mac.
Step 2: Launch Disk Utility, select the SD card in the left sidebar, and click Erase.
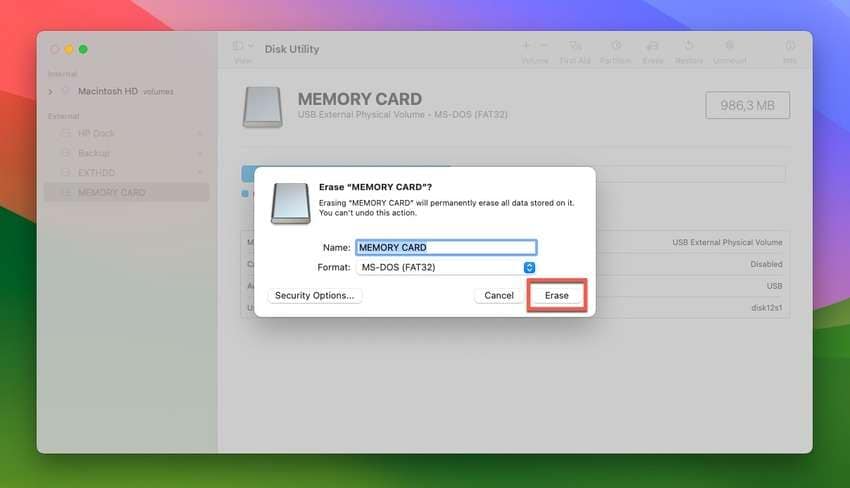
Step 3: Set the MS-DOS (FAT32) format if your SD card doesn't exceed 32 GB or exFAT if it has more than 64 GB of storage. Click Erase and confirm your choice.
Corrupted SD Cards
You can fix SD card data corruption in many ways, but the following are the most straightforward. However, formatting might resolve the problem if these or other methods don't work.
Windows
Step 1: Connect your SD card to your computer.
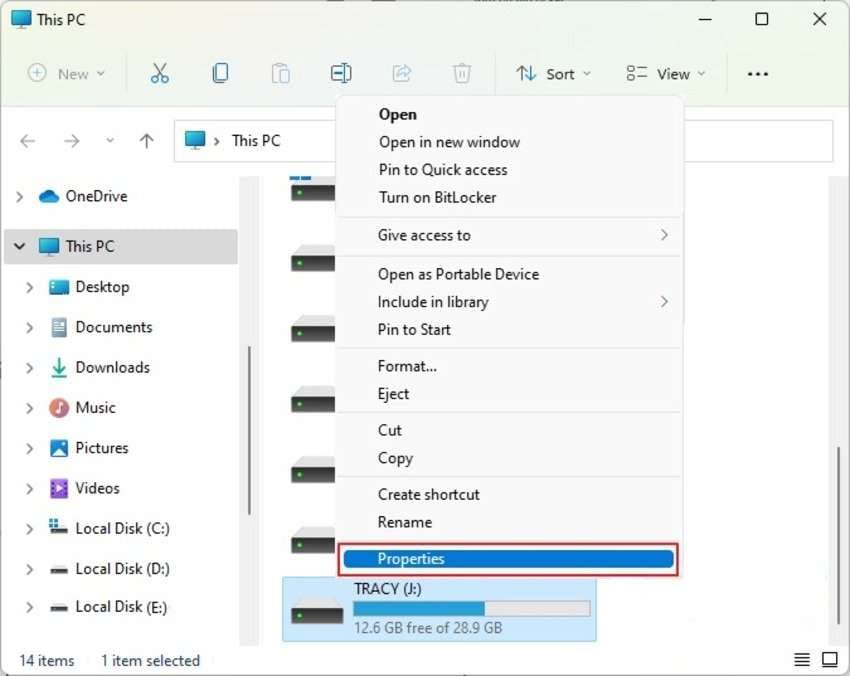
Step 2: Go to File Explorer > This PC, right-click your SD card, and select Properties.
Step 3: Click Check in the Tools tab and Repair the drive if the checker finds errors.

macOS
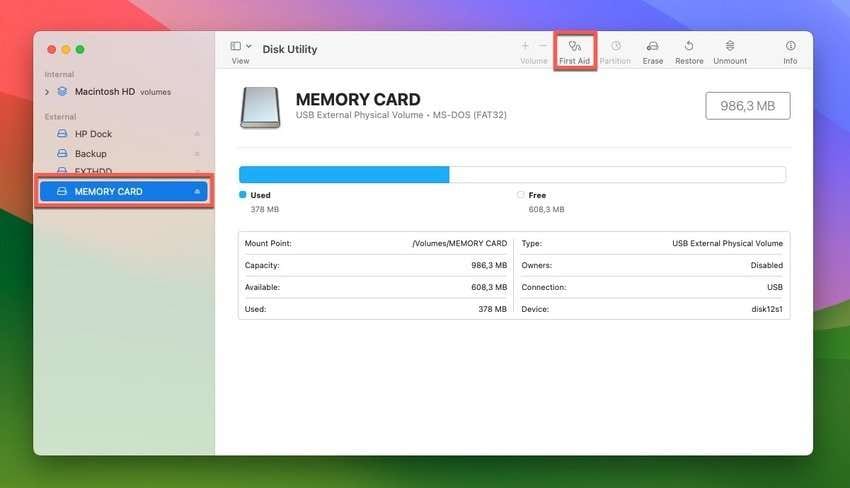
Step 1: Connect your SD card to your Mac.
Step 2: Launch Disk Utility, select your SD card in the left sidebar, click First Aid, and hit Run.
Corrupted Photos
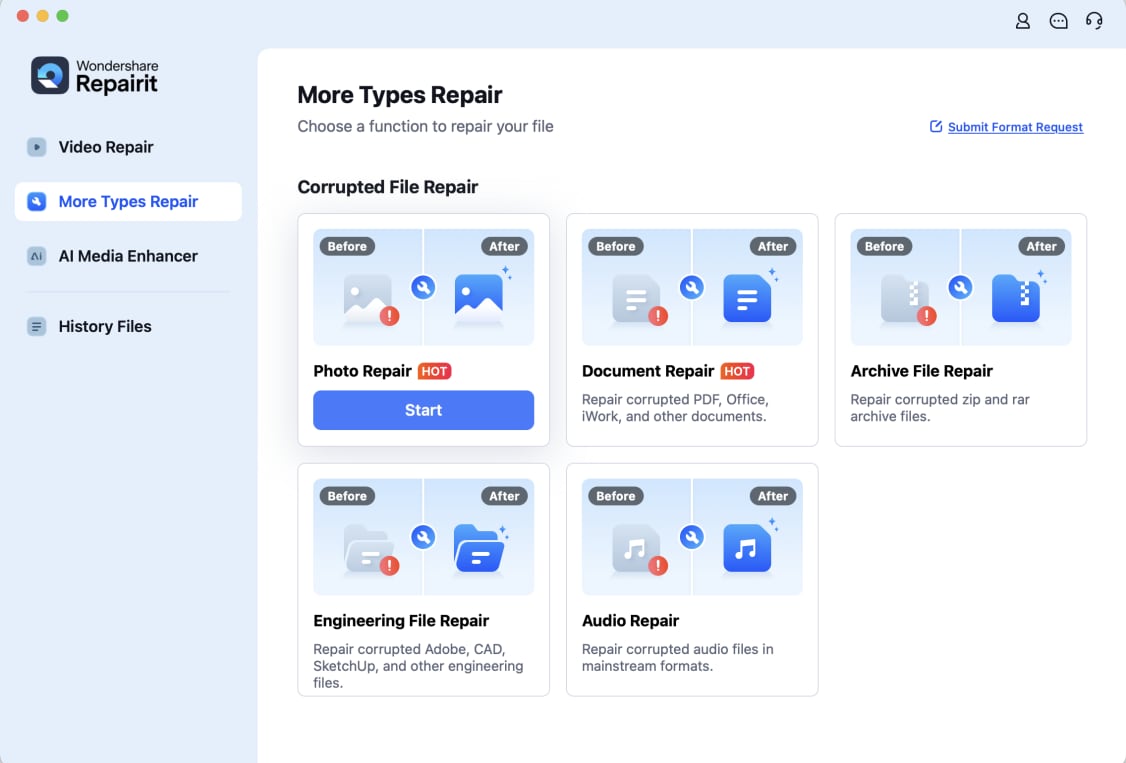
Whether the issues above leave your SD card with corrupted photos or they were already there, a reliable solution like Wondershare Repairit Photo Repair can return them to their former glory. This desktop software supports 18 image formats and is compatible with Windows and macOS.
Download the suitable version to your computer, install the software, and follow the steps below to fix your corrupted SD card pictures (the interface is identical on macOS and Windows):
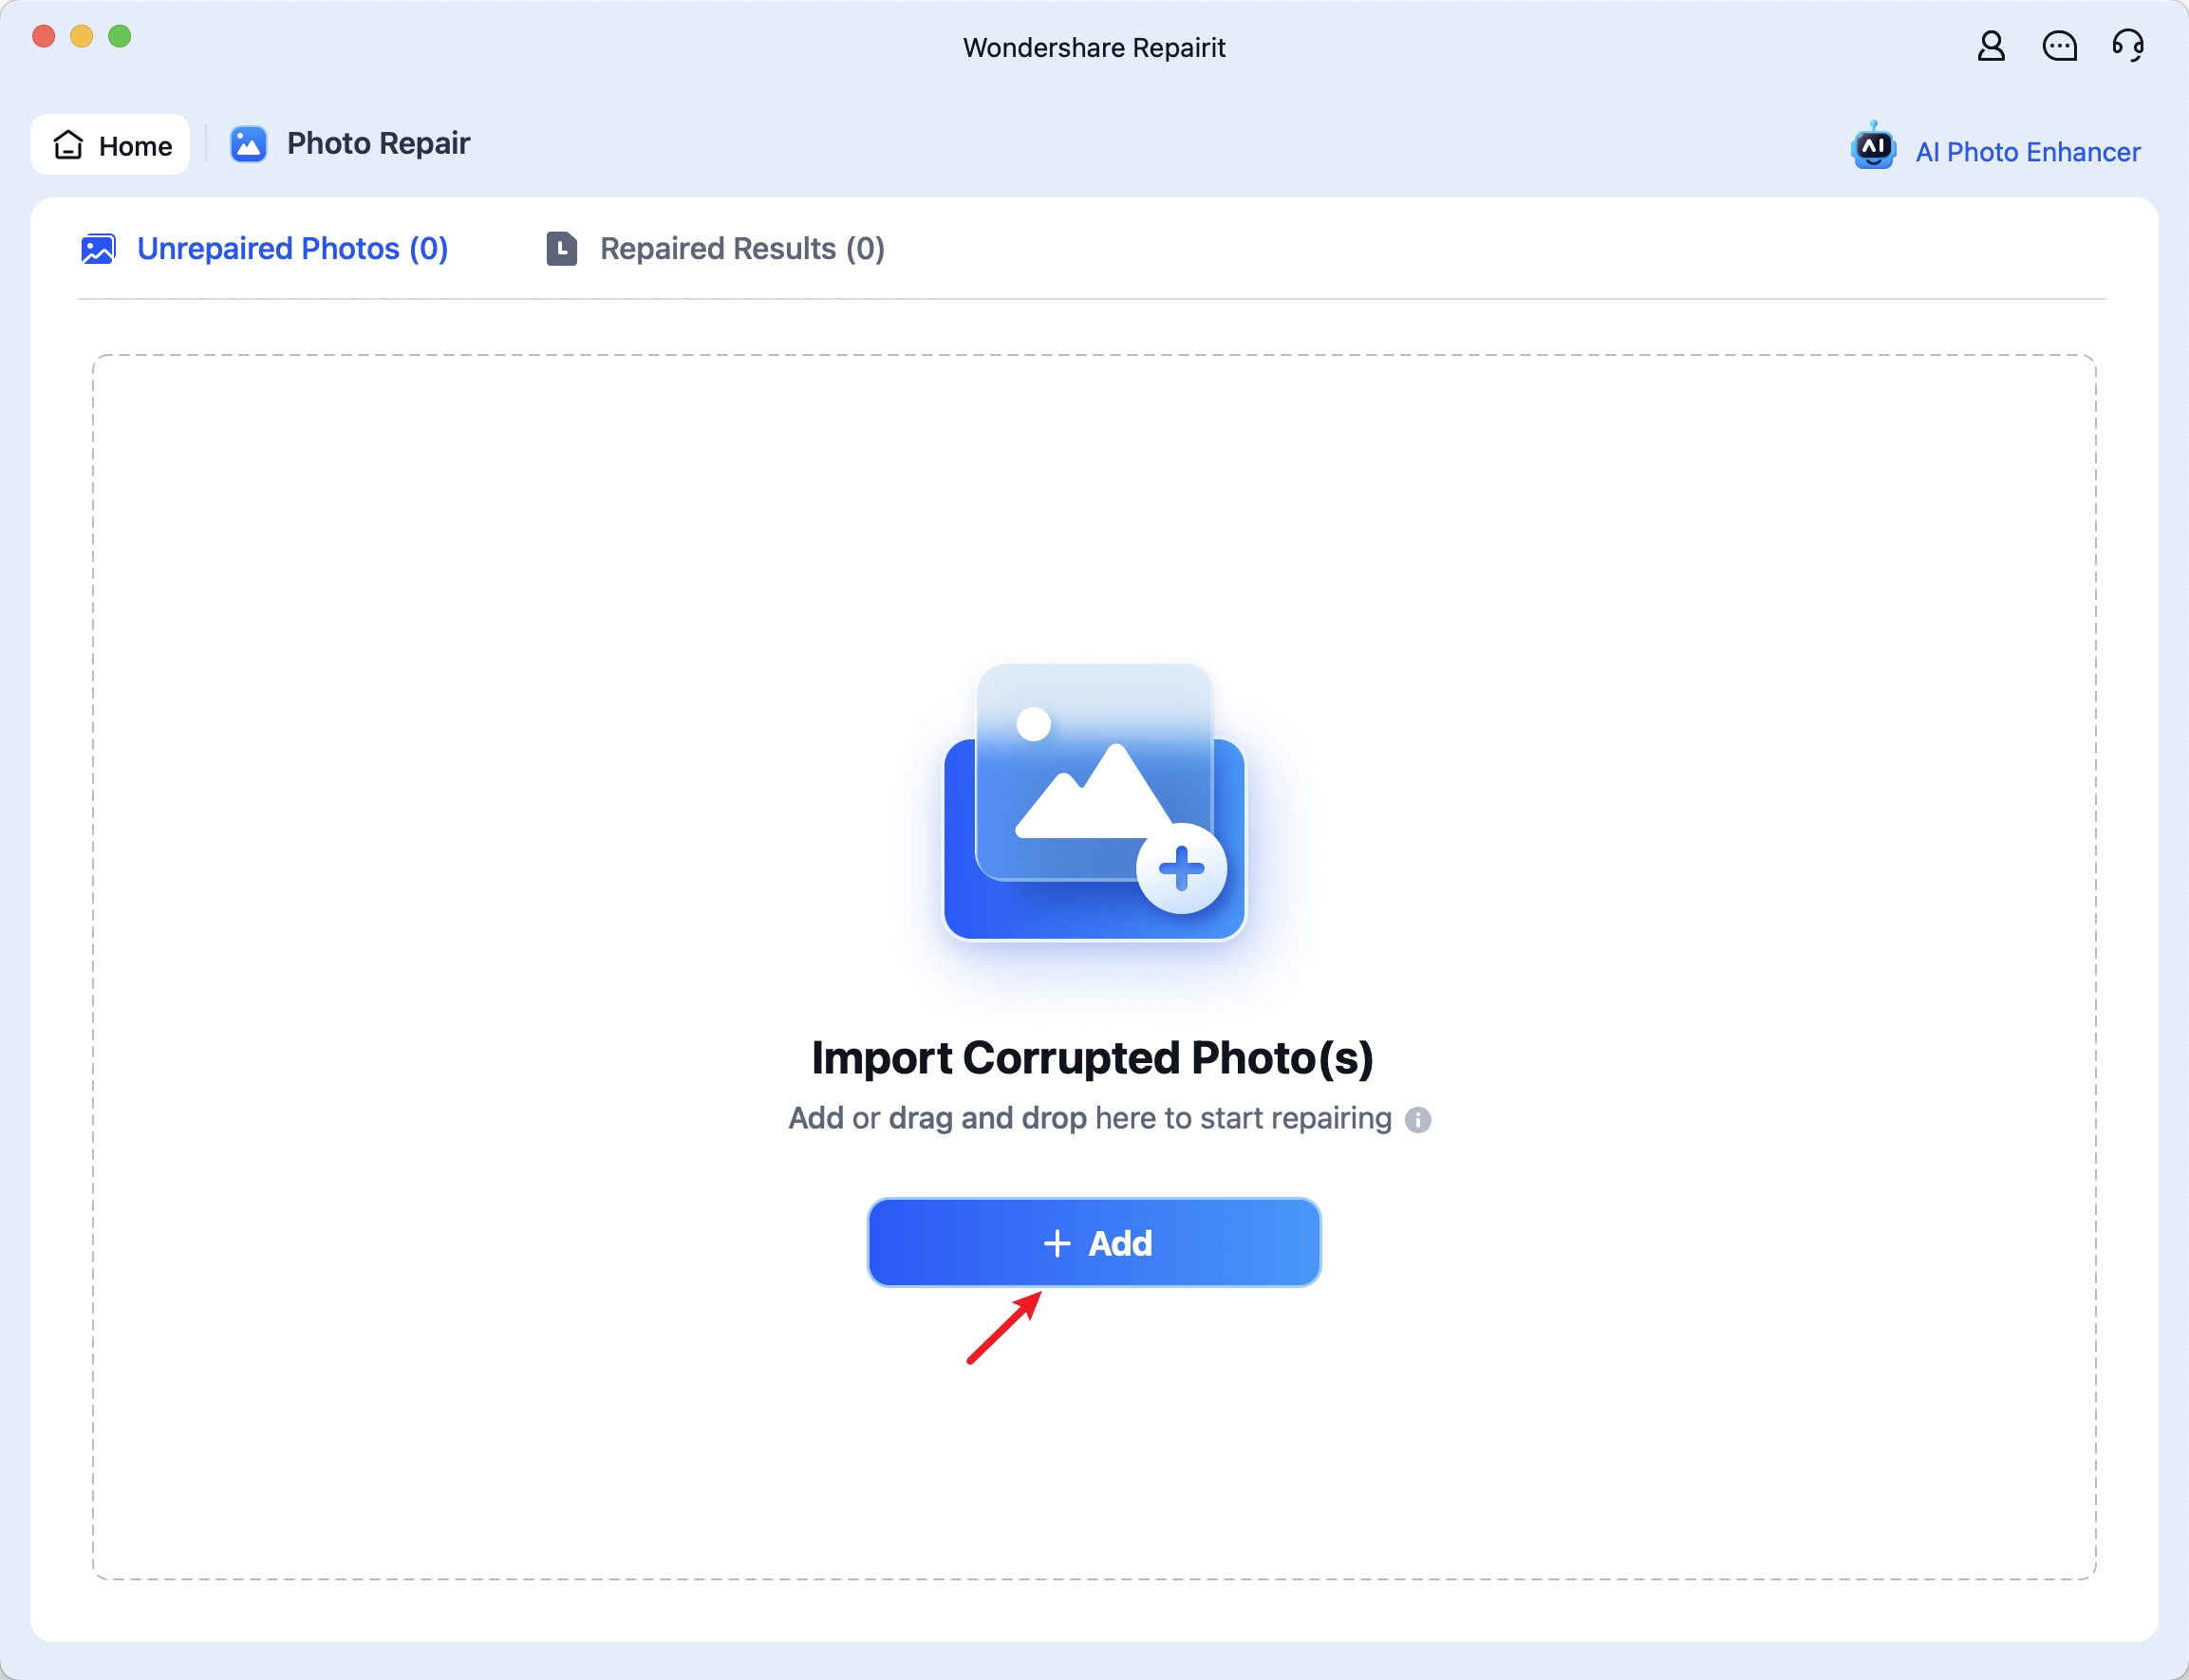
Step 1: Connect your SD card to your computer.
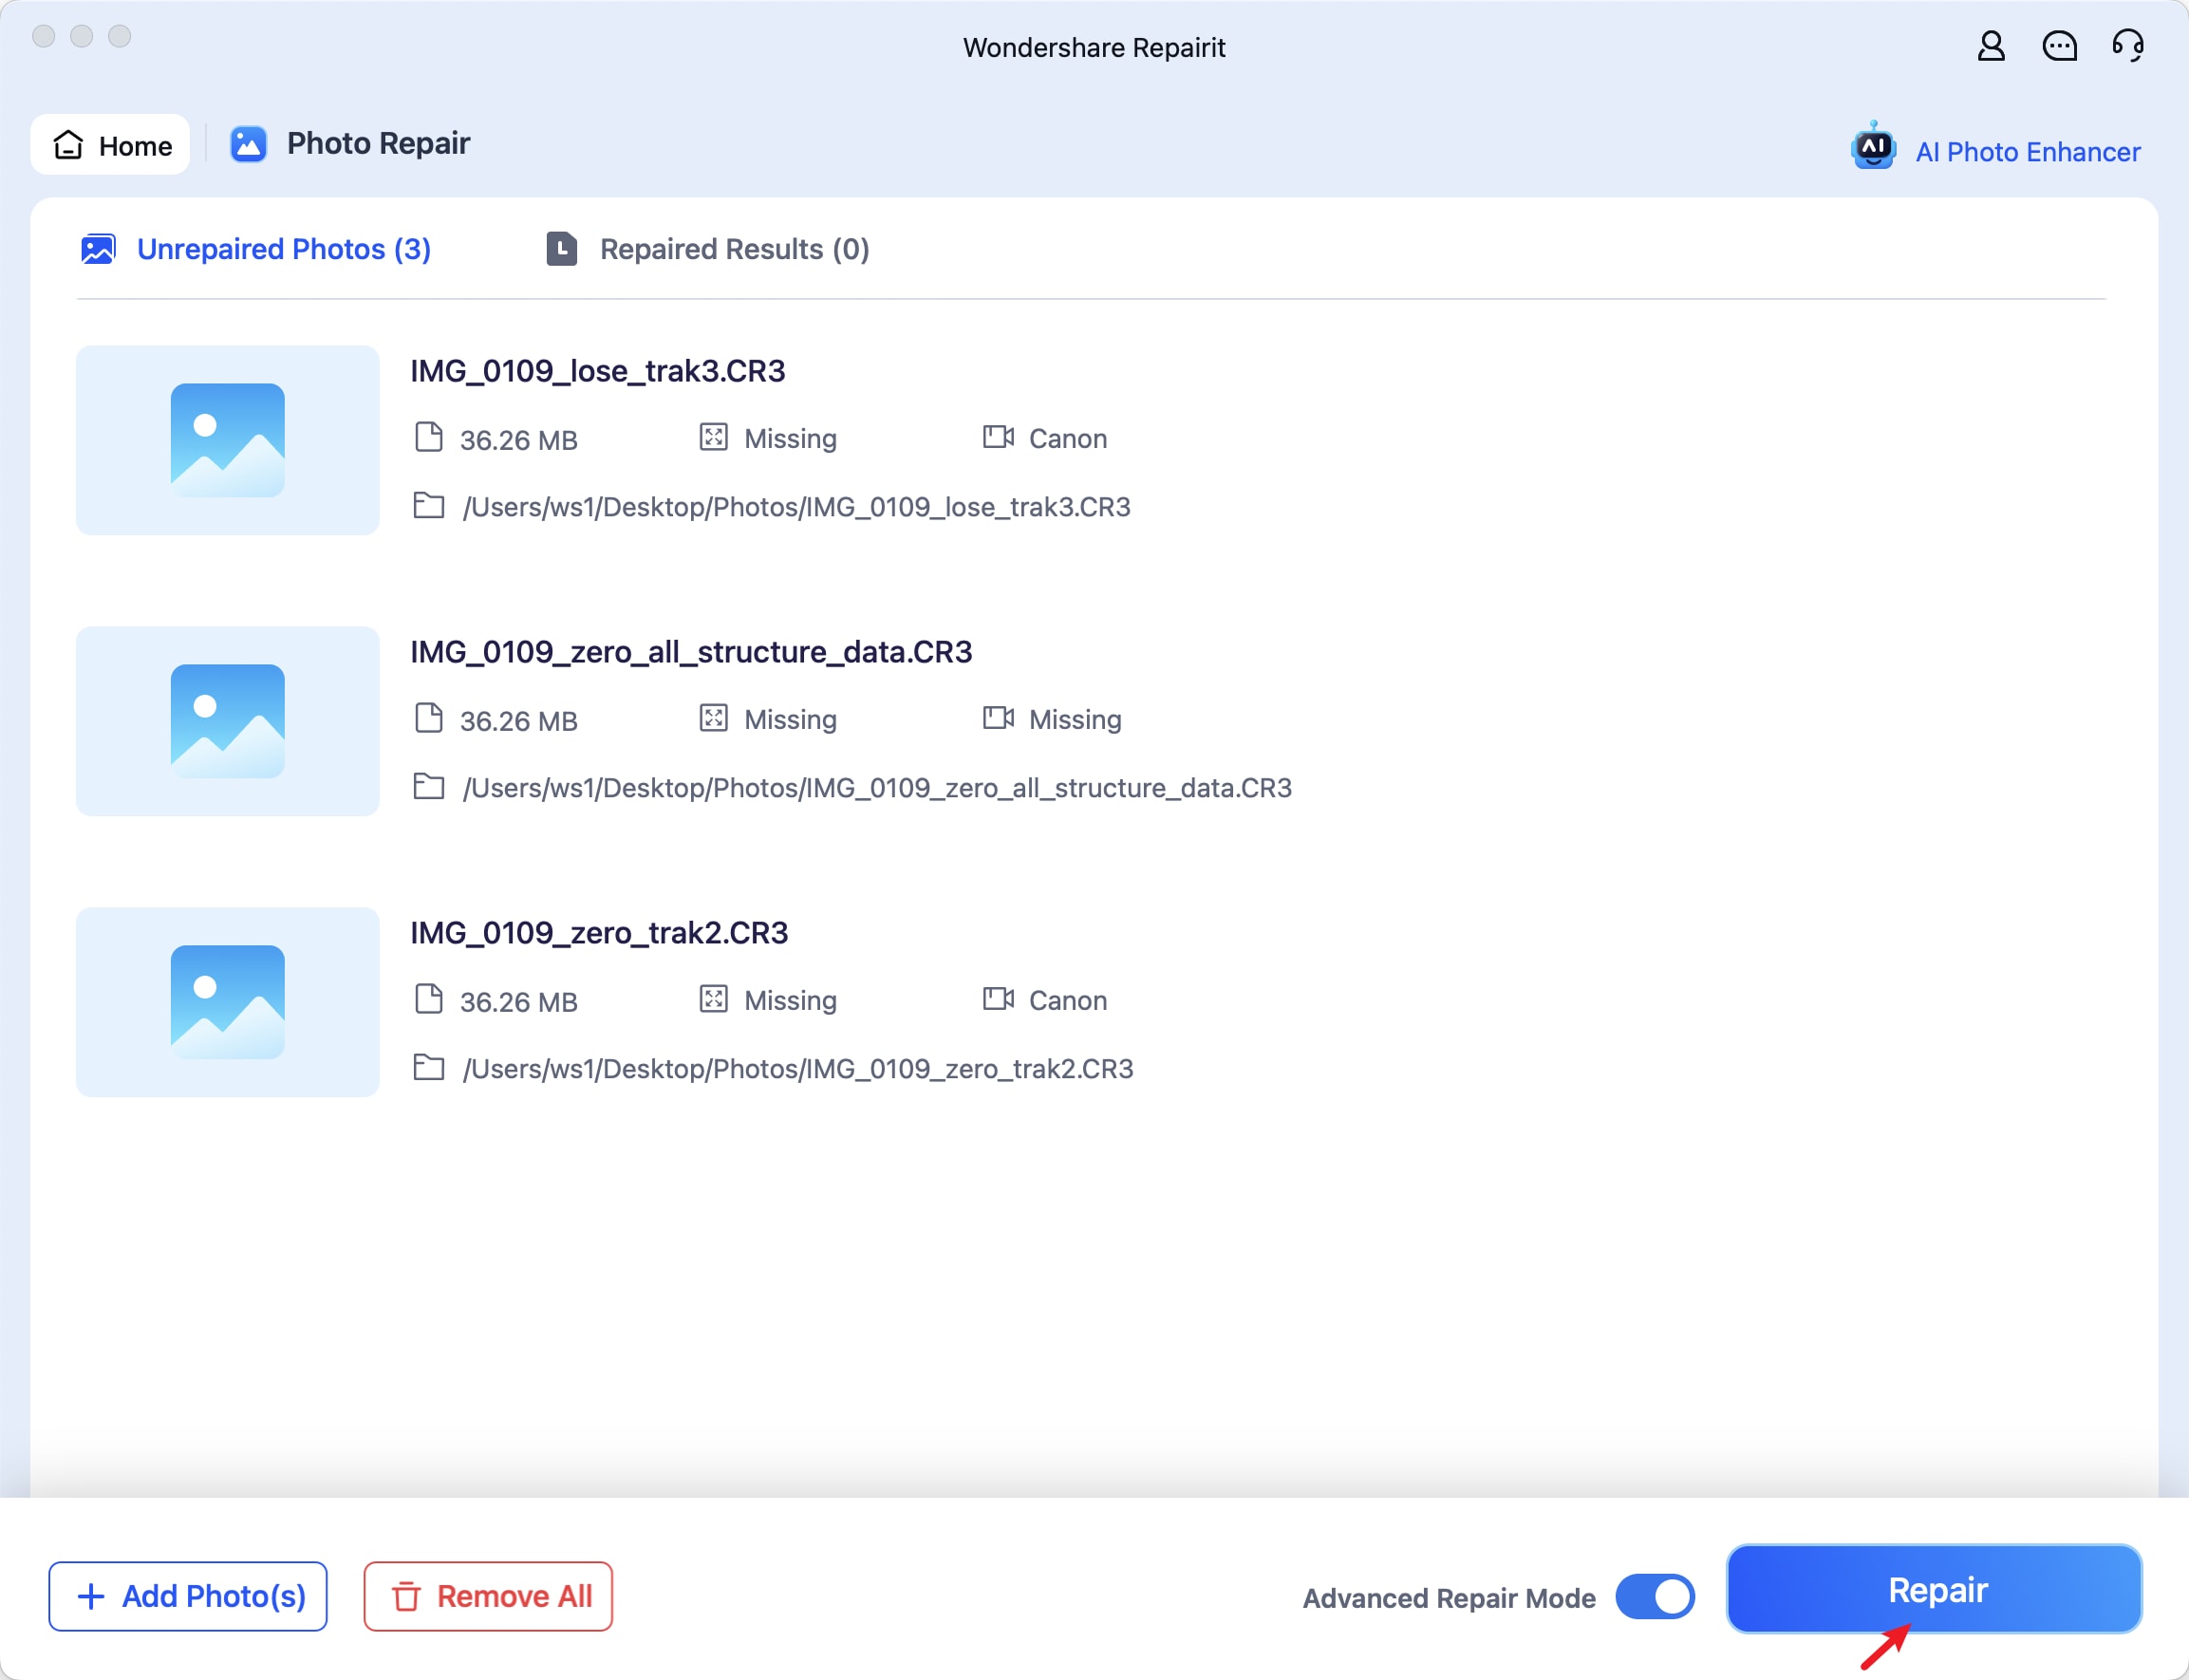
Step 2: Launch Wondershare Repairit and go to More Types Repair > Photo Repair.
Step 3: Click Add to import corrupted images from your SD card.
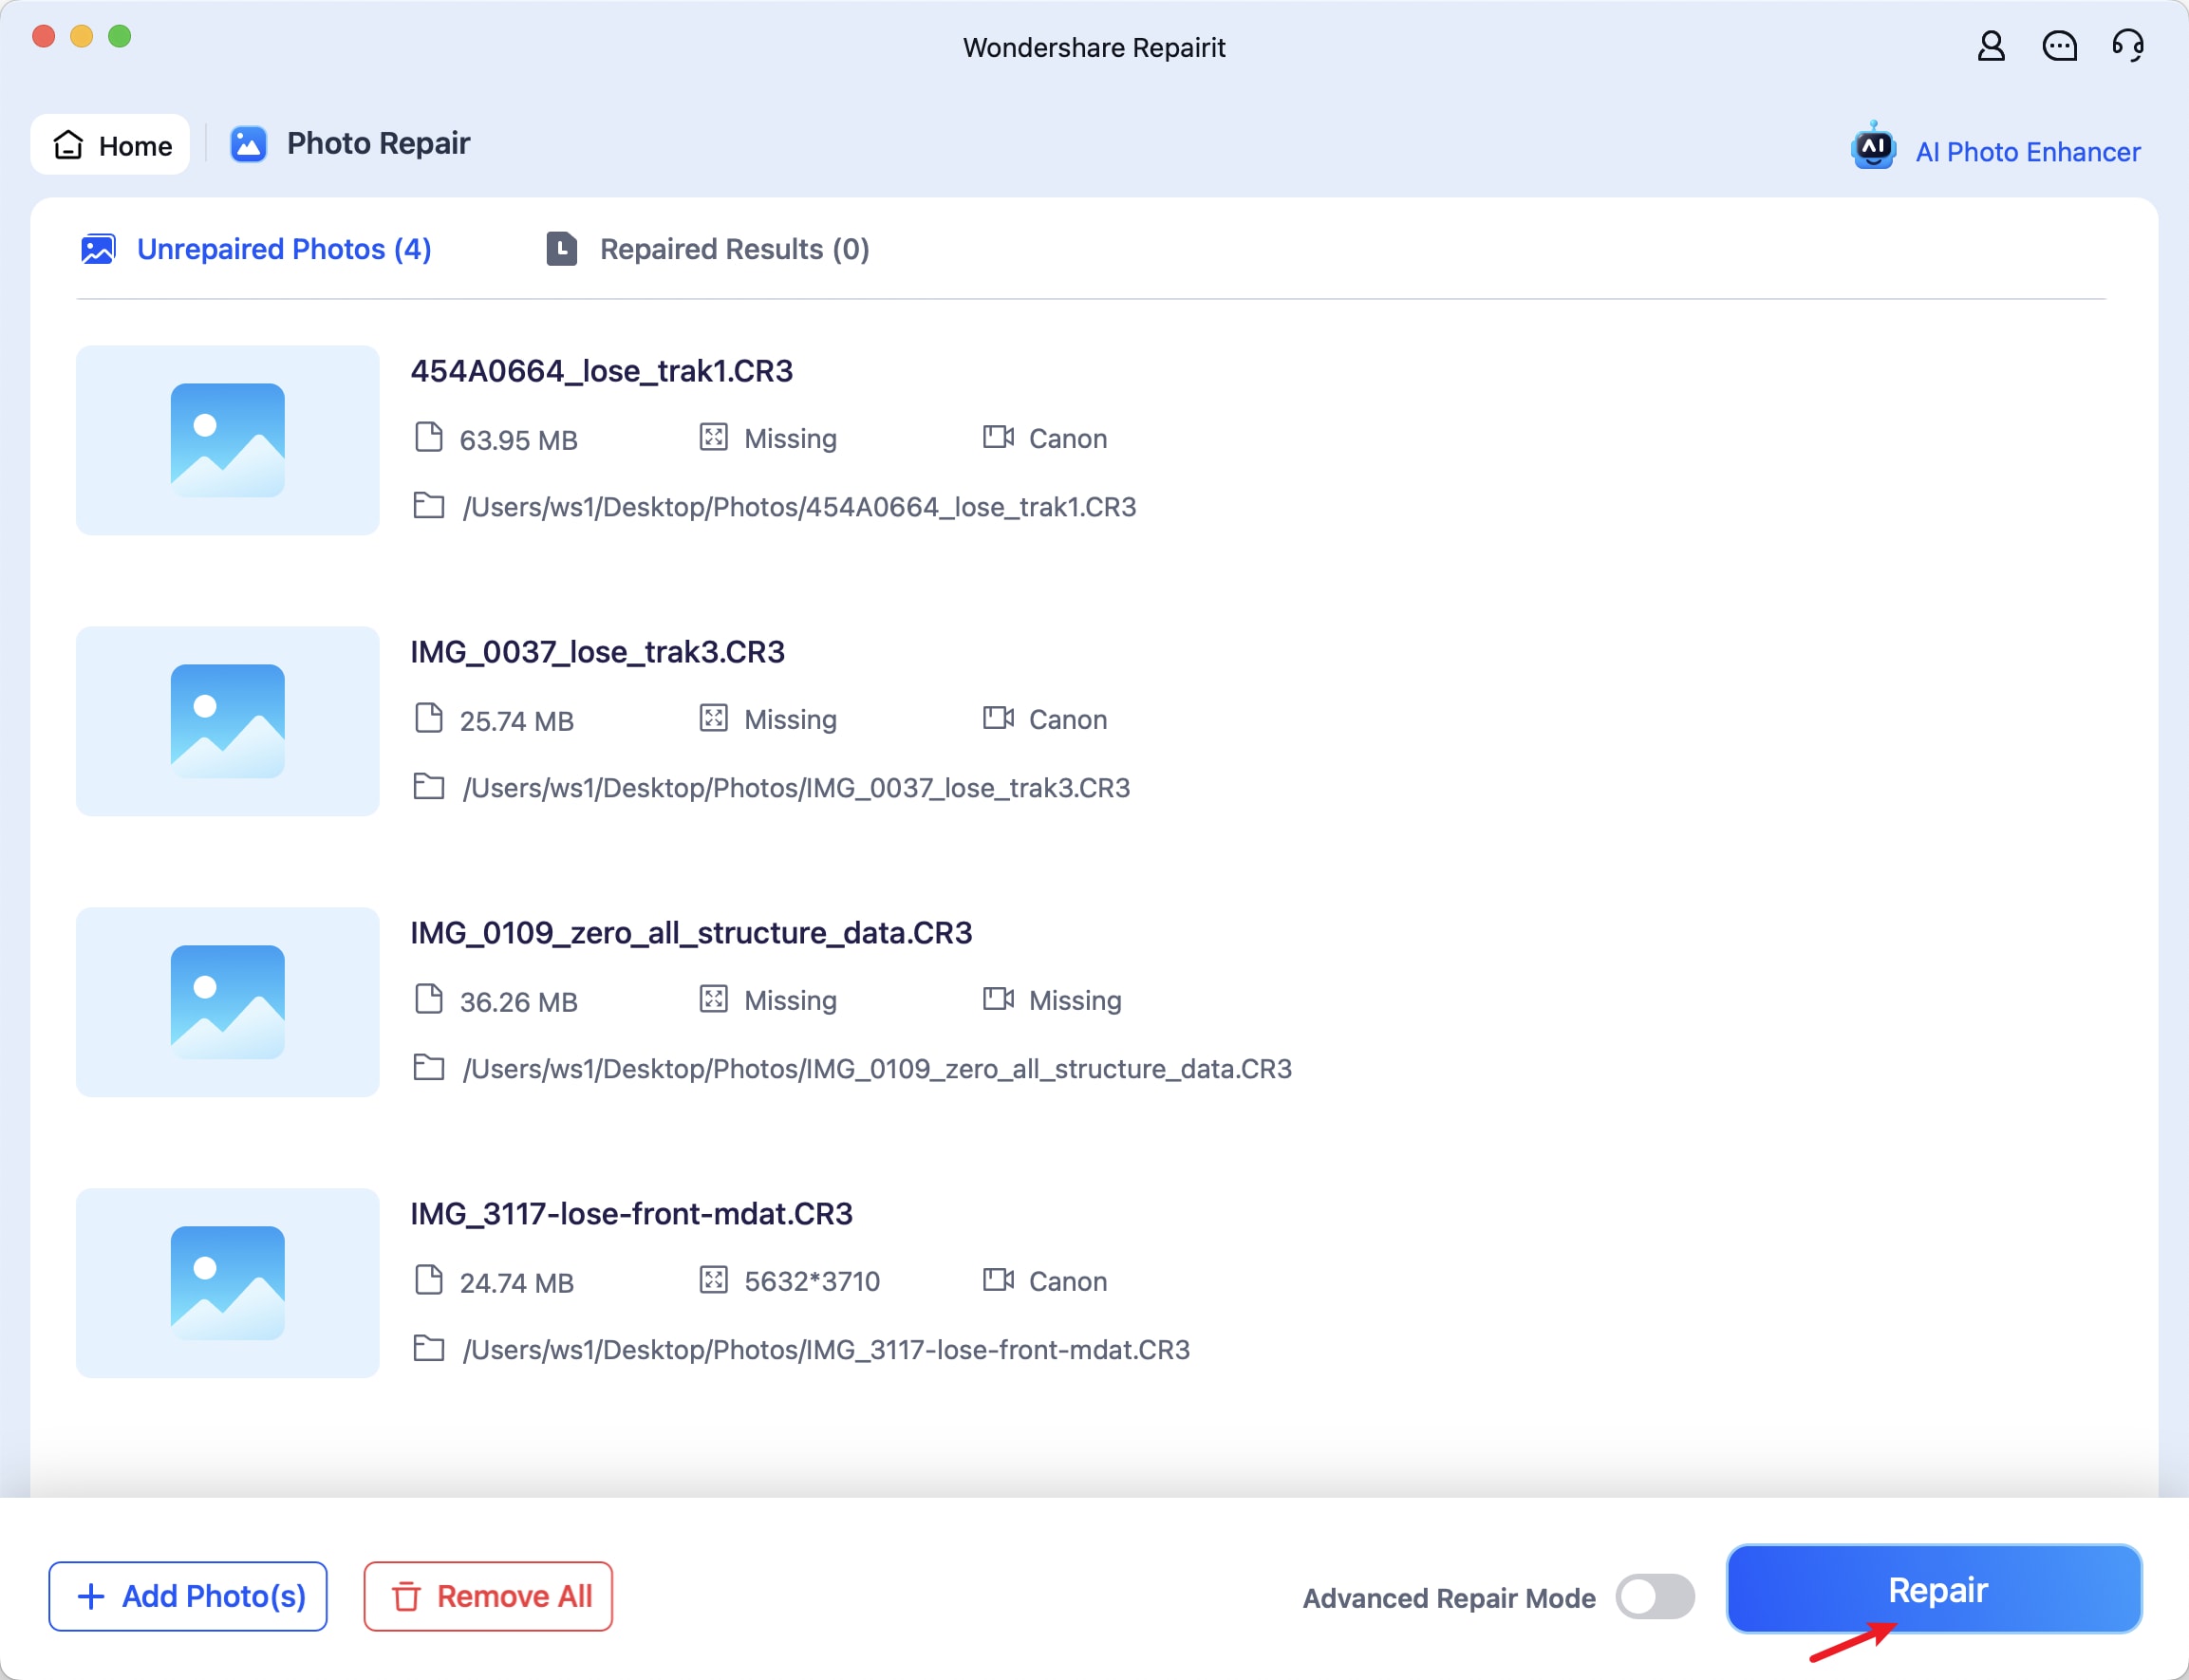
Step 4: Click Repair.
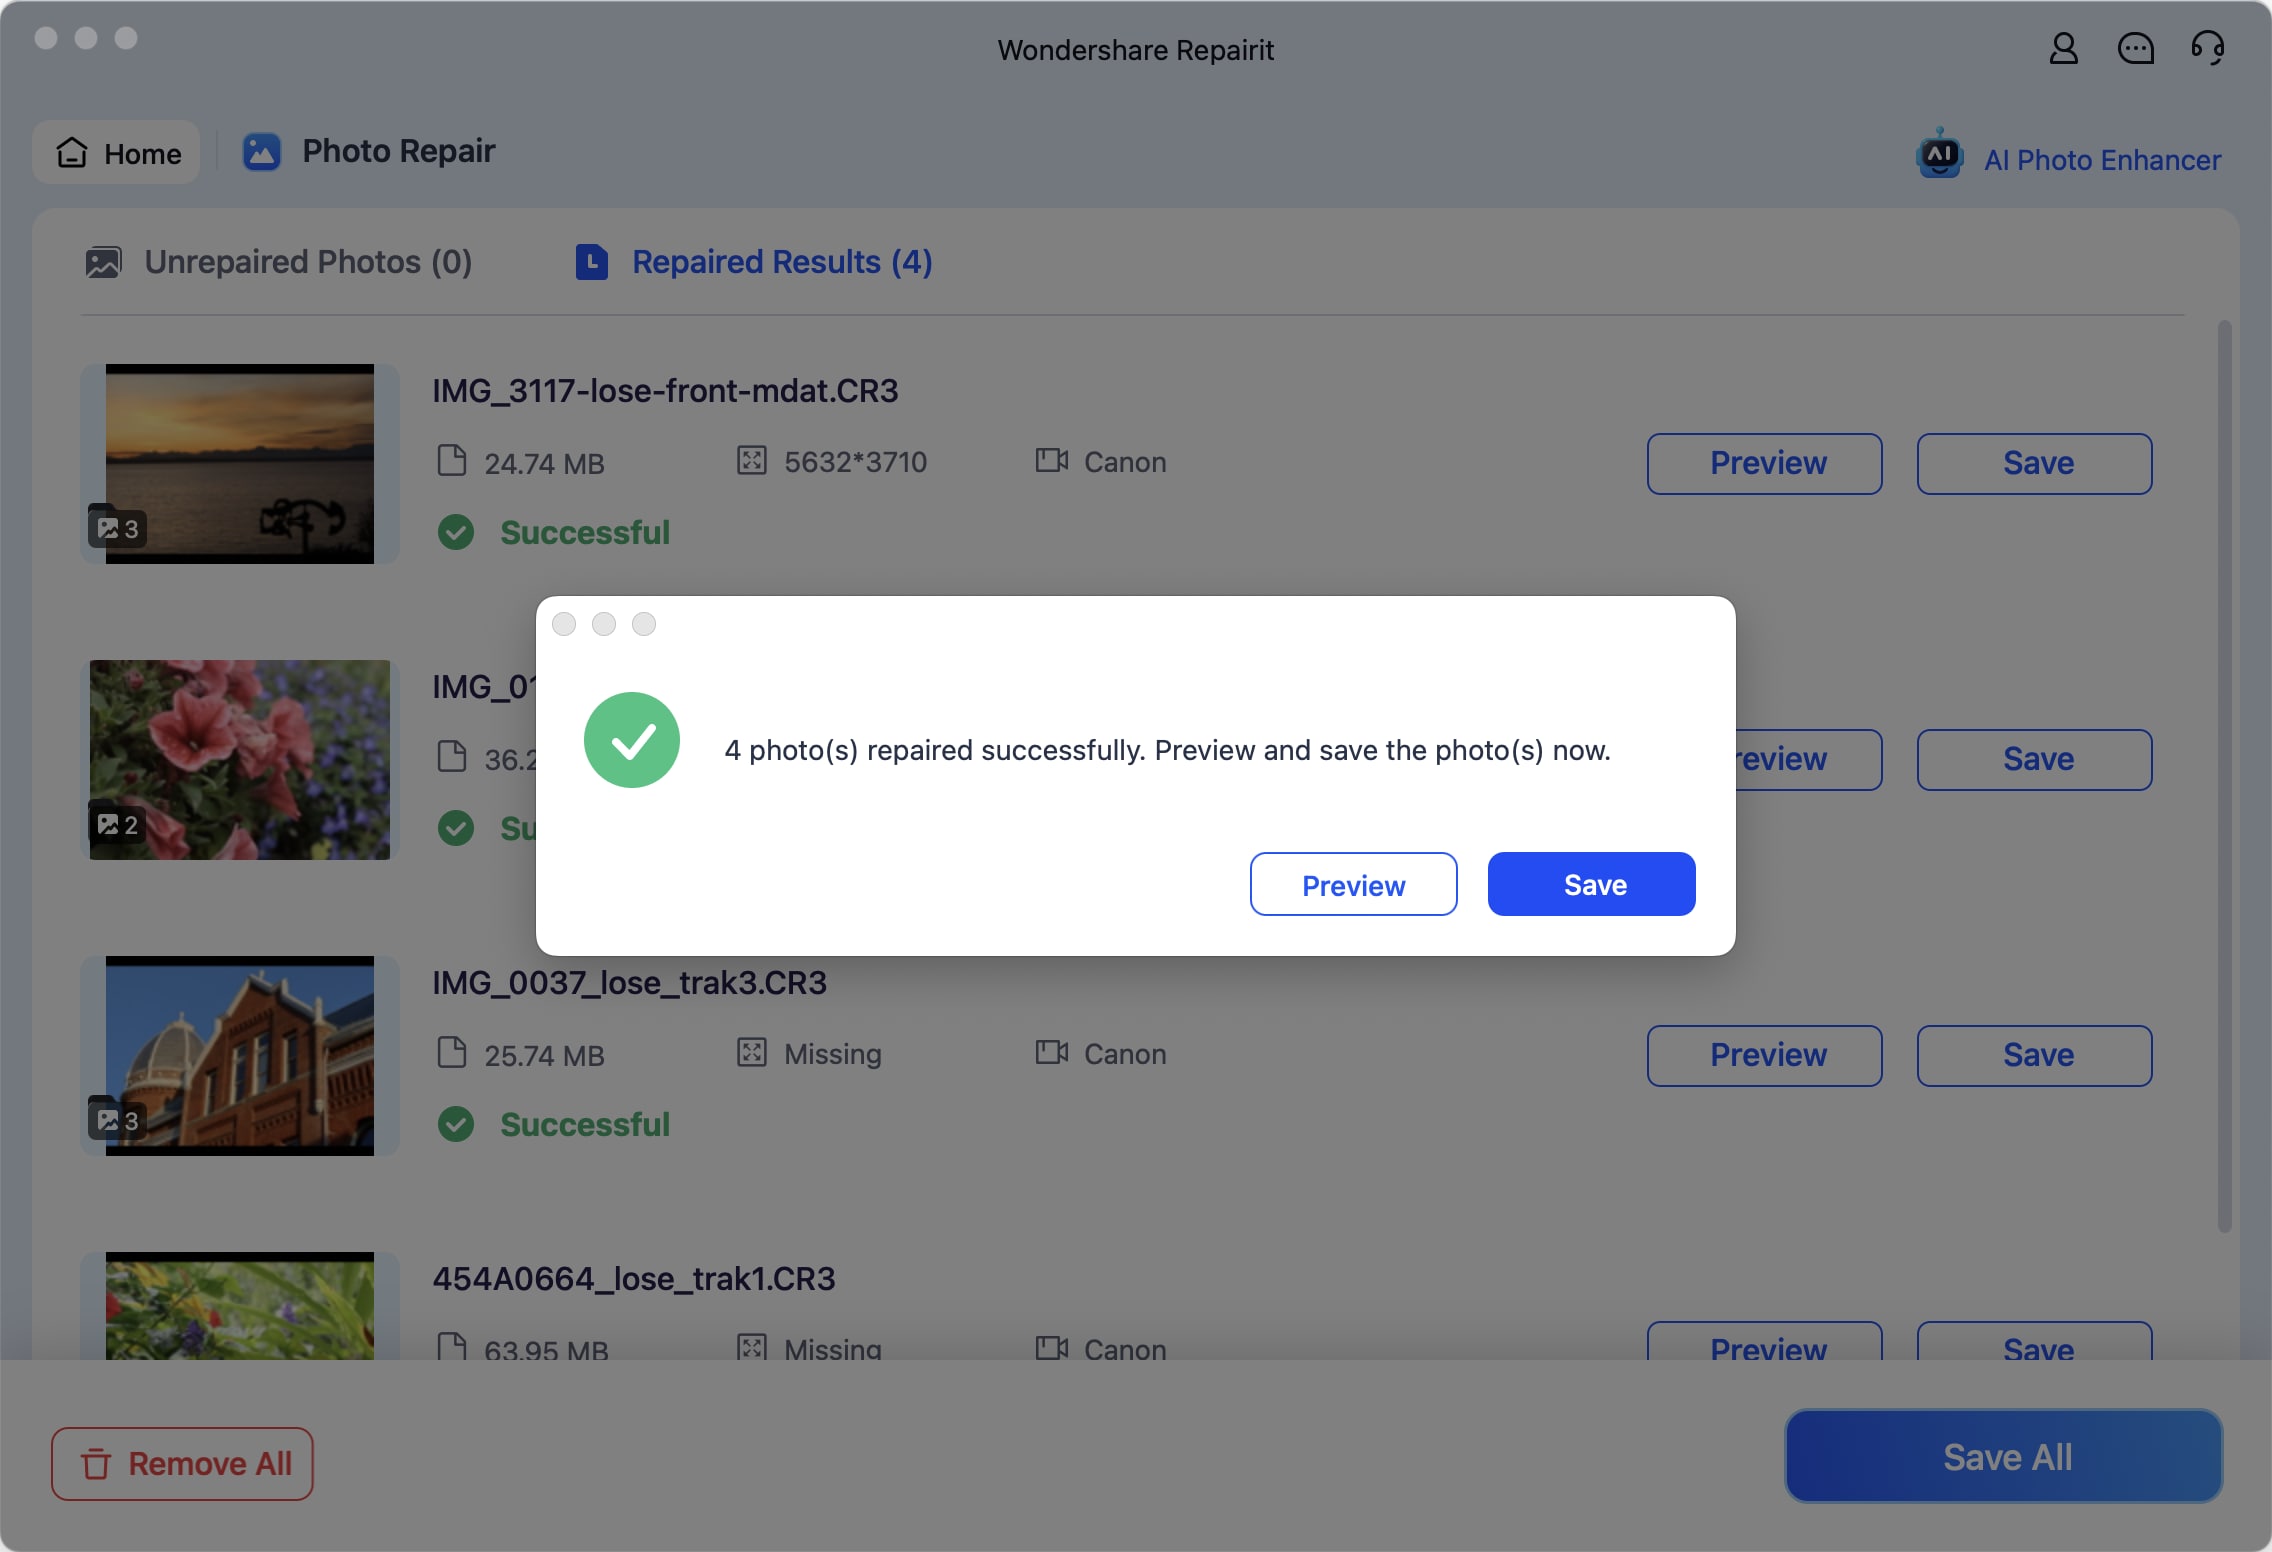
Step 5: Click OK when you see the success message and preview the pictures.
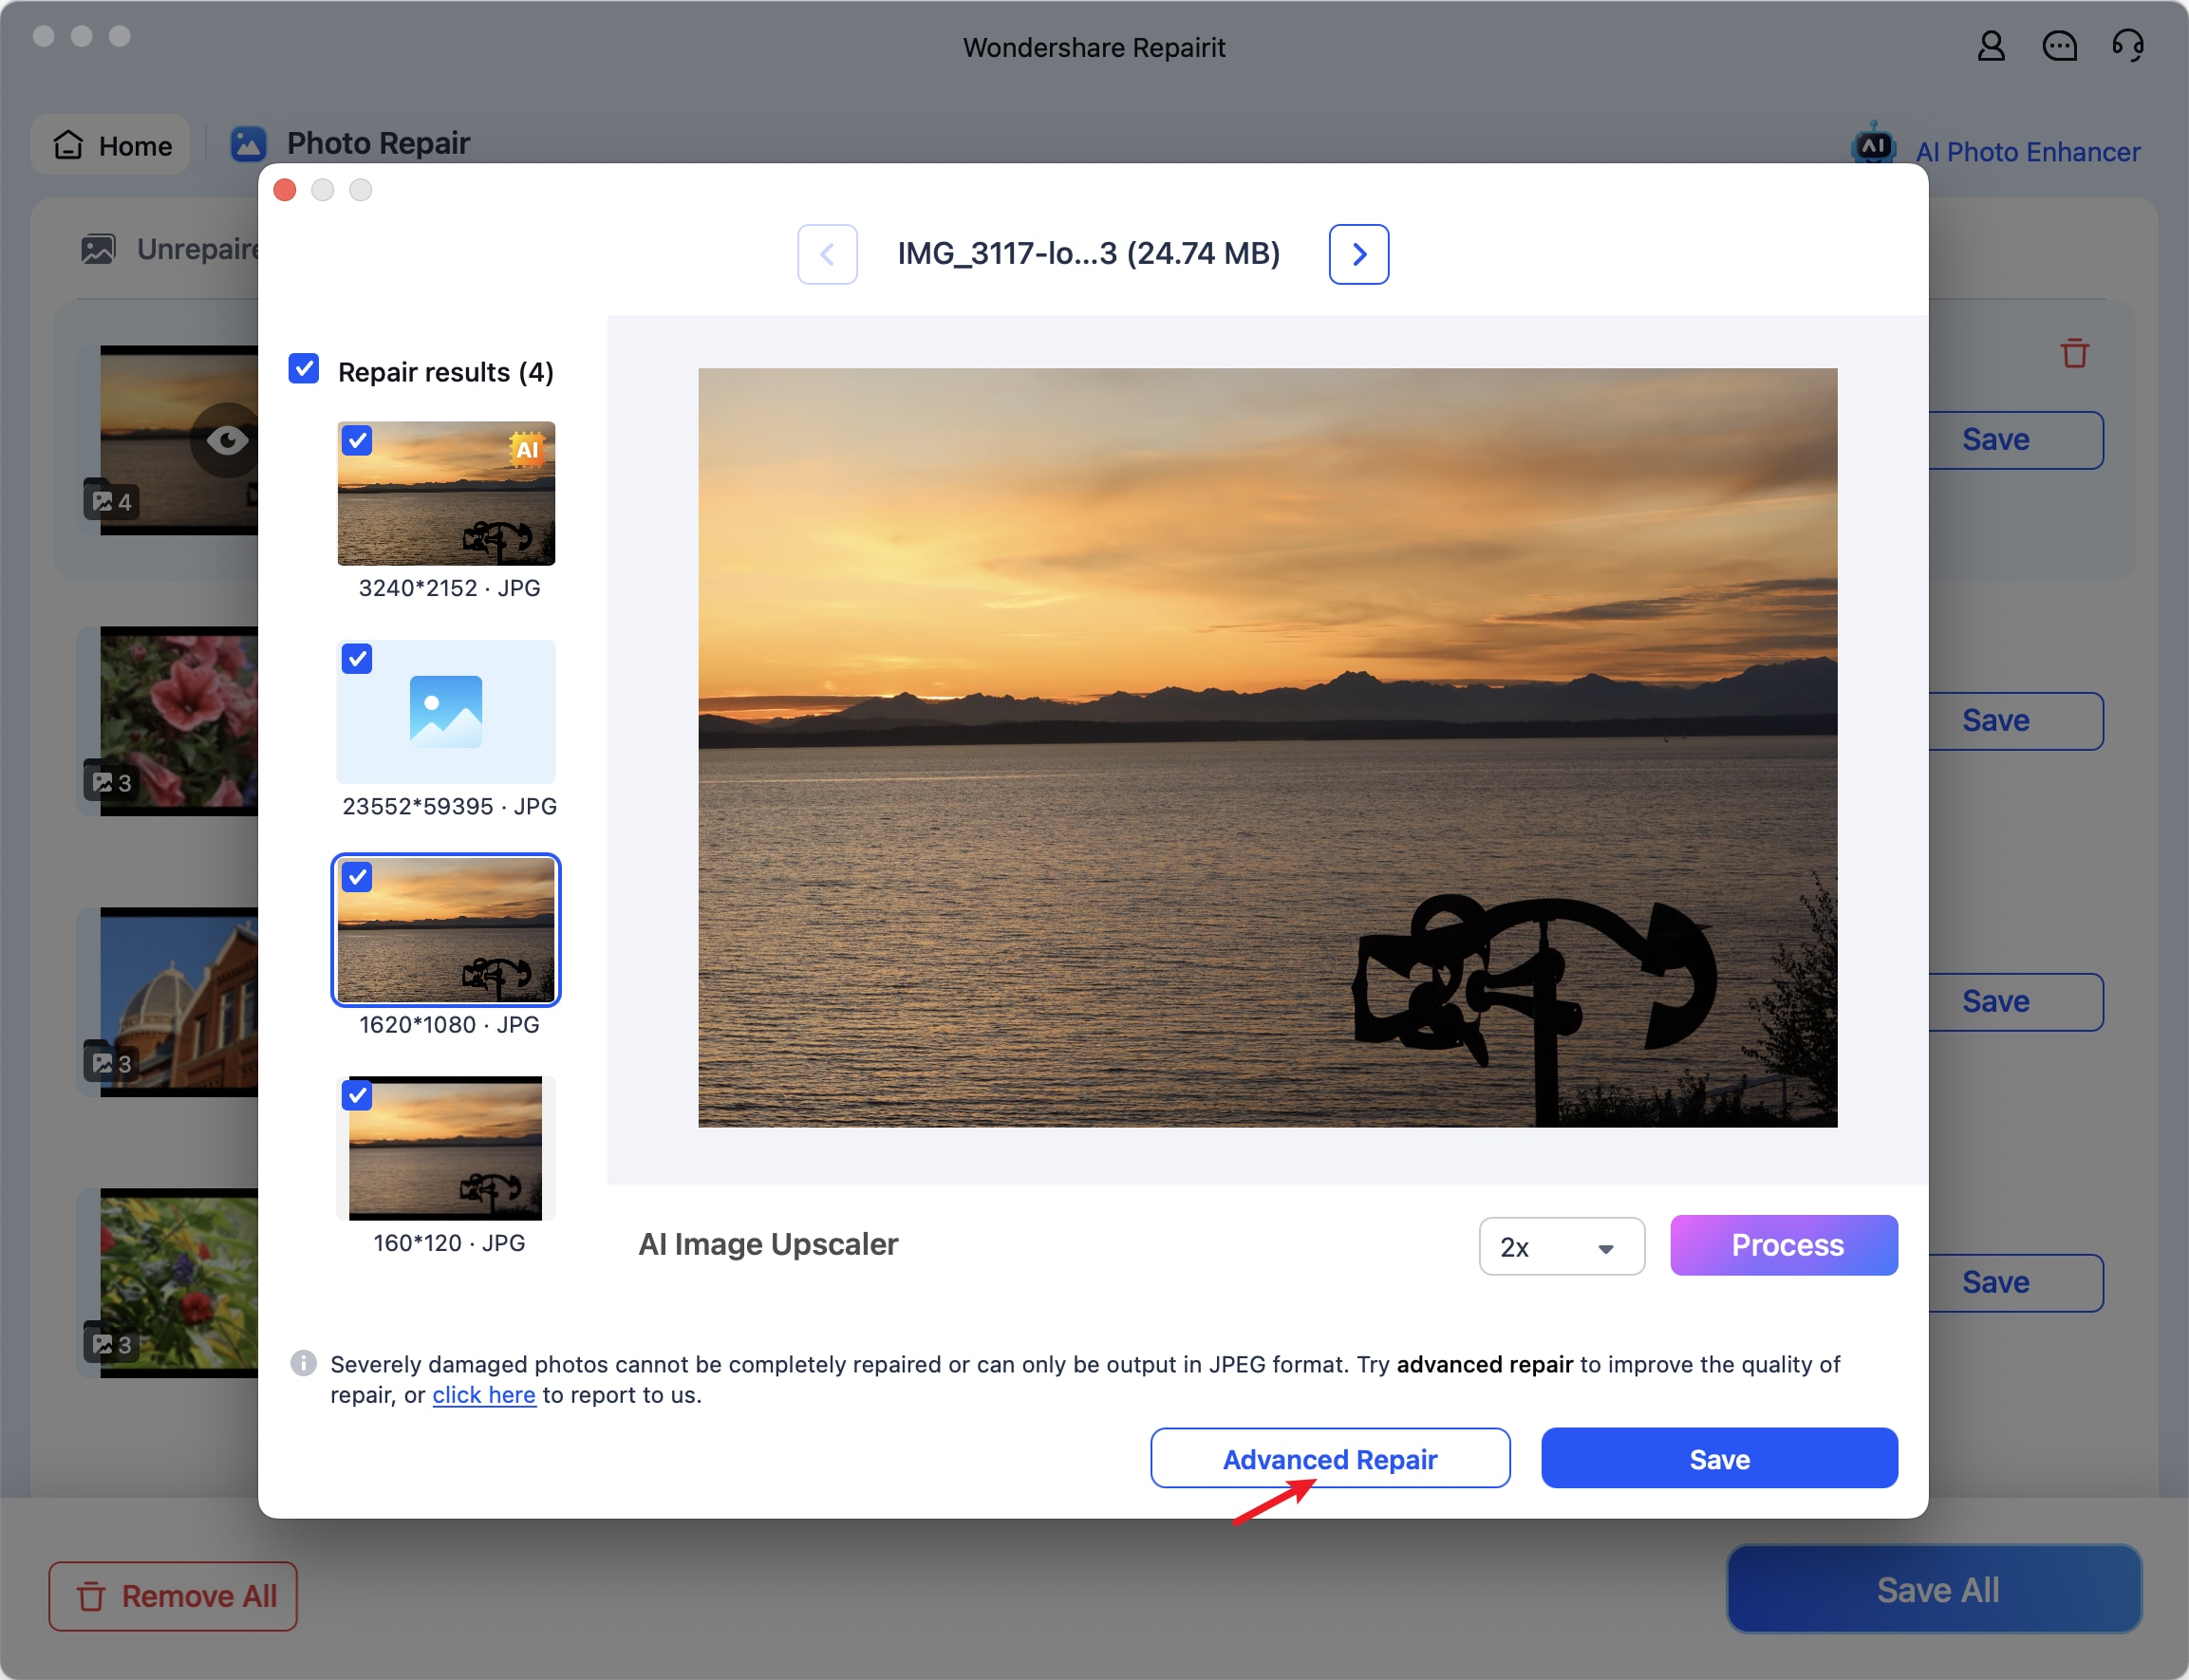
Step 6: Click Advanced Repair if the standard mode couldn't fix severely damaged files. Otherwise, proceed to the last step. You can also use the AI Image Upscaler to increase the resolution by up to 800% without losing quality.
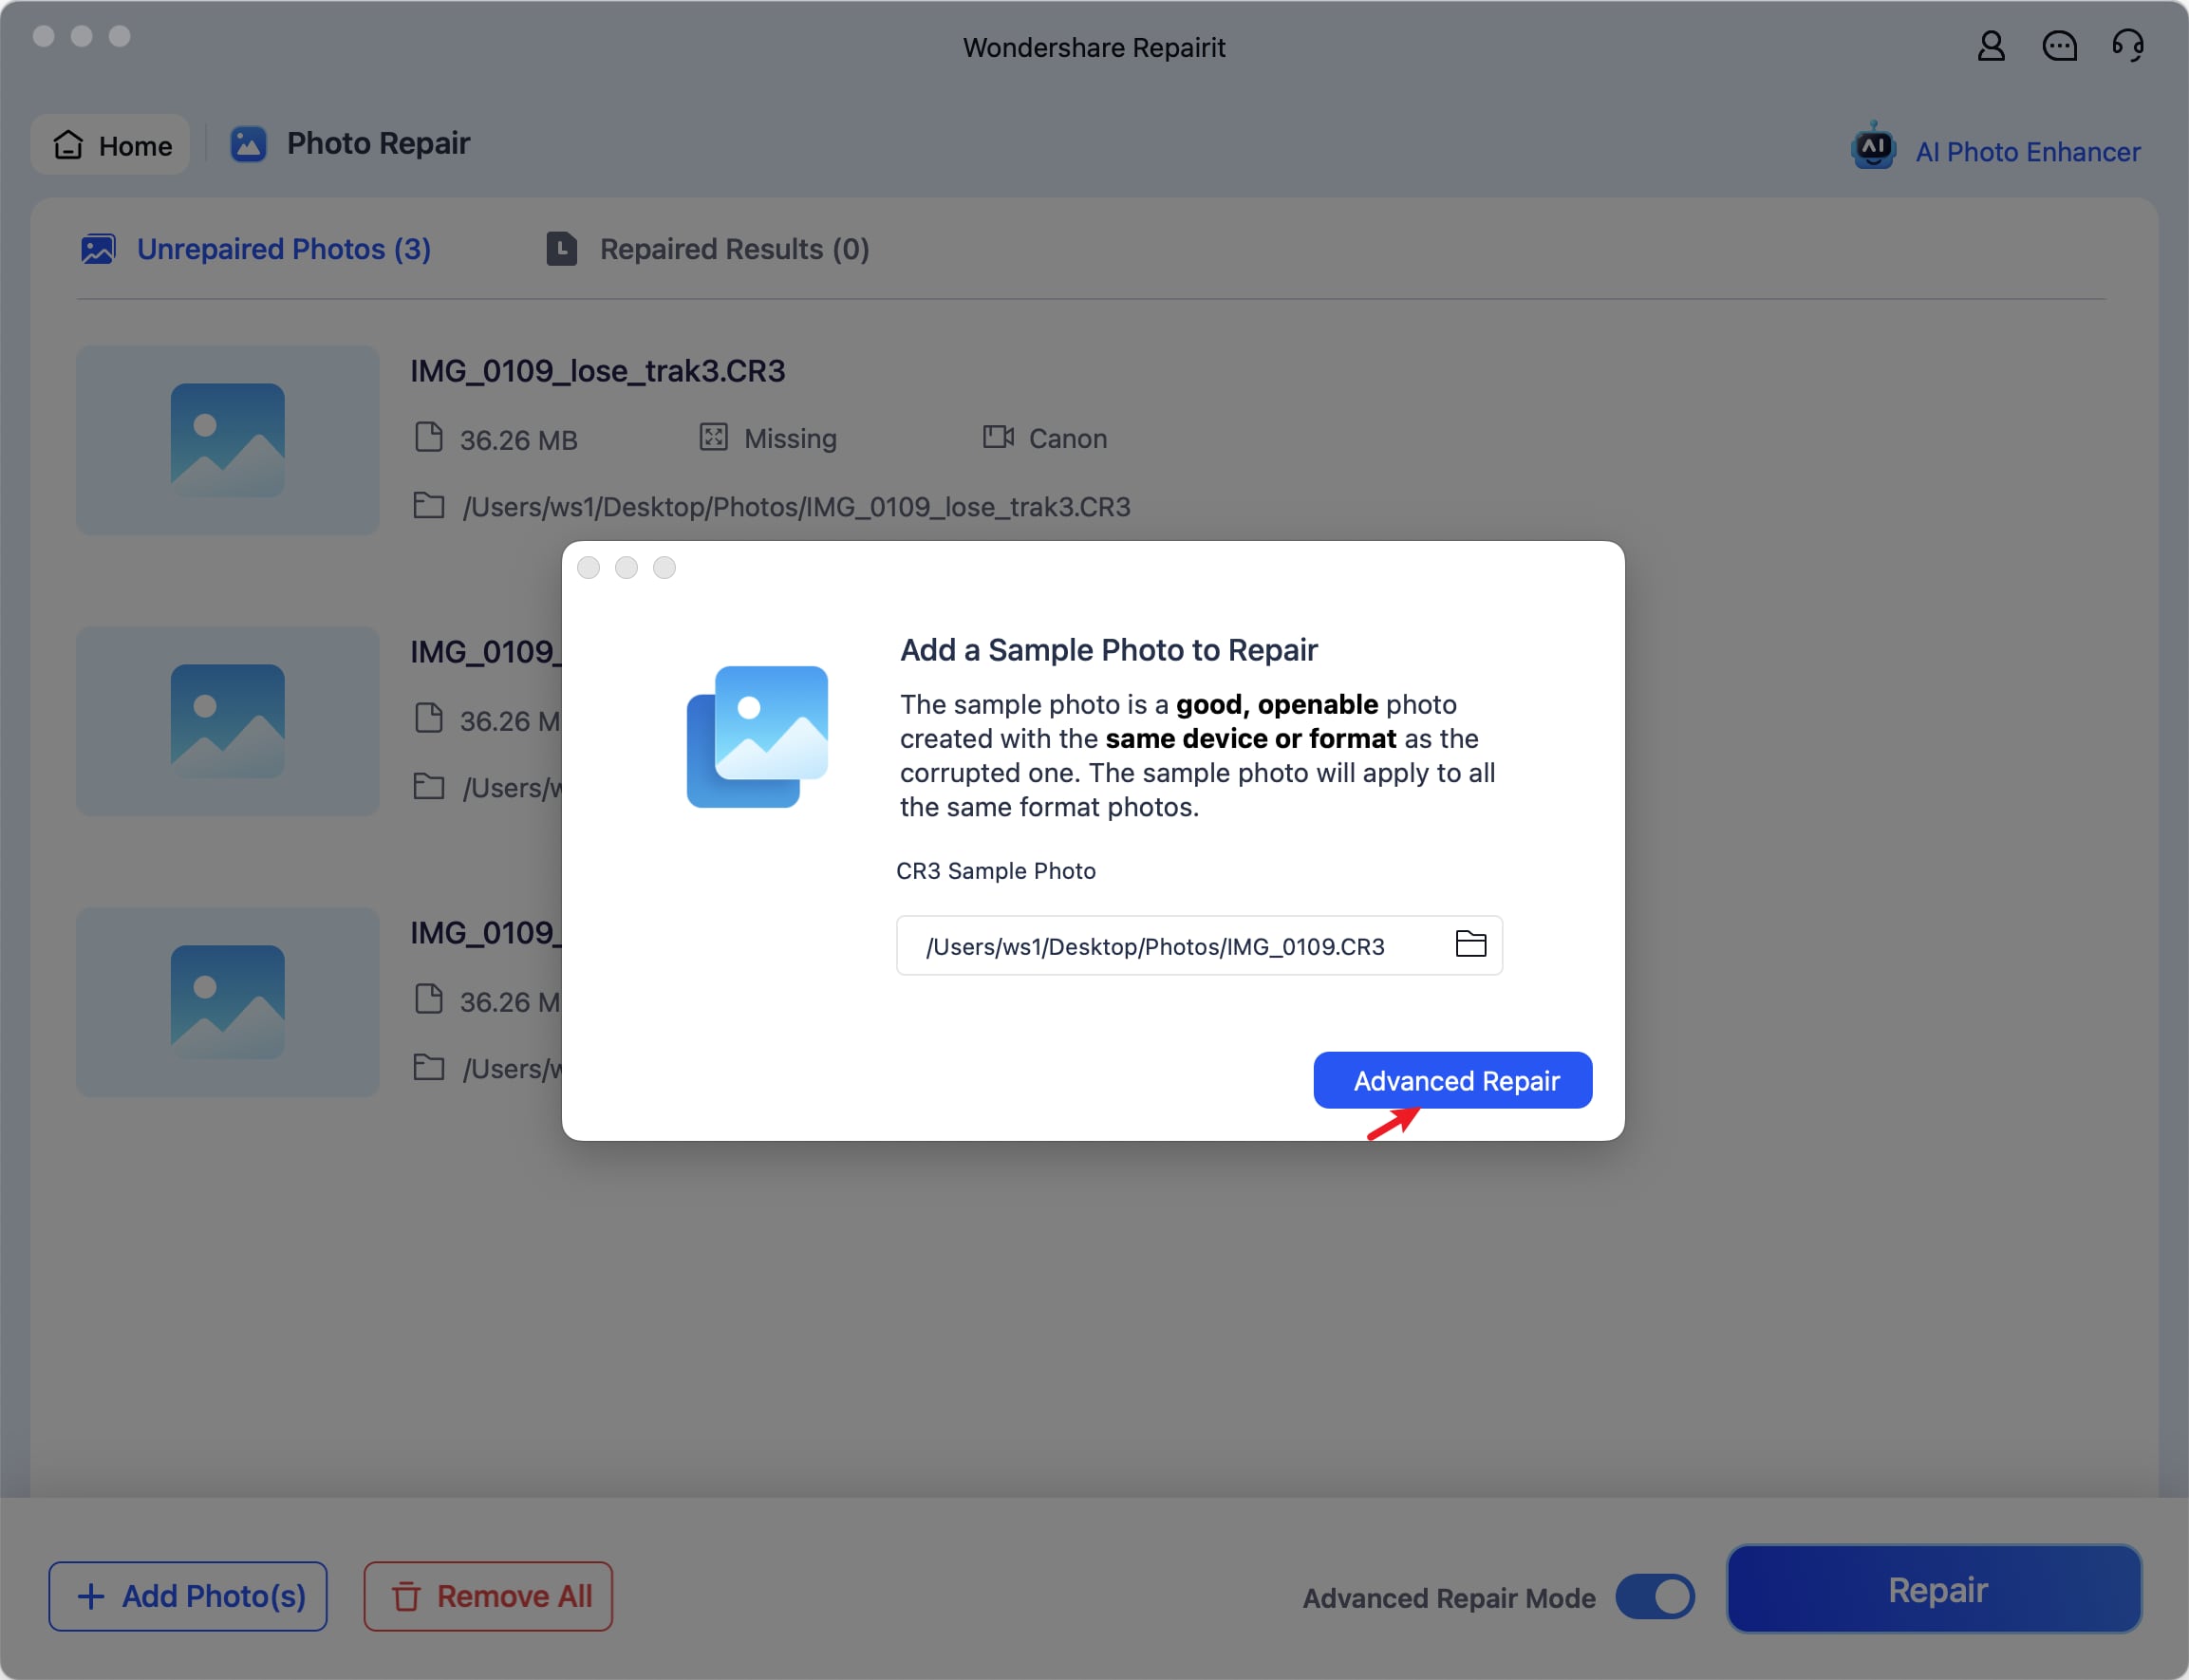
Step 7: Click Repair after activating the Advanced Repair mode.
Step 8: Add a reference photo, ensuring it matches the origin device and format of the original picture(s). Hit Next.
Step 9: Preview the results and click Save or Save All.
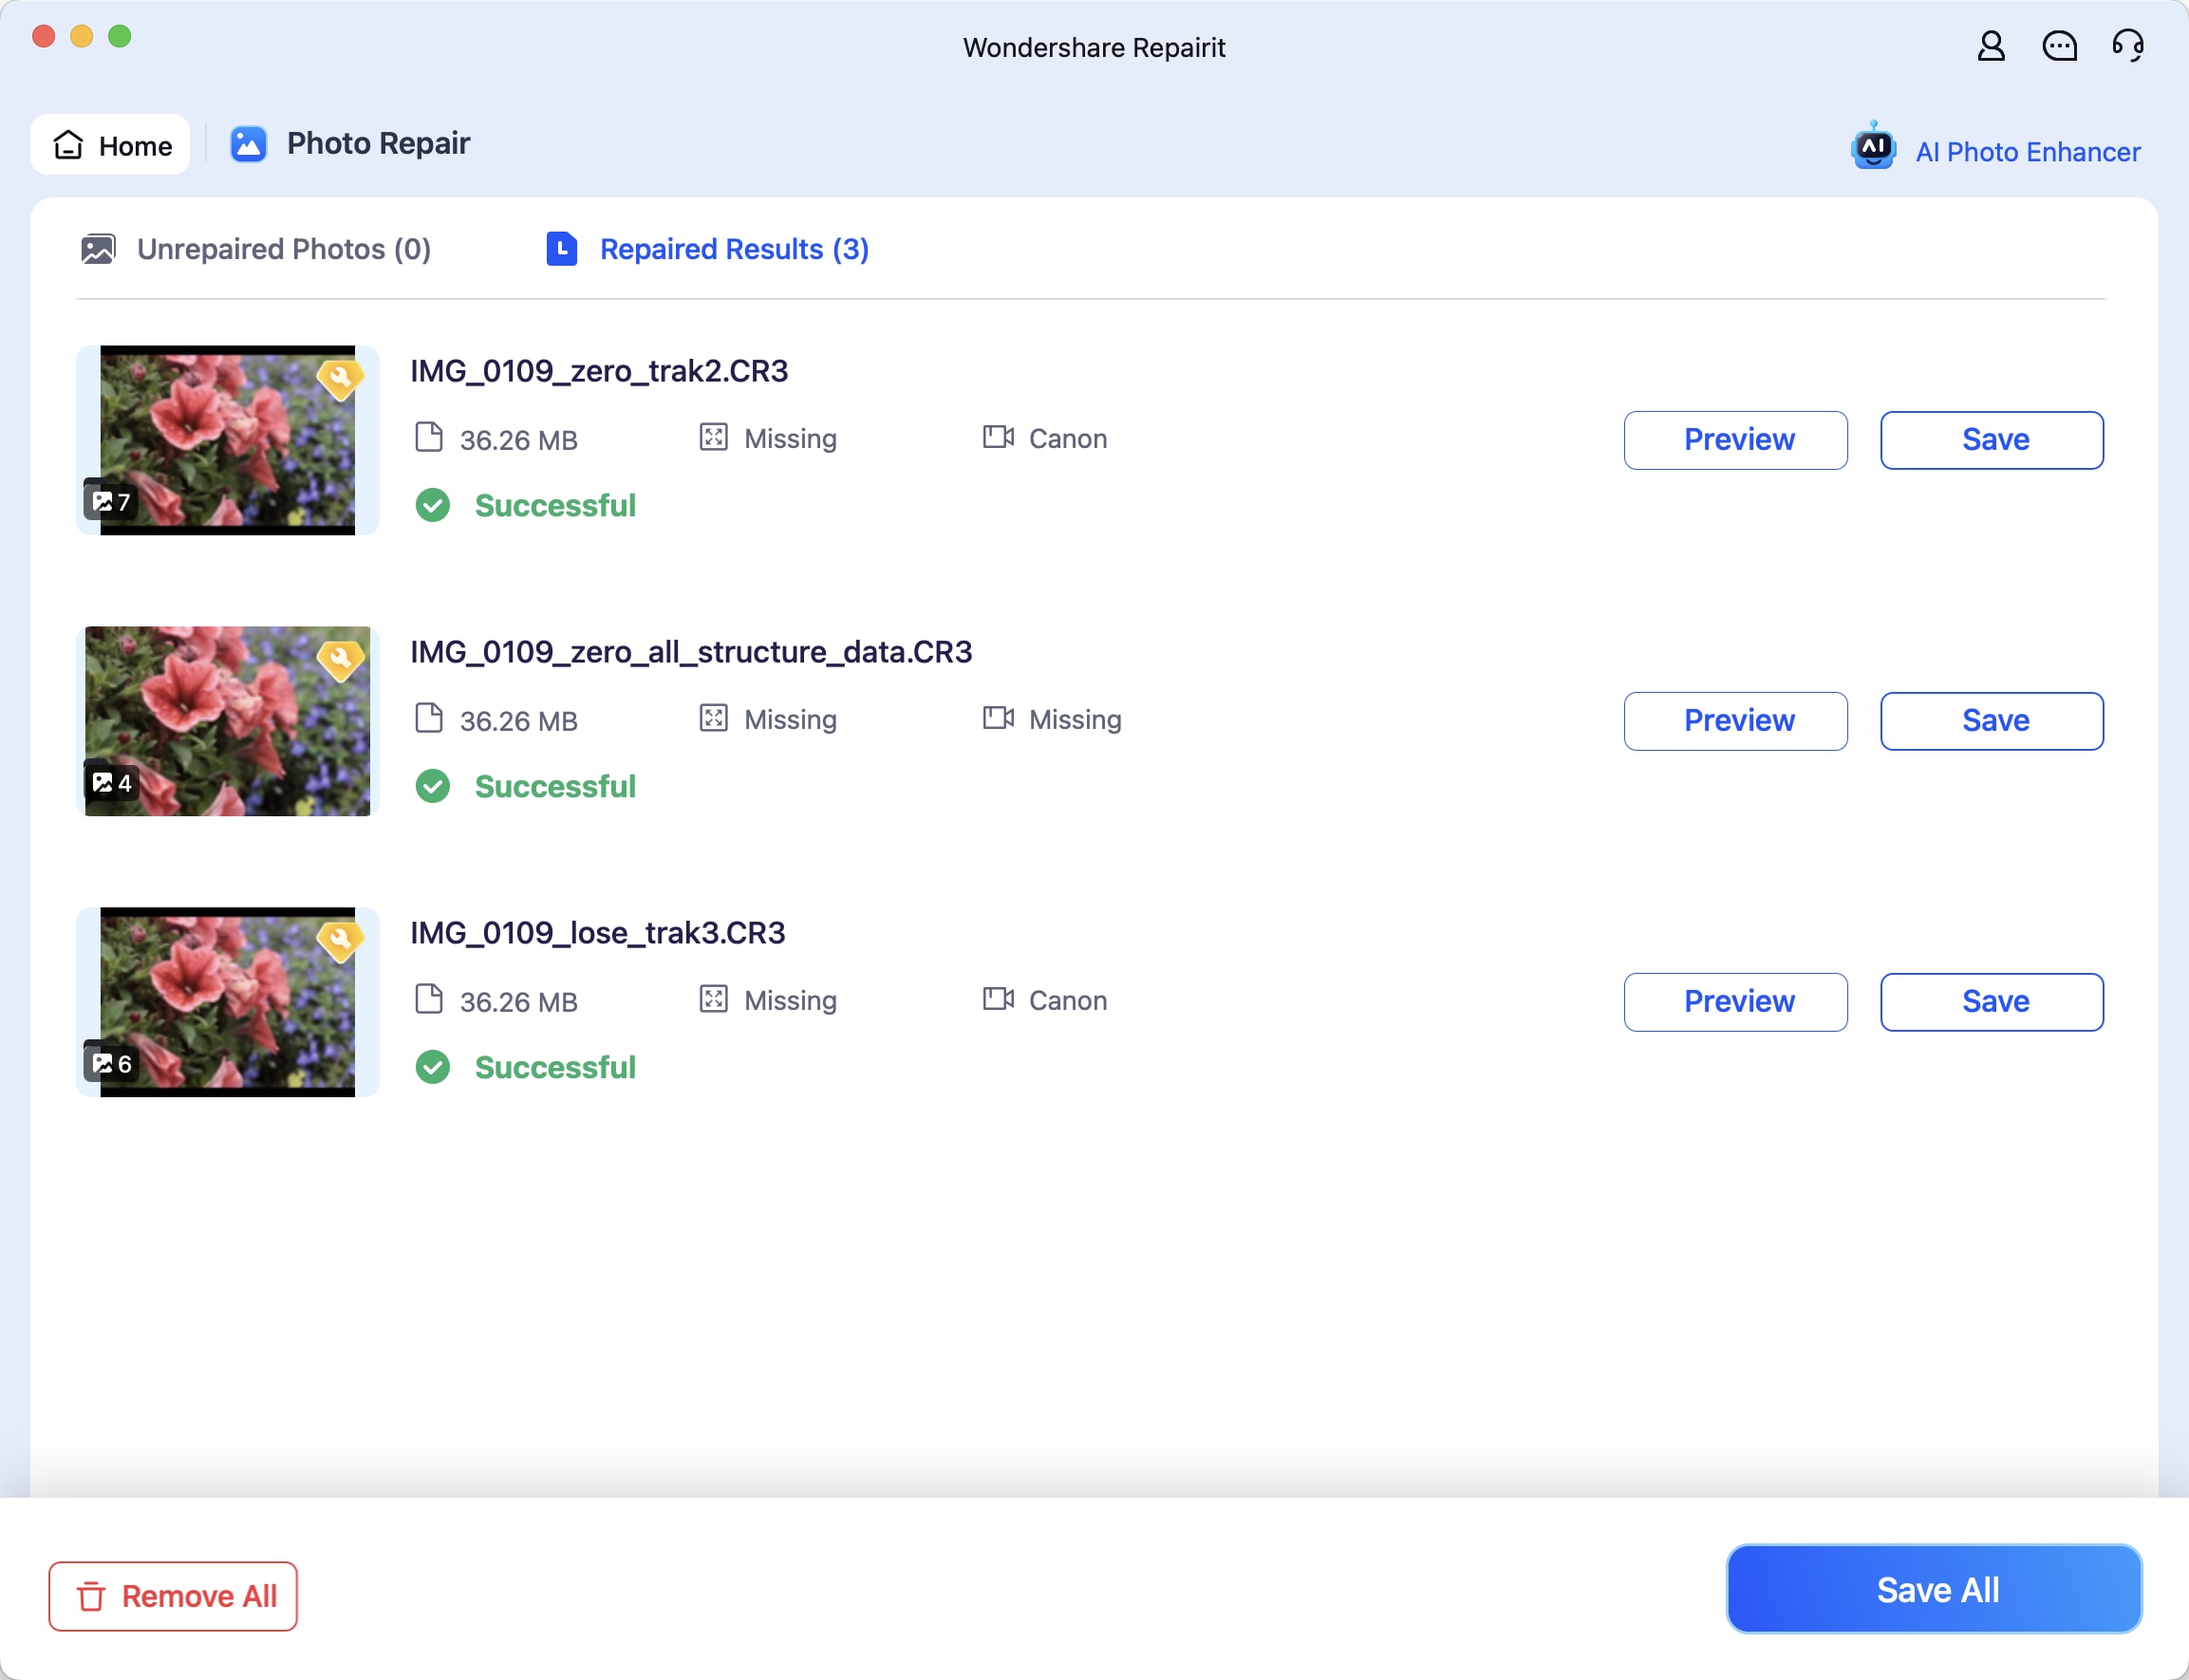
Step 10: Choose a destination for the fixed pictures and hit Save.

How to Use SD Cards Correctly
Using SD cards correctly is the key to avoiding damage and data loss. Here are the essential tips to follow:
- Safely eject SD cards after use - The Safely Remove Hardware feature on Windows and macOS is there for a reason. It ensures a connected storage device finishes writing data before disconnecting it, thus preventing data corruption.
- Keep them clean - Use a soft, lint-free cloth or compressed air duster to keep your SD cards spotless. Foam buds and 90% isopropyl alcohol can also help clean the connectors, but you won't need them unless your SD cards collect years' worth of dust.
- Handle them carefully - Don't forcibly insert and remove them from card readers and other devices because you might damage them. Moreover, don't expose them to liquids or extreme temperatures.
- Don't insert SD cards into infected devices - Viruses and other malware could spread to your SD card if you connect it to a compromised computer, tablet, or mobile phone.
Unexpected issues like malware or unintentional damage might occur even if you take these precautions. Therefore, create regular SD card backups to safeguard your data.
Conclusion
Now that you know how to view photos on your SD card, it's time to pick a method suitable for your device and browse your shots.
Built-in and external SD card readers are fantastic for viewing your photos across desktop and mobile devices. Of course, you can browse them directly on your camera by establishing a USB connection with your computer.
If you encounter compatibility issues or corruption, follow the steps above to eliminate the problem without losing data, including fixing corrupted images with Wondershare Repairit Photo Repair.
Frequently Asked Questions
-
Why is my SD card not showing photos?
If your SD card is not showing photos, the issue may be caused by file system incompatibility, hidden files, a faulty card reader, or data corruption. First, try reconnecting the card, using a different USB port, or testing it on another device. If the SD card is detected but photos are missing, they may be hidden or corrupted. -
Why can't I open pictures from my SD card?
If you can see the image files but cannot open them, the photos may be corrupted due to improper ejection, malware infection, interrupted transfers, or bad sectors. In this case, running a disk check (Windows) or First Aid (macOS) may help. For severely damaged image files, professional photo repair software may be required. -
How do I access an SD card on Windows 11?
To access an SD card on Windows 11, insert it into your computer's built-in slot or connect it using an external SD card reader. Open File Explorer, select This PC, and locate the SD card under Devices and Drives. Open the DCIM folder or your custom photo folder to view the images. -
How do I fix corrupted photos on an SD card?
You can fix corrupted photos on an SD card by first repairing the storage device using built-in tools such as Check Disk (Windows) or First Aid (macOS). If the image files remain damaged, specialized photo repair tools like Wondershare Repairit Photo Repair can restore unreadable or distorted images without affecting other files. -
Can I recover photos after formatting an SD card?
Yes, in many cases you can recover photos after formatting an SD card, especially if you performed a quick format. Stop using the card immediately to avoid overwriting data and use reliable data recovery software to scan and restore deleted files. The sooner you act, the higher the recovery success rate.
