"Correct workflow for editing Braw in Premiere Pro…what plugins are needed (if any) to access the raw settings for each BRAW clip?..." - Reddit user
BRAW files, or Blackmagic RAW, are a popular format for high-quality video. However, Premiere Pro doesn’t support them natively, so you’ll need a BRAW plugin to get started. This guide will show you how to easily work with BRAW in Premiere Pro, from installing the right plugin to importing and editing BRAW files. Let’s get started.
In this article
Part 1. What Is BRAW and Why Use It?

BRAW, or Blackmagic RAW, is a video format created by Blackmagic Design. Filmmakers and video editors widely use it because it offers HD video with smaller file sizes. BRAW also allows for flexible color grading and editing for professional projects.
Here are some key benefits of using BRAW files:
- Maintains excellent video quality while keeping file sizes manageable.
- Easy to adjust color, contrast, and other settings without losing quality.
- Optimized for smooth playback and faster editing.
- Includes camera metadata like ISO, white balance, and exposure, which can be changed in post-production.
While BRAW has many advantages, Premiere Pro doesn’t support it natively. This means you can’t import or edit BRAW files directly without installing a plugin.
Repairit is the one and only mainstream fixer that supports Braw and R3d video format repair.

Part 2. How to Import BRAW Files in Premiere Pro?
Since Premiere Pro doesn’t support BRAW files natively, you’ll need to install the official Blackmagic plugin. Follow these simple steps:
Step 1: Visit the official Blackmagic Design website.
Step 2: Scroll to the Latest Downloads section and look for the Blackmagic RAW Developer SDK plugin.
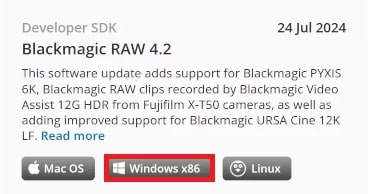
Step 3: Select your computer’s operating system and start the download.
Step 4: Fill out the required personal details as requested.
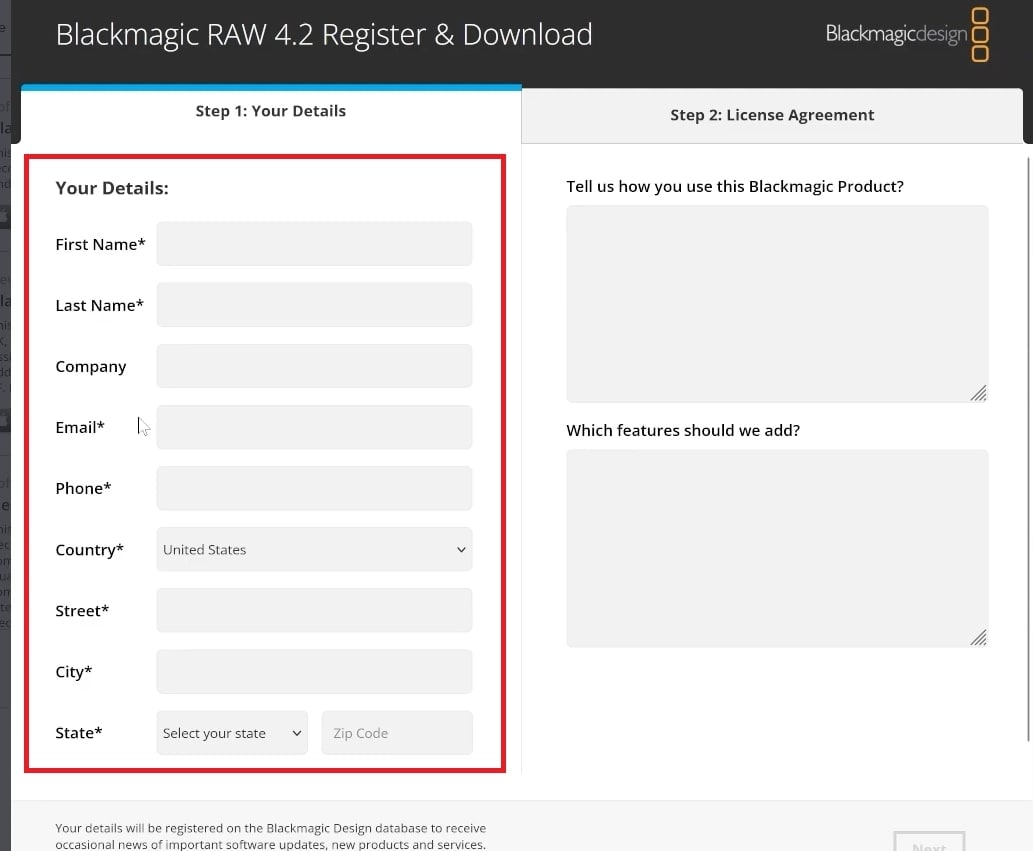
Step 5: Agree to the terms, check the box, and click Register and Download.
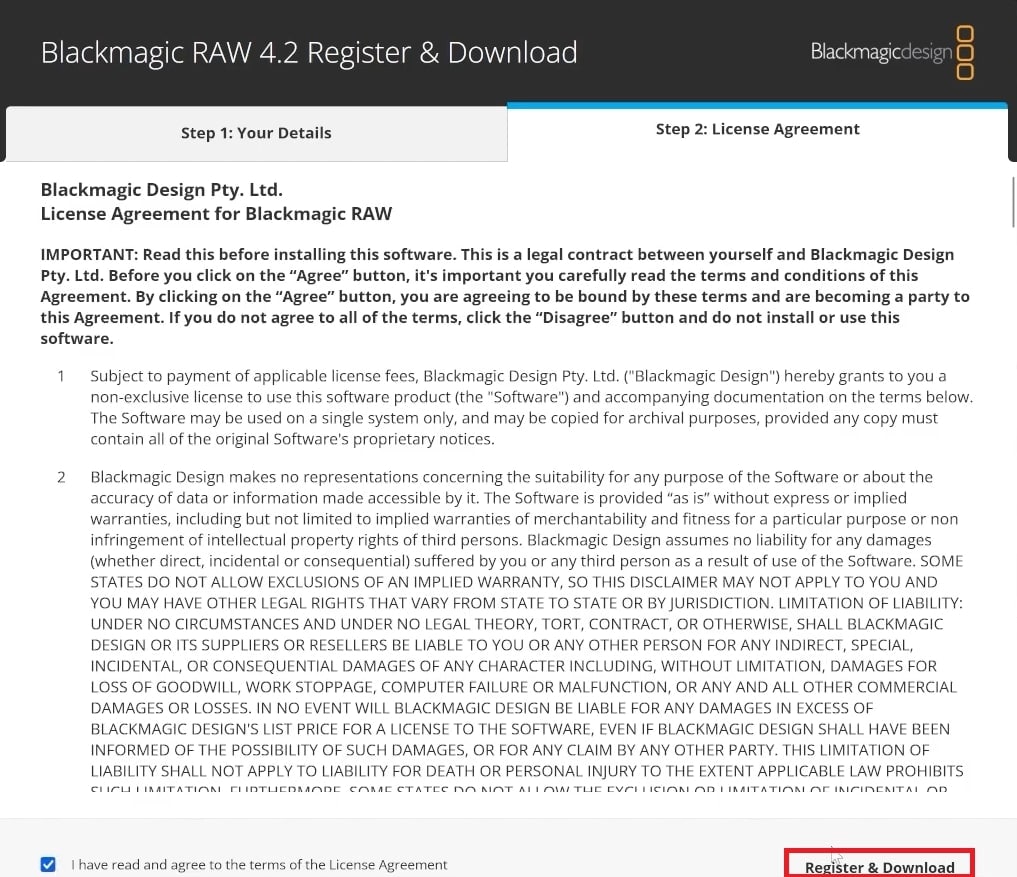
Step 6: Open the Downloads folder and double-click the installer file. Follow the on-screen plugin instructions to complete the installation.
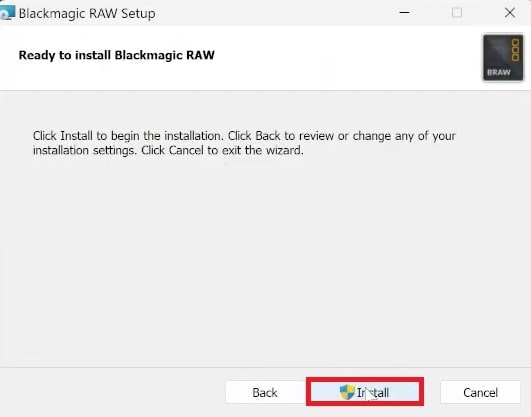
Step 7: After installation, restart Premiere Pro. You’ll now be able to import and edit BRAW files directly in the program.

That’s it! Once the plugin is installed, working with BRAW files in Premiere becomes seamless.
Part 3. How to Edit BRAW Files in Premiere Pro?
Editing BRAW (Blackmagic RAW) files in Premiere Pro requires a few specific steps to ensure smooth compatibility. Here's a quick guide to get you started:
Step 1: Once the plugin is installed, open Premiere Pro.
Step 2: Start a new BRAW file project or open an existing one. Name it.
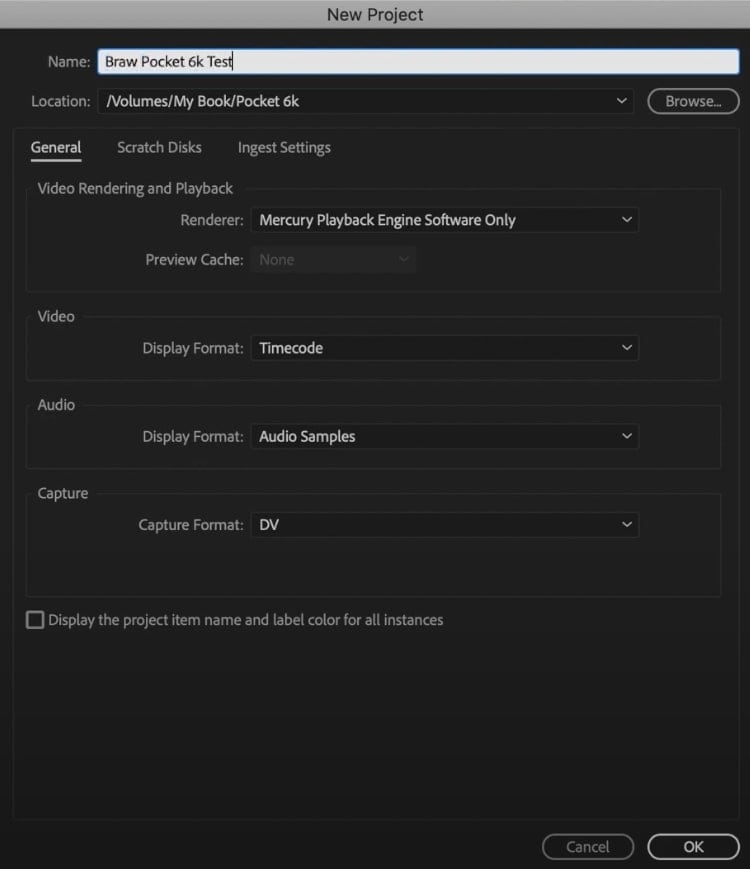
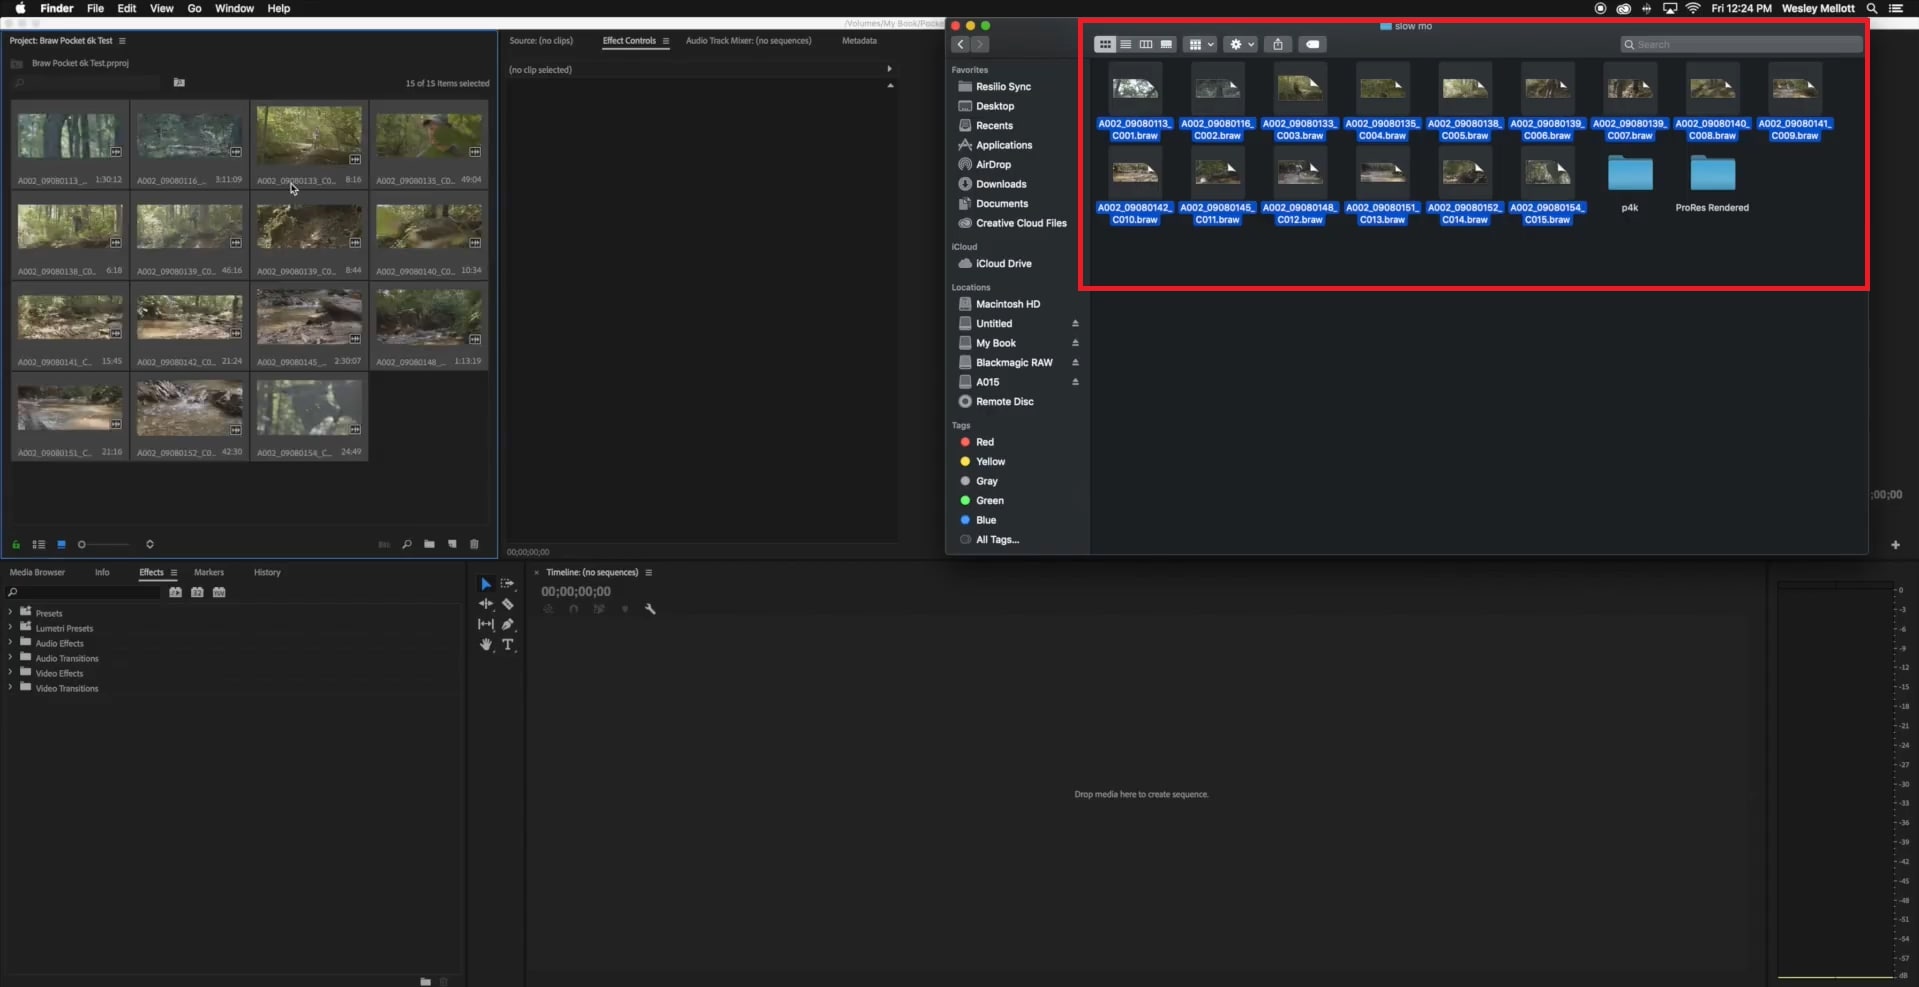
Step 3: Drag and drop BRAW files into Premiere Pro.
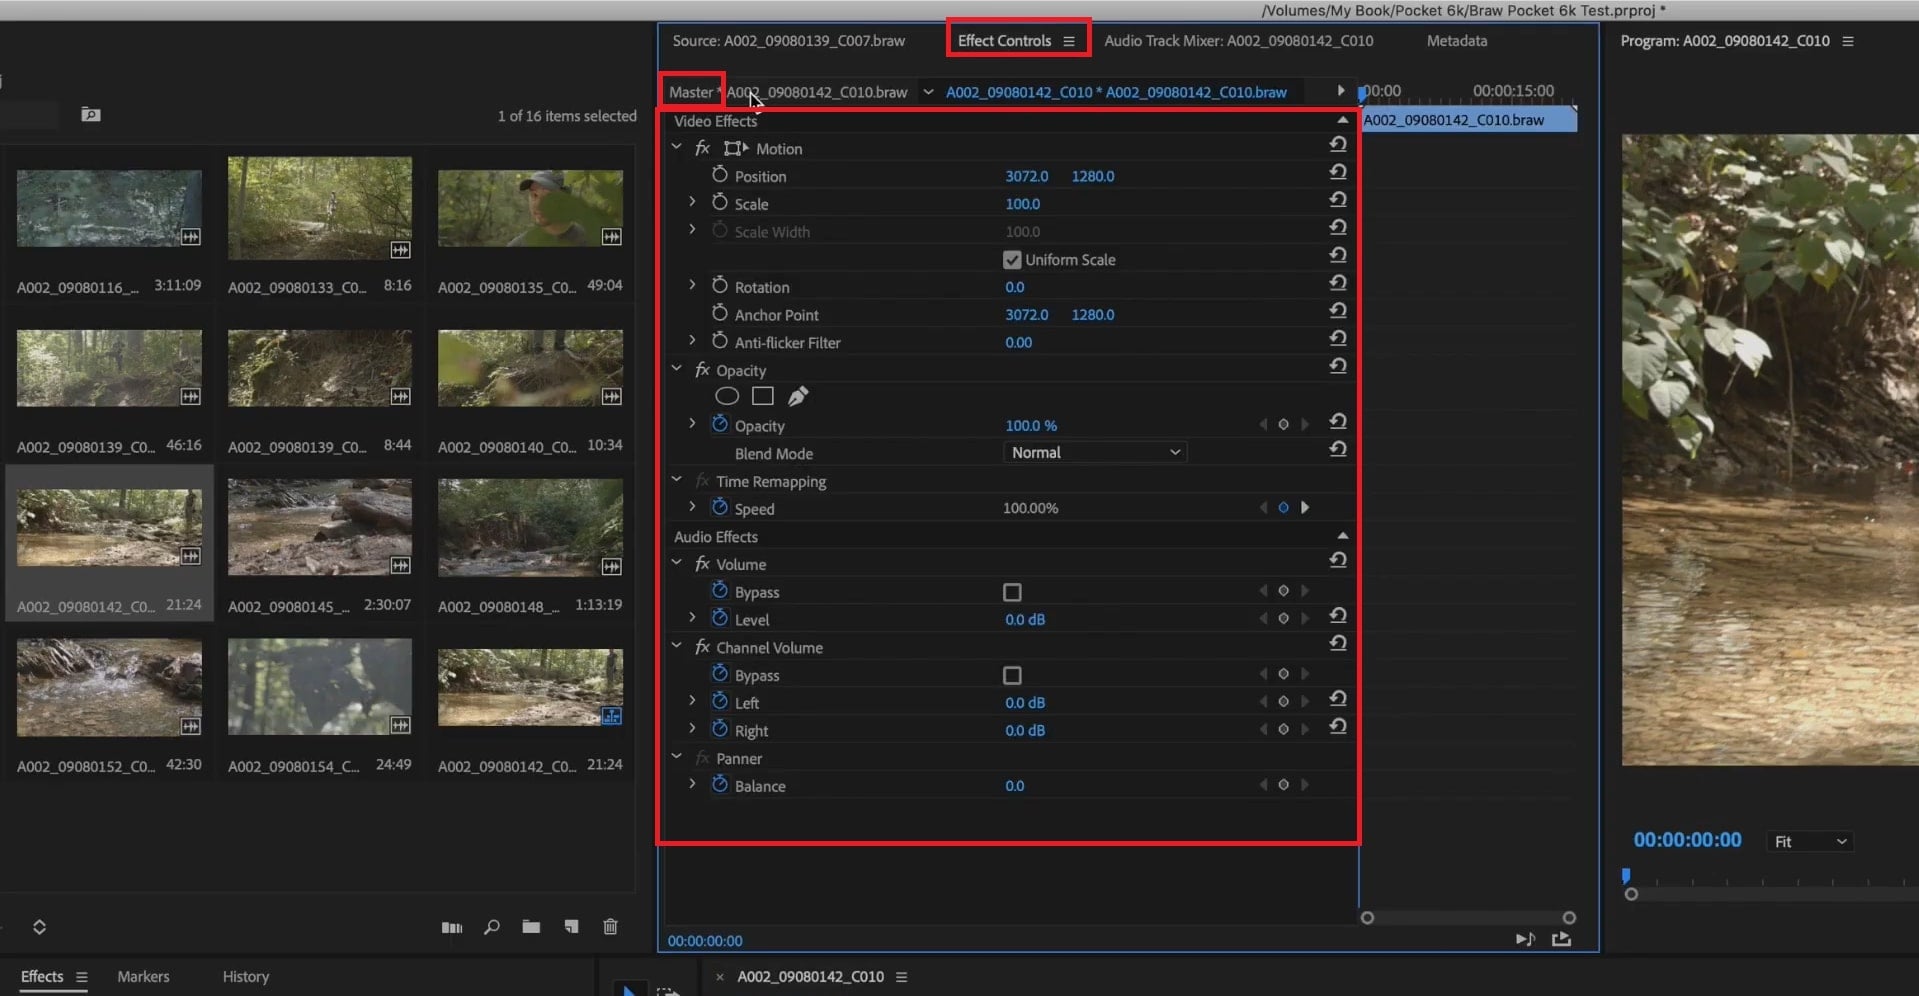
Step 4: Go to the Effects Controls panel and click Master. Adjust settings like white balance, ISO, color space, and exposure directly.
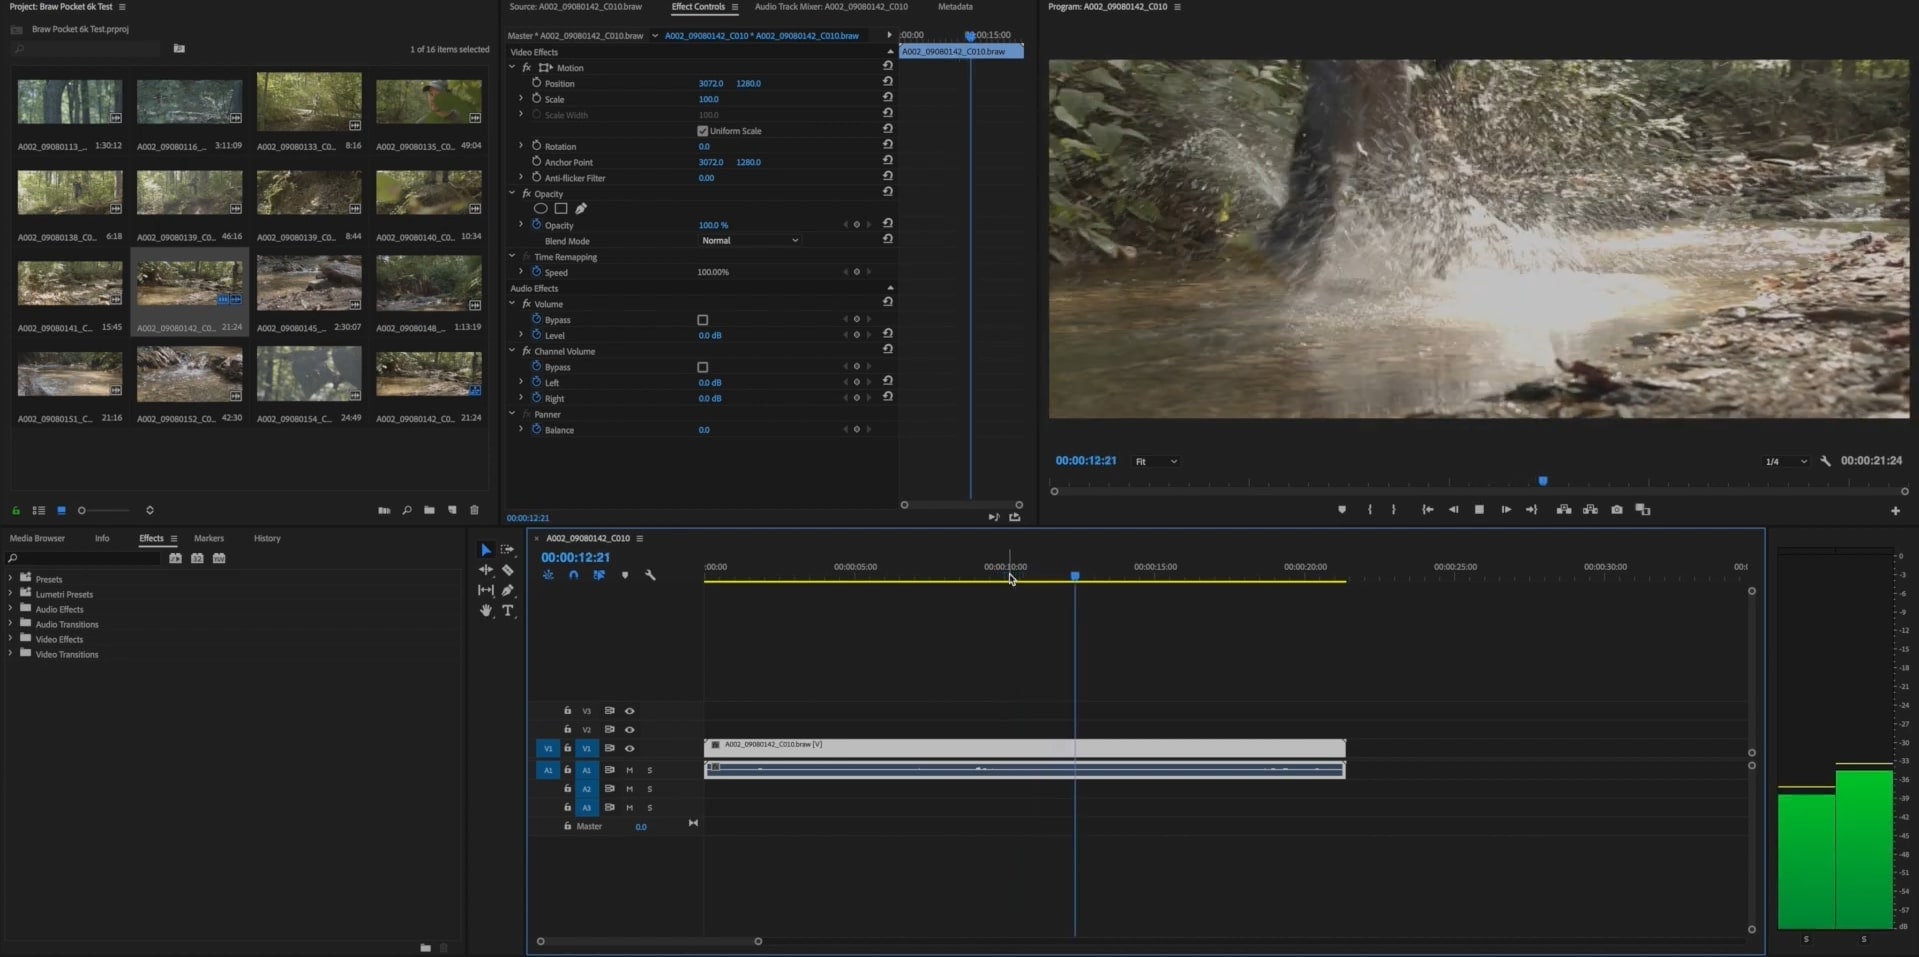
Step 5: You can playback the BRAW video file and apply the edits further.
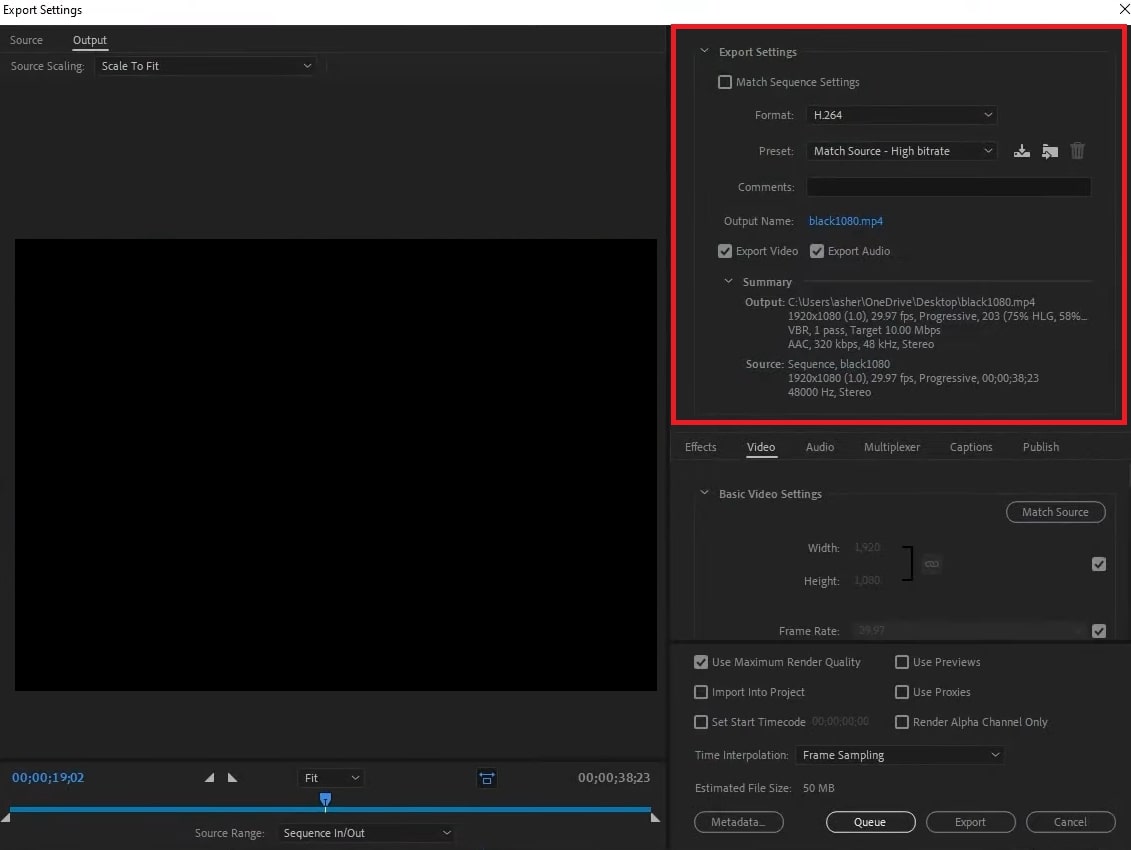
Step 6: After editing, export your final video with your preferred settings.
Part 4. Why Can’t Import BRAW Files to Premiere Pro?
Importing BRAW files into Premiere Pro can be challenging because the software doesn’t support this format by default. Without additional tools or plugins, Premiere Pro cannot recognize or process Blackmagic RAW files.
Here are other reasons why you can’t import BRAW files to Premiere Pro:
- Using an outdated BRAW plugin can lead to compatibility troubles with newer versions of Premiere Pro.
- If the BRAW files are corrupted or incorrectly exported, Premiere may fail to import them.
- Improper installation of the Blackmagic plugin can prevent Premiere Pro from reading BRAW files.
Part 5. How to Repair Corrupted BRAW Video Files?
Videographers and YouTubers working with BRAW files usually edit, save, and delete files regularly. But what if you accidentally lose or delete a BRAW file you still need?
Moreover, file corruption can also happen. This is due to improper file transfers, sudden interruptions during recording, or storage device failures. These issues can make your video files unplayable, causing delays in your editing workflow.
Repairing corrupted BRAW files immediately is important to avoid losing valuable video. Without timely repair, you might face difficulties opening or editing the files, even after installing the necessary plugins for Premiere Pro.
This is where Repairit Video Repair comes to the rescue. Its advanced video repair feature can quickly locate and recover complete BRAW files using a powerful algorithm designed for efficiency. This tool also ensures they are restored without losing quality.
Key Features:
- Repair RAW footage from any storage device, including cameras, memory cards, computers, USB drives, and NAS storage.
- Supports BRAW files and other formats like MP4, MOV, AVI, MKV, and more.
- Restores Full HD, 4K, and 8K BRAW videos without corruption.
- Preview BRAW files before recovery to see if they are good for saving.
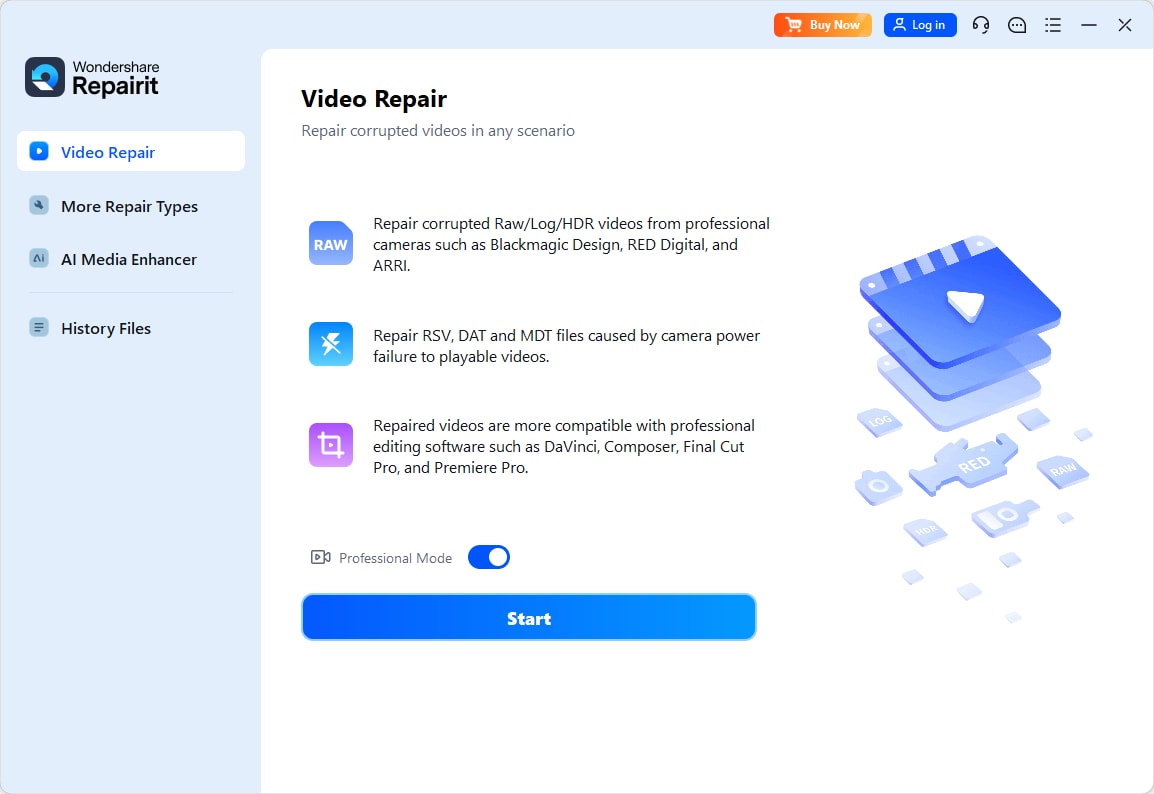
Step 1: Open Repairit BRAW Video Repair. Add the corrupted BRAW videos by turning on the "Professional Mode" switch and clicking the "Start" button.
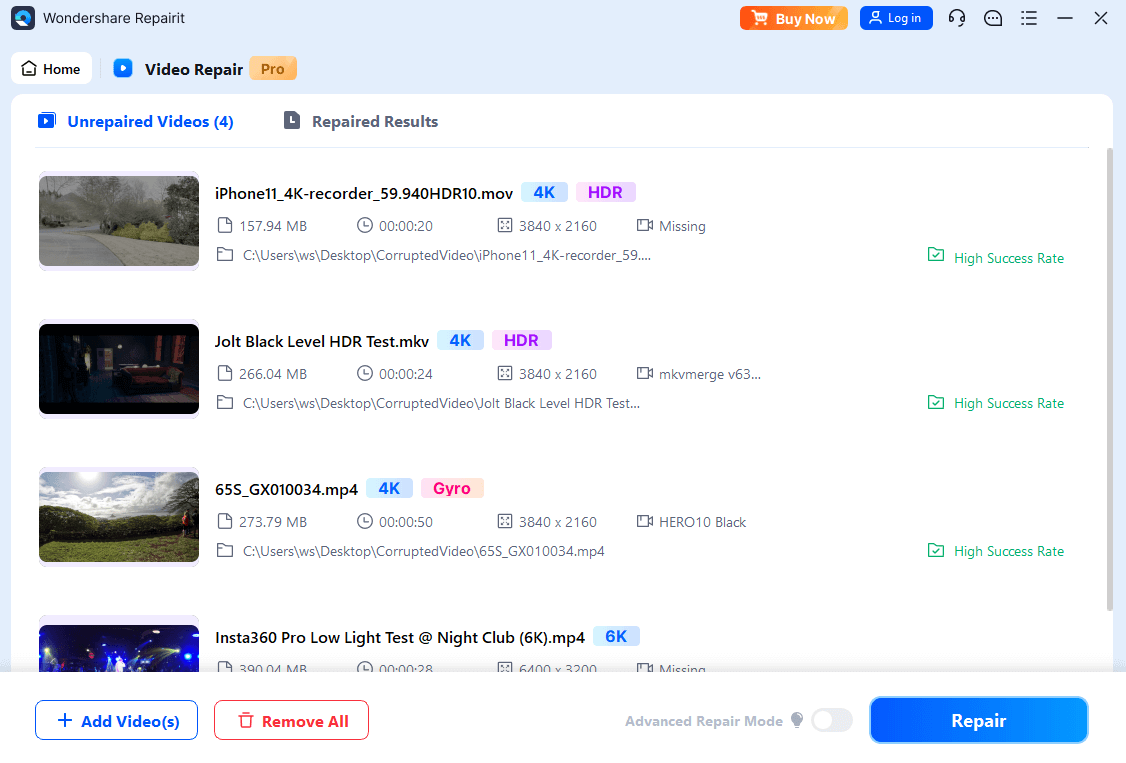
Step 2: Press Repair to start repairing the BRAW video files.
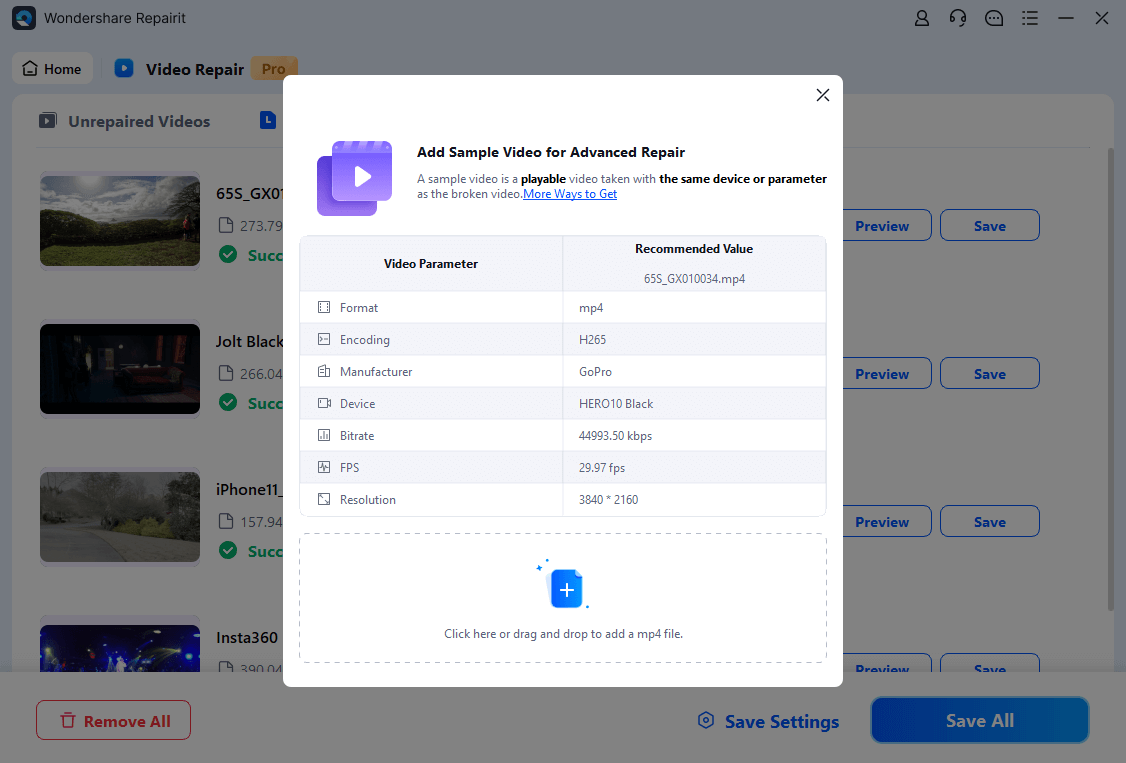
If your BRAW files are wholly damaged and cannot be repaired with the simple process, try using the Advanced Repair mode. Just select Advanced Repair and upload a sample BRAW video file to begin.
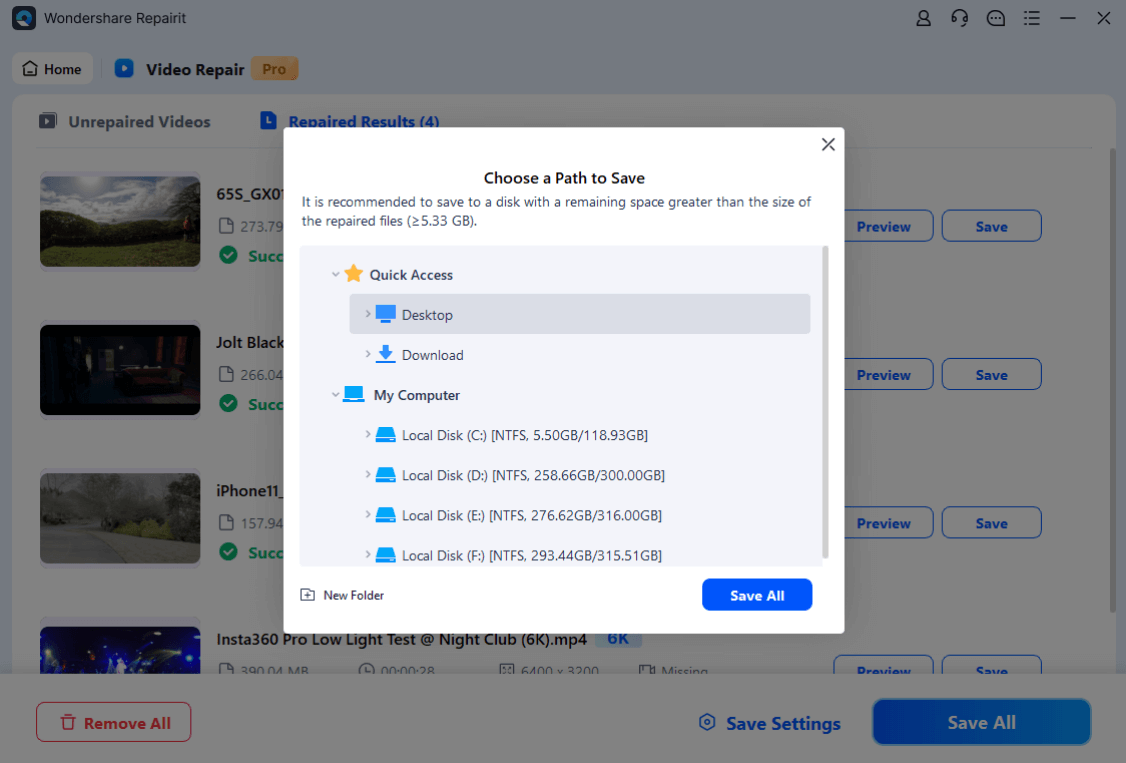
Step 3: You can preview the fixed BRAW video before saving. Once seen, press Save and pick a BRAW file location. Do not paste on the previous path where it was lost.
Try the Leading-first Fixer to Repair Corrupted BRAW Video Files

Part 6. Tips for Efficient BRAW Workflow in Premiere Pro
Save time and work more efficiently with BRAW files in Premiere Pro using these simple tips:
- Download and install the OFFICIAL Blackmagic RAW plugin to ensure compatibility with Premiere Pro.
- Adjust playback resolution to half or quarter for smoother editing, especially with large 4K or 8K BRAW files.
- Create proxy files to speed up your workflow without compromising quality during editing.
- Keep your BRAW files in well-structured folders and avoid renaming them after import to prevent errors.
- Use the metadata embedded in BRAW files to adjust settings like ISO, white balance, and exposure directly in Premiere.
- Regularly update Premiere Pro and your Blackmagic plugin to avoid compatibility issues.
Conclusion
BRAW files provide high-quality video and are great for editing, but Premiere Pro doesn’t support them by default. Installing the Blackmagic RAW plugin makes it easy to import and edit BRAW files. If you face issues like file corruption or loss, tools like Repairit Video Repair can help restore your files. By following the tips for an efficient workflow, you can work smoothly with BRAW files in Premiere Pro.
FAQ
-
What are the advantages of working with BRAW in Premiere Pro?
Working with BRAW in Premiere Pro offers several benefits. It allows flexibility in editing by adjusting settings like ISO and exposure. This also provides smaller file sizes while maintaining high quality and offers more control for high-quality color grading in post-production. -
What if my BRAW files don’t appear in Premiere Pro after importing?
Ensure that:1. The Blackmagic RAW plugin is properly installed.
2. Your BRAW files are not corrupted.
3. You are using a supported version of Premiere Pro (check the plugin compatibility).
-
Can I use BRAW files in Premiere Pro on both Mac and Windows?
Yes. Blackmagic RAW is supported on both macOS and Windows. Also, you can use BRAW files on either platform with the Blackmagic RAW plugin.


 ChatGPT
 Perplexity
 Google AI Mode
 Grok
Grok

