
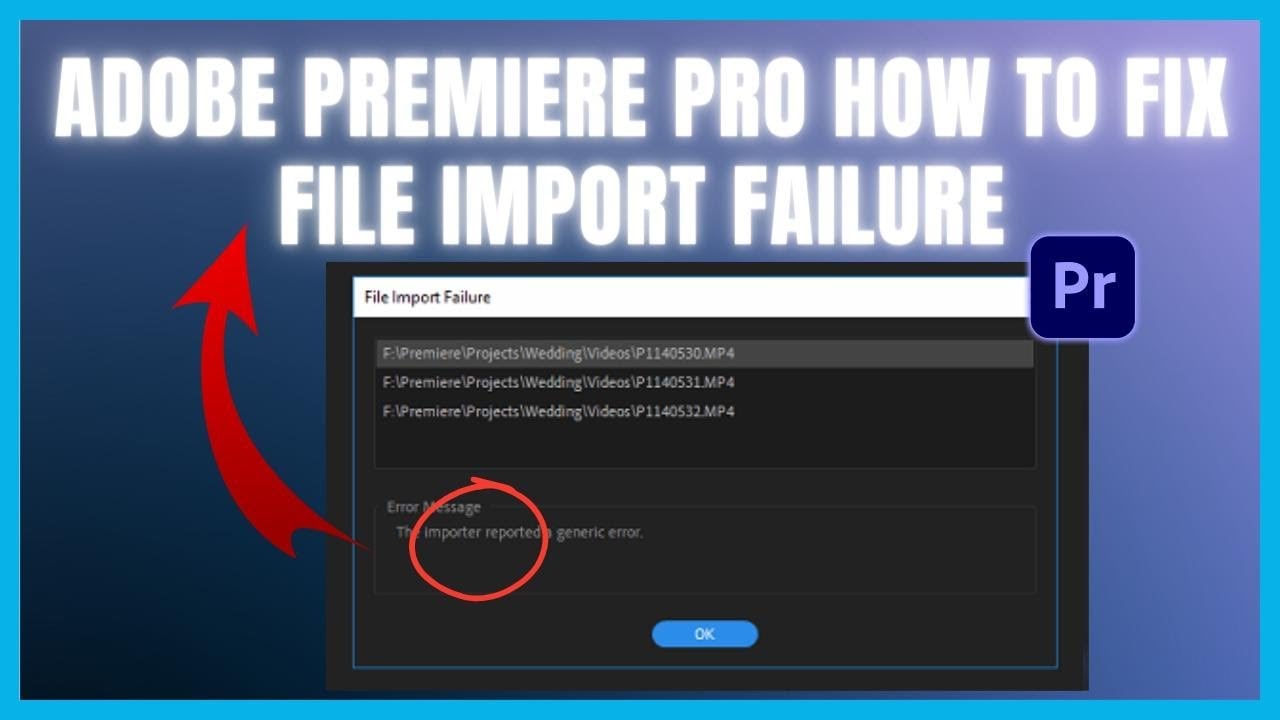
Running into a file import failure in Premiere Pro can be frustrating, especially when you're eager to start editing. If you've seen error messages or struggled with Premiere file import failure, you're not alone. This issue is common and usually caused by unsupported file formats, codecs, or software glitches.
In this guide, we’ll share the easy fixes for Premiere Pro file import failure so you can get back to work quickly. Let’s dive in and solve the problem step by step.
In this article
Part 1. Why Does Premiere File Import Failure Happen?
When you try to open a video, audio, or project in Premiere Pro, it should load smoothly. However, you might encounter file import failures, such as missing audio or video streams, unsupported formats, generic errors, or damaged files.
These errors can root from various reasons, including:
- Unsupported file types
- Missing codecs
- DRM protection
- File corruption
- Excess media cache files
- Inactive software
- Software bugs
Part 2. 6 Ways to Fix Premiere Pro File Import Failure
Now that you know why file import failure happens in Premiere Pro, it’s time to focus on the solutions. Luckily, most of these troubles can be fixed with a few simple steps. Below are six effective ways to resolve Premiere Pro file import failure and get your projects back on track.
Way #1: Rename the File Extension
Sometimes, Premiere Pro may fail to import a file simply because of its file extension. The software might not recognize certain extensions, even if the file is otherwise compatible. Renaming the file extension to a more widely supported format can solve the problem. This is a quick and easy fix that doesn’t require any advanced tools.
Here's how you can do it.
Step 1: Locate your video file(s) to import.
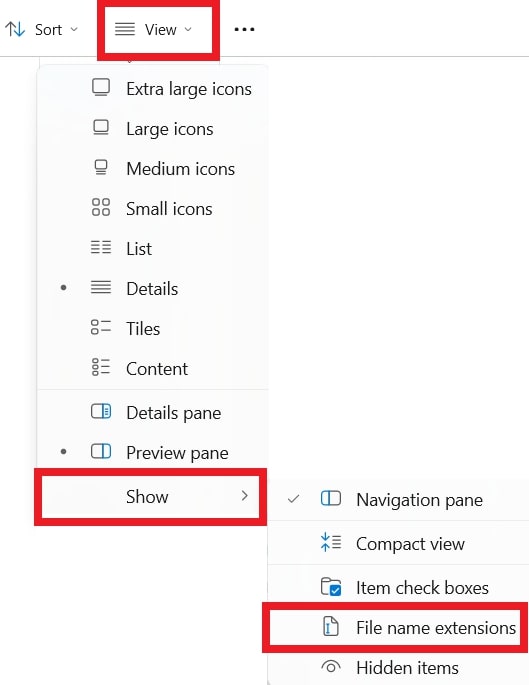
Step 2: Enable file extensions:
- On Windows: Open File Explorer, click View and check Image name extensions.
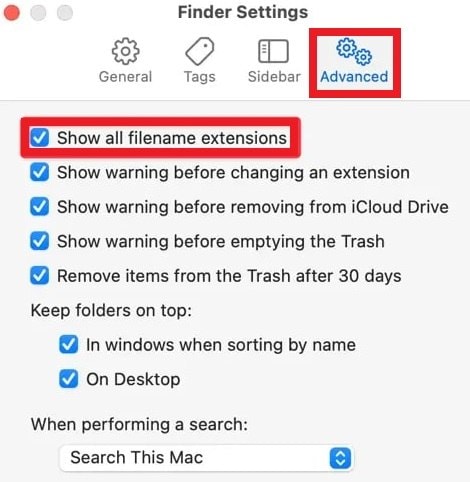
- On Mac: Open Finder and go to Preferences. Click Advanced and check Show all filename extensions.
Step 3: Right-click the file and select Rename (or press F2 on Windows).
Step 4: Change the file extension (e.g., .mkv or .mov) to a more common format like .mp4 or .avi.

Step 5: Open Premiere Pro and try importing the renamed file.
Way #2: Move the Video to a New Location
Another common solution to fix Premiere Pro file import failure is to move the video to a new location. Sometimes, the file’s current location can cause issues with the import process. The file path or folder name might have special characters or be too long. Alternatively, the file is stored in a folder with restricted permissions or a complex file path.
Try placing the video in a simple folder, like on your desktop, or in a new folder with a short name. Then, import the file again and see if it works. Here are the steps:
Step 1: Find the video(s) on your storage.
Step 2: Right-click your desktop or drive and create a new folder with a simple name like Video Files.
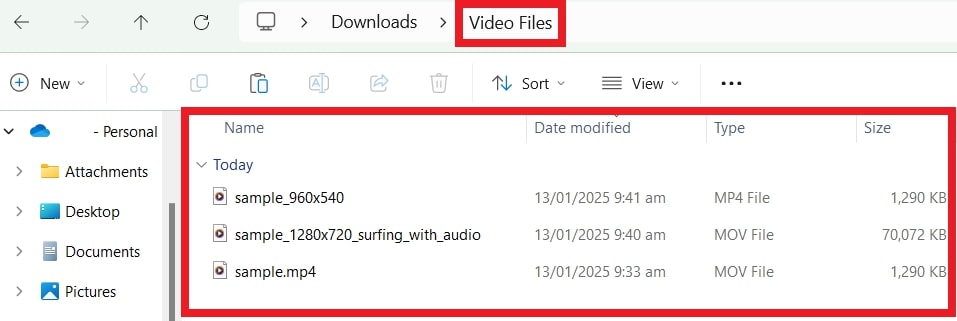
Step 3: Copy and paste the video file(s) into the new folder.
Step 4: Open Premiere Pro and go to your project.
Step 5: Use the Import option to add the video from its new location.
Step 6: Check if the video imports successfully.
Way #3: Clear Media Cache Files
One of the most effective ways to fix Premiere Pro file import failure is by clearing the media cache files. Over time, Premiere Pro can accumulate a lot of cached data. This can slow down performance and cause import issues. Clearing these cache files helps free up space and addresses the problems like failed imports.
Follow the below steps to clear the media cache.
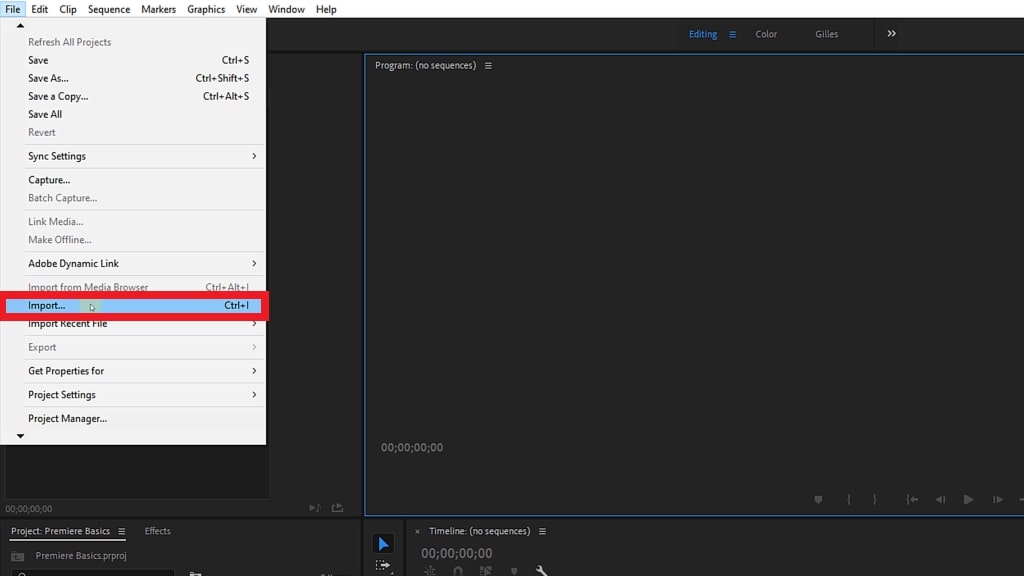
Step 1: Open Premiere Pro and go to the top menu.
Step 2: Click Edit (Windows) or Premiere Pro (Mac) and select Preferences.
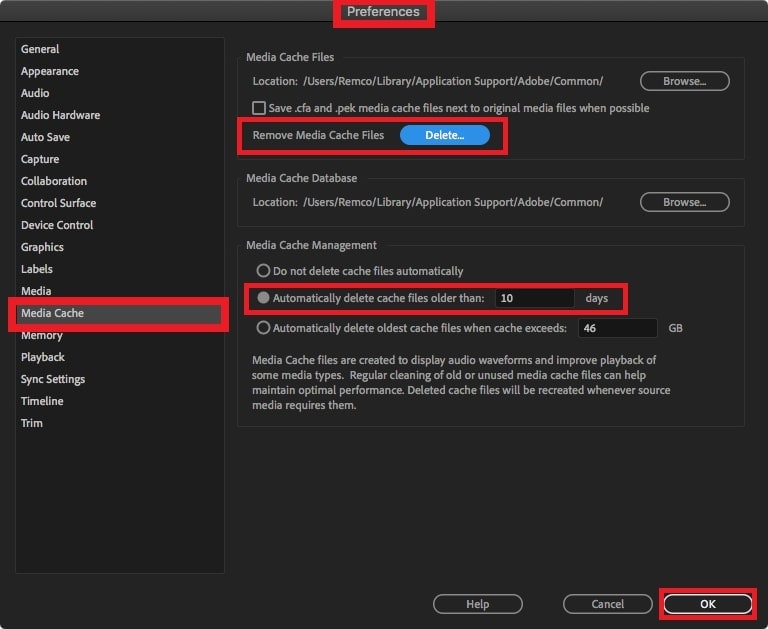
Step 3: Choose Media Cache from the list of preferences.
Step 4: Click Delete next to Remove Media Cache Files.
Step 5: See the “Automatically delete cache files older than…” option. You can customize the days.
Step 6: Restart Premiere Pro and try importing your file again.
Way #4: Repair Corrupted Video Files
Corrupted video files are a common reason for import failures in Adobe Premiere Pro. When a file is damaged, it may not open properly or work with editing software.
Thankfully, there are tools available that can help restore damaged video files to a usable state. One such tool is Repairit Video Repair. The user-friendly program is a powerful solution for fixing corrupted video files quickly and efficiently.
Repairit’s comprehensive features make it ideal for fixing corrupted video files that fail to import into Premiere Pro. Its advanced repair capabilities, support for numerous formats, and intuitive interface ensure reliable and effective results.
- Supports a wide range of formats, including MXF, MOV, MP4, M2TS, MKV, MTS, 3GP, AVI, and more.
- Repair RSV, DAT, and MDT files damaged by camera power failures.
- The repaired videos work with editing software like DaVinci, Composer, Final Cut Pro, and Premiere Pro.
- Repairs videos corrupted during shooting, transferring, editing, or converting. Handles issues caused by device interruptions like power failures.
- The tool offers quick and advanced repair modes: Quick Repair and Advanced Repair.
Follow these 3-step repair processes of Repairit.
Step 1: Run the Repairit Video Repair program. Add the corrupted videos to be imported to Adobe Premiere Pro by clicking the +Add button.

Step 2: Hit Repair to start fixing the corrupted videos to be imported to Adobe Premiere Pro.

For severely damaged videos, tick the Advanced Repair option. Upload a sample video to quickly improve the video repair quality.

Step 3: You can preview the repaired videos before importing them to Adobe Premiere Pro. If everything looks good, click Save and choose a new location to save the file. Avoid saving it in the original location to prevent repeating the same error.

Repair Corrupted Video Files
 Security Verified. Over 7,302,189 people have downloaded it.
Way #5: Install Media Feature Pack
If you're using Windows and Premiere Pro fails to import files, missing media components might be the issue. Installing the Media Feature Pack can fix this. It's a Windows add-on that provides essential media-related features like codecs, which Premiere Pro needs to handle certain file types.
If you're using Windows 11/10, follow these steps to install the Media Feature Pack:
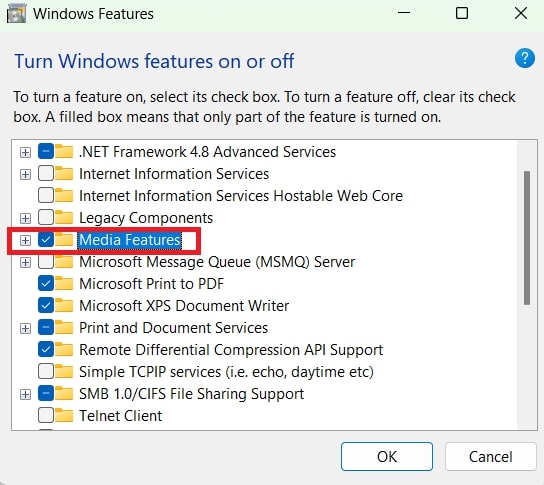
Tips: Before starting, enable the Media Features option in Windows Features to avoid issues with the pack not appearing in Optional Features.
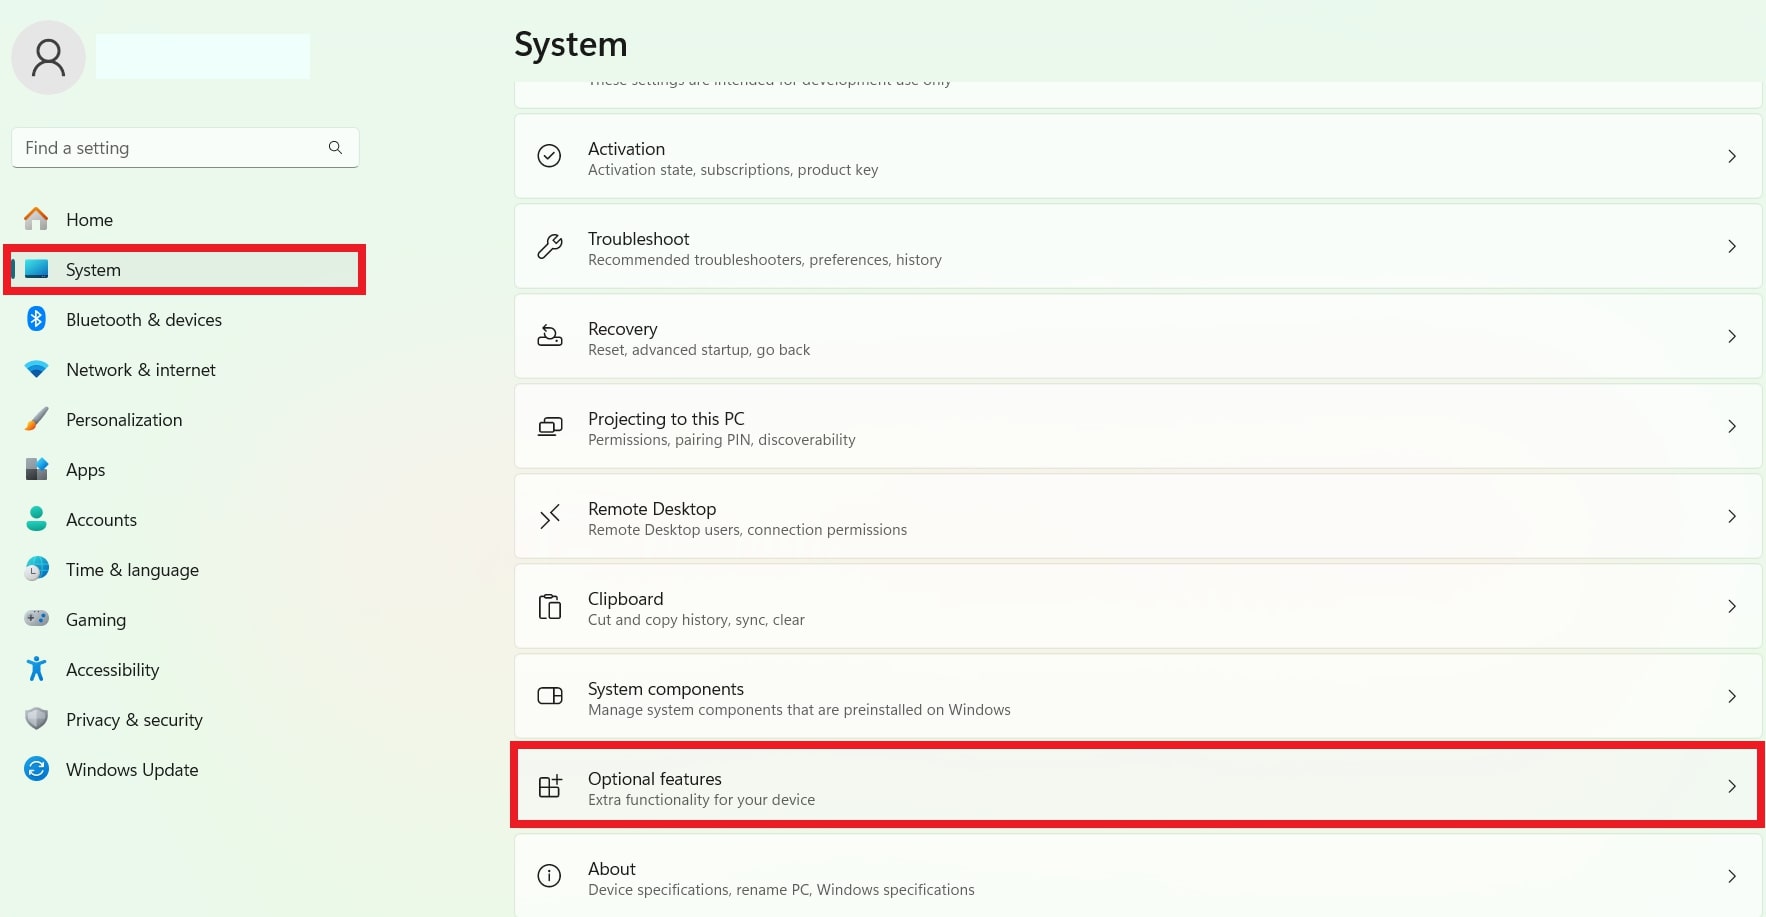
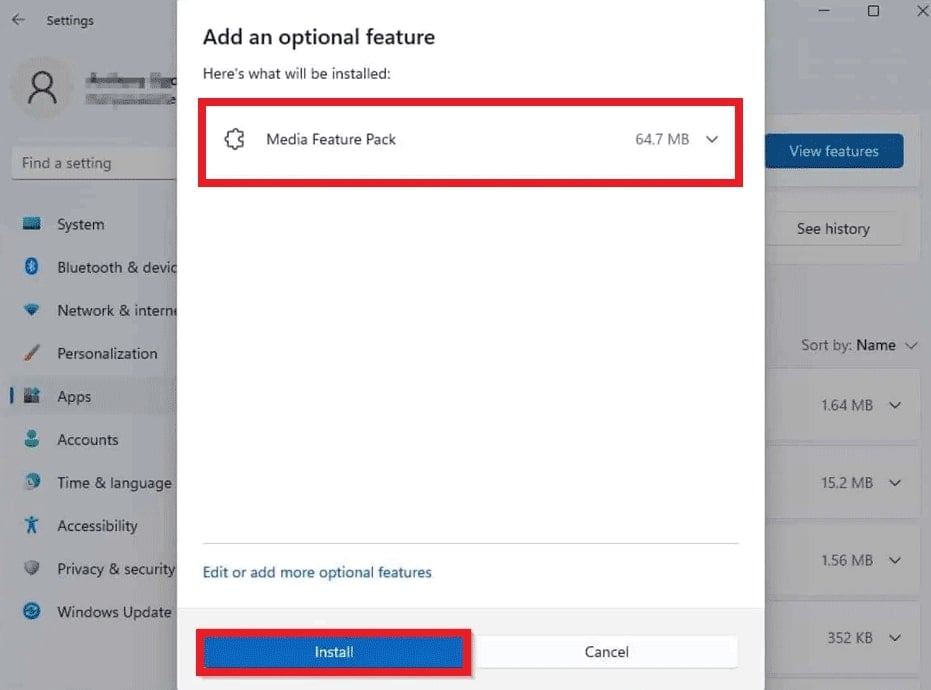
Step 1: Open Settings and click System. Find Optional features.
Step 2: Click Add a feature (Windows 10) or View features under Add an optional feature (Windows 11).
Step 3: Search for the Media Feature Pack. Select it and click Install.
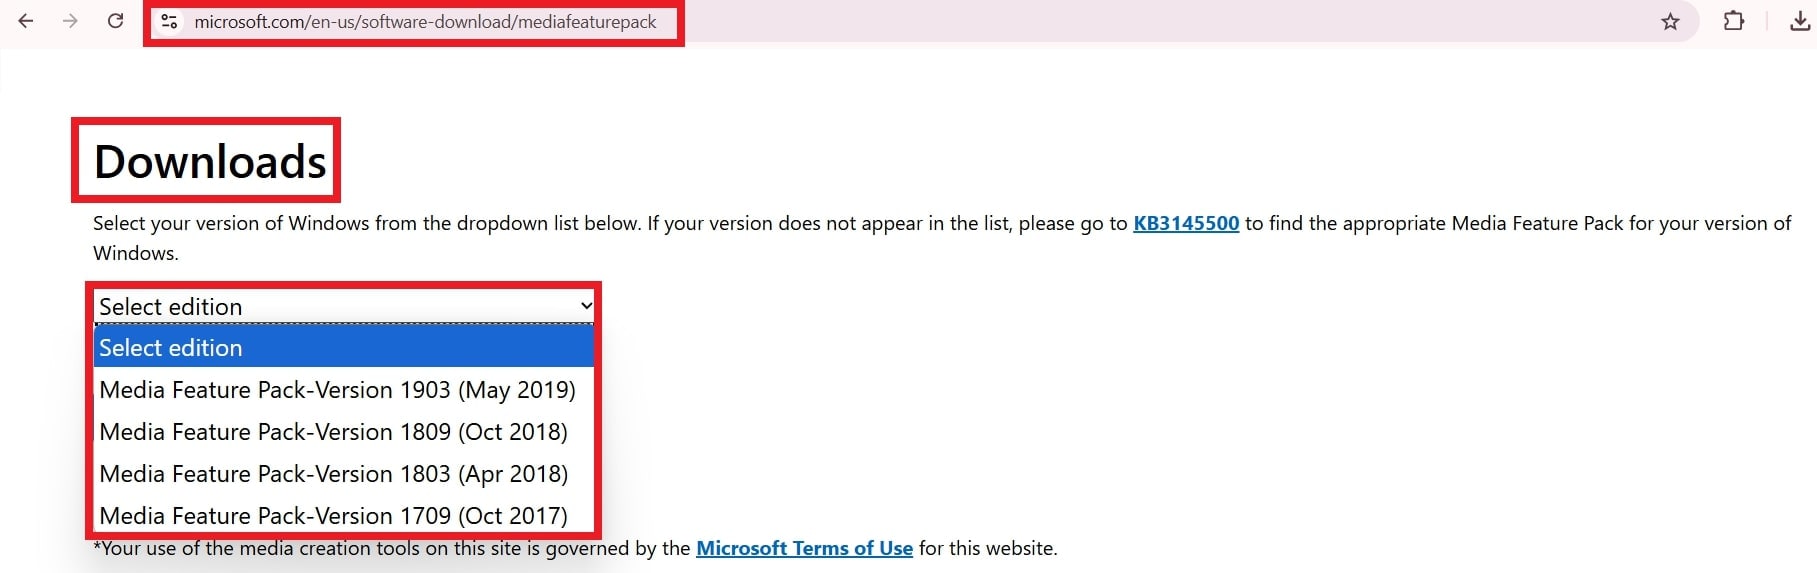
If the Media Feature Pack is not showing, follow these instructions to manually download and install it:
Step 4: Open your browser and go to the Media Feature Pack Download Page.
Step 5: Scroll to the Downloads section.
Step 6: Select your version and click Confirm.
Step 7: Run the file and follow the on-screen instructions to complete the installation.
Step 8: Wait for the pack's installation to complete. Then restart your computer.
Step 9: Open Premiere Pro and try importing the file again.
Way #6: Reinstall Adobe Premiere Pro
If you’ve tried the previous solutions and are still facing file import failure, reinstalling Adobe Premiere Pro might be your last resort.
Sometimes, software issues or corrupted files can cause persistent import problems. Reinstalling Adobe Premiere Pro can fix these problems by ensuring you have a clean and updated version of the program. This resolves bugs and restores default settings for a fresh start.
Here’s how to reinstall Adobe Premiere Pro and resolve the import issue.
Step 1: Find Adobe Premiere Pro in the list of installed apps.
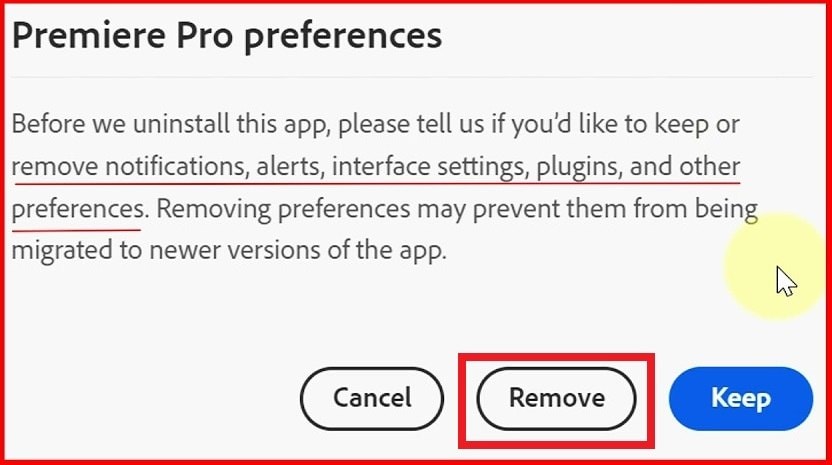
Step 3: Hit the three dots next to it and press Uninstall.
Step 4: Adhere to the on-screen instructions to finish the uninstallation.
Step 5: Restart your computer to clear any remaining files.
Step 6: Reinstall Adobe Premiere Pro.
Step 7: Launch the program and try importing your file again.
Conclusion
Dealing with file import failure in Premiere Pro can be frustrating, but it's easy to fix with the right steps. Understanding common causes, like unsupported file types, missing codecs, or corrupted files, helps you troubleshoot. You can rename the file extension, move the video, clear media cache files, install the media feature pack, or reinstall Premiere Pro. For more severe cases, tools like Repairit Video Repair can repair damaged files. Use these methods to solve the import failure issue and get back to editing smoothly.
FAQ
What video file formats are supported in Premiere Pro?
Premiere Pro imports a wide range of formats, including MP4, MOV, AVI, MPEG, and H.264.How do I check if my system resources are causing import issues?
Monitor your system’s CPU, RAM, and disk usage while trying to import a file. If any resource is maxed out, consider upgrading your hardware or closing other applications to free up resources.Can plugins or third-party codecs cause import issues in Premiere Pro?
Yes. Third-party plugins or missing codecs can interfere with file imports. Disable or uninstall any recently added plugins and check that necessary codecs are installed.
