
Many people capture memories daily, but sometimes photo flicker ruins their clear shots. This issue appears as unwanted light changes, making pictures look strange or unclear. It can make photos look either dull or shaky instead of sharp and clean.
Fortunately, various easy solutions are available for both Android and iPhone to overcome this issue. Thus, this guide explains easy methods anyone can follow to reduce photo flicker effortlessly.
Table of Contents
Part 1. Common Causes of Photo Flicker on iPhone and Android Cameras
The problem usually happens because of light, camera settings, or minor technical problems. Before fixing the issue, let's explore the most common reasons causing flickering pictures:
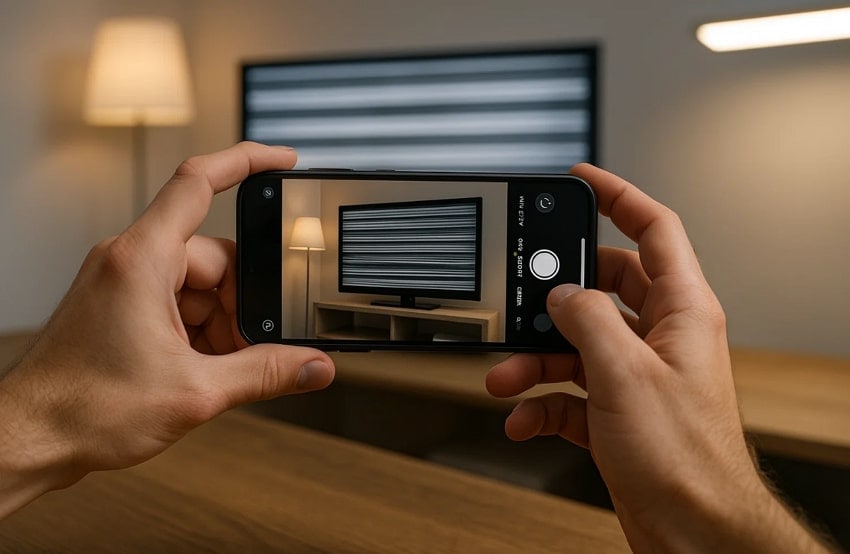
- Artificial Light: Indoor lights flash faster than cameras can record, creating uneven brightness. This mismatch between bulb flicker and camera sensor speed results in strange marks across pictures.
- Screen Reflection: Shooting near bright screens causes reflection that confuses camera sensors. The reflected light patterns interfere with exposure, making flicker pictures appear across photos.
- Shutter Speed: Fast shutter speeds may not match light frequency, creating visible flicker patterns in the shot. This timing clash prevents smooth light capture, causing photos to show distracting flicker.
- Frame Rate: Frame rate differences with artificial light sources cause flicker patterns in photos. When the frame rate doesn’t match the lighting frequency, photos appear uneven and poorly balanced.
- Software Bugs: Errors in the camera app sometimes misread lighting signals, producing lines in images. When software glitches occur, photos capture uneven brightness and strange patterns.
Part 2. Fix Photo Flicker on iPhone with Built-in Camera Settings and Updates
iPhone cameras include several native settings that can help reduce flickering images while shooting. Thus, the following parts provide you with the top 4 solutions to help you resolve the flicker images issue:
Fix 1. Disable Macro Mode
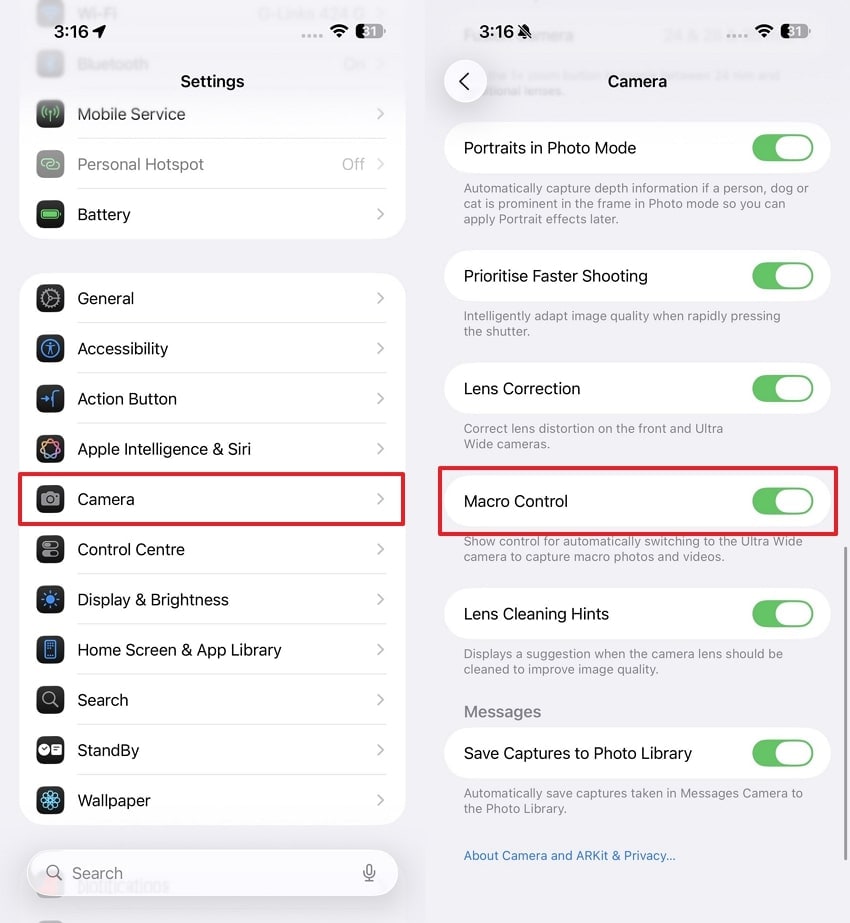
The first fix is to disable Macro Mode, which helps keep the camera from automatically switching lenses in close shots. When active, Macro Mode changes to the Ultra Wide lens, which sometimes causes image instability. Upon turning it off, you can decide exactly when to use the macro to ensure cleaner captures. So, follow the quick steps to resolve the flickering photo problem on your iPhone:
Instructions. As you access settings, head to the “Camera” app and toggle off “Macro Control.”
Fix 2. Turn Off Live Photos
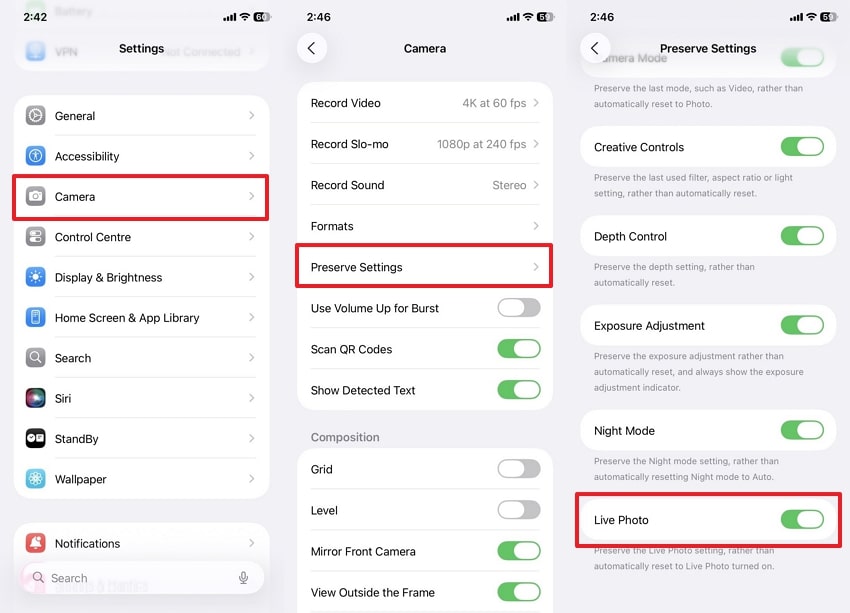
You can also turn off Live Photos when you want more stable and sharper images. This feature records a short moving clip, which sometimes adds unwanted motion blur to your photos. By disabling it, the camera focuses only on capturing still frames with more precise results. Hence, go through the following guide to prevent errors like a flickering photo on your phone:
Instructions. Upon heading to the “Camera” app on your phone’s settings, go to “Preserve Settings” and disable the “Live Photos” toggle.
Fix 3. Adjust Exposure Manually
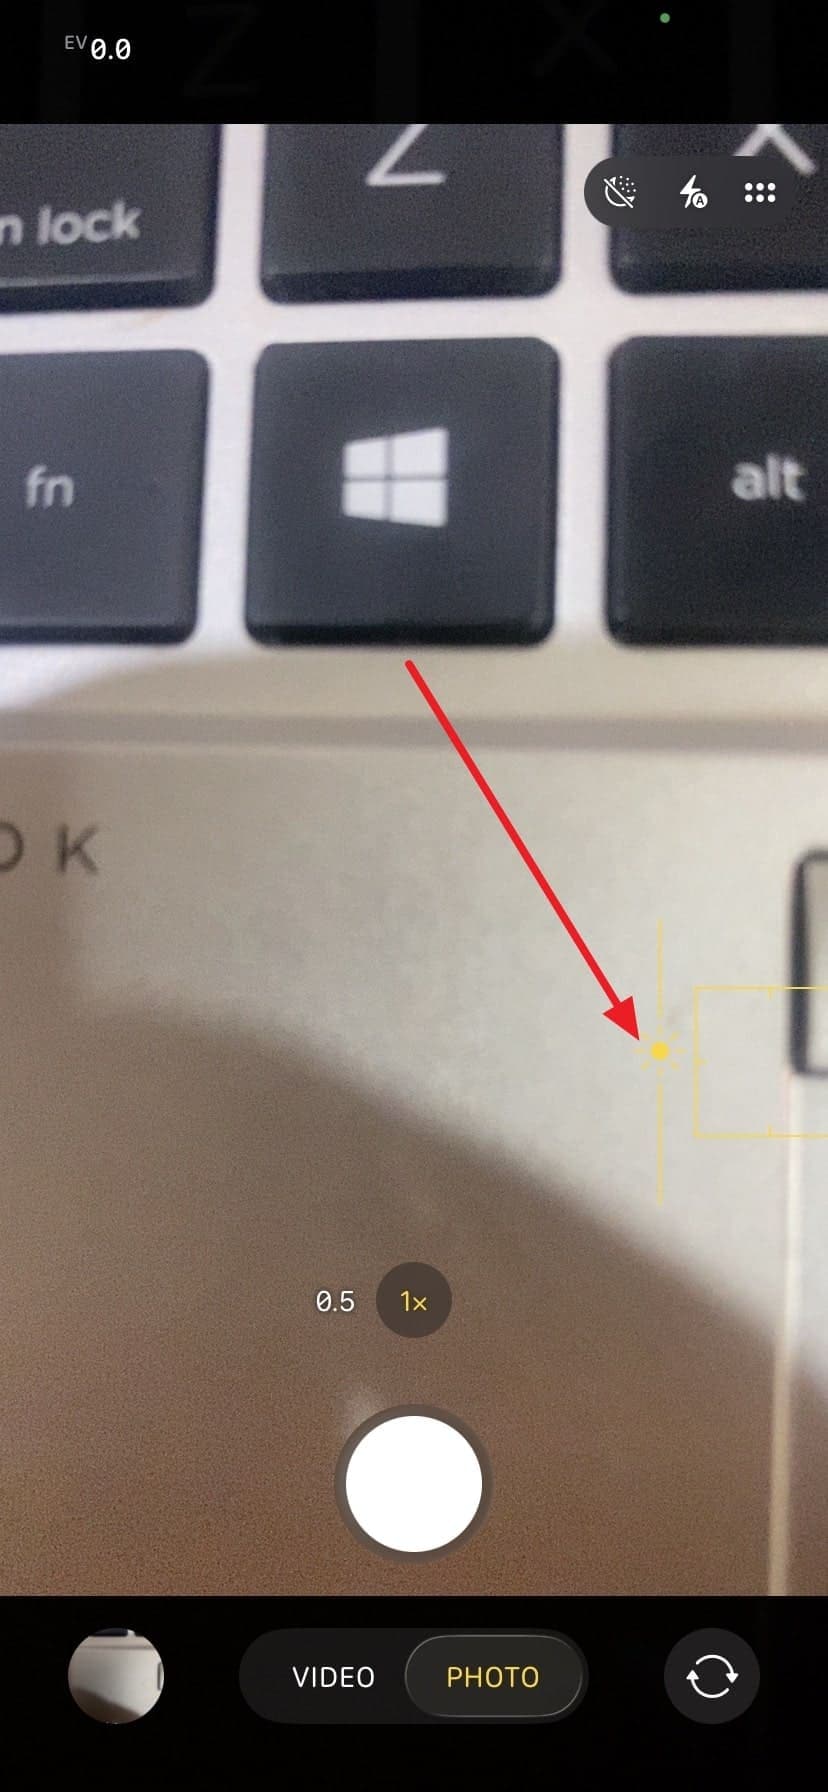
Manually adjusting exposure on an iPhone also allows you to control how much light enters the camera. Automatic settings sometimes struggle with artificial lighting, which can lead to uneven brightness in photos. When you set exposure yourself, you prevent sudden light shifts that actually create a flicker pic. Anyway, review the guide below to find out how you can adjust exposure manually:
Instructions. Open the “Camera” app and then tap the screen to set focus. Afterward, use the “Sun” icon slider to adjust exposure until the photo looks natural.
Fix 4. Turn Off HDR
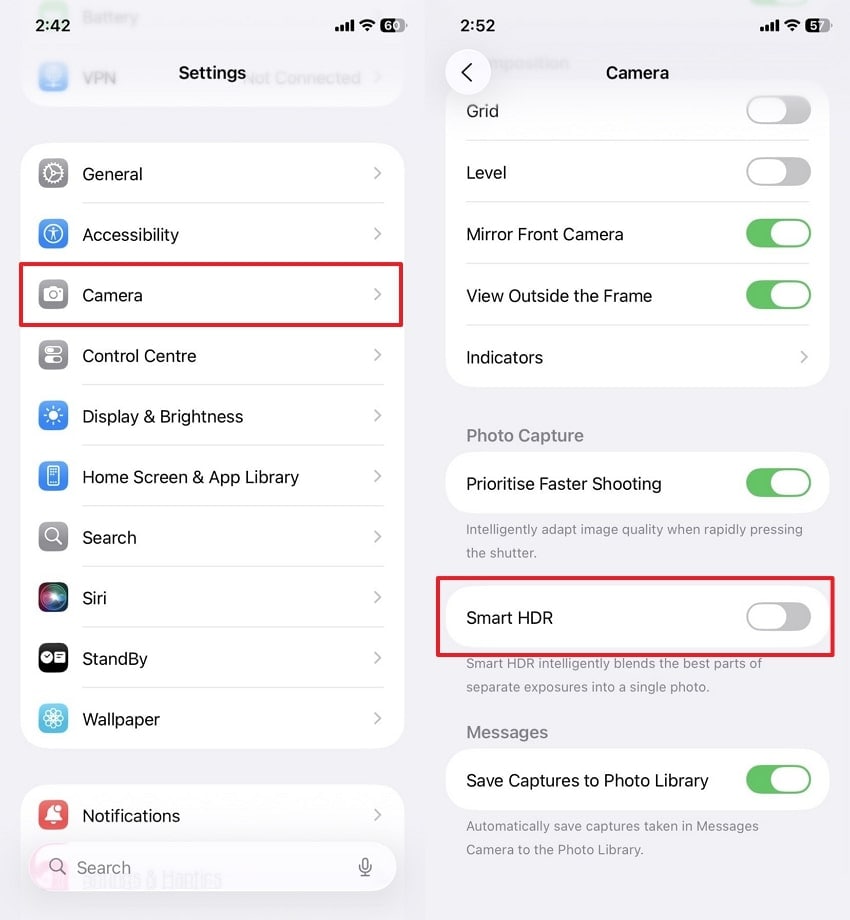
Another solution to avoid unstable results is turning off the HDR of your phone's camera. This feature blends multiple exposures for balanced lighting, but it sometimes creates stripes or in shots. When you disable it, the camera captures a single frame with balanced lighting and clarity. So, take guidance from the following instructions to disable this feature and address the photo flicker problem:
Instructions. When you access the “Camera” settings, locate and turn off the “Smart HDR” toggle.
Part 3. Fix Photo Flicker on Android by Adjusting Camera Modes and Settings
Android users also face flickering pictures when camera modes or settings do not match the lighting conditions. Below, we will explore multiple solutions so you can quickly reduce these issues and capture clearer photos:
Fix 1. Adjust Camera Settings (Manual Focus/Pro Mode)
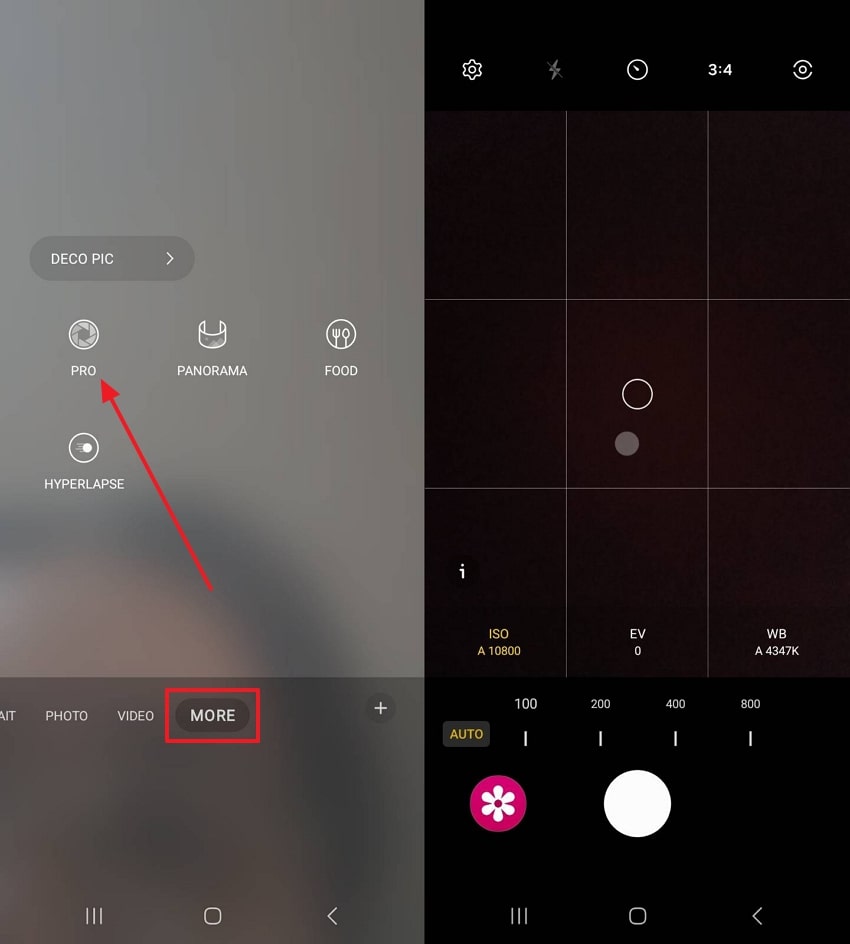
Adjusting camera settings on Android using Manual Focus or Pro Mode gives you better control over results. Automatic settings often misread indoor lighting, which may result in uneven tones or flickering images.
With Pro Mode, you can adjust shutter speed and exposure to match the environment. This flexibility helps prevent sudden brightness shifts that usually disturb photo quality. Below are the steps to solve photo flicker through this method:
Instructions. Open the “Camera” app and choose the “Pro” mode from the “More” tab. After that, adjust settings like ISO, shutter, focus, and white balance using sliders.
Fix 2. Boot in Safe Mode
You can also boot your device in safe mode to resolve issues like photo flicker. In Safe Mode, the phone temporarily disables all external apps and runs only the core system functions. This makes it easier to test whether the issue comes from the phone itself or the installed external camera app. Thus, follow the given guide to put your phone into safe mode and fix the flicker pic problem:
Step 1. Press the “Power” key for a few seconds and keep pressing the “Power Off” option until the “Safe Mode” choice appears. Select Safe Mode to restart your phone.

Step 2. Once the device turns on with “Safe Mode” shown at the bottom, open the Camera app. If photos look clearer in Safe Mode, external apps are likely responsible.
Fix 3. Turn Off Blue Light or Night Light Filters
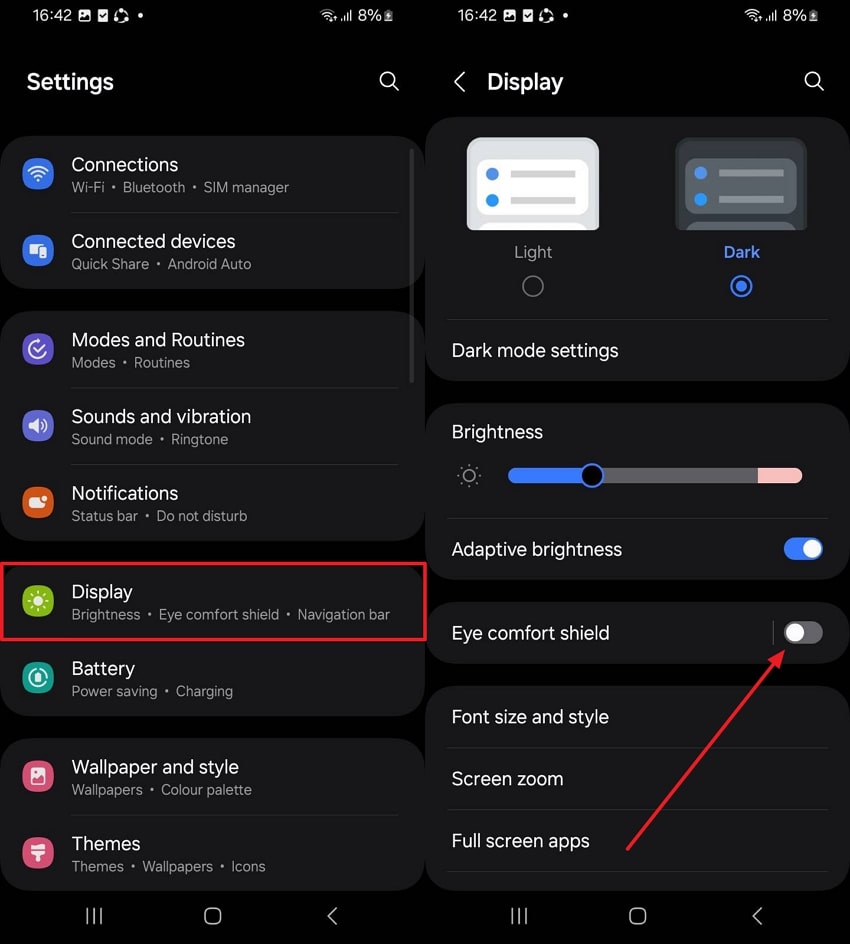
While exploring the top fixes, turning off Blue Light or Night Light filters can improve photo quality. These filters change screen colors, which sometimes interfere with camera sensors and may create flickering images. Upon disabling them, your camera receives natural lighting without unnecessary color changes or distortion. Hence, explore the steps below to learn how to turn off these filters on your phone:
Instructions. When you access the “Display” section from settings, toggle off the “Eye Comfort Sheild.”
Fix 4. Enable Developer Mode & Disable HW Overlays
Another effortless way to fix photo flicker is by enabling Developer Mode and disabling HW overlays. When you disable HW overlays, the phone uses the GPU to handle visuals, which helps prevent screen flickering. This option helps reduce visual interruptions that appear when capturing photos in challenging light conditions. So, review the given steps to perform this process and resolve issues like flickering pictures:
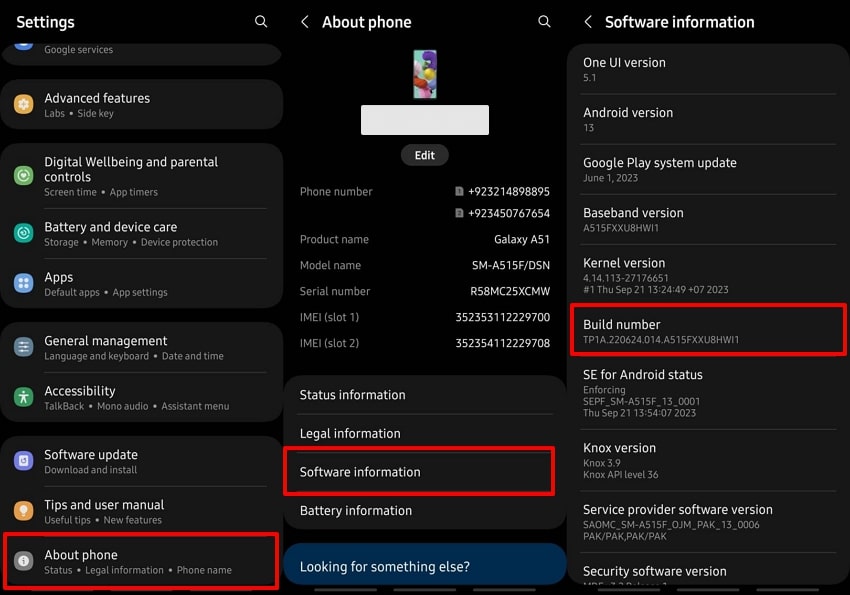
Step 1. Initiate by heading to the “About Phone” section and opting for the “Software Information” option. After that, tap the “Build Number” 7 times quickly upon confirming the developer mode is enabled.
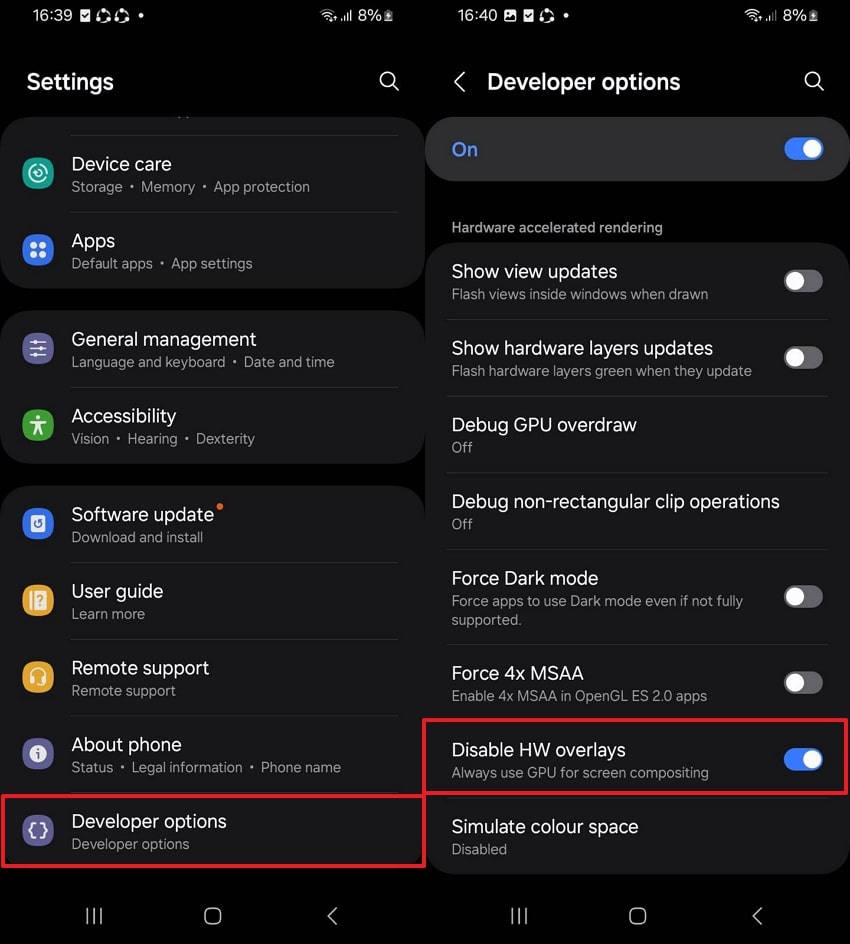
Step 2. Head back to the settings’ main screen and tap the “Developer Options” section. Subsequently, you need to enable the “Disable HW Overlays” toggle.
Pro Tip. Use Trusted Photo Repair Tool to Fix Photo Flicker in Seconds
Sometimes, even after changing settings, you may still struggle with unclear results or a flickering photo. In such cases, using a professional photo repair tool can be the best solution. A smart option is Repairit, an intelligent AI-powered photo repair that automatically detects and restores damaged images. This dedicated tool supports 20+ image formats, including JPEG and PNG, to repair them effortlessly.
Moreover, it even allows repairing multiple photos at once, saving time with high-speed results. Users can also preview repaired results before saving to ensure satisfaction with outputs. In addition, the program even removes digital noise and grain while preserving photo sharpness and small details. Besides, it offers both a desktop version and an online platform for users to repair their photos according to their preferences.
Key Features
- Resolution Boost: The tool can increase image quality up to 800% without losing original photo quality.
- Advanced Repair: It also handles severely corrupted images in multiple formats with precise AI-powered restoration.
- Thumbnail Extraction: You can extract thumbnails from corrupted images, allowing recovery of original visual previews.
Step-by-Step Tutorial to Repair Flickering Photos Using Repairit
Adhere to the following comprehensive steps to understand how you can use this dedicated program:
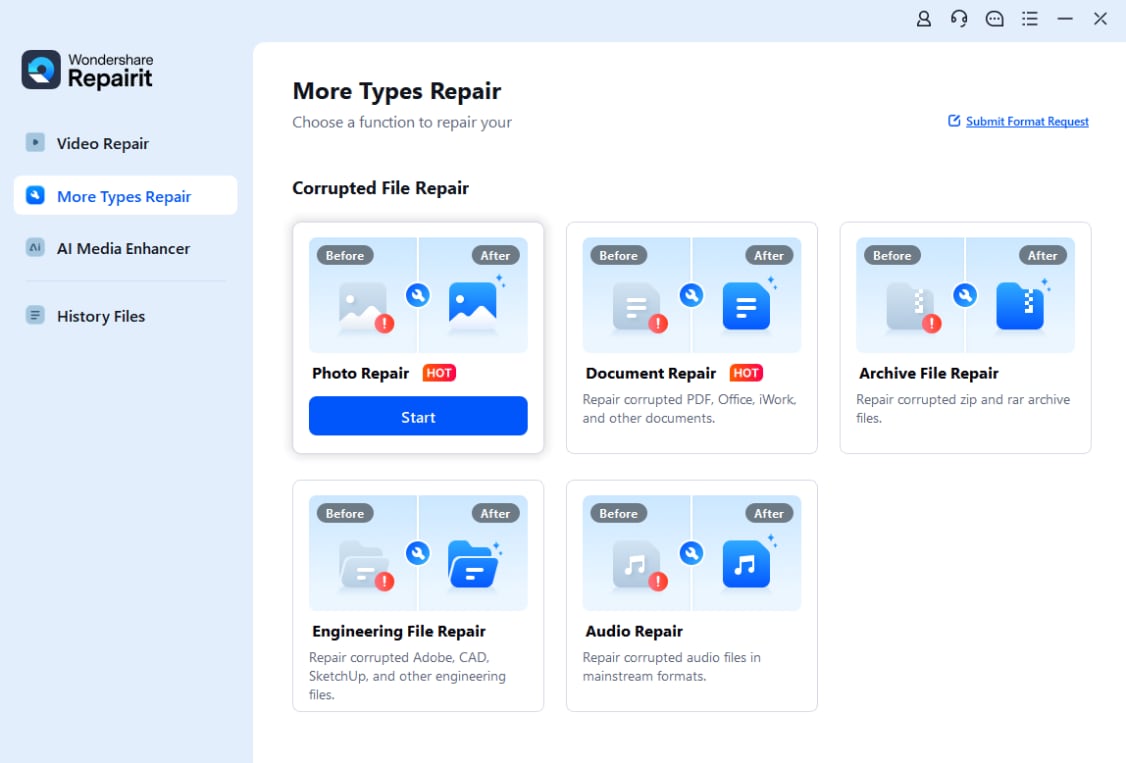
Step 1. Access the Photo Repair to Fix Flickering Photos
Initially, access the “More Types Repair” tab and choose “Photo Repair” by pressing the “Start” button.
Step 2. Import Your Flickering Images
Afterward, click the “+Add” button to import flicking photos and then hit the “Repair” button to start fixing them.

Step 3. Export Your FixedPhotos
Once repaired, preview the result and click both the “Save All” and the “Save” buttons to export them.

Fix Photo Flicker Now
 Security Verified. Over 7,302,189 people have downloaded it.
Conclusion
In summary, fixing photo flicker may seem complicated, but with the proper steps, it becomes simple. Both iPhone and Android devices offer useful settings to reduce brightness issues and improve photo clarity. However, if photo flicker still continues, you may need an advanced solution. In such a case, Repairit is the best solution for restoring clear photos when photo flicker problems don't resolve.
FAQs
-
Q1. Why does flicker appear more on moving subjects?
Moving subjects create uneven exposure because sensors struggle to balance fast light changes. When combined with artificial lighting, the sensor cannot process frames, causing visible flicker. Using higher ISO or stable lighting sources helps reduce flicker while capturing moving subjects. -
Q2. What is the role of frame rate in photo flicker?
Frame rate mismatch with artificial lights usually confuses the sensor’s timing. As a result, this mismatch creates flickering effects across pictures. So, aligning the frame rate to local lighting frequency ensures smooth light capture and clearer photos. -
Q3. How can severely damaged, flickering photos be restored?
Severely damaged, flickering photos may require professional repair tools instead of regular adjustments. Among the available options, Repairit can restore pixelated or corrupted pictures with precision. It even supports multiple formats to ensure lost details are recovered for lasting clarity.
