

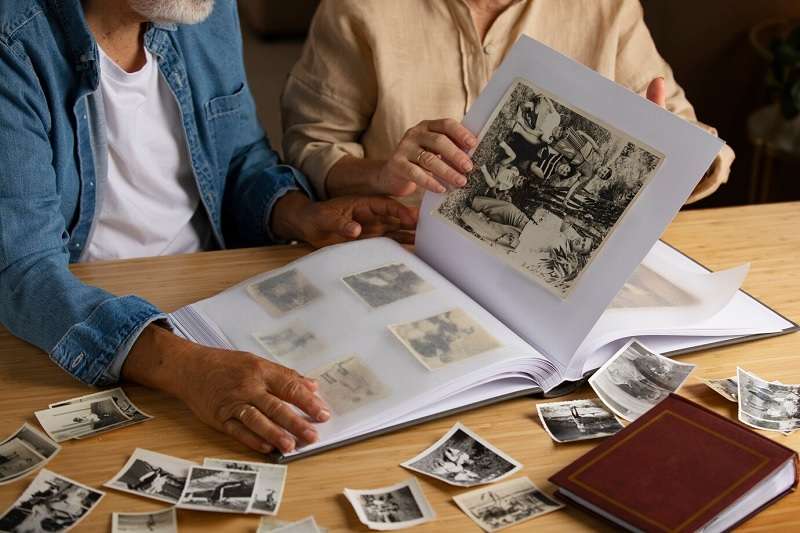
Learning how to make blurry photos into HD is important to capture moments frozen in time. Preserving the clarity and details of these vintage treasures is important.
The article unveils five proven solutions to remove blur from photos, ensuring the enhancement of cherished memories. As a dedicated tool, Wondershare Repairit takes the spotlight. The platform offers a reliable means to breathe new life into these timeless images. Join us on a journey to rediscover the beauty of the past and elevate the visual narrative of your most precious memories.
In this article
Part 1. Why Do Photos Turn Blurry?
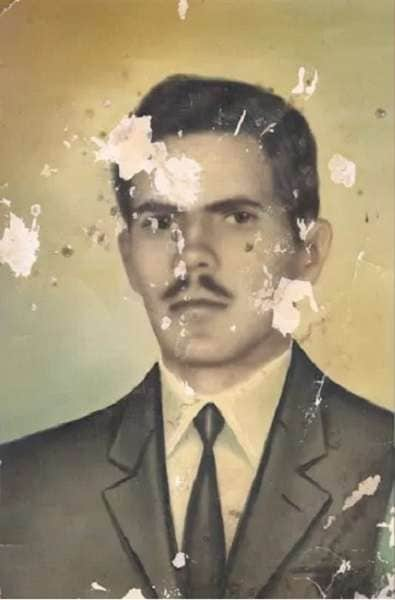
Old photos often bear the hallmark of time through a veil of blur and obscurity. With age, they often lose the sharpness that once defined them. The reasons behind photo blurring are straightforward, such as:
Motion
Blurring happens when there’s movement during a shot. Even slight shifts, common in older cameras with slower shutter speeds, can soften details.

Focus Issues
Focus problems, whether from aging cameras or manual errors, can make once-sharp subjects look fuzzy. Over time, this shift in focus blurs the image.

Degraded Film
The film quality matters. Over time, environmental factors like humidity and temperature fluctuations degrade the film, distorting images. The degradation introduces artifacts and distortions, further contributing to the overall blurriness of the image.

Beyond these, photos face more challenges that can blur their quality:
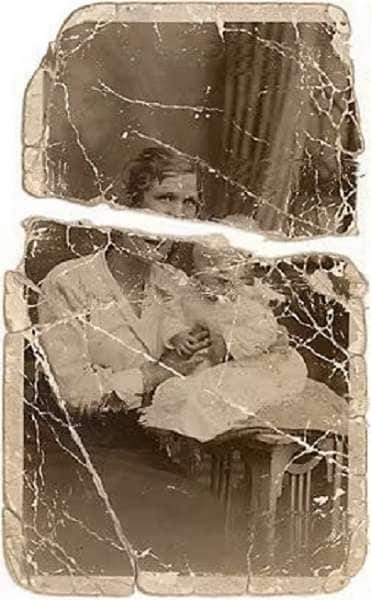
Scratches, Spots, Smudges, and Blemishes
Physical damage mars clarity. Scratches or smudges from mishandling become visible distortions. These imperfections, often incurred during handling and storage, become visible distortions on the image.
Improper Storage
Neglecting proper storage exposes photos to sunlight, moisture, and extreme temperatures, accelerating deterioration.
Age
Sometimes, the sheer passage of time takes its toll. As photos age, materials break down naturally, leading to a loss of vibrancy and sharpness.
Tools like Wondershare Repairit help revive and preserve these timeless memories. In the next sections, let’s explore techniques to counteract these aging factors and breathe new life into your cherished photographs.
Part 2. How To Make Blurry Photos Into HD – 5 Methods
Below are 5 effective methods to elevate your cherished memories. Learn how to turn blurry photos into high-definition gems, breathing new life into moments frozen in time. Let’s start by using a dedicated online tool for a hassle-free experience.
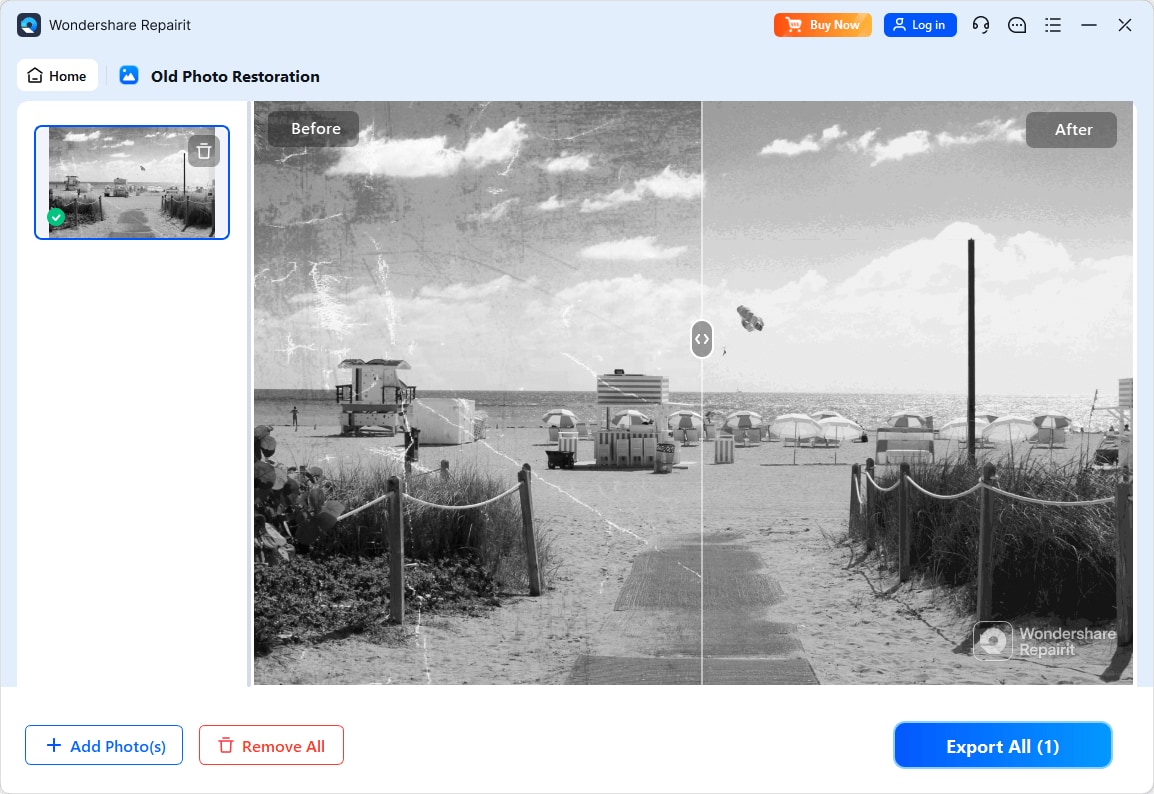
Method 1: Using an Offline Software
Wondershare Repairit is the ultimate solution to resurrect faded memories. This powerful tool specializes in restoring old photos and breathing new life into them. It’s a platform powerhouse that transforms faded memories into high-definition treasures. Uncover how to use it to revitalize your old photos by following these steps:
Step 1: Download, install, and launch Wondershare Repairit on your computer.
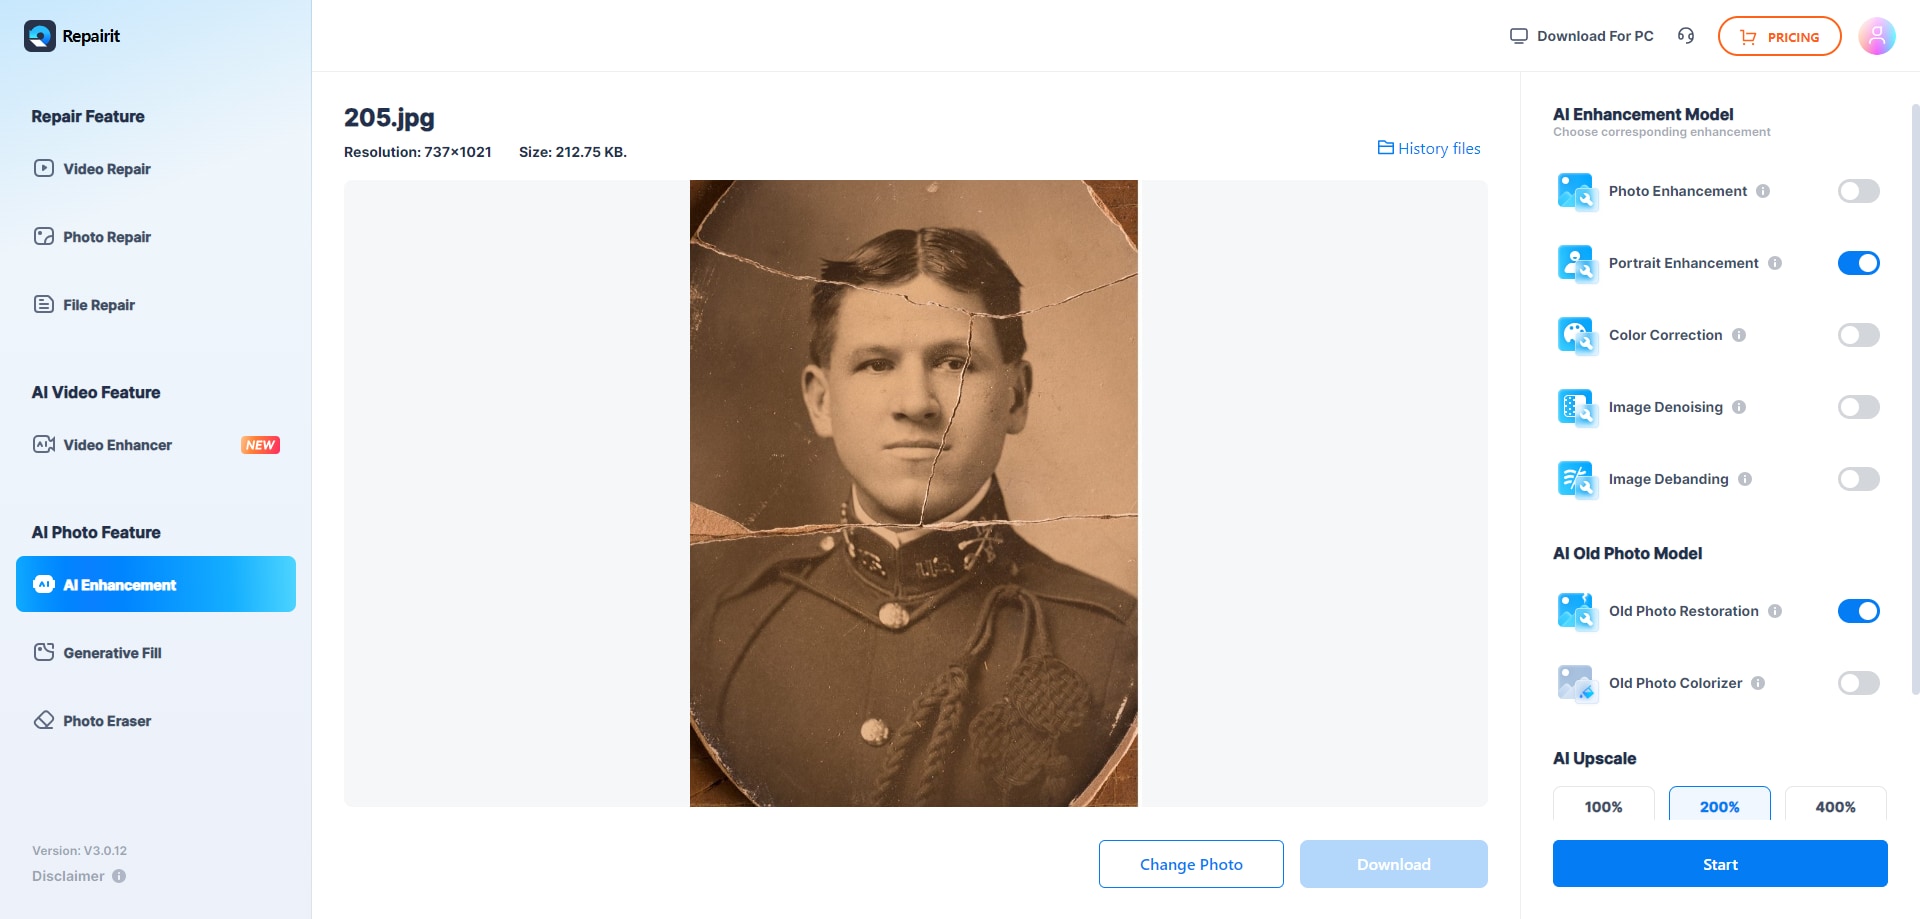
Step 2: Choose More Types Repair > AI Photo Enhancer, then click the Add button to upload your cherished old photos from your computer. You can use the batch processing feature to upload and repair multiple photos of various formats.

Step 3: Customize your experience by selecting a mode—Restore & Colorize, Restore Only, or Colorize Only, you can also choose a desired resolution from "Output Resolution, then click the Start Enhancing button to apply the app’s advanced AI algorithms. Allow the tool to work its magic and wait a moment.
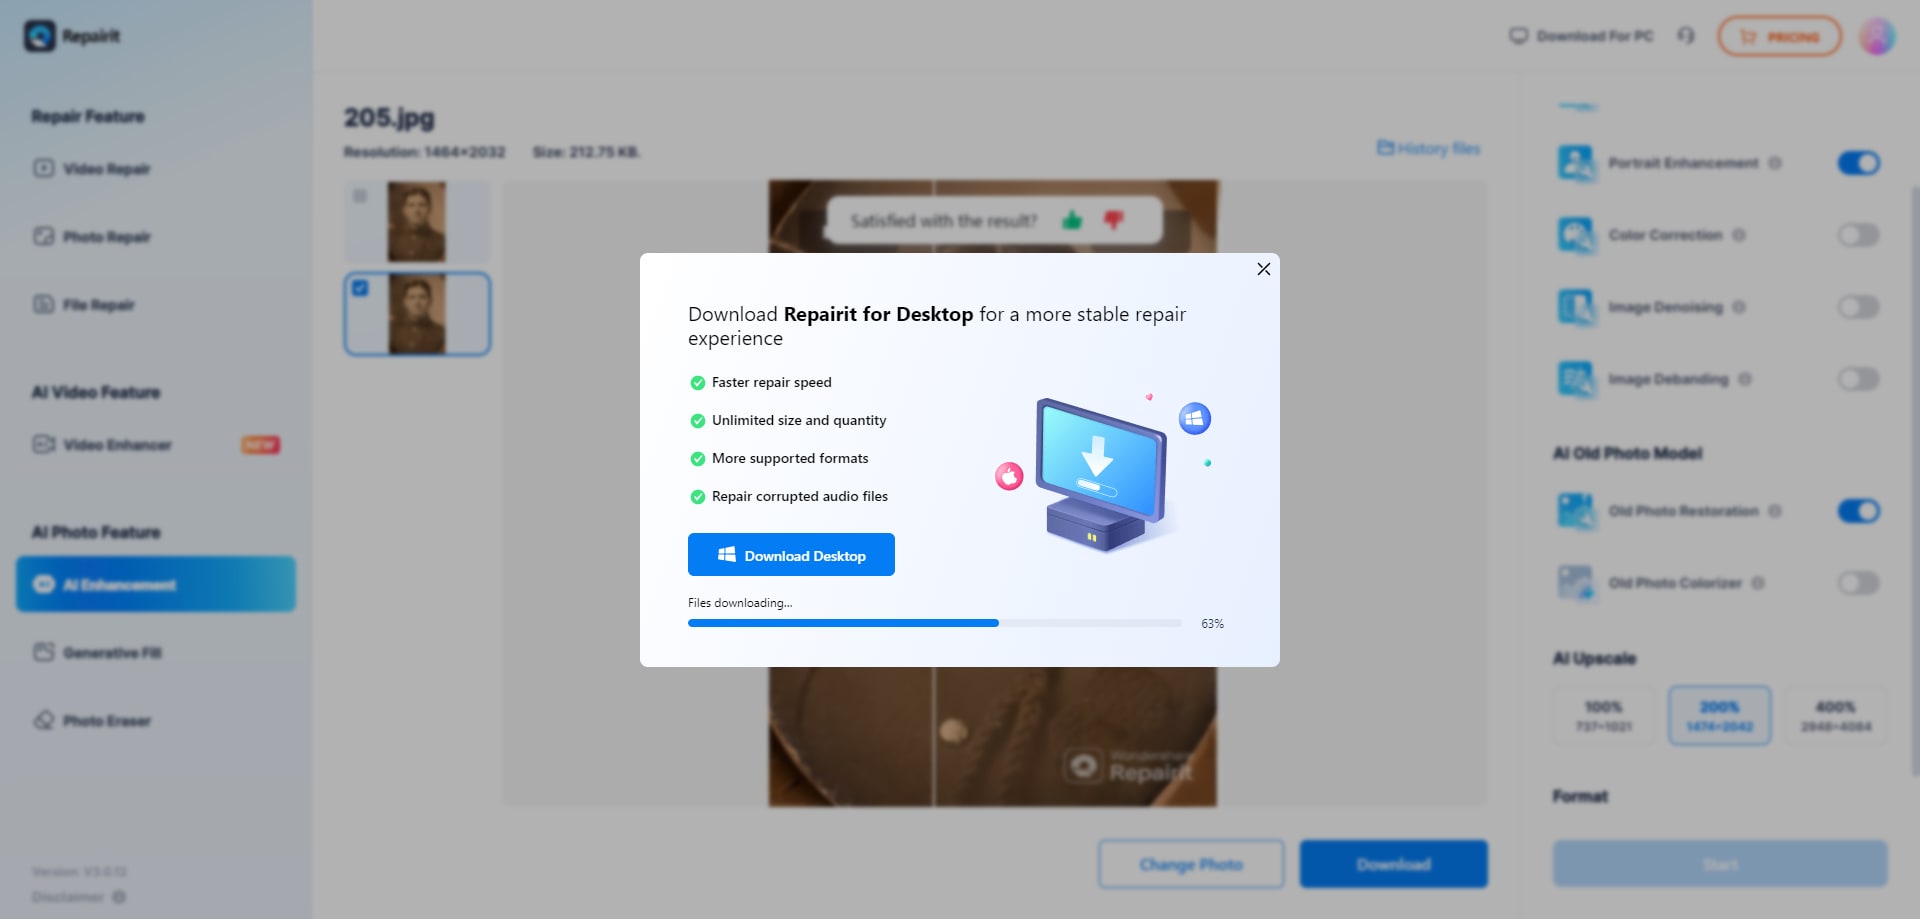
Step 4: Upon successfully restoring your uploaded old photos, please check the restored photo quality. If satisfied, click Save All and choose a path to your computer. Wait within seconds for your restored and colorized photos to download.
This video can help you fix your blurry photos with a step-by-step guide.
Clear Your Blurry Photo Now
 Security Verified. Over 7,302,189 people have downloaded it.
Method 2: Using a Dedicated Online Tool
Repairit also has a versatile online version you can take advantage of, which doesn't need you to download anything. Follow the steps to start using Repairit online:
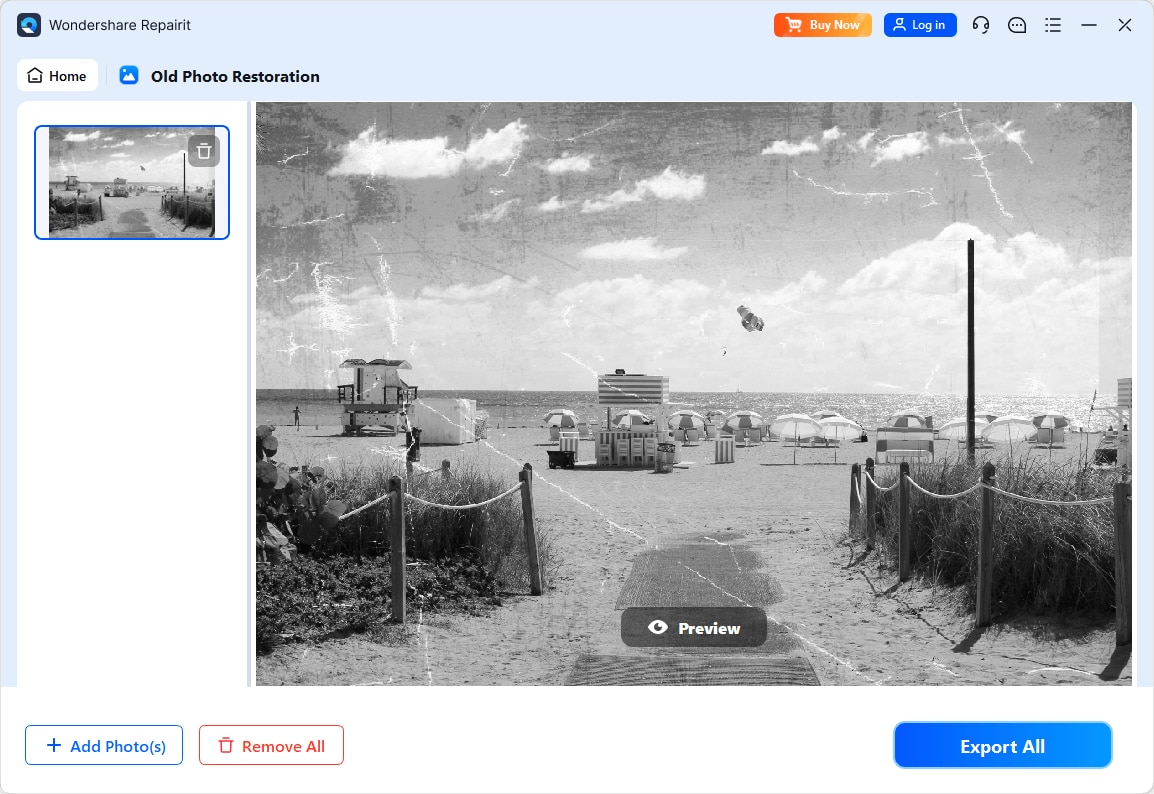
Step 1: Go to Wondershare Repairit’s Old Photos Restoration Online tool. Next, click "Upload Image" to upload your old photos
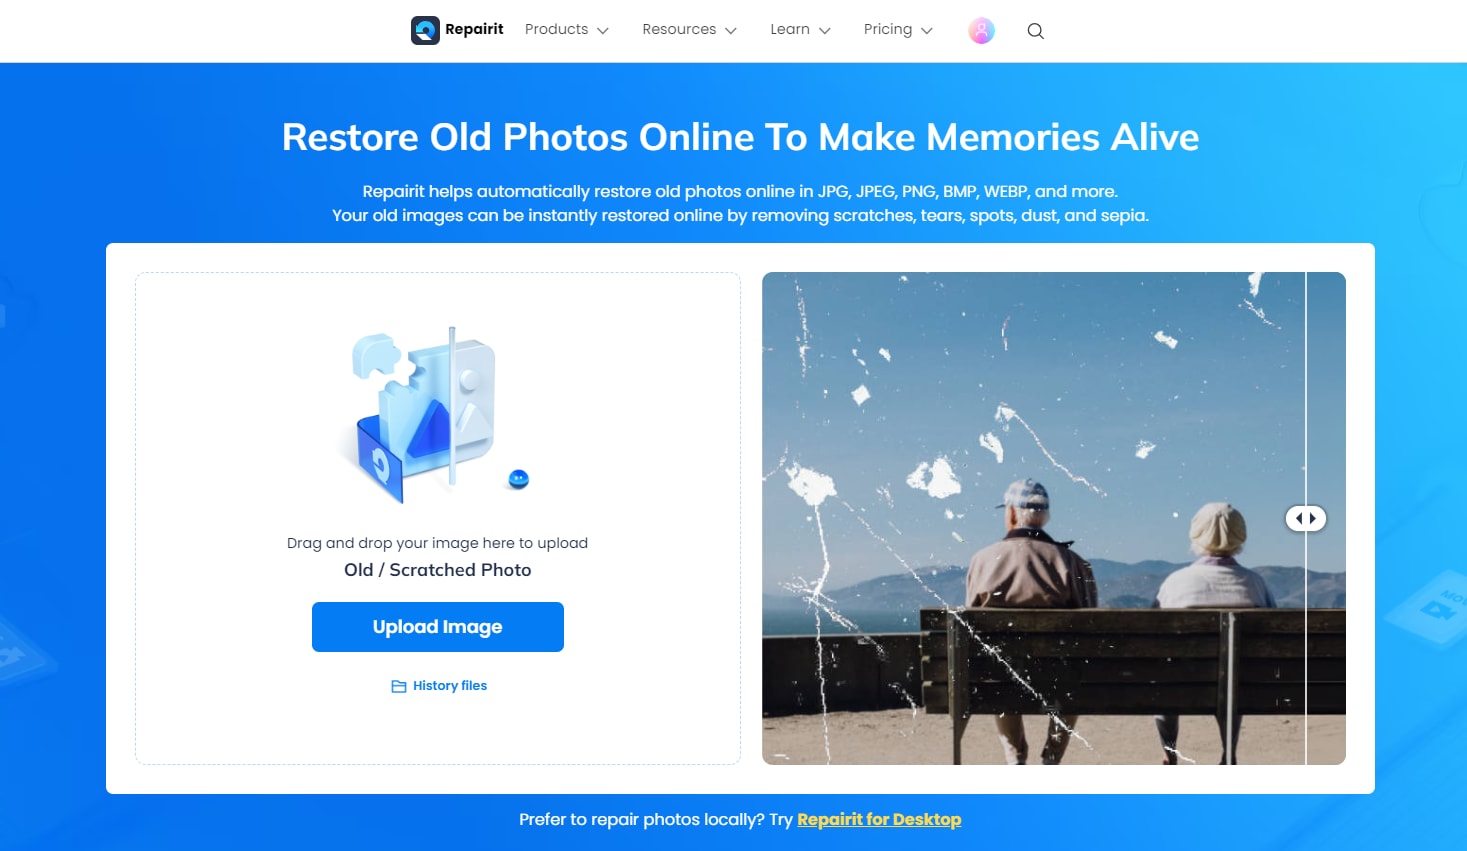
Step 2: Click Old Photo Restore if you need to repair scratches or improve the clarity of faces. You can also click on Old Photo Colorize to colorize black and white photos. Otherwise, please turn it off to maintain the original color of your photo.
Step 3: Wait for the tool’s advanced AI algorithm to work its magic. The platform removes scratches, tears, and blemishes from old photos. Witness the restoration of faded colors and the enhancement of intricate details. Once your photo is restored, click Download to preserve the high-quality JPG or PNG results.
Why Wondershare Repairit Restores Old Photos With Ease
- High-quality results. Repairit delivers unparalleled quality in photo restoration. The tool ensures your memories regain their original brilliance.
- Fast image restoration. Powered by AI, Repairit swiftly restores images. The platform saves you valuable time without compromising on quality.
- Face enhancement. It uses advanced algorithms for precise face enhancement, preserving the essence of your subjects.
- Safe & guaranteed. Trust Repairit for secure and guaranteed photo restoration. It provides peace of mind as you revive your cherished moments.
Pricing Details
Explore the various plans of Wonderhare Repairit using the comparison table. Choose the one that best suits your photo restoration needs.
| Plan Type | Free Version | Monthly Plan | Yearly Plan | Perpetual License |
| Online | Available | $9.99 per month | $4.08 per month (billed $48.99 annually) | Not applicable |
| Windows | $69.99 for 1 month | $79.99 for 1 year | $99.99 one-time payment | |
| Mac | $79.99 for 1 month | $99.99 for 1 year | $119.99 one-time payment |
Method 3: Use Your Smartphone’s Un-Blur Tool
Many smartphones come equipped with powerful built-in tools to salvage blurry photos. Here’s a step-by-step guide on how to use these tools to enhance your images.
Step 1: Open your gallery and choose the blurry photo you want to improve.
Step 2: Look for the editing options in your phone’s gallery or photo app. A pencil icon or Edit button often represents this. Choose the Sharpness tool and adjust the sharpness level to try to fix the blur on the photo.
Method 4: Pick a Better Shot
Sometimes, choosing a superior shot is the best way to combat photo blur. You can also try merging multiple exposures for an HDR effect. Follow these steps to capture and enhance your moments.
Step 1: Choose a superior shot if you’re using Live Photos (iPhone), Top Shot (Pixel), or Motion Photo (Samsung). Select the best frame or use advanced features to enhance the overall quality of your photograph.
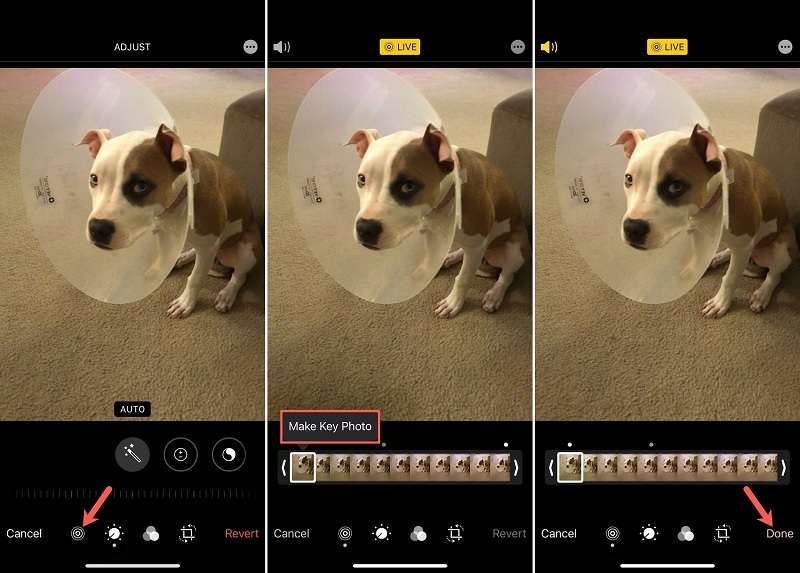
Step 2 for iPhone: Click on Edit for the photo, tap the Live Photos button (the circle within a circle), go to the desired frame, and then tap Make Key Photo.
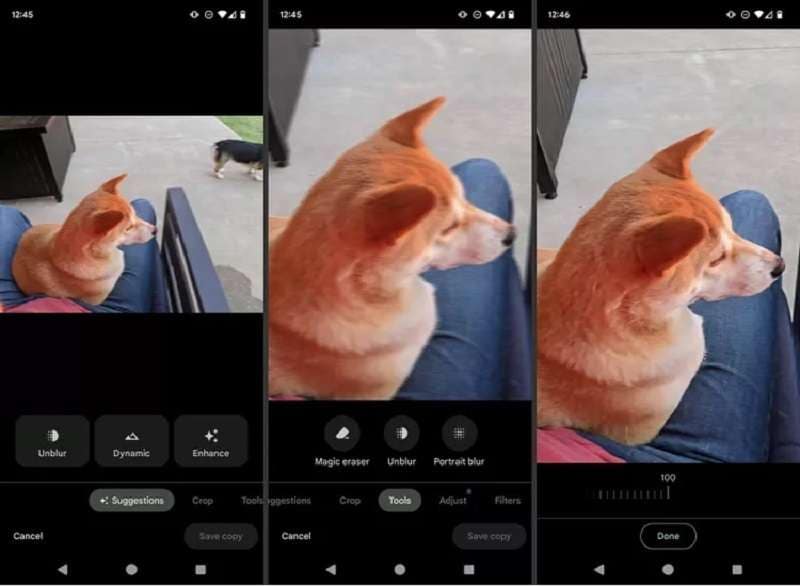
Step 2 for Pixel: Swipe up on the photo, select Shots in this photo series, scroll to the preferred one, and tap Save copy.
Step 2 for Samsung: Tap View motion photo, pick a frame, and press the screenshot button from the menu.
Method 5: Use Alternative Tools
In case Repairit online or offline isn’t available, several alternative tools can step in to rejuvenate your photos. Here’s a quick overview of some powerful alternatives:
Adobe Photoshop
Adobe Photoshop, an industry standard, offers robust photo editing capabilities. From erasing imperfections to refining details, it’s your go-to for clear, crisp photos. Discover how to enhance a blurry photo with Photoshop. Let’s dive in and get started.
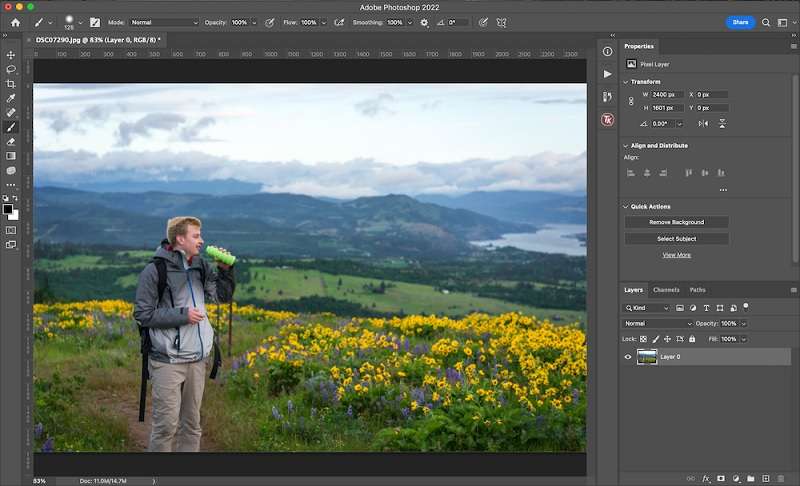
Step 1: Begin by launching your blurry photo in Photoshop. Unlock the background layer by selecting the lock button adjacent to your photo layer in the Layers panel.
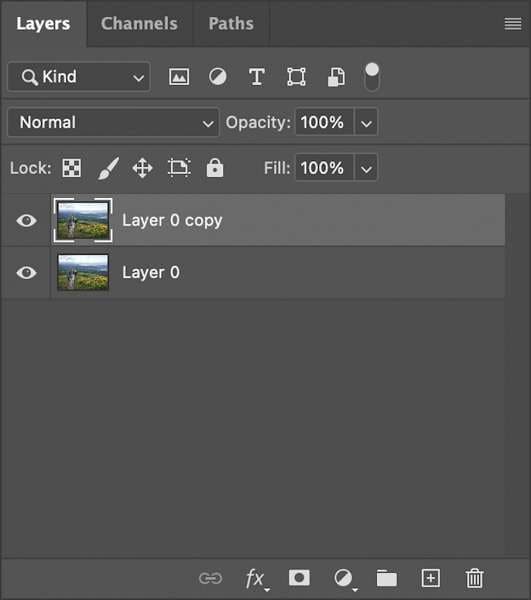
Step 2: Select the photo layer and duplicate it by using Command + J (Mac) or Control + J (PC). This creates an identical layer for applying sharpening. It enables easy comparison between the original and enhanced versions, adjusting opacity for seamless blending. Your Layers panel should now display the duplicated background layer.
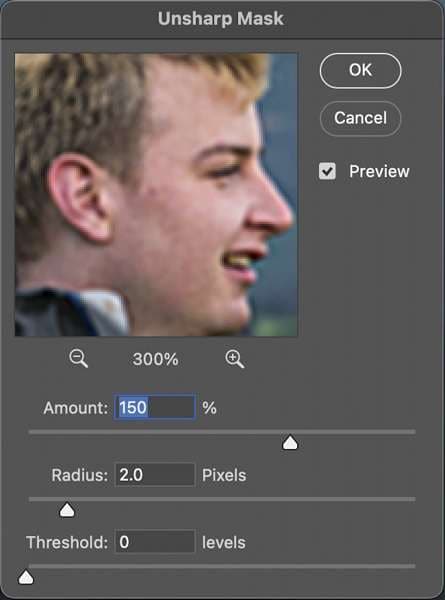
Step 3: Enhance blurry photos in Photoshop using the Unsharp Mask. Go to Filter > Sharpen > Unsharp Mask. Set the amount to 150% and the threshold to 0. Begin with a one-pixel radius, gradually increasing until satisfied (1-25 pixels). Click OK, fine-tune, and perfect your sharpening adjustments.
Lightroom
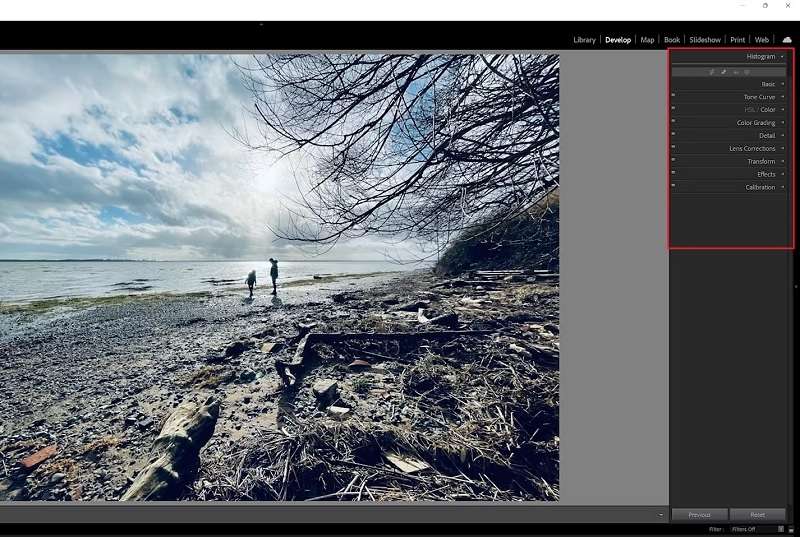
Adobe Lightroom, specializing in photo enhancement, is another excellent choice. Its intuitive interface and advanced editing tools make it a versatile option. Here’s how to remove blur from photos using Lightroom’s Basic and Detail panels.
Step 1: Import your image into Lightroom and access the right-side panel. Go to the Basic tab, then expand its options. Adjust your photo by tweaking image metrics such as highlights and contrast for a customized enhancement.
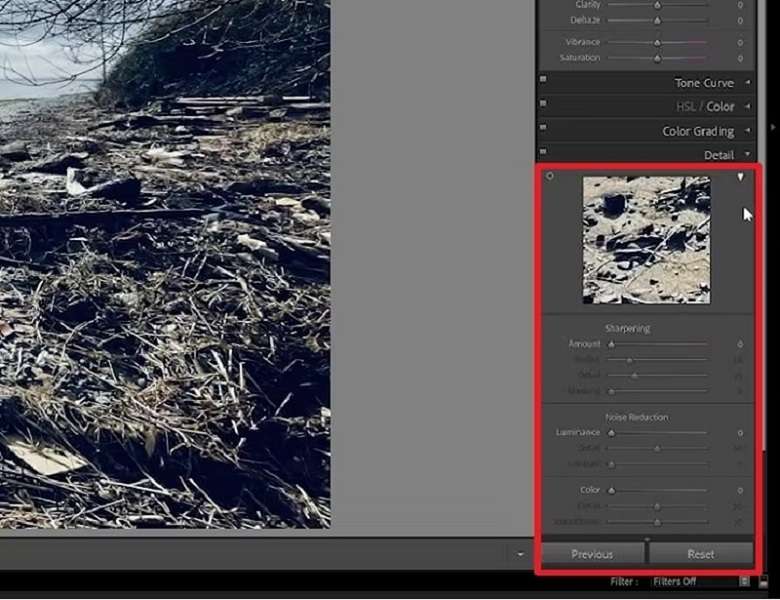
Step 2: Fine-tune the specifics by adjusting opacity using sliders. Next, go to the Detail panel. Here, tailor Sharpness and Noise Reduction settings to transform your image from blurry to clear.
VSCO (iOS)
Ideal for iOS users, VSCO is a user-friendly app with a variety of filters and editing tools. Few are aware that VSCO excels at rectifying blurred images. The app guarantees an intuitive solution for eliminating blur from any photograph. Follow these steps:
Step 1: Download and launch the VSCO app, import your photos, and click the slider icon. Tap the small upward arrow to access the slider menu, where you can utilize any tool of your choice.

Step 2: Select the Sharpen tool (open triangle). Fine-tune the sharpness to your preference, then save the photo.
PIXLR (iOS & Android)
PIXLR caters to both Android and iOS users, providing a comprehensive set of editing tools. Its user-friendly interface makes it accessible to all levels of expertise. It’s a great editing app to remove blur from a photo. Here’s how.
Step 1: To eliminate blur in your image, access the editing tools under the suitcase icon. Then, locate the Sharpen tool.
Step 2: Precise sharpening is crucial. Use PIXLR’s amount slider (1-100) and radius slider for edge control. Be cautious with the radius slider, as small adjustments can significantly affect your image. Combine both sliders for optimal enhancement.

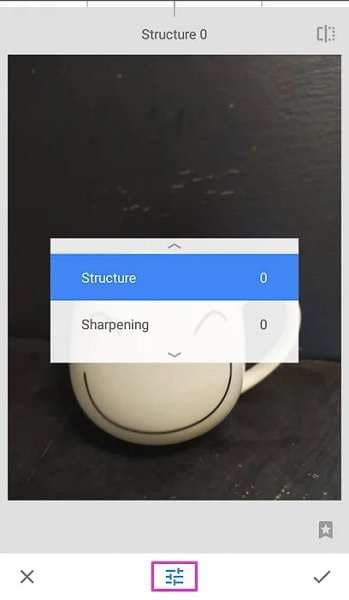
Snapseed
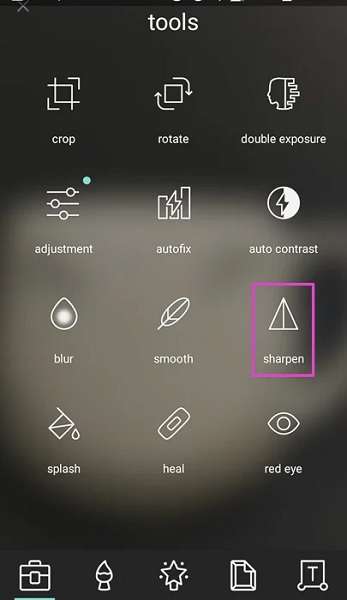
Snapseed, developed by Google, is a powerful photo editing app for both Android and iOS. Its extensive features make it a popular choice to remove blur from a photo. Follow the steps:
Step 1: Upon opening a photo, use editing tools like Crop or Tune Image. For advanced edits, explore options like Tone Curve or White Balance. To sharpen, select Details in the Tools menu.

Step 2: Select either Structure or Sharpness by tapping the adjustments icon at the bottom of the screen. Begin by swiping right to enhance sharpness, then switch to the Structure slider. Adjust both sliders until achieving your desired result.
When Repairit isn’t an option, these alternative tools ensure your photos receive the attention they deserve. Explore their features and find the one that best suits your photo restoration needs.
Bonus. Tips To Prevent Blurry Photos
Blurry photos can dampen the magic of precious moments. Elevate your photography game with these simple tips to keep your images sharp and vibrant.
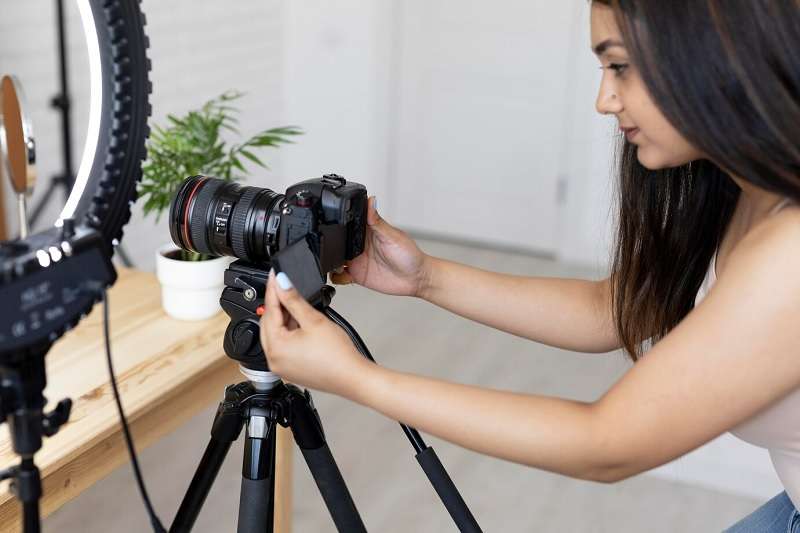
Stable camera setup
Ensure a stable foundation for your camera to prevent unwanted motion. Use a tripod or brace against a solid surface to minimize camera shake, especially in low-light conditions.
Appropriate shutter speed
Adjust your shutter speed based on the scene and subject. A faster shutter speed freezes fast-paced action, while a slower speed adds a sense of motion. Experiment to find the sweet spot for your desired effect.
Proper focus techniques
Master your camera’s focusing modes. For moving subjects, use continuous autofocus; opt for single-shot autofocus for still scenes. Manual focus provides ultimate control, allowing you to pinpoint the focal point precisely.
Adequate lighting
Good lighting is key to sharp photos. Use natural light when possible and supplementary lighting sources in dim conditions. Proper illumination reduces the need for longer exposure times, minimizing the risk of blur.
Image stabilization technology
Take advantage of your camera’s built-in image stabilization or lens stabilization features. This technology compensates for small shakes and vibrations, which is especially useful when shooting at slower shutter speeds or with telephoto lenses.
Conclusion
The article has explored the causes of photo blur and effective restoration methods. It also discussed the key features of Wondershare Repairit. In addition, combining the tips outlined above enhances your ability to capture crisp, clear photos. Following them reduces the chances of ending up with blurry photos and elevates their quality.
Using tools like Repairit to remove blur from photos and enhance our cherished memories is crucial. However, feel free to try all the methods discussed to see the best solution to your needs.
FAQ
-
1. How to choose the right software for removing blur from photos?
For effective photo blur removal, consider software with advanced algorithms. Options like Adobe Photoshop or Wondershare Repairit are suitable choices. Look for user-friendly interfaces and compatibility with your preferred editing style. -
2. Can I fix blurry photos with a smartphone?
Certainly, you can enhance smartphone photos using apps like VSCO, Pixlr, or Snapseed. These applications provide powerful tools such as sharpening and structure adjustments. They allow you to improve image clarity directly on your device. Choose the one that aligns with your preferences for a seamless and effective editing experience. -
3. What’s the role of auto-focus in preventing image blur?
Auto-focus is pivotal in preventing image blur. It ensures accurate focus on the subject, reducing blur risk. A well-functioning auto-focus adjusts the lens to maintain sharpness by keeping the subject focused.
